Add a Sub-Account
Adding a sub-account, sub-merchant or child merchant involves the following major steps:
- Step 1: Basic Details
- Step 2: Verify PAN
- Step 3: Business Details
- Step 4: Sub-Account Bank Details
- Step 5: Verifying Authority Details
- Step 6: Additional Documents
Notes:
- There is no mail sent or intimated to sub-merchant when you add a sub-merchant using this procedure.
- PayU will verify the documents submitted in Step 6: Additional Documents and activate the sub-account by two working days. If you encounter any issues, contact your PayU Account Manager or PayU Support.
The following describes the procedure to add a sub-account:
Step 1: Basic details
-
Select Split & Transfer Payments on the menu.
The Split Payments Overview page is displayed.
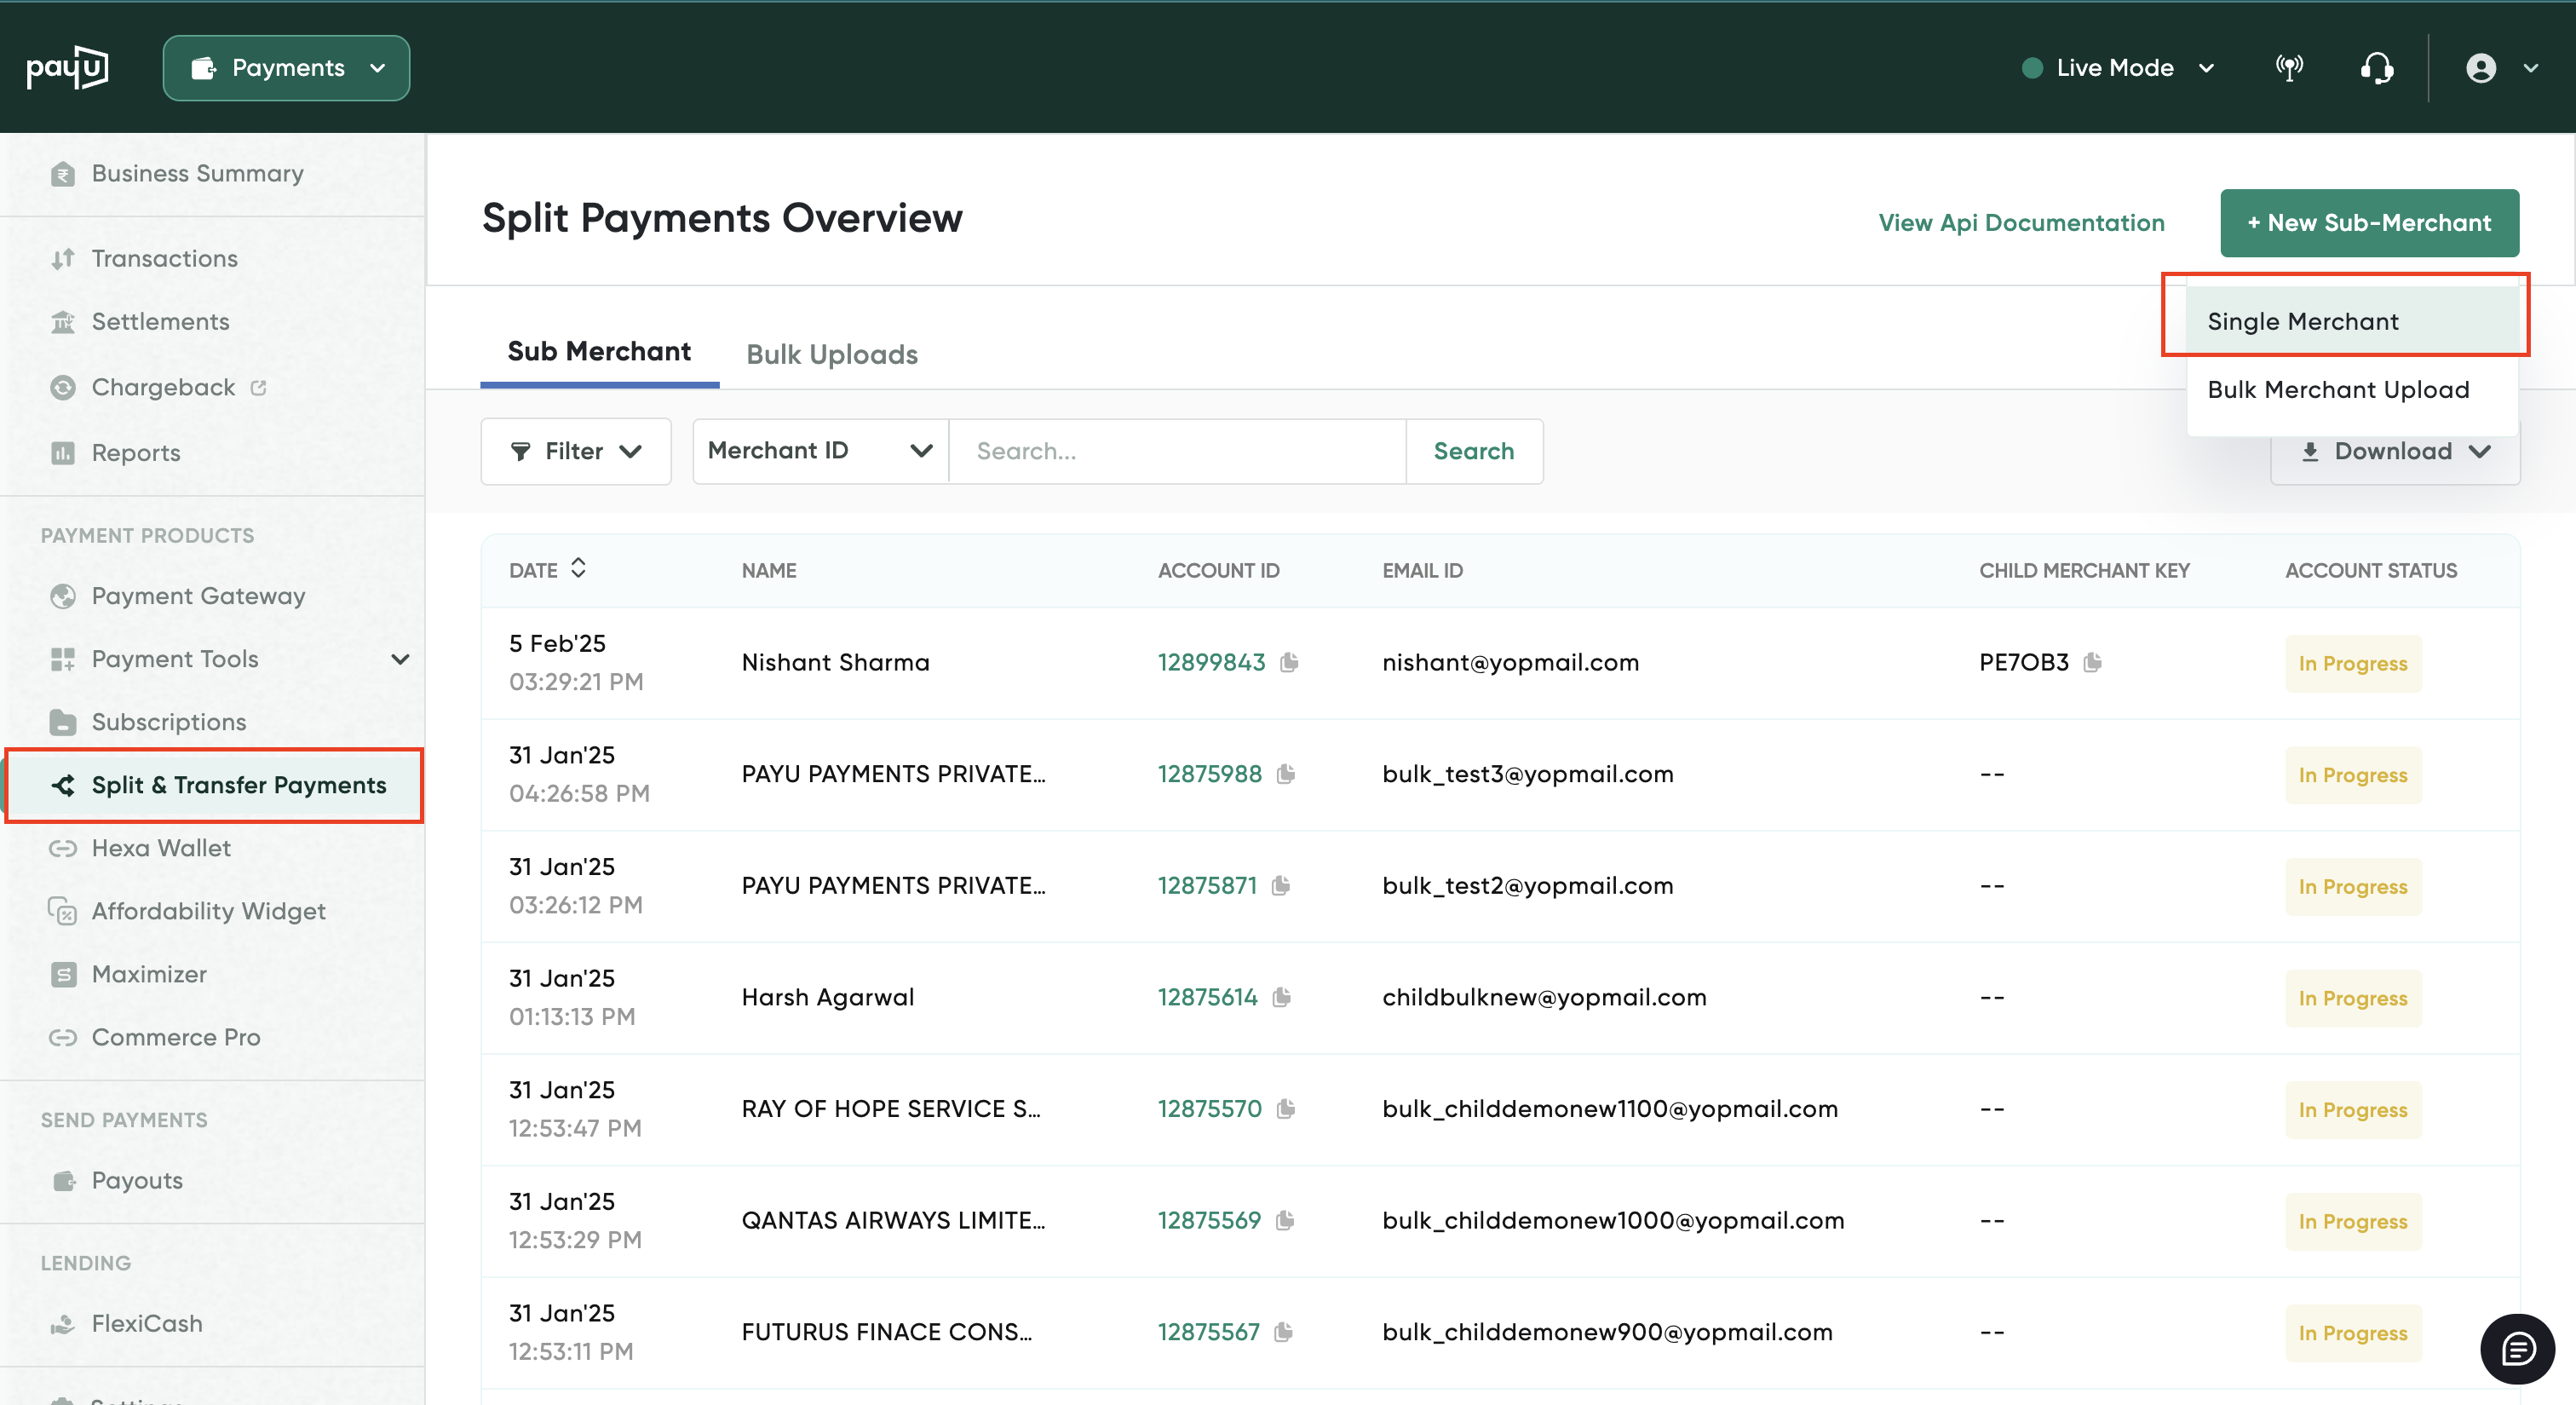
-
Click New Sub-Merchant at the top-right corner and select Single Merchant.
From the dropdown, select Single Merchant .
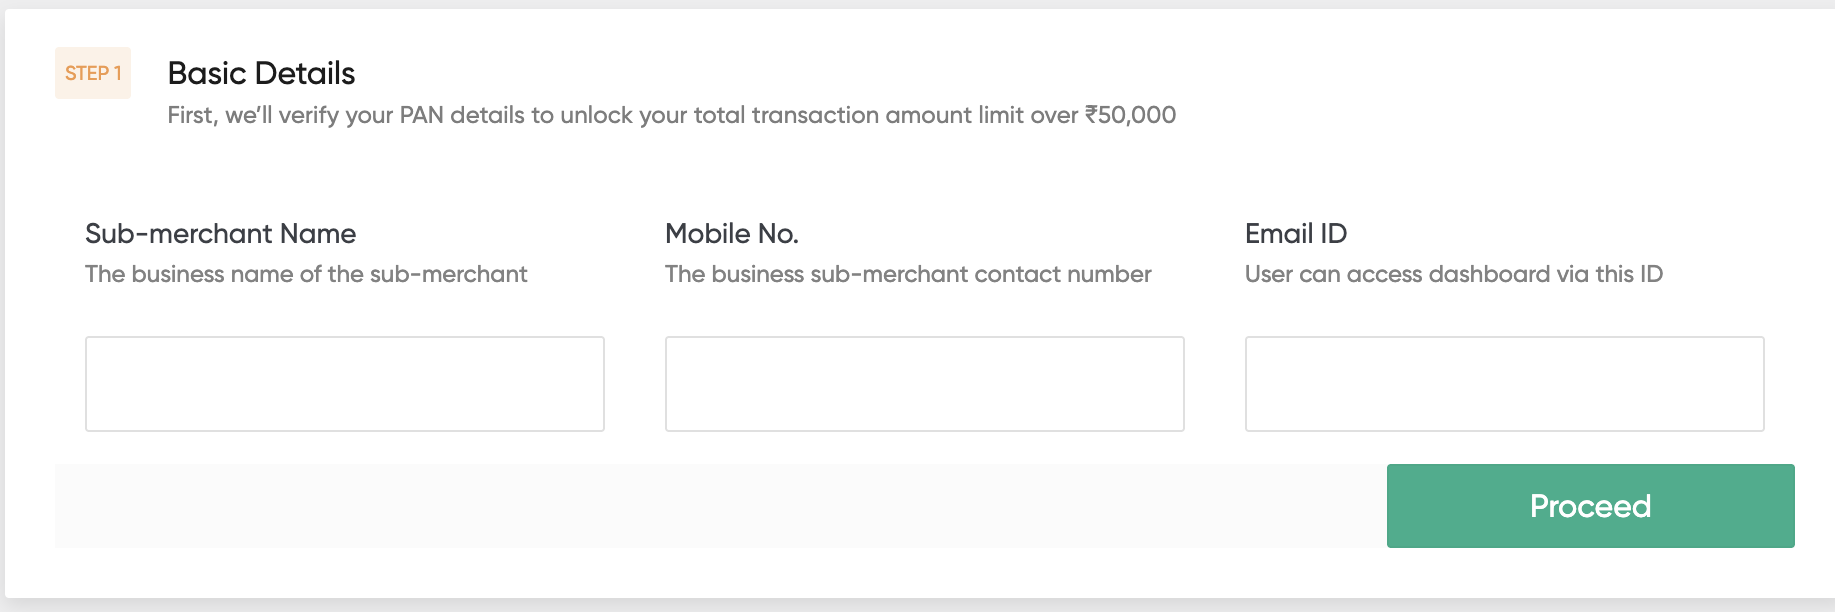
- Enter the details as specified in the following table:
| Field | Description |
|---|---|
| Sub-merchant Name | Enter the business account name in this field. The name entered in the field will be printed in the various reports generated from PayU Dashboard. |
| Mobile No | Enter your 10-digit mobile number in this field. |
| Email ID | Enter your business email ID linked to this Dashboard in this field. |
-
Click Proceed.
The page is refreshed to display the other panes to complete the sub-account details.
Step 2: PAN verification
-
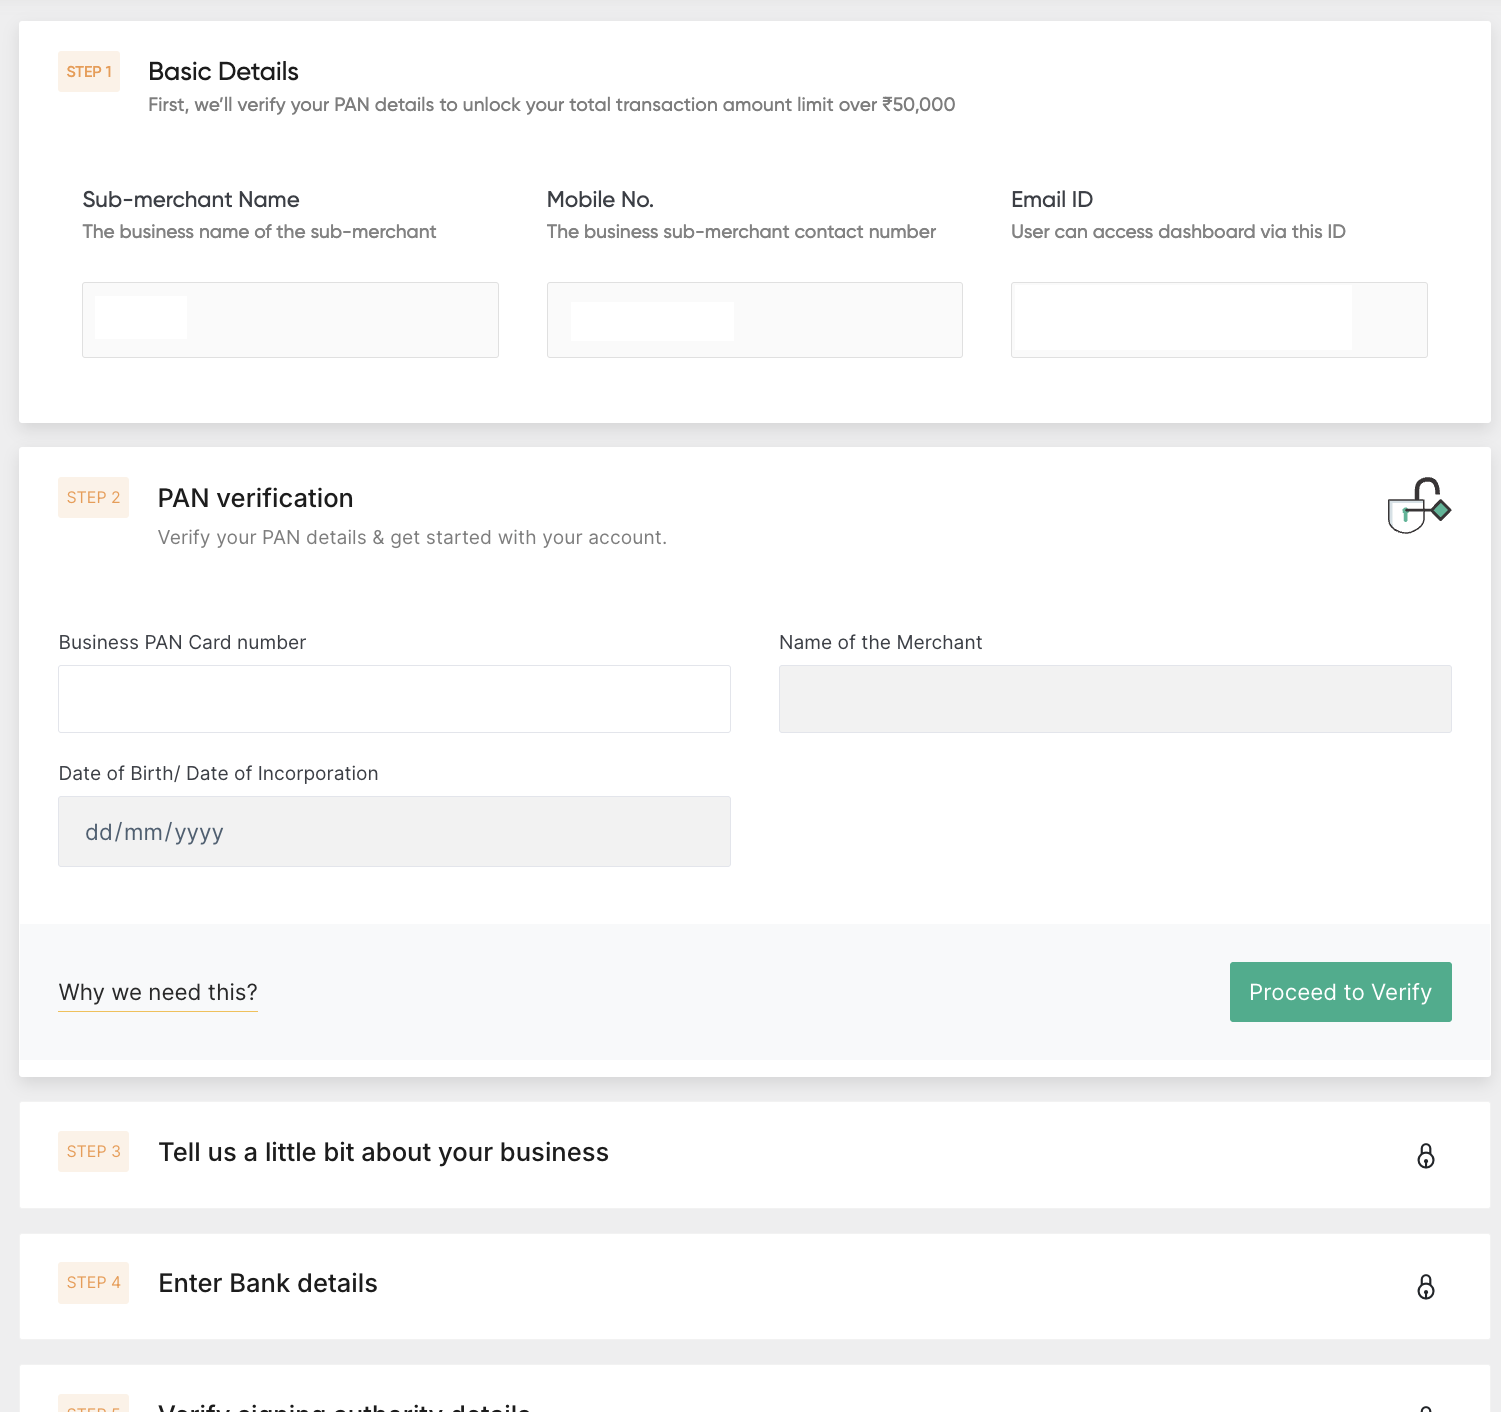
Enter your business PAN card number in the Business PAN Card Number field. If your business is a sole proprietorship, enter your personal PAN card number.
-
Enter your date of birth or company’s date of incorporation in the Date of Birth/Date of Incorporation field.
-
Click Proceed to Verify.
A pop-up page is displayed to choose the business entity.

-
Select your business entity type from the drop-down and click the Confirm I am<your business name> button. Where <your business name> is substituted with the name you entered in the Business PAN Card Number field at Step 2.
The Tell us a little bit about your business pane is displayed.
Step 3: Business details
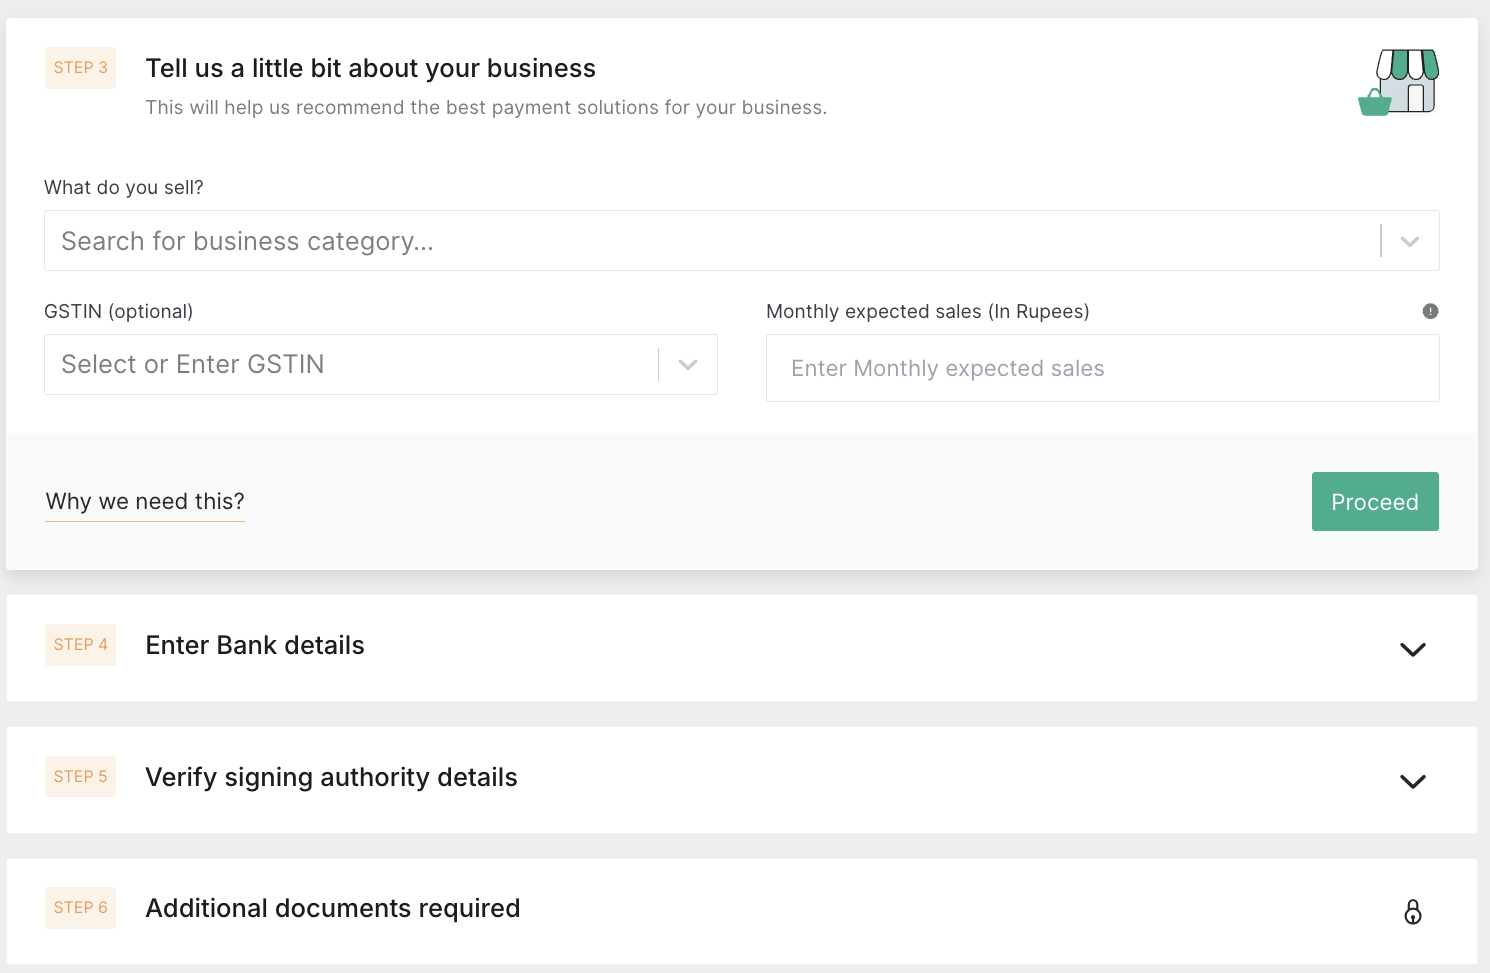
- Enter the details on the Tell us a little bit about your business pane as specified in the following table:
| Field | Description |
|---|---|
| Business Category | Select your business category from this drop-down list. |
| GSTIN | Enter your GSTIN if your business has GSTIN. |
| Monthly expected Sales (in Rupees) | Enter the expected sales from your business per month (in rupees) in this field. |
-
Click Proceed.
The Step 4: Enter Bank Details <your name> pane is displayed.
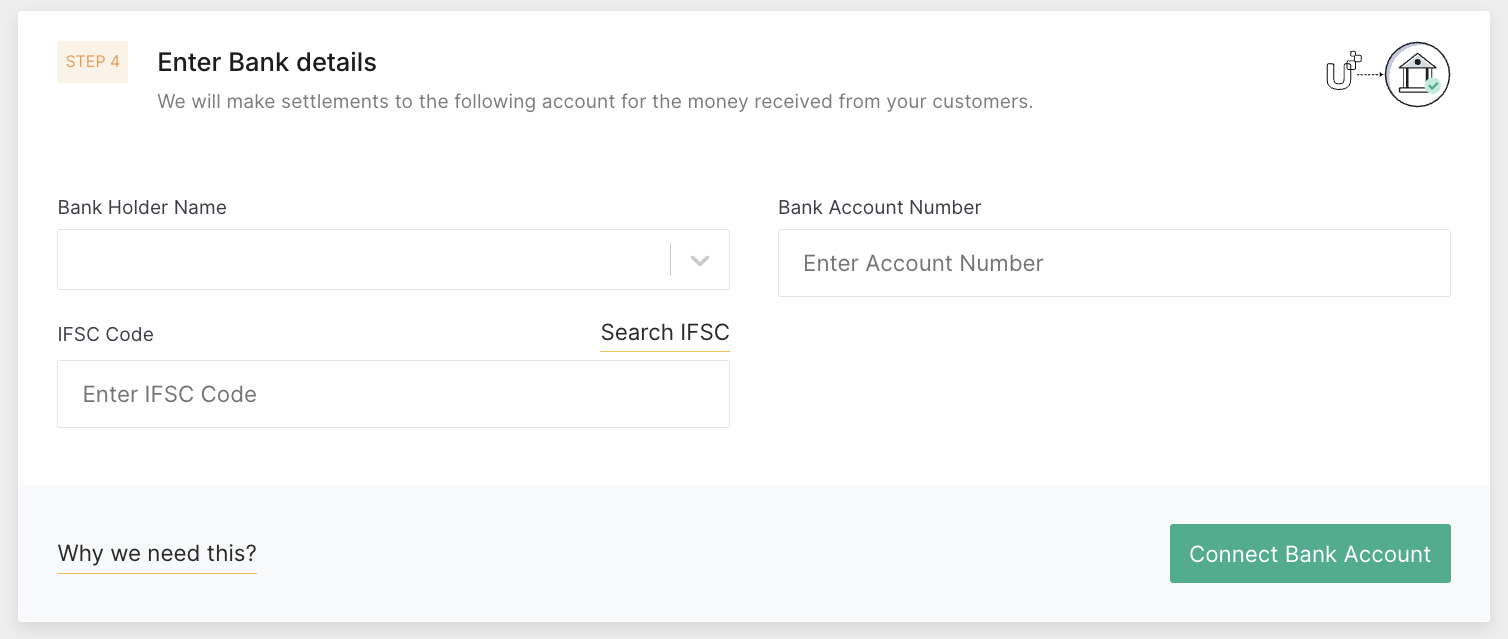
Step 4: Bank details
- Enter the sub-account bank details as described in the following table:
Note: In case you do not have sub-account or child merchant bank details or if you skip the step, follow the steps as described in Step 2: Update bank details of Create Child Merchant API.
| Field | Description |
|---|---|
| Bank Holder Name | Select the name of the beneficiary from the drop-down list. |
| Bank Account Number | Enter the account number of the beneficiary. |
| IFSC Code | Enter the bank branch IFSC code or click the Search IFSC option to search and select the IFSC code. |
-
Click Connect Bank Account.
The Step 5: Verifying Authority Details pane is displayed.
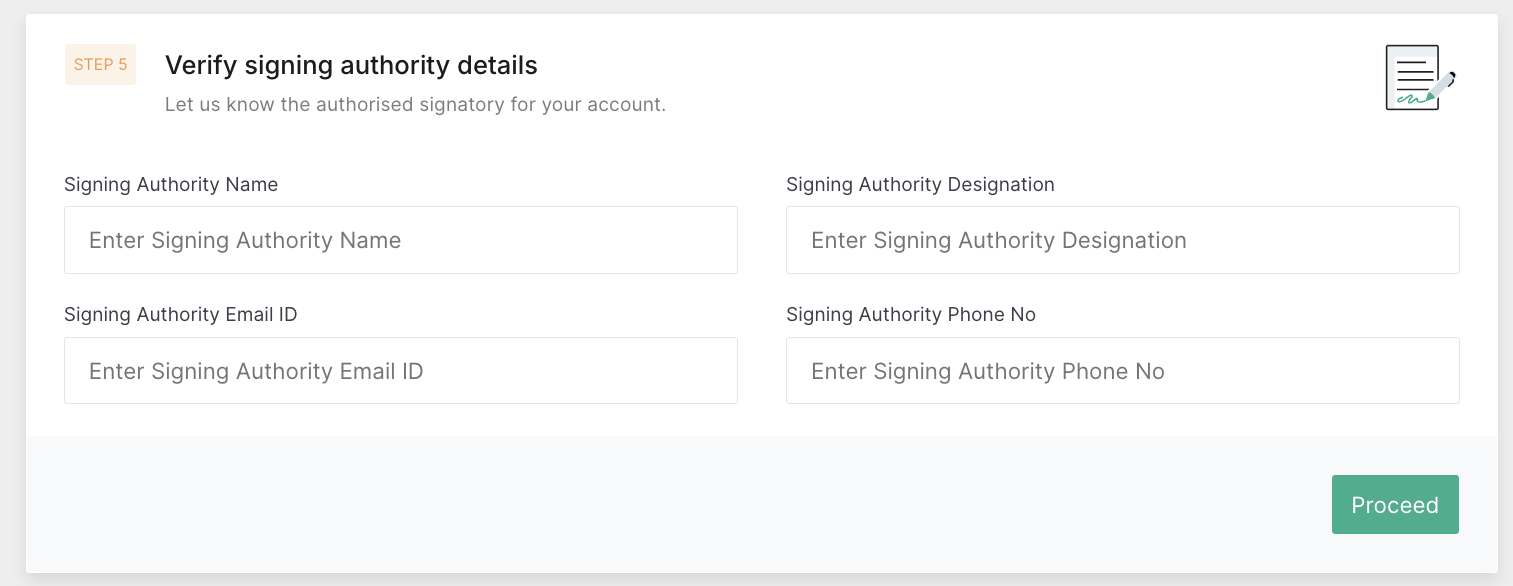
Step 5: Verifying Authority Details
- Enter the signing authority details of your company as described in the following table:
| Field | Description |
|---|---|
| Signing Authority Name | Enter the signing authority name. |
| Signing Authority Designation | Enter the signing authority designation. |
| Signing Authority Email ID | Enter the signing authority email-ID. |
| Signing Authority Phone No | Enter the signing authority phone number. |
- Click Connect Bank Account.
The Step 6: Additional documents required pane is displayed.
Step 6: Additional Documents
Notes:
- Upload signed schedule C document through your parent merchant or Dashboard
- E-Sign Schedule C through OTP, triggered by parent merchant
- If bank account verification fails, then cancelled cheque needs to be uploaded
- Select any of the following options from the Bank Account Proof of drop-down list and upload the proof document using the Upload Document Select a scanned copy or photo of your PAN card:
- Passport
- Bank Passbook
- Canceled Cheque
- Bank Verification Letter

-
Upload the Schedule C document using the Upload Schedule C field. Also, you can ask your sub-merchant to e-sign the schedule C addendum using the Send Email to Child button.
-
Click Submit Documents.
After the sub-account bank details are submitted, the following confirmation message is displayed.

Verification of Docs:PayU will verify the documents and activate the sub-account by two working days. If you encounter any issues, contact your PayU Account Manager or PayU Support.
If the sub-account bank details are not entered, the following page is displayed so that you can share it with your merchant.

Updated 5 months ago