Activate Account
To ensure compliance with regulatory guidelines, PayU requires its merchants to complete the KYC (Know Your Customer) process. Completing the KYC process is mandatory for all merchants using PayU's services. After completing the KYC, your account gets activated. You can access the Periodic KYC Update page using the following URL:
https://onboarding.payu.in/app/onboarding
Complete Re-KYC: This section is applicable or explains the procedure for completing the Re-KYC too.
Prerequisites
Before starting the KYC process, make sure you have the following documents ready:
- Proof of identity (such as Aadhaar card, passport, or PAN card)
- Proof of address (such as Aadhaar card, passport, or utility bill)
- Business proof (such as GST registration certificate or business license)
Documents Checklist: For the complete list of documents based on your business type, refer to Documents Checklist for Account Activation.
Navigate to the Merchant Activation page
To open the merchant activation page on the Dashboard:
-
Log in to Dashboard.
The Business Summary page is displayed. -
Click Activate Account*at the top or under Complete your Onboarding.
A page is displayed with the message, "Your account is active. Complete your full KYC." The PAN Verification section is displayed, requesting your PAN details.
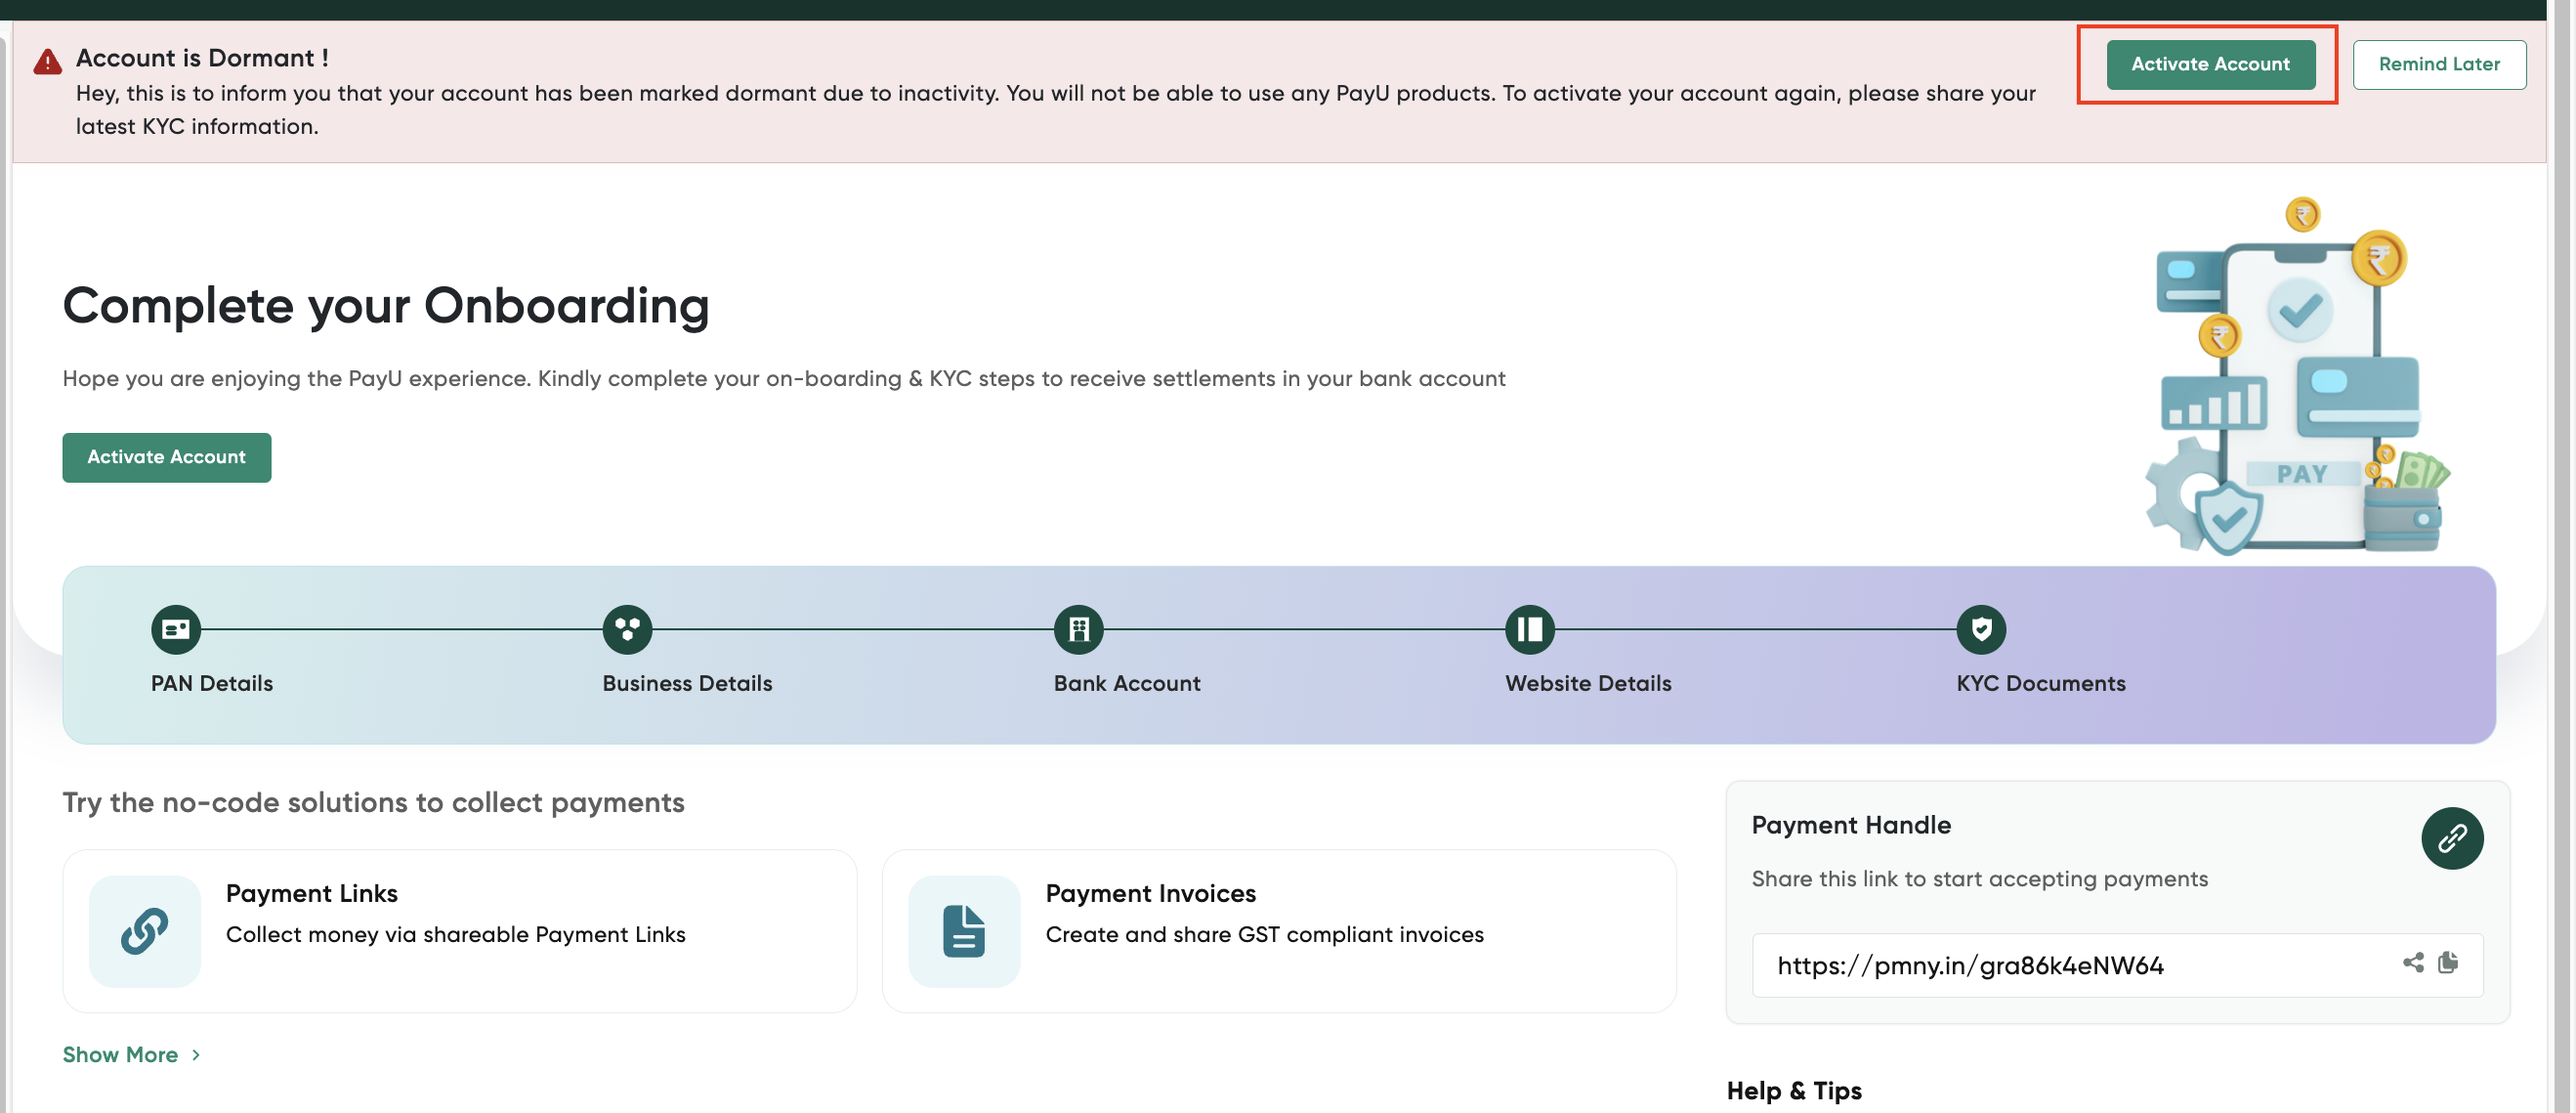
The onboarding page is displayed with PAN verification tile is displayed.
PAN Verification
To verify your PAN on the PAN verification section:
- Enter your PAN in the Business PAN Card field.
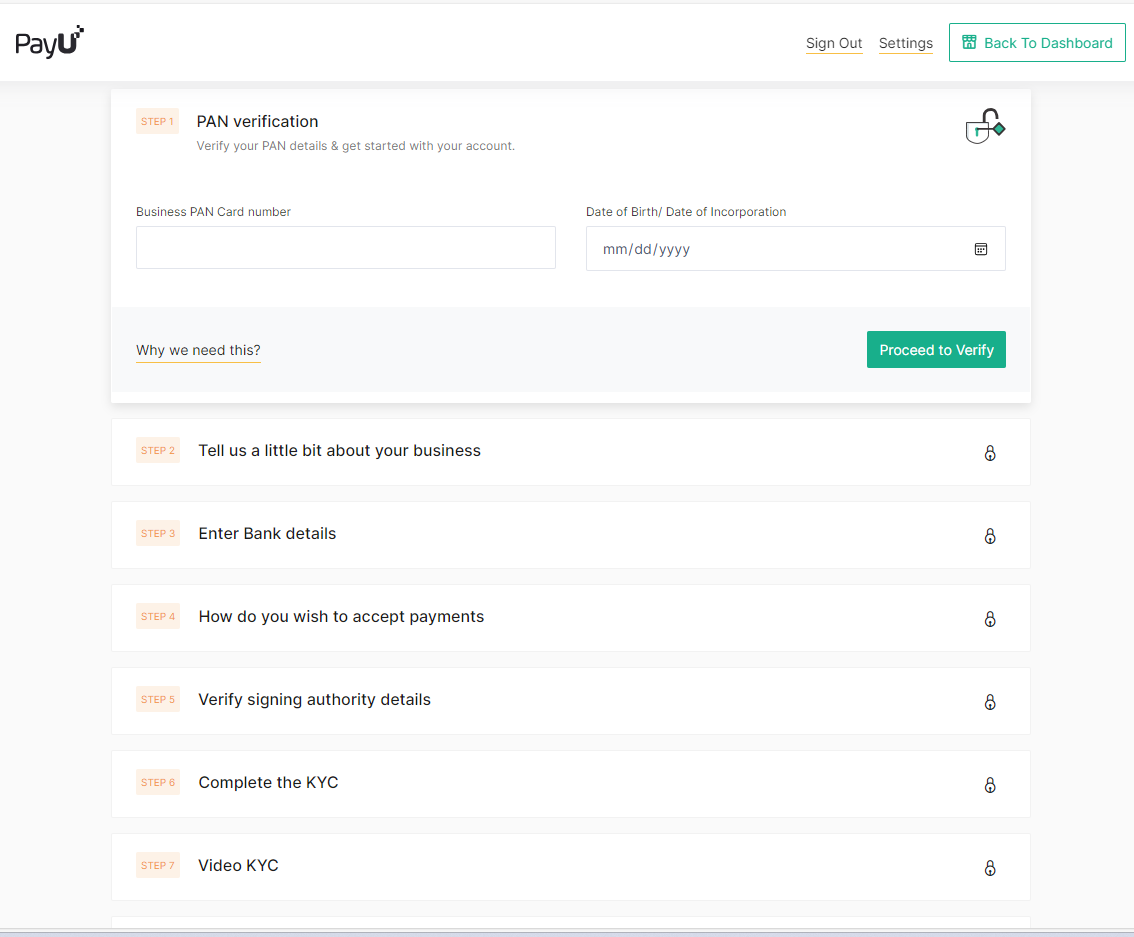
- Click Proceed to Verify.
After the PAN is verified, the section name gets updated to "Your PAN is verified. Way yo Go!" and Tell us a little bit about your business section is enabled.
Tell us a little bit about your business
To enter information on your business in the Tell us a little bit about your business section:

- Select your business category from the Business Category drop-down list.
- Select your business sub-category from the Business Sub-Category drop-down list.
- Enter your GSTIN in the GSTIN field (optional).
- Enter your business's estimated monthly sales or revenue in the Expected Sales per month field.
- Click Proceed.
The section name gets updated to Business details submitted successfully. The Enter Bank details of<your name>section is enabled, where<your name>is substituted with your name as in PAN.
Enter Bank Details
To enter your bank details on the Enter bank details of <your name> section:
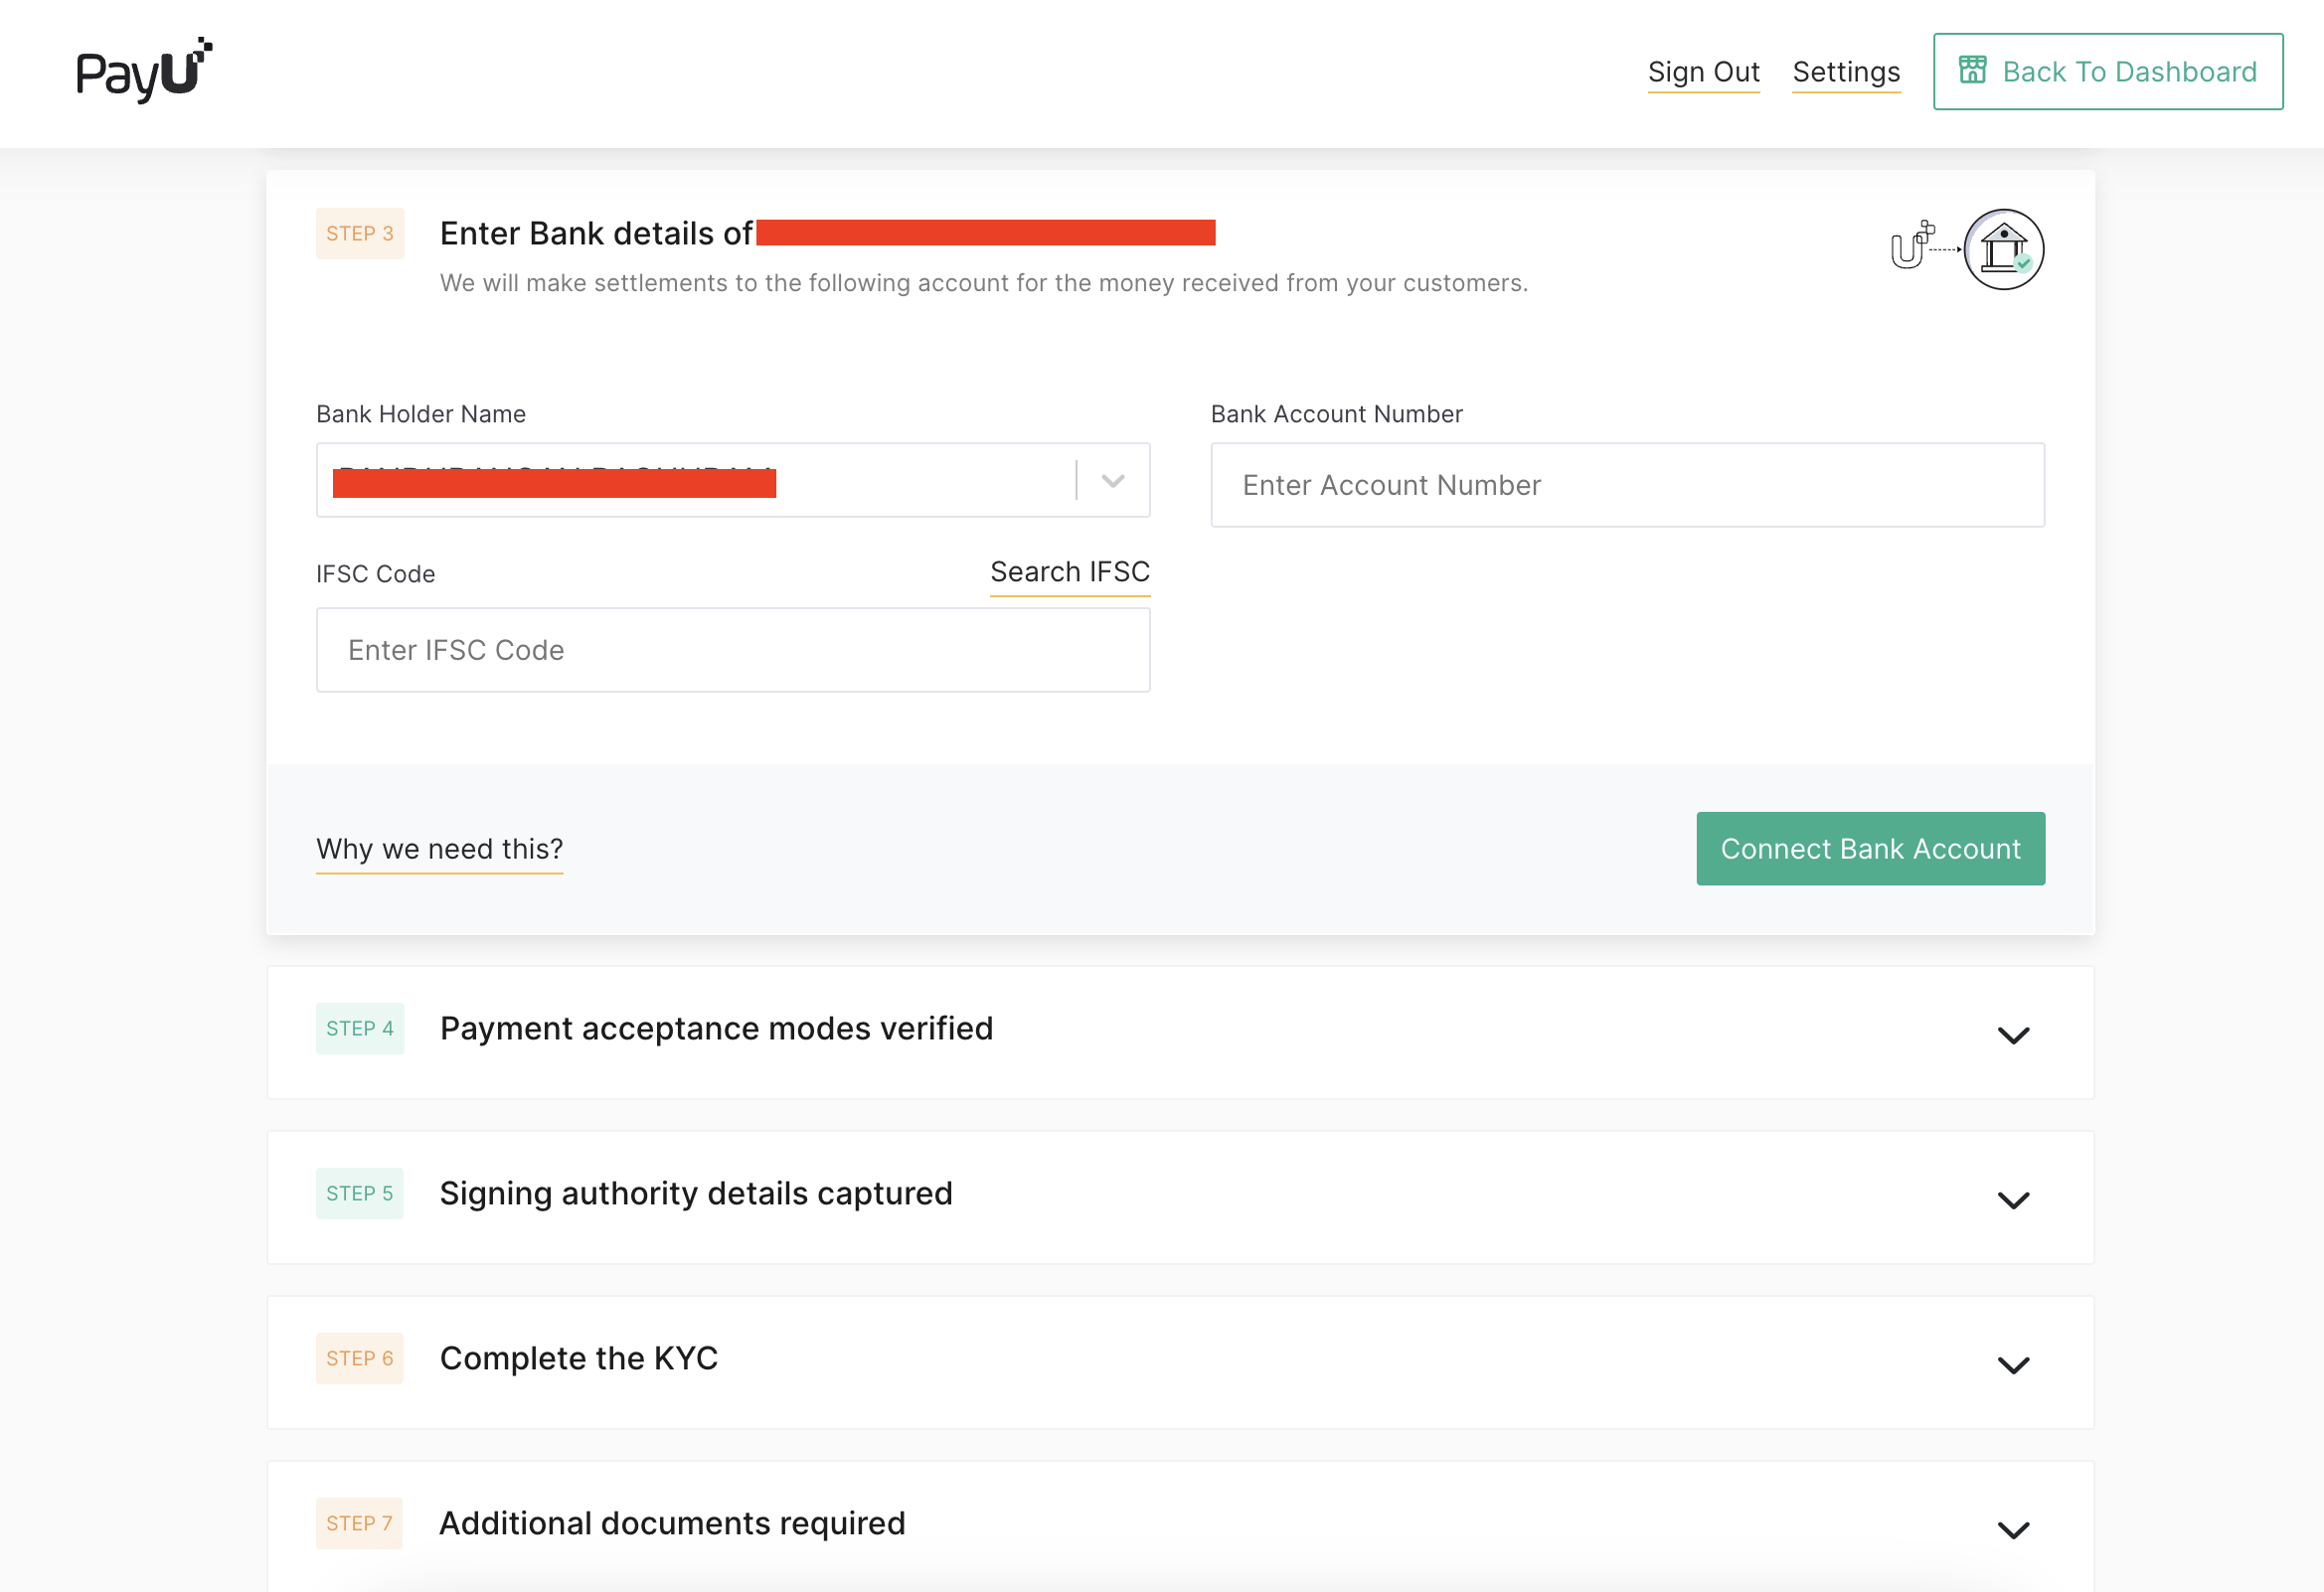
- Enter your account number in the Bank Account Number field.
- Enter your bank IFSC code in the IFSC Code field. You can find the IFSC code on the chequebook provided by your bank.
- Click Connect Bank Account.
How do you Wish to Accept Payments
To specify how do wish to accept payments from your customers, select any of the following on the How do you wish to accept payments section:

On my website/app: Enter the URL for the following fields:
- Website
- Android App
- iOS App
Note:You have to ensure that the list of pages are created on your website as indicated under the Important – Your website must have the following pages.
I don't have a website/app: You can use the following features of Dashboard to collect payments if you don't have a website or app:
- Payment Links
- Payment Invoices
- Payment Buttons
Click Next to proceed to the Verify signing authoring details section.
The section title gets updated to "Signing authority details captured" and the Verify signing authority details section is enabled.
Verify Signing Authority Details
To verify your business signing authority details in the Verify signing authority details section:

-
Verify the details in the following fields:
- Signing Authority Name
- Signing Authority’s PAN card number
- Signing Authority Email ID
-
Update the email ID in the Signing Authority Email ID field if required.
-
Click Proceed to KYC.
The section name gets updated to "Signing authority details captured" and the Complete the KYC section is enabled.
Complete the KYC
To fetch your KYC documents automatically from the cKYC/Aadhaar database or upload the documents manually, select any of the following options:
-
Fetch from cKYC: To fetch your KYC automatically from the cKYC database:
- Enter your date of birth or company’s incorporation date in the Date of Birth/ Date of Incorporation field.
- Select the "I hereby authorize PayU..." check box to authorize PayU to fetch the KYC documents from cKYC.
- Click Submit.

-
Fetch from Aadhaar: To fetch your KYC automatically from the Aadhaar database:
- Select the "By proceeding I accept Aadhar Terms and Conditions" check box to accept Aadhar Terms & Conditions.
- Click Submit.

-
Upload documents manually: To upload the KYC documents manually:
- Verify the details in the following fields:
- Name
- Address
- Postal Code
- City
- State
- Update the Address and Postal Code fields if required.
- Choose Yes in the Do you have a different Operating Business Address? field if the business address is different and enter the following details:
- Address
- Postal Code
- Click Confirm and Proceed.
An additional section, Additional documents required is displayed. For more information, refer to Additional Documents Required.
- Verify the details in the following fields:
Additional Documents Required
To submit the documents manually:

- Select each of the following drop-down lists and select the document by clicking "Select file from your library":
- PAN Card: Select a scanned copy or photo of your PAN card.
- Address Proof: Select a scanned copy or photo of a government-issued ID card such as Passport or Driving License.
- Government issued certificate copy (only if requested): Select your Income Tax returns scanned document (80G).
- Click Submit Documents.
A message similar to the following is displayed at the bottom right corner of your browser.
Reach PayU:If you are unable to complete your KYC, contact your PayU Key Account Manager or visit PayU Support.
Updated 4 months ago