CommercePro COD App - Shopify
You can accept Cash on Delivery (COD) payments for your store on Shopify and account them using the CommercePro COD app. To install the CommercePro COD app, refer to Install CommercePro COD App
Use cases
- To reduce fraud in COD orders and RTO, the app will check customers' eligibility for the COD payment mode. Only eligible customers are allowed to place orders using the COD payment option.
- If a customer is not eligible for COD, they have the option to place an order using
Benefits
- Built-in RTO Intelligence supporting blacklisting of COD payment option based on the following parameters:
- PIN codes
- Specific addresses
- Mobile numbers
- Setting up a maximum cart amount limit for COD orders
- In-house AI model for RTO intelligence to limit COD based on multiple parameters such as cart value, user phone number, pin-code, SKUs added etc.
Reference: To configure the RTO settings, refer to Configure RTO Settings.
Install CommercePro COD App
Prerequisites
- Install PayU CommercePro App: Ensure that PayU CommercePro app installed on the store. For more information, refer to Install CommercePro Checkout App.
- Enable COD: Before you follow this procedure, you need to contact your PayU key account manager (KAM) or Support to enable COD on your CommercePro Checkout app. For more information, navigate to the PayU Support to raise a request.
To install CommercePro COD app:
- Log on to your shopify store (if required).
- Navigate to the following URL:
https://apps.shopify.com/payu-cash-on-delivery
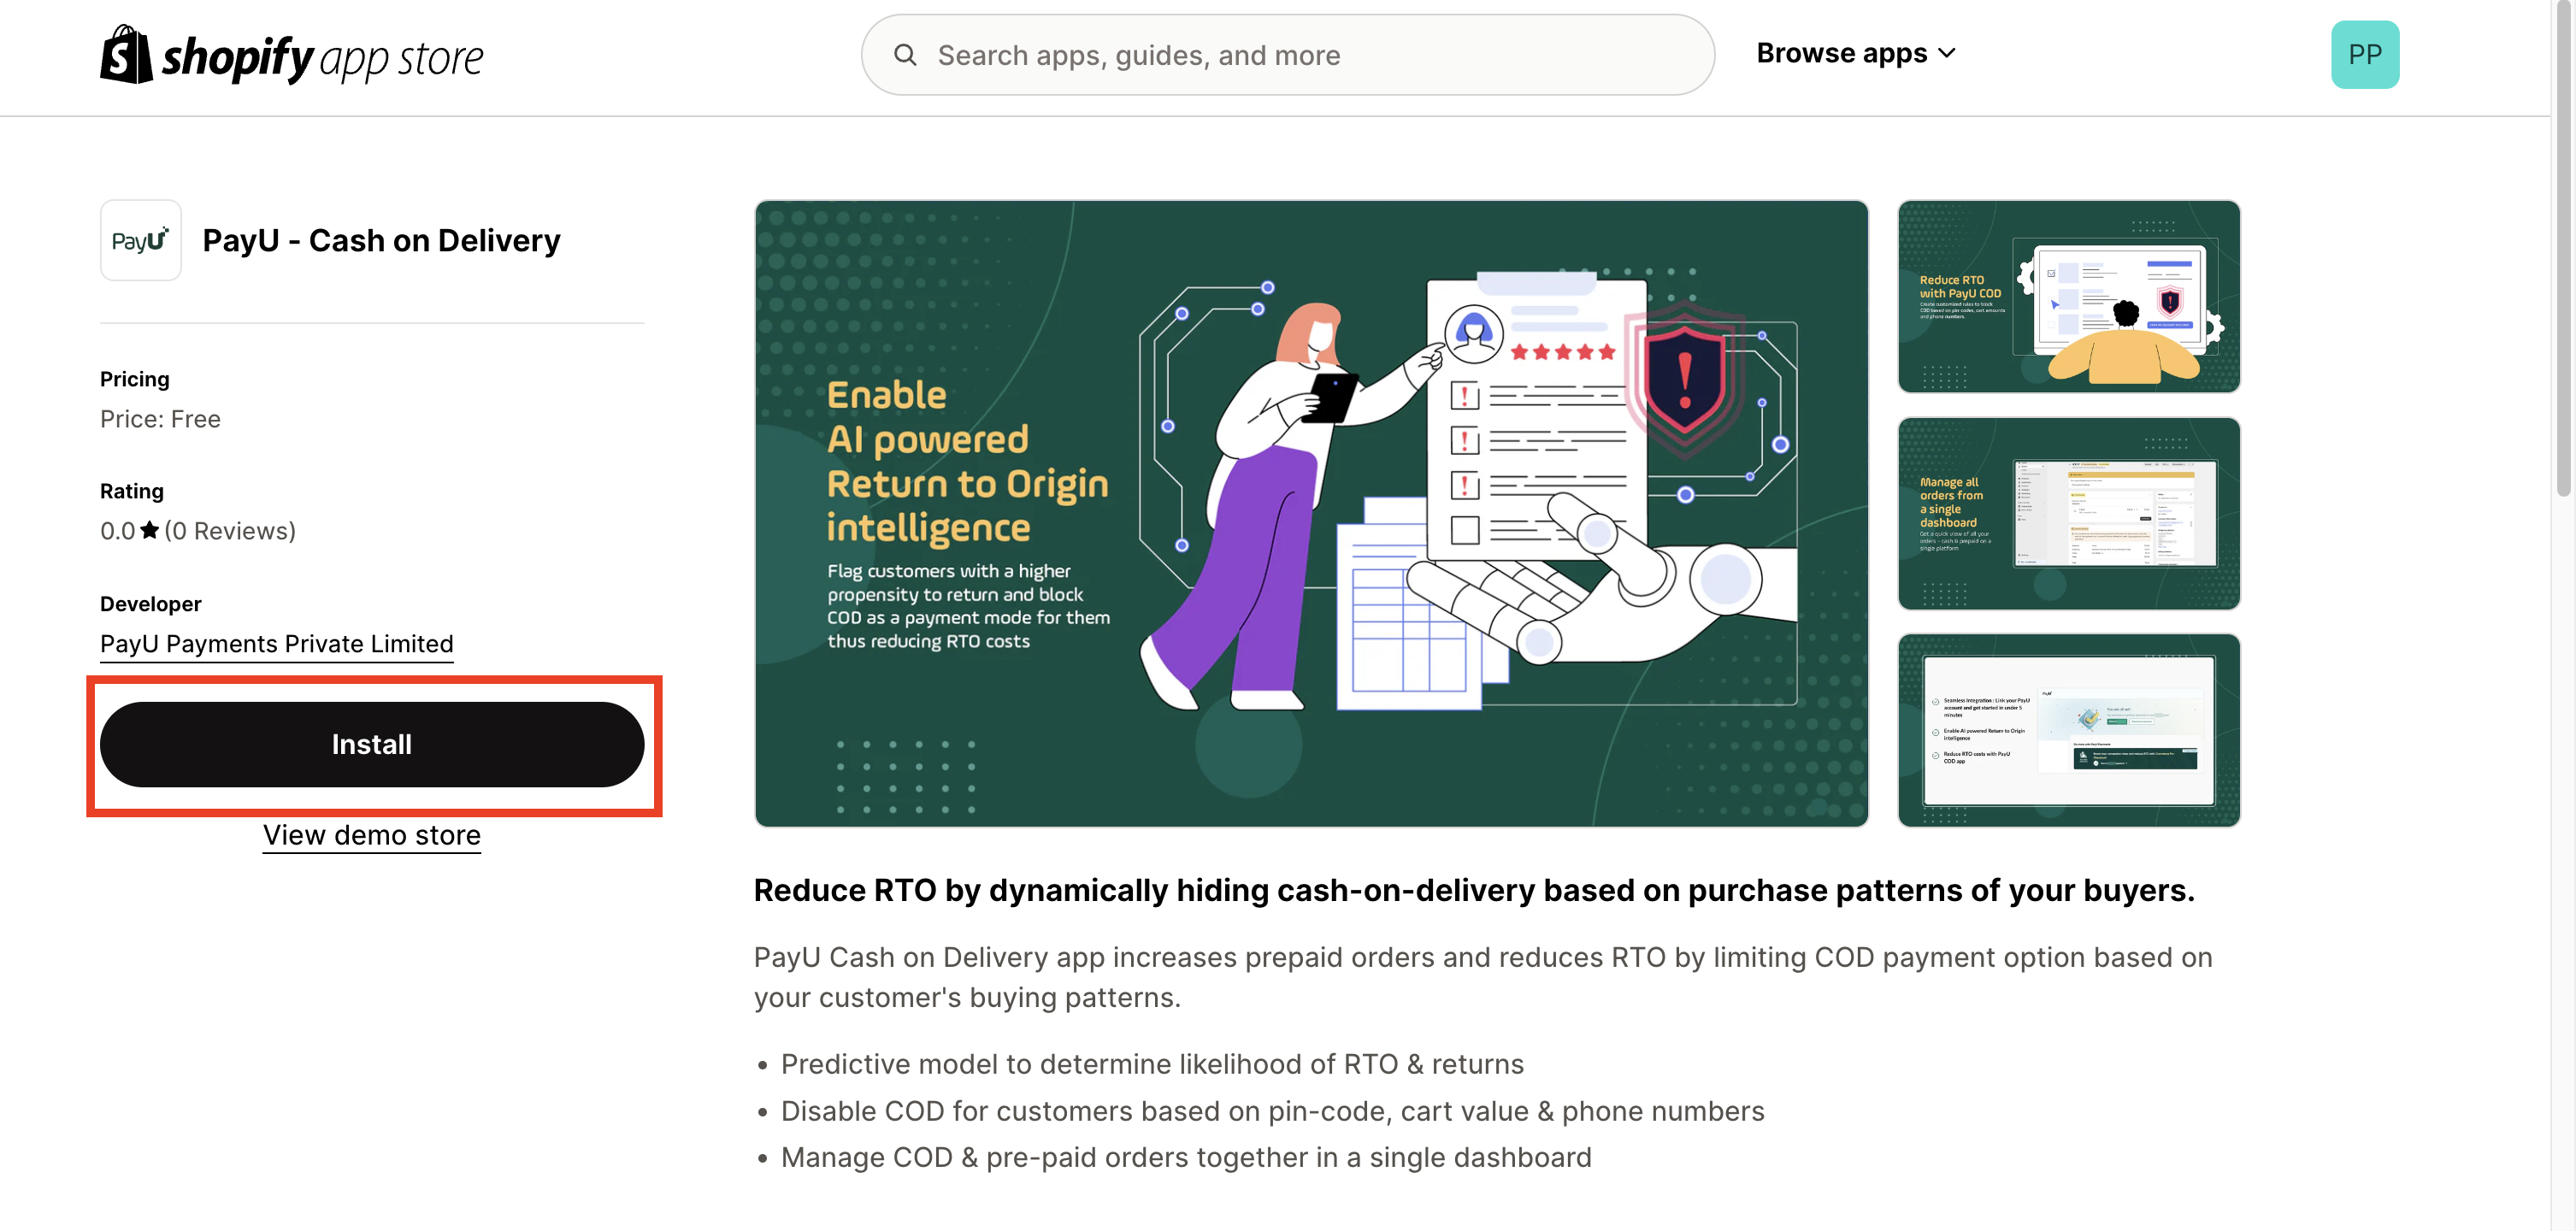
- Click Install.
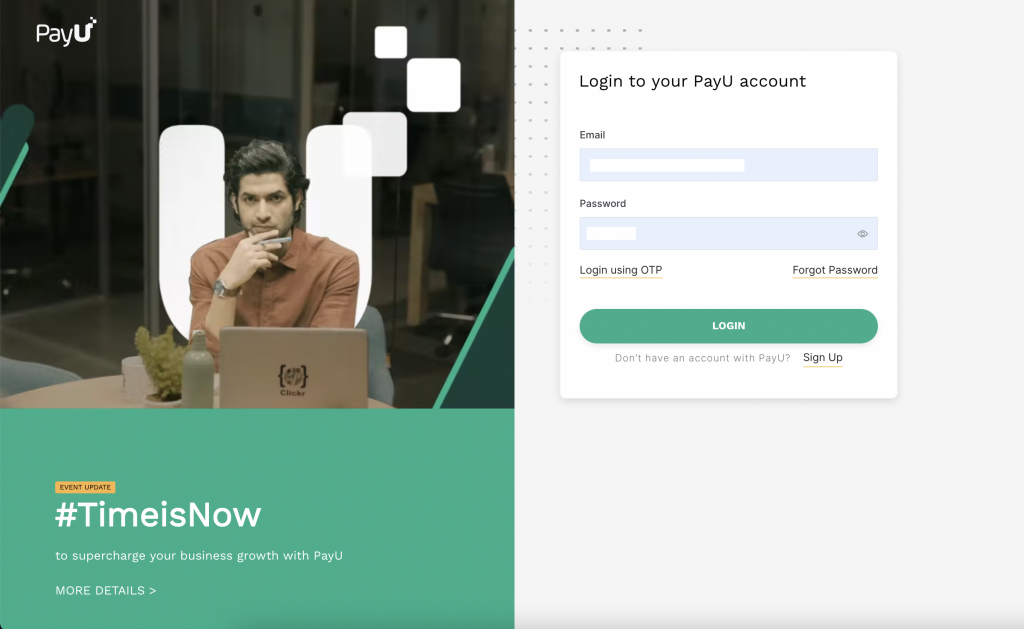
You will be redirected to PayU Account sign in page.
- Log in into your PayU Account using the Email and Password OR Login using OTP option.
This process will connect your PayU account with ‘PayU CommercePro Checkout’ Shopify App.
After successfully login into your PayU account, a page similar to the following is displayed to indicate that app installation is complete and linked to your PayU account.

Configure RTO Settings
You can configure RTO settings by configuring the amount limit for COD and blacklist/whitelist users on PayU Dashboard as described in the following sub-sections:
Navigate to RTO Settings
- Log on to PayU Dashboard. For more information, refer to Log in to Dashboard
- Select CommercePro from the menu on left pane.
- Select the Configuration tab.
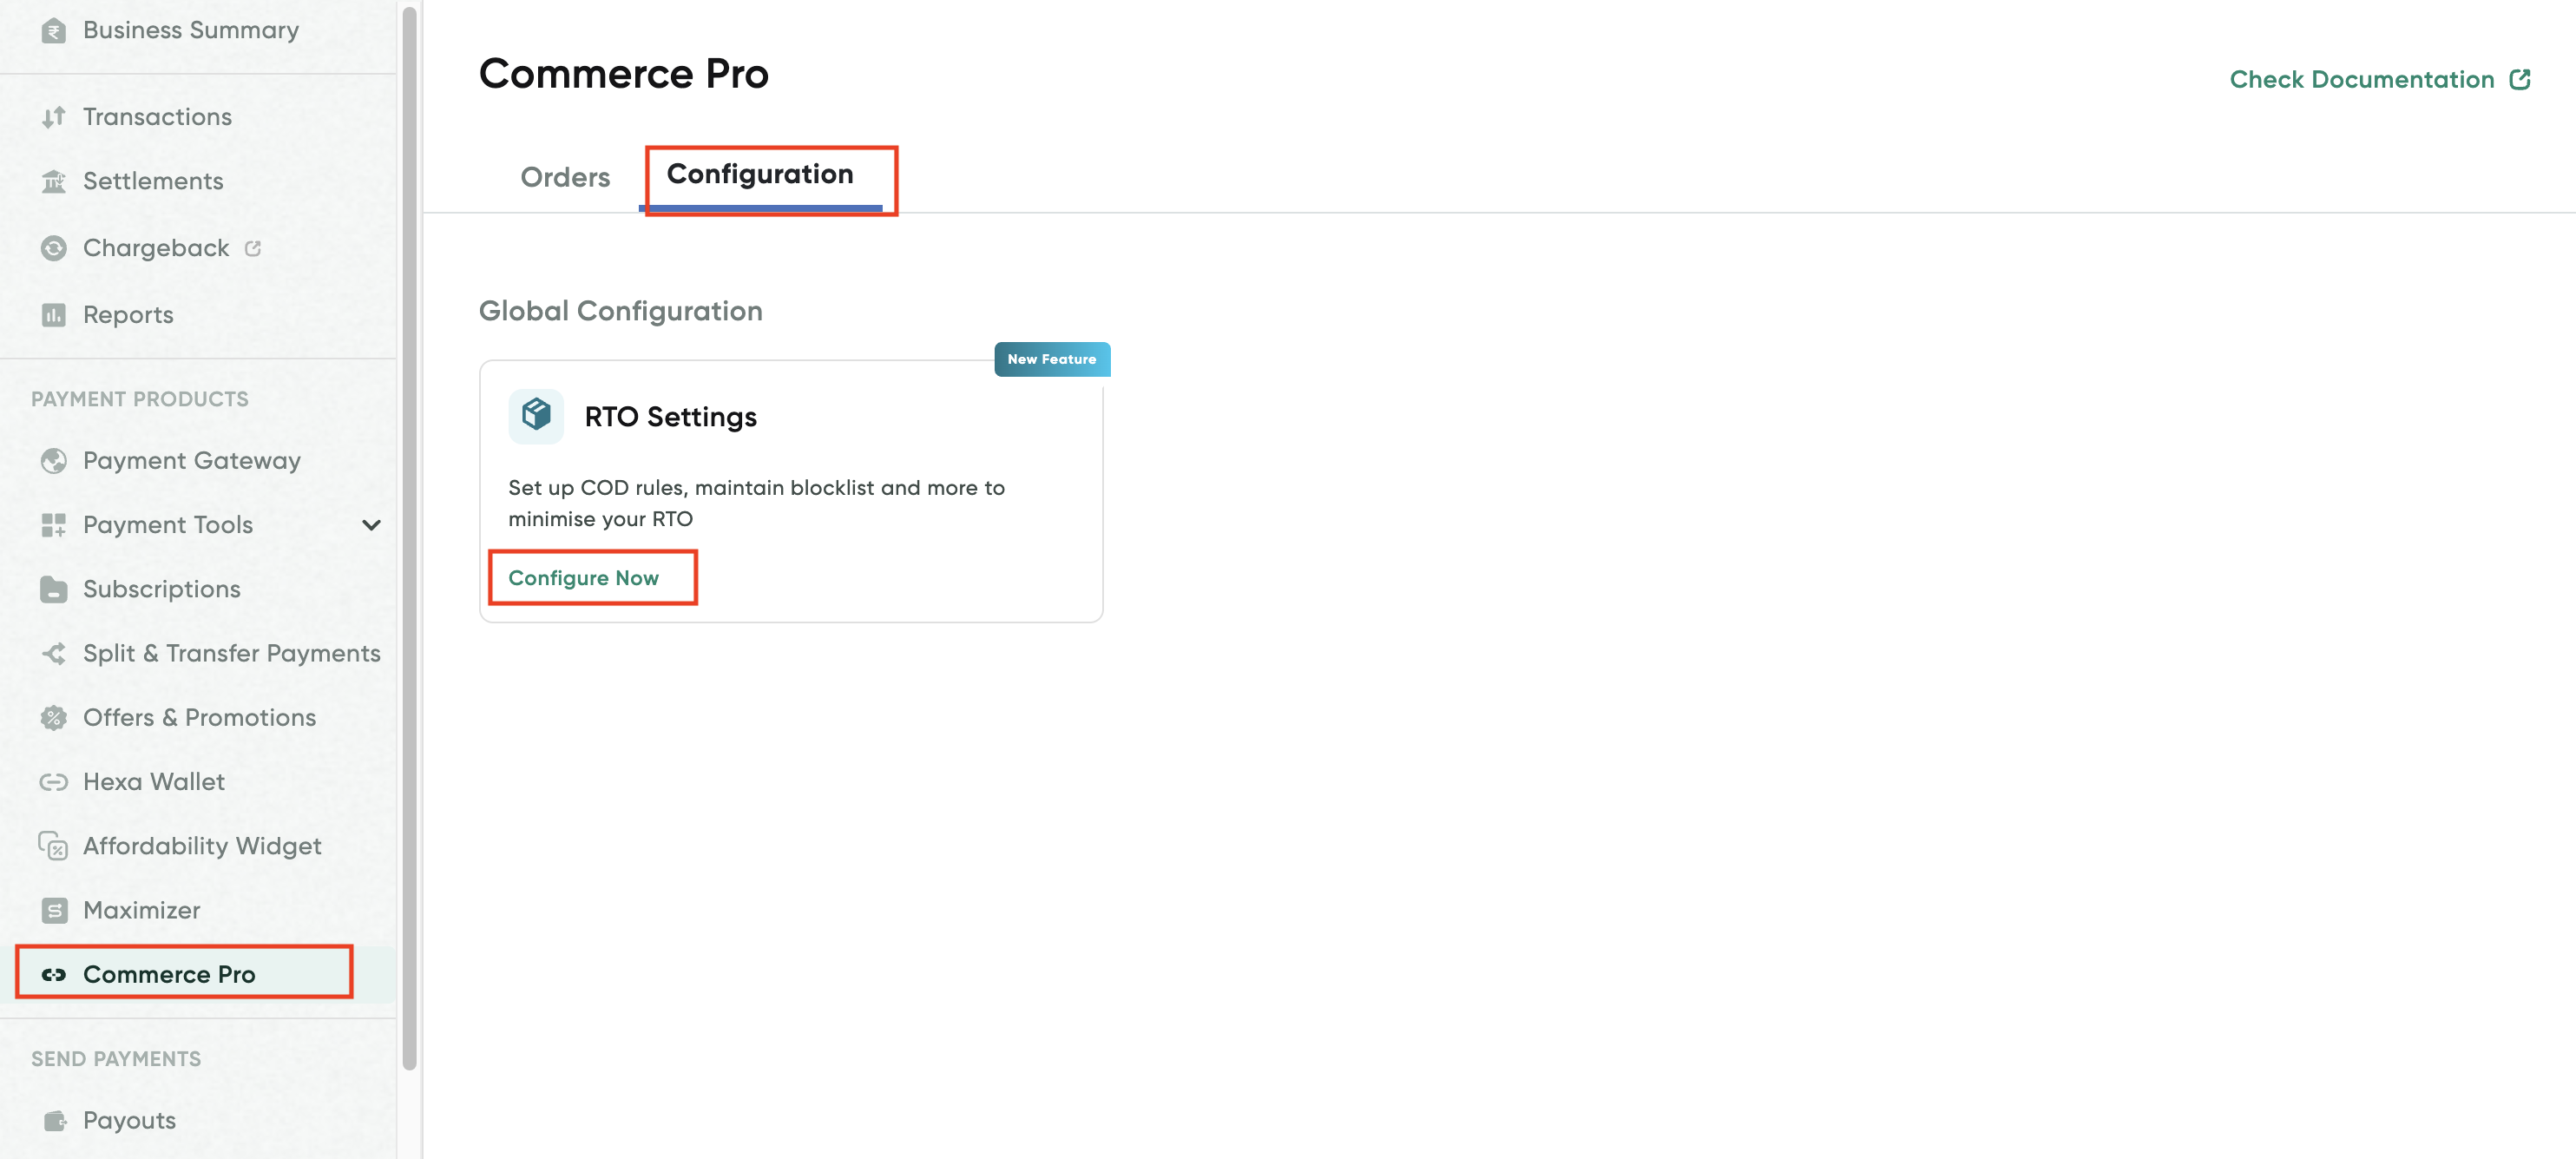
- Click Configure Now on the RTO Settings page.
Configure amount rule
- Navigate to the RTO Settings page.
The Amount Rule tab is displayed.
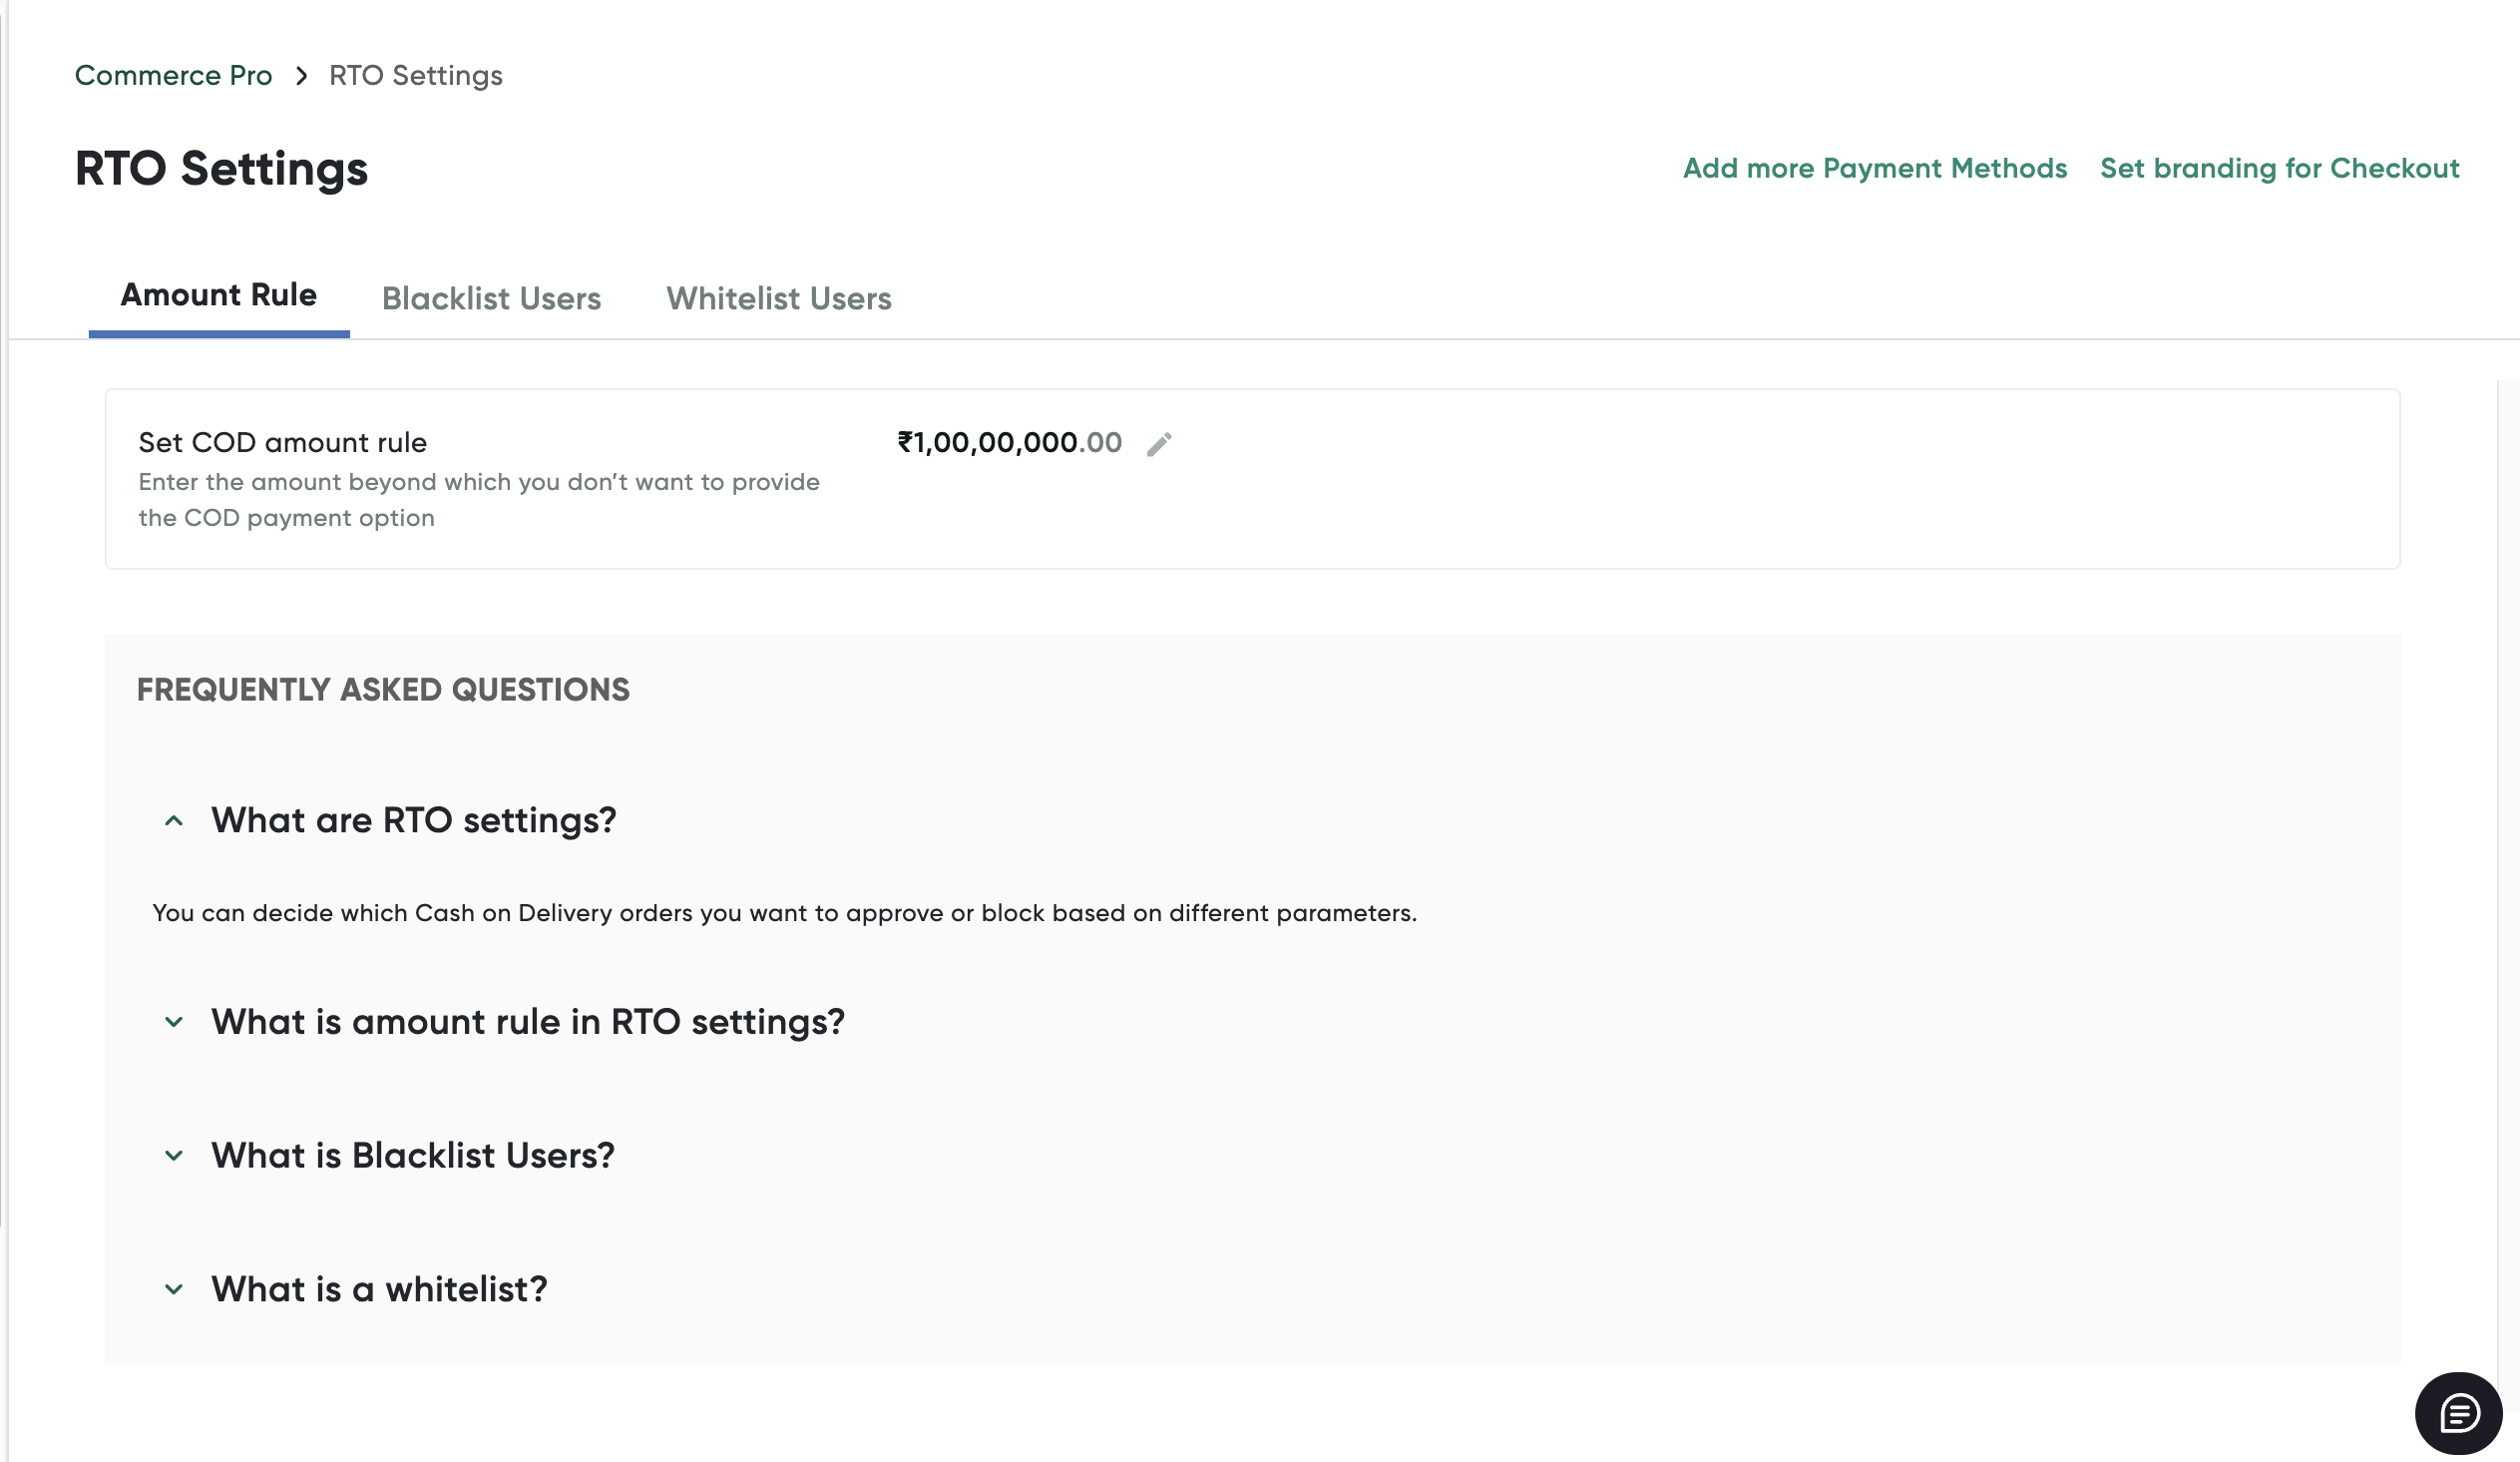
- Click the Edit button in the Set COD amount rule field.
The Set COD amount rule pop-up page is displayed.
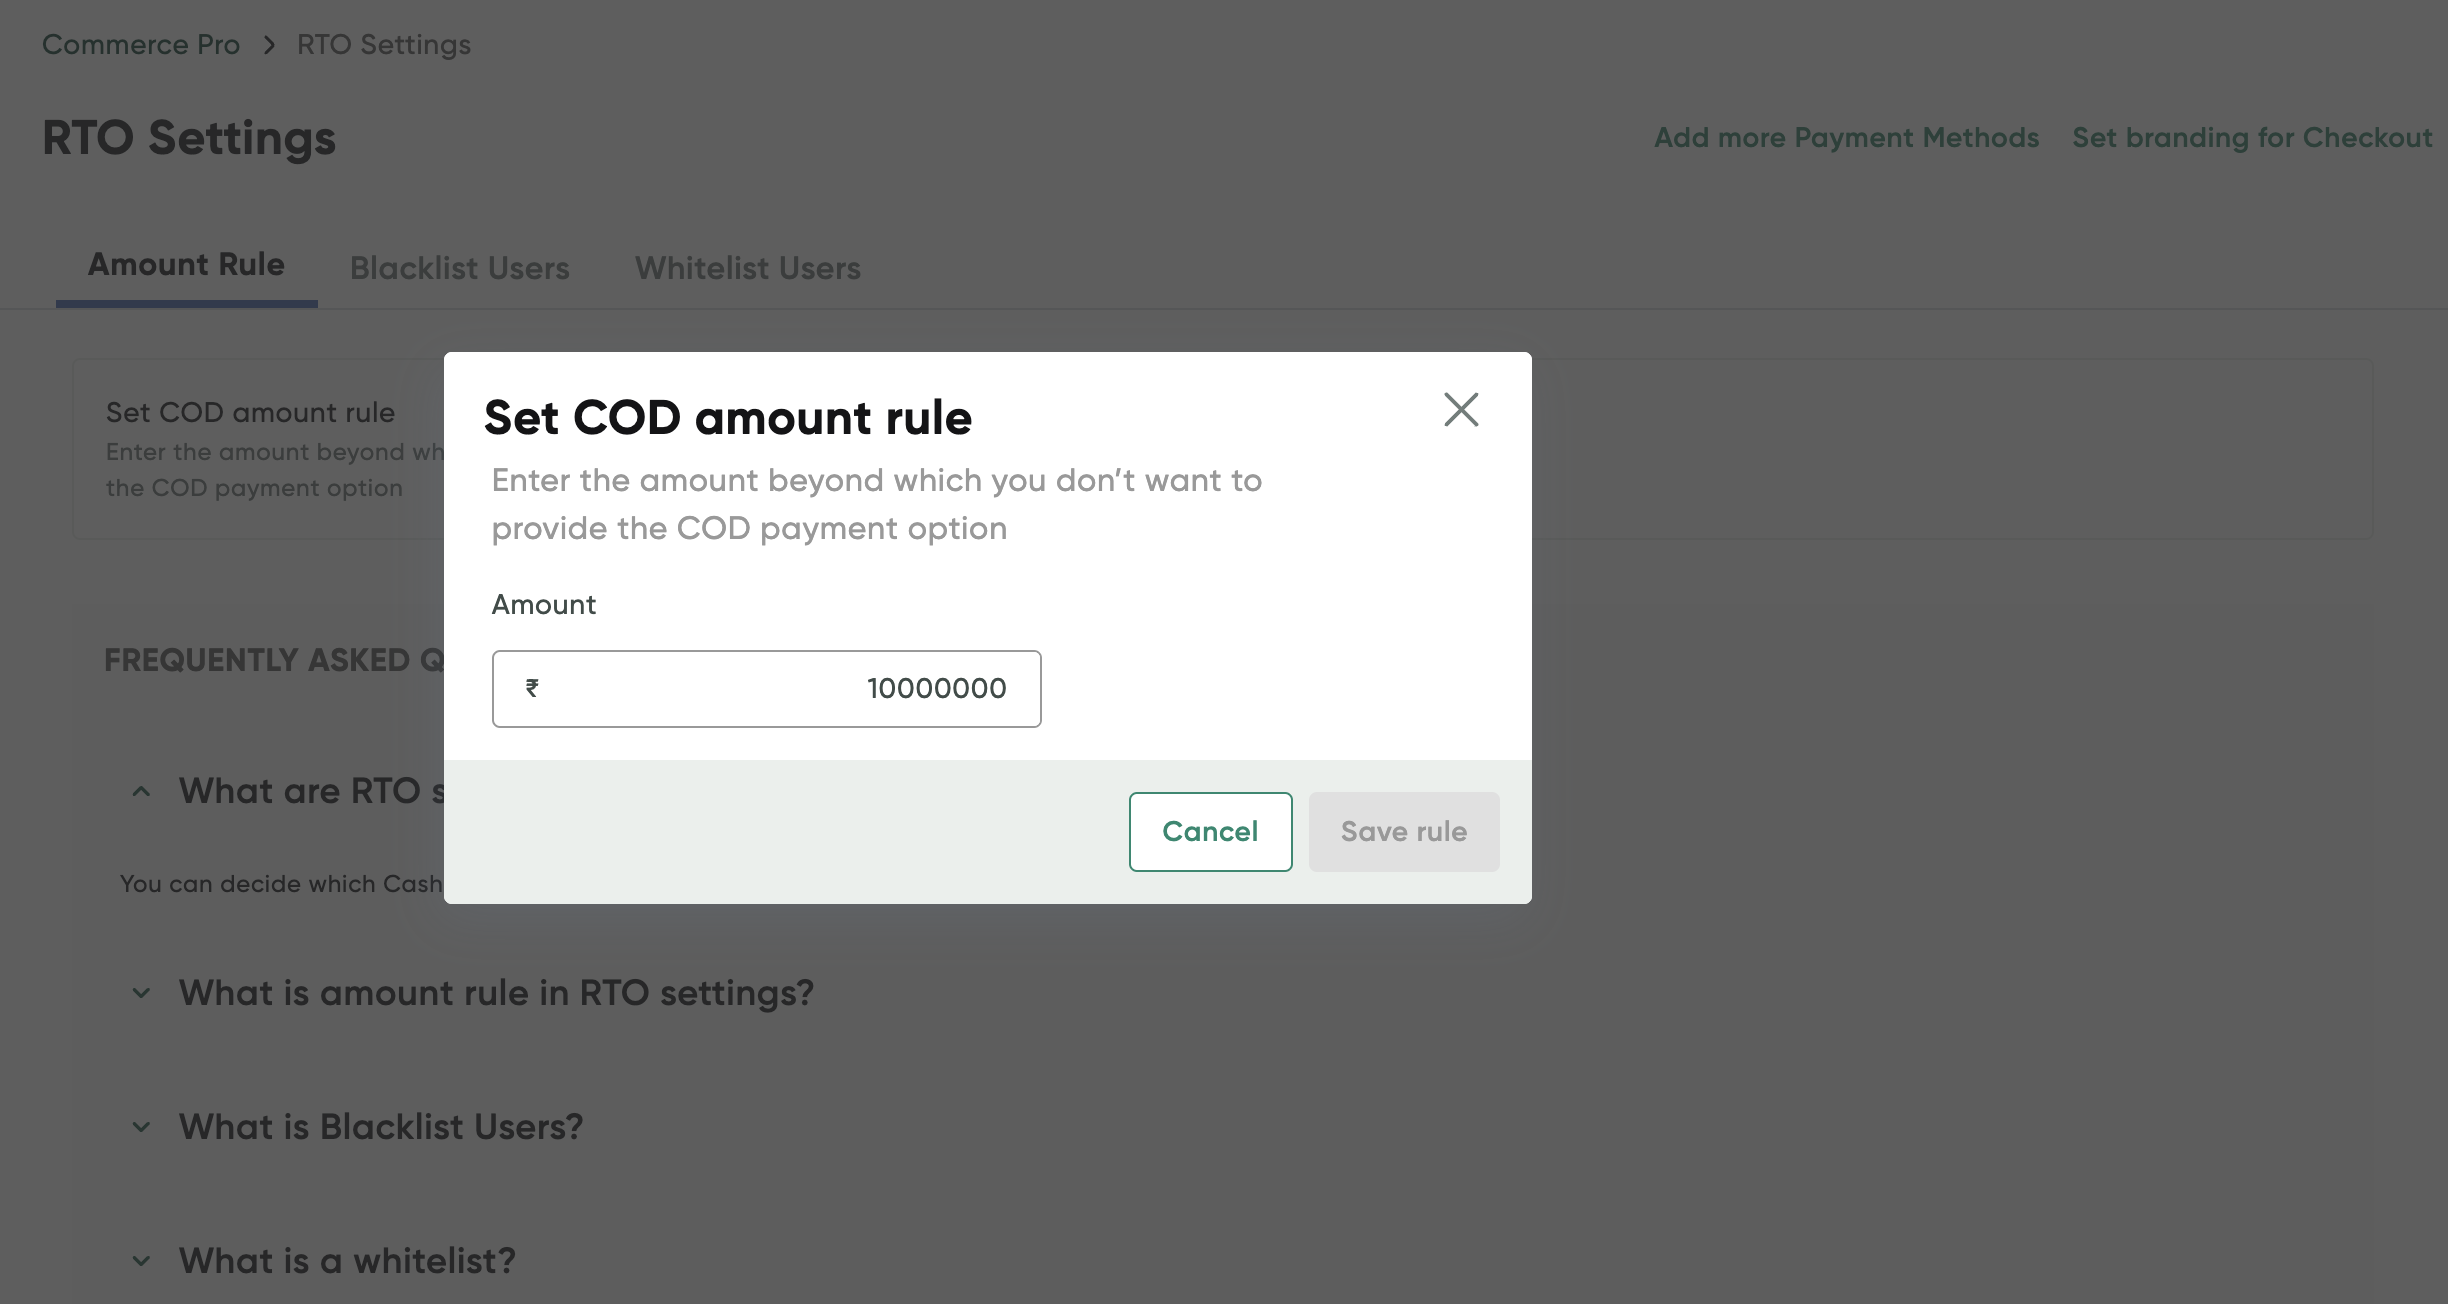
- Enter the amount limit for COD transactions in the Amount field.
- Click the Save rule button.
Blacklist users
You can manually blacklist user by specifying there details or upload their details in bulk.
Manually blacklist a user
To manually blacklist a user:
- Navigate to the RTO Settings page.
- Select the Blacklist Users tab.
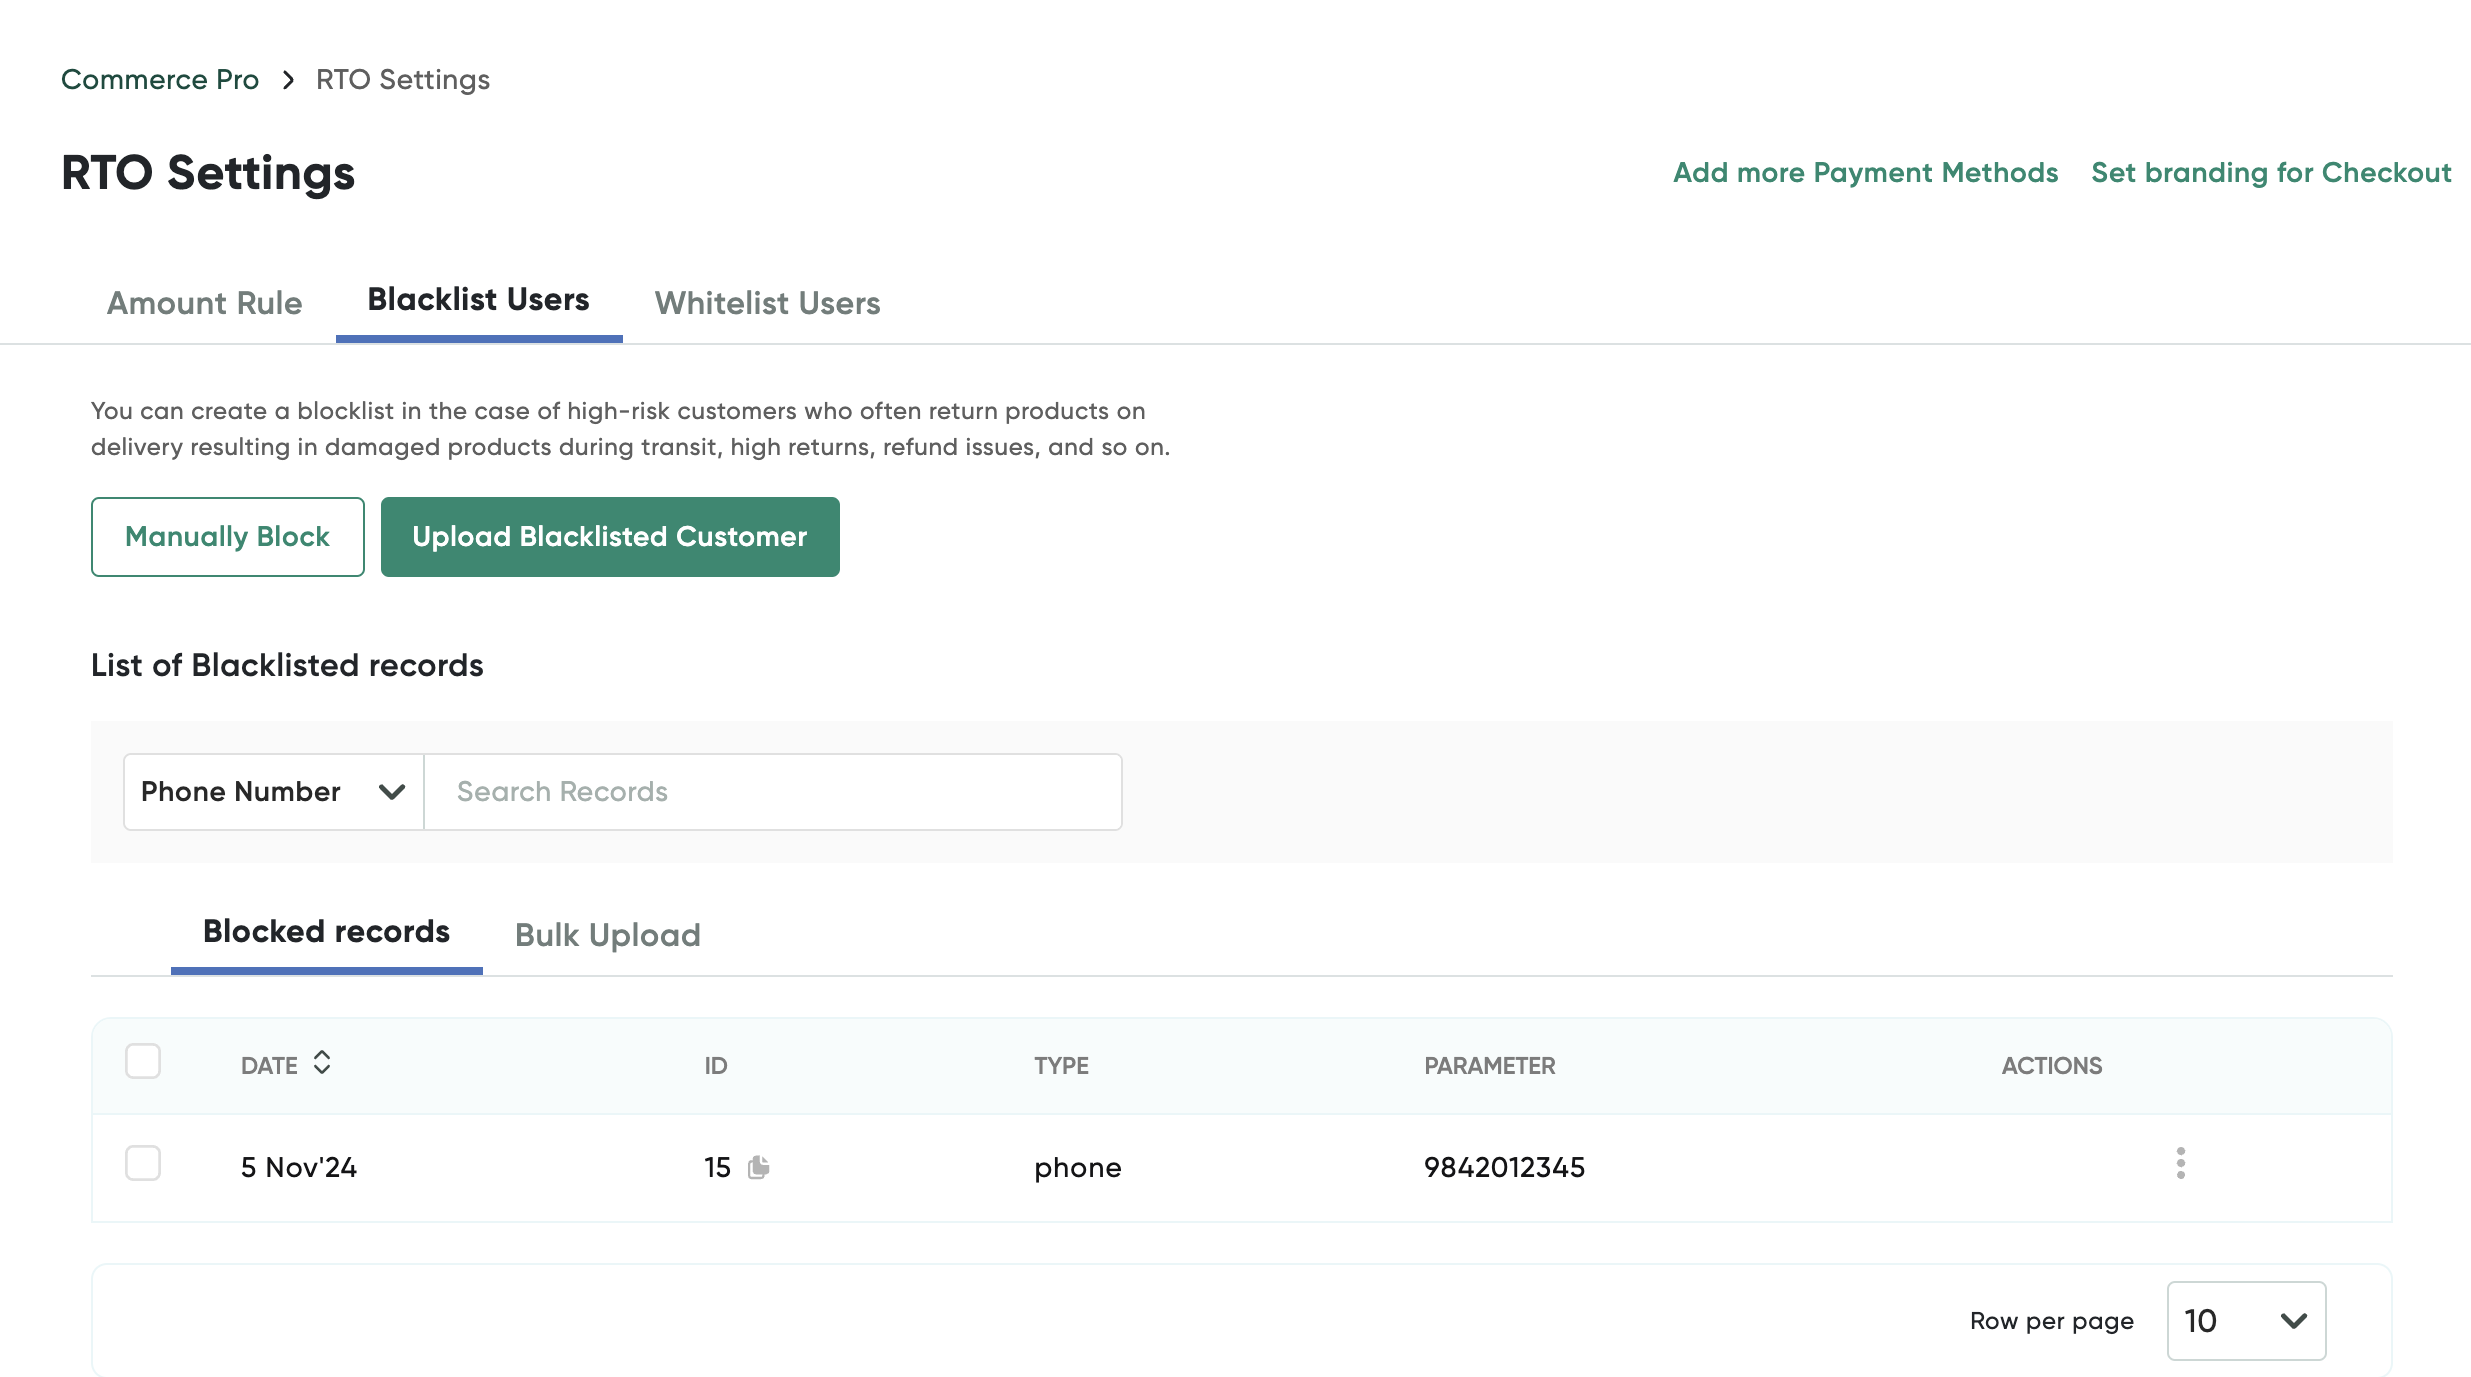
- Click the Manually Black button.
The Block Customers pop-up page is displayed.
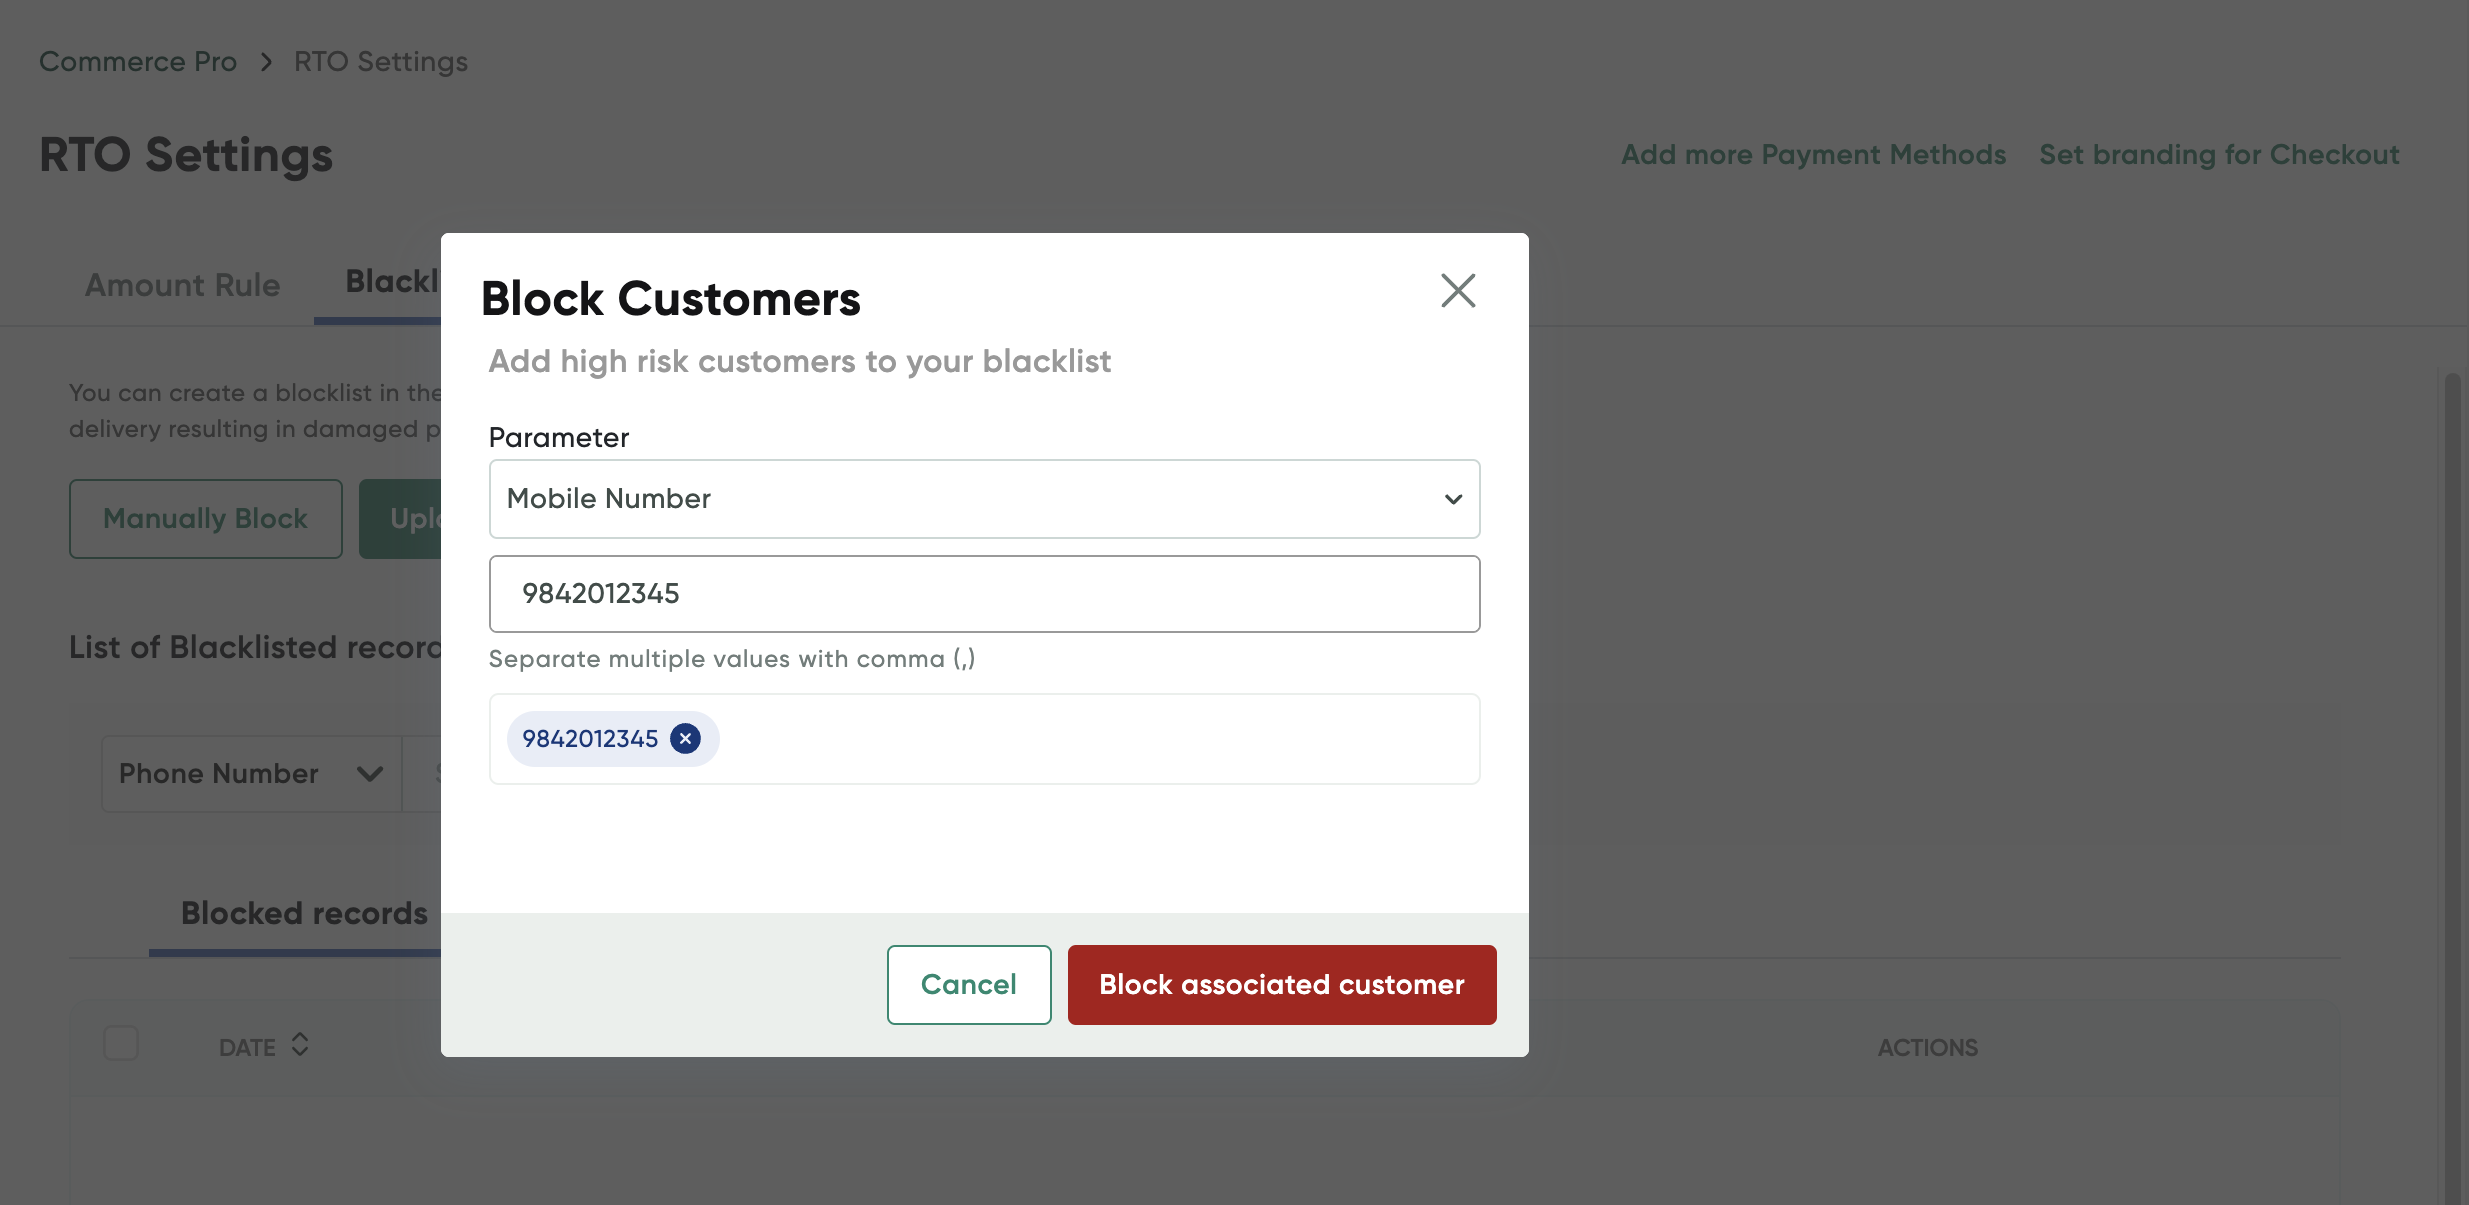
- Select any of the following options from the Parameter drop-down list and specify the value accordingly:
- Mobile Number
- PIN Code
Based on your customer's any of the above details in Shopify records, they will blocked from using COD or not shown while payment.
- Click Block associate customer.
Blacklist users in bulk
To blacklist users in bulk:
- Navigate to the RTO Settings page.
- Select the Blacklist Users tab.
-
Click the Upload Blacklisted Customer button.
The Upload Blacklisted Customer List pop-up page is displayed.
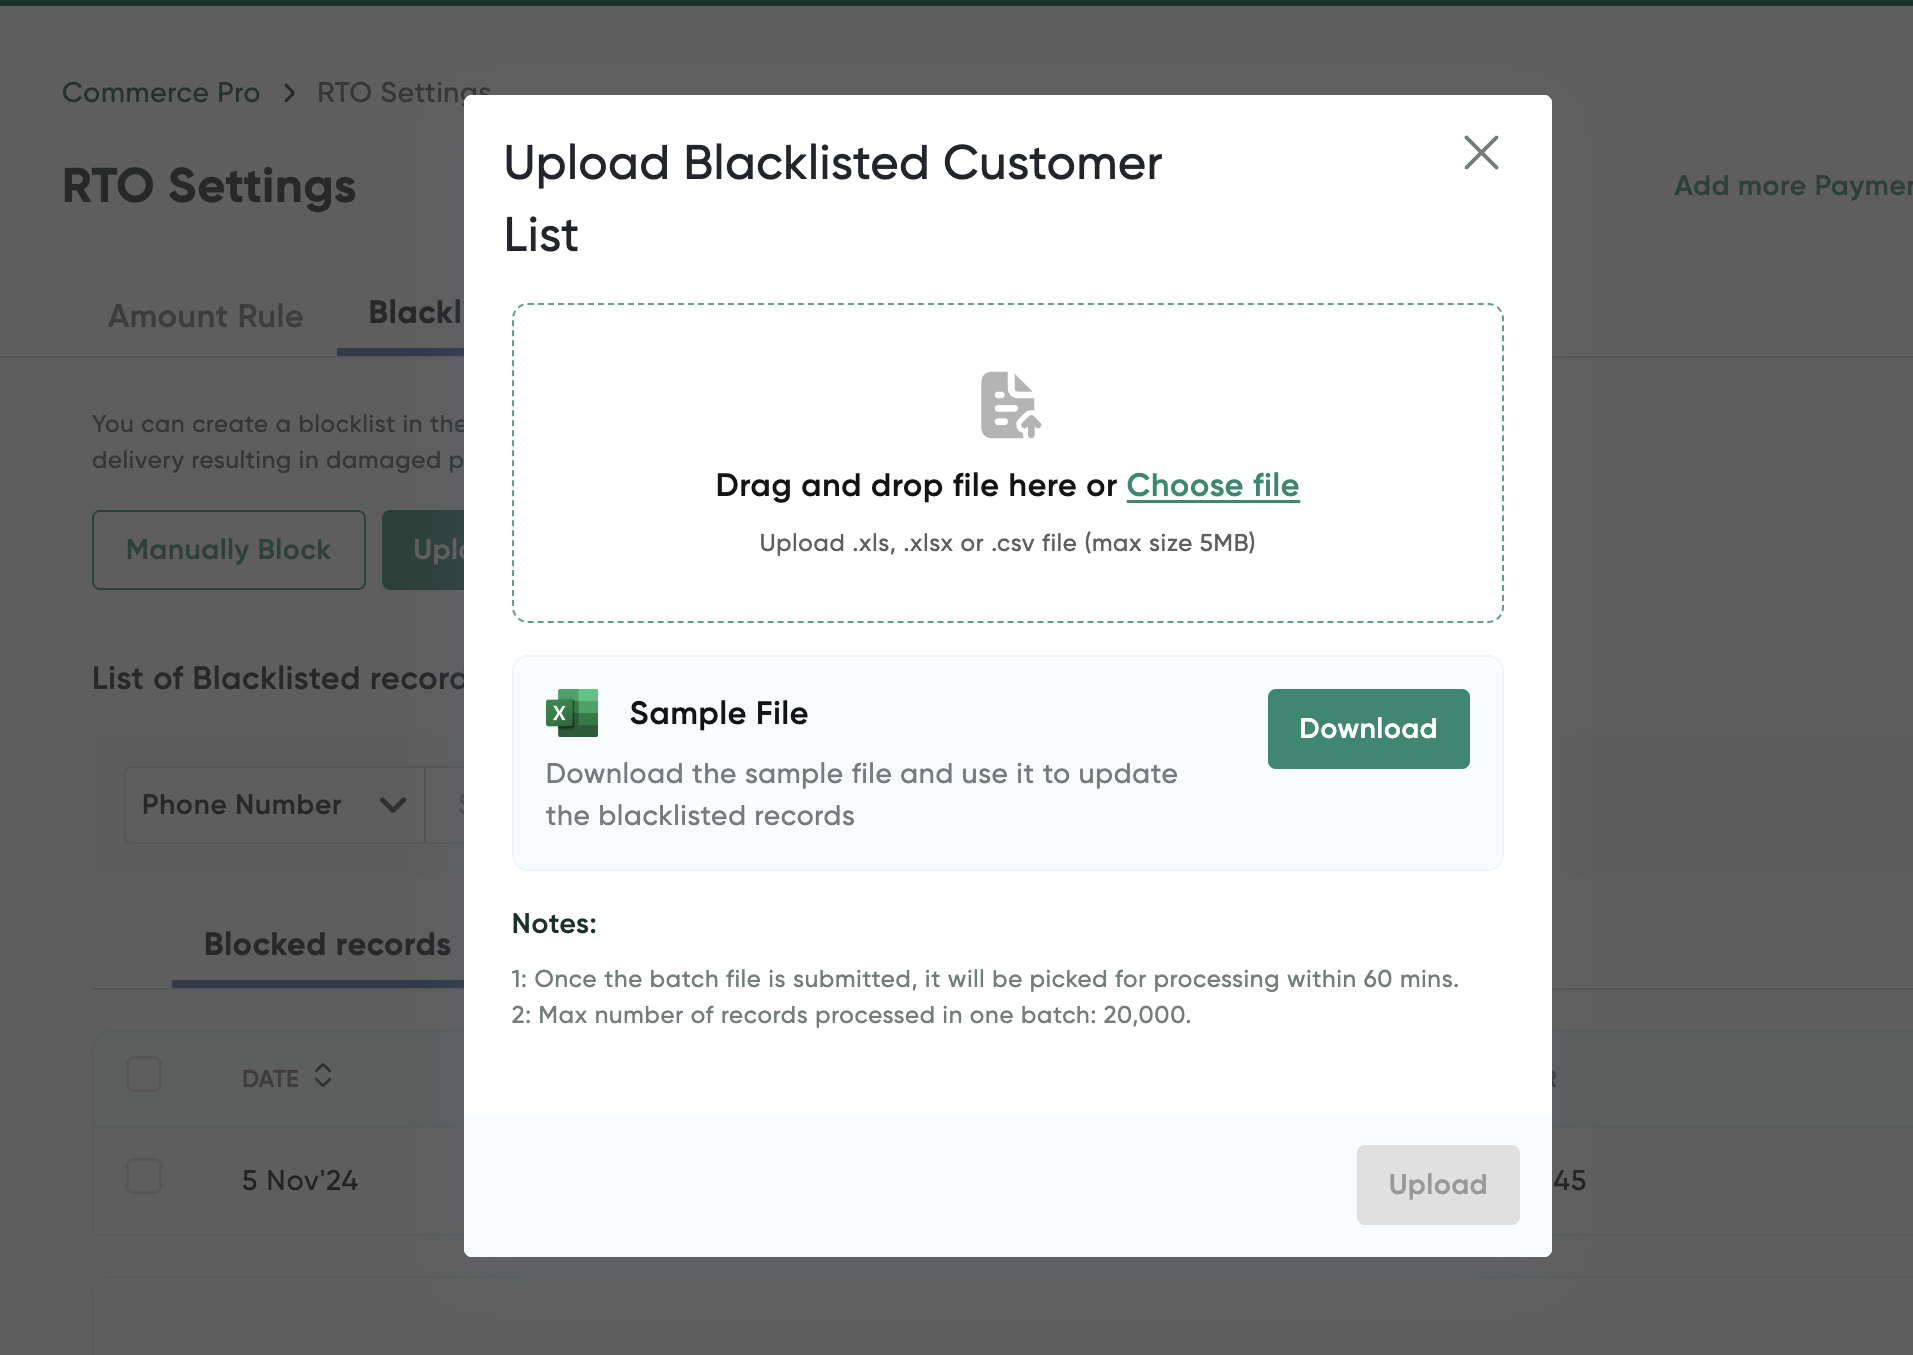
- Download the sample file using the Download button and enter the customer details to be blocked.
- Click the Choose file button to upload the spreadsheet containing the blacklisted customer list.
- Click Upload.
Whitelist users
You can manually whitelist user by specifying there details or upload their details in bulk.
Manually whitelist a user
To manually whitelist a user:
- Navigate to the RTO Settings page.
- Select the Whitelist Users tab.
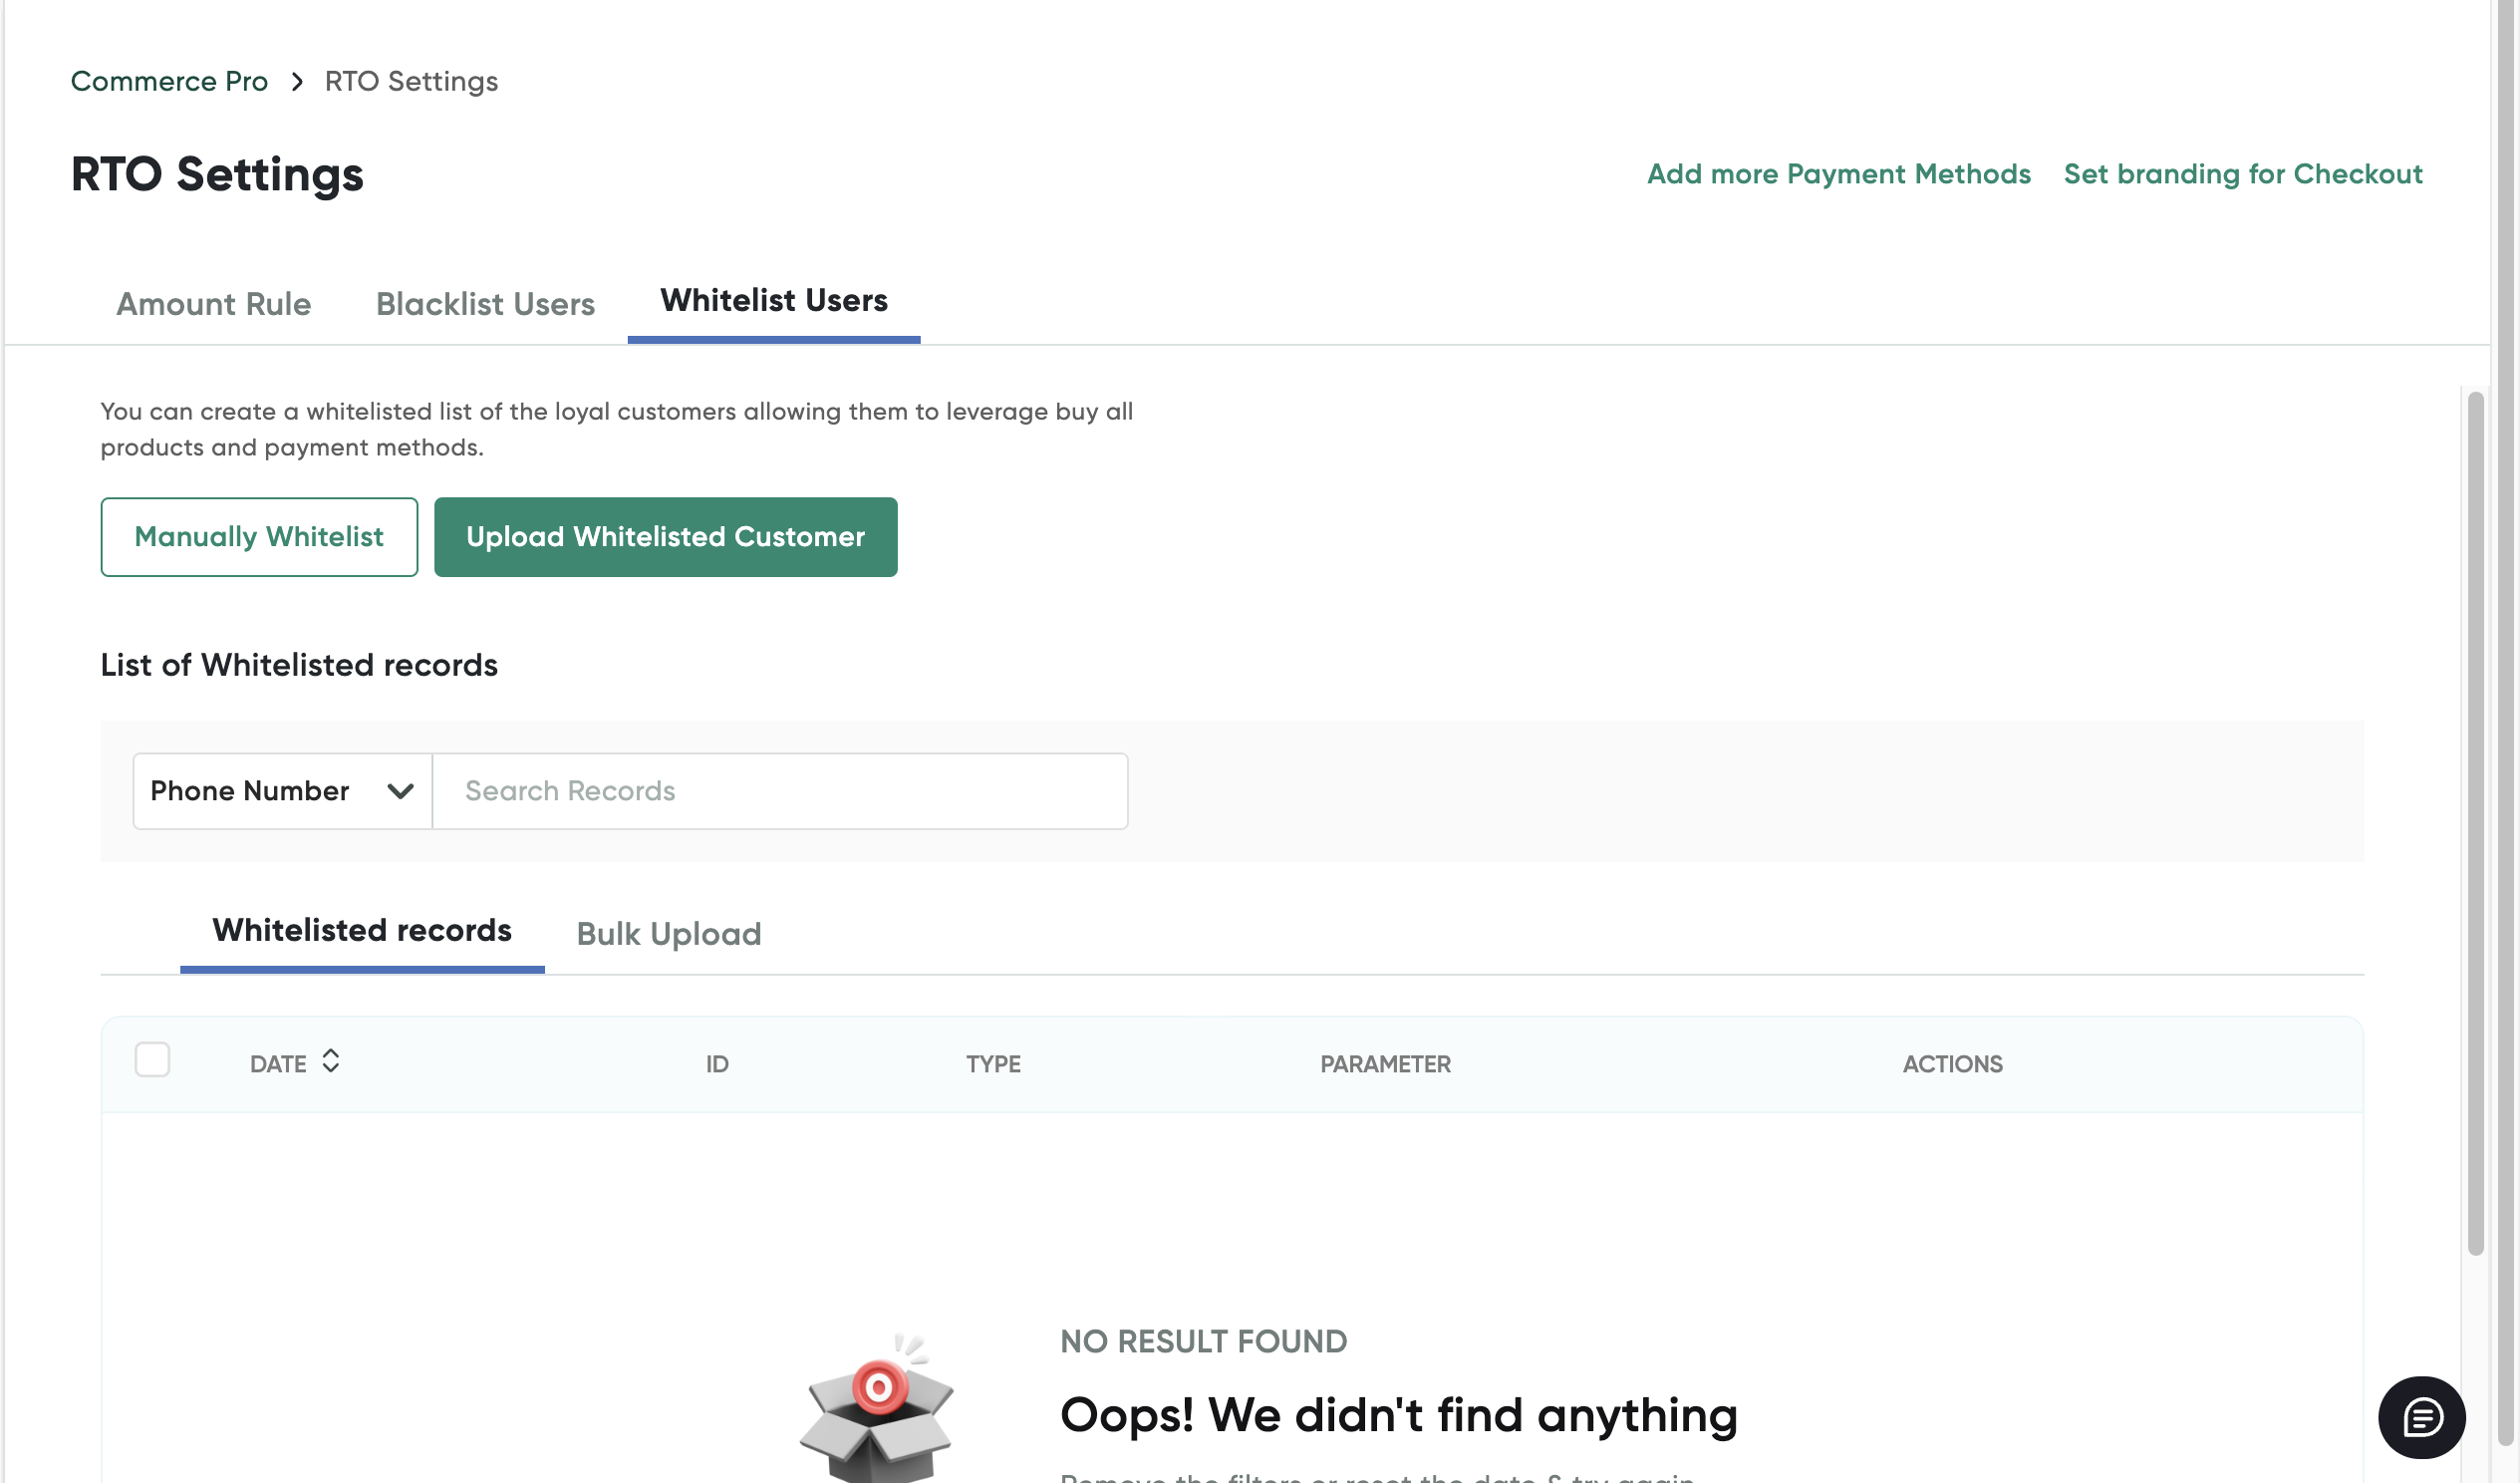
- Click the Manually Whitelist button.
The Whitelist Customers pop-up page is displayed.

- Select any of the following options from the Parameter drop-down list and specify the value accordingly:
- Mobile Number
- PIN Code
Based on your customer's any of the above details in Shopify records, they will be whitelisted so that COD payment mode is shown while payment.
- Click Whitelist associate customer.
Whitelist users in bulk
To whitelist users in bulk:
- Navigate to the RTO Settings page.
- Select the Blacklist Users tab.
-
Click the Upload Whitelisted Customer button.
The Upload Whitelisted Customer List pop-up page is displayed.
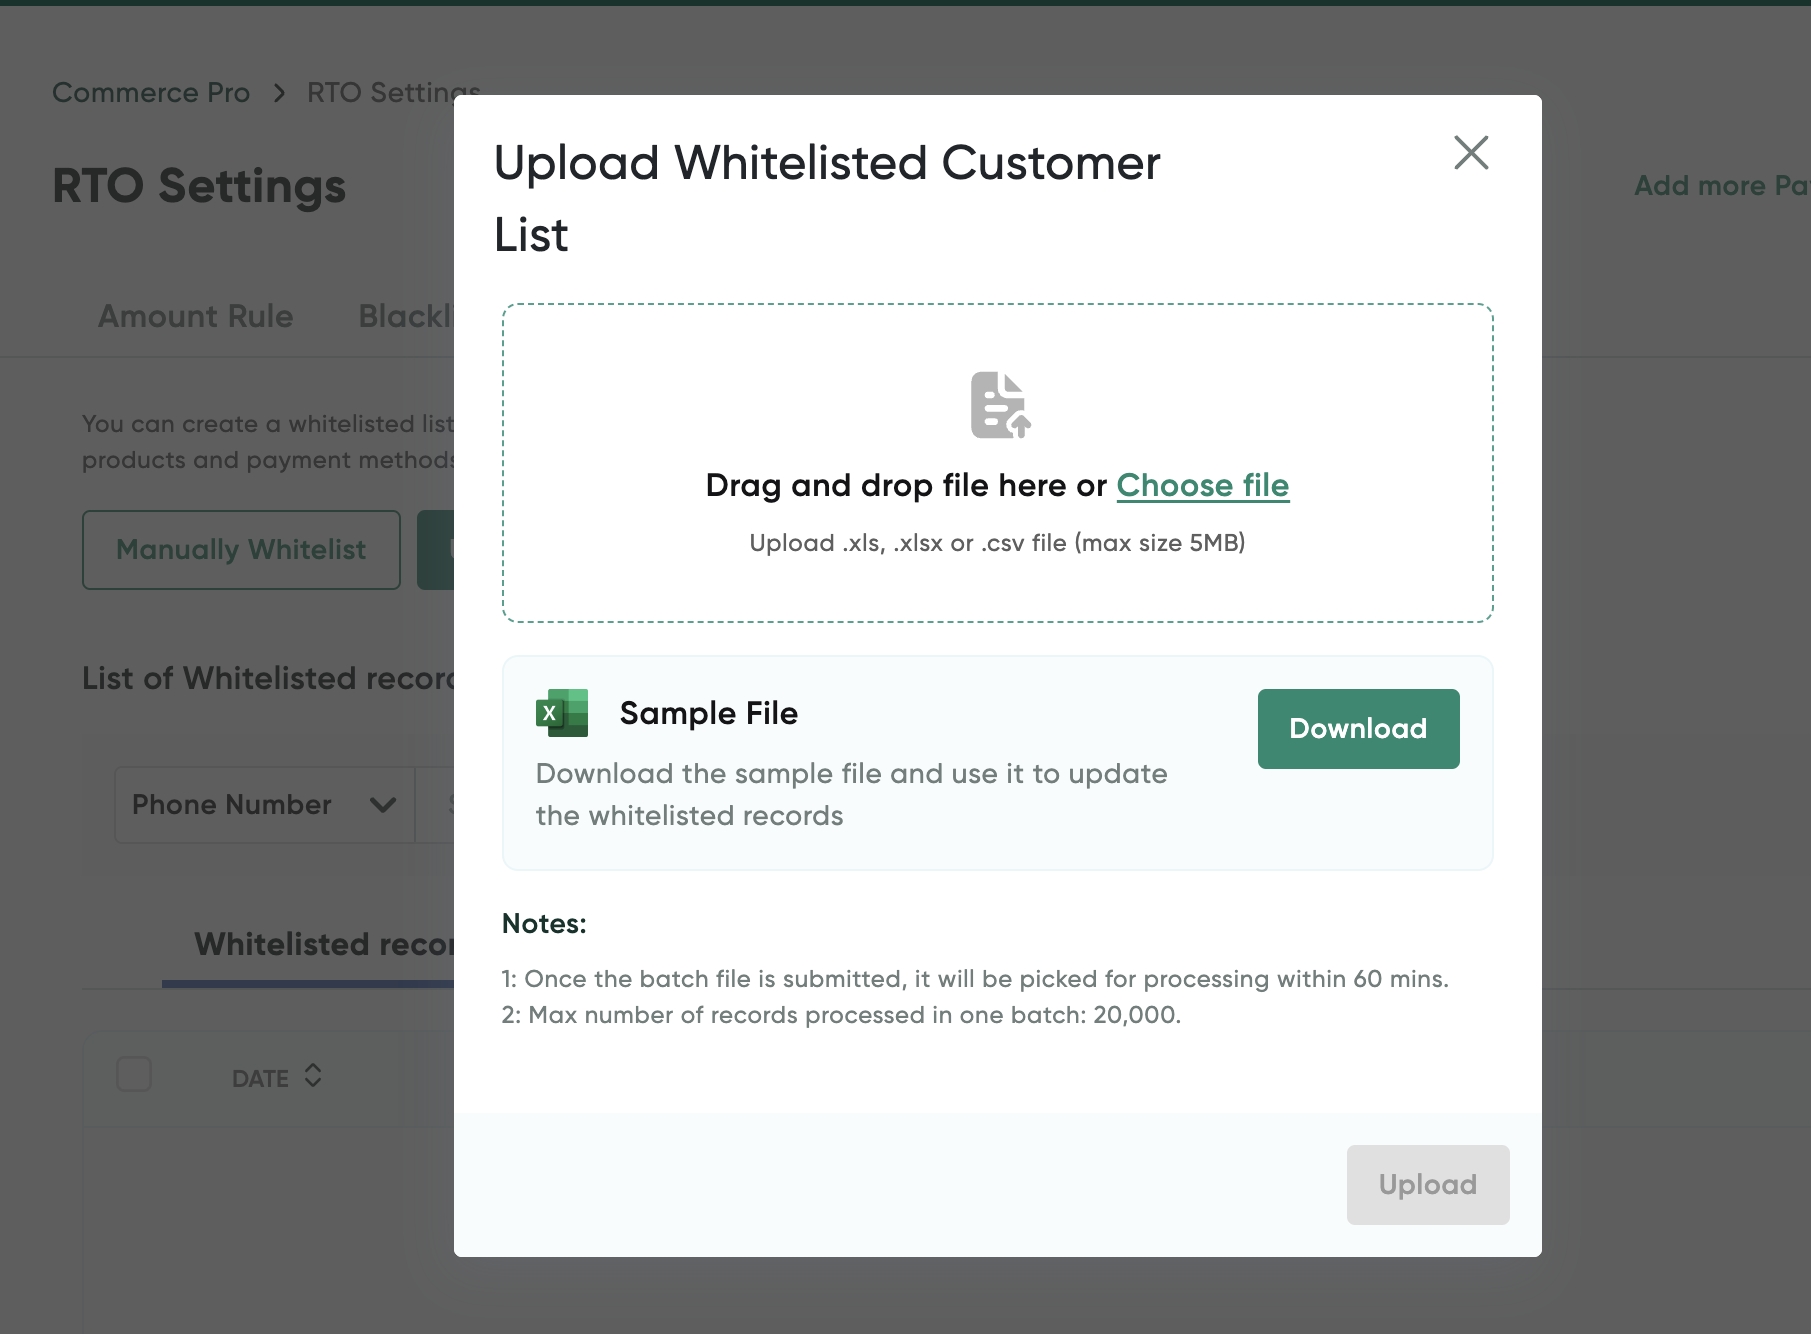
- Download the sample file using the Download button and enter the customer details to be whitelisted.
- Click the Choose file button to upload the spreadsheet containing the whitelisted customer list.
- Click Upload.
View COD Orders
To view the COD orders done using CommercePro Checkout app:
- Log on to PayU Dashboard. For more information, refer to Log in to Dashboard
- Select CommercePro from the menu on left pane.
The Orders tab is displayed similar to the following screenshot:
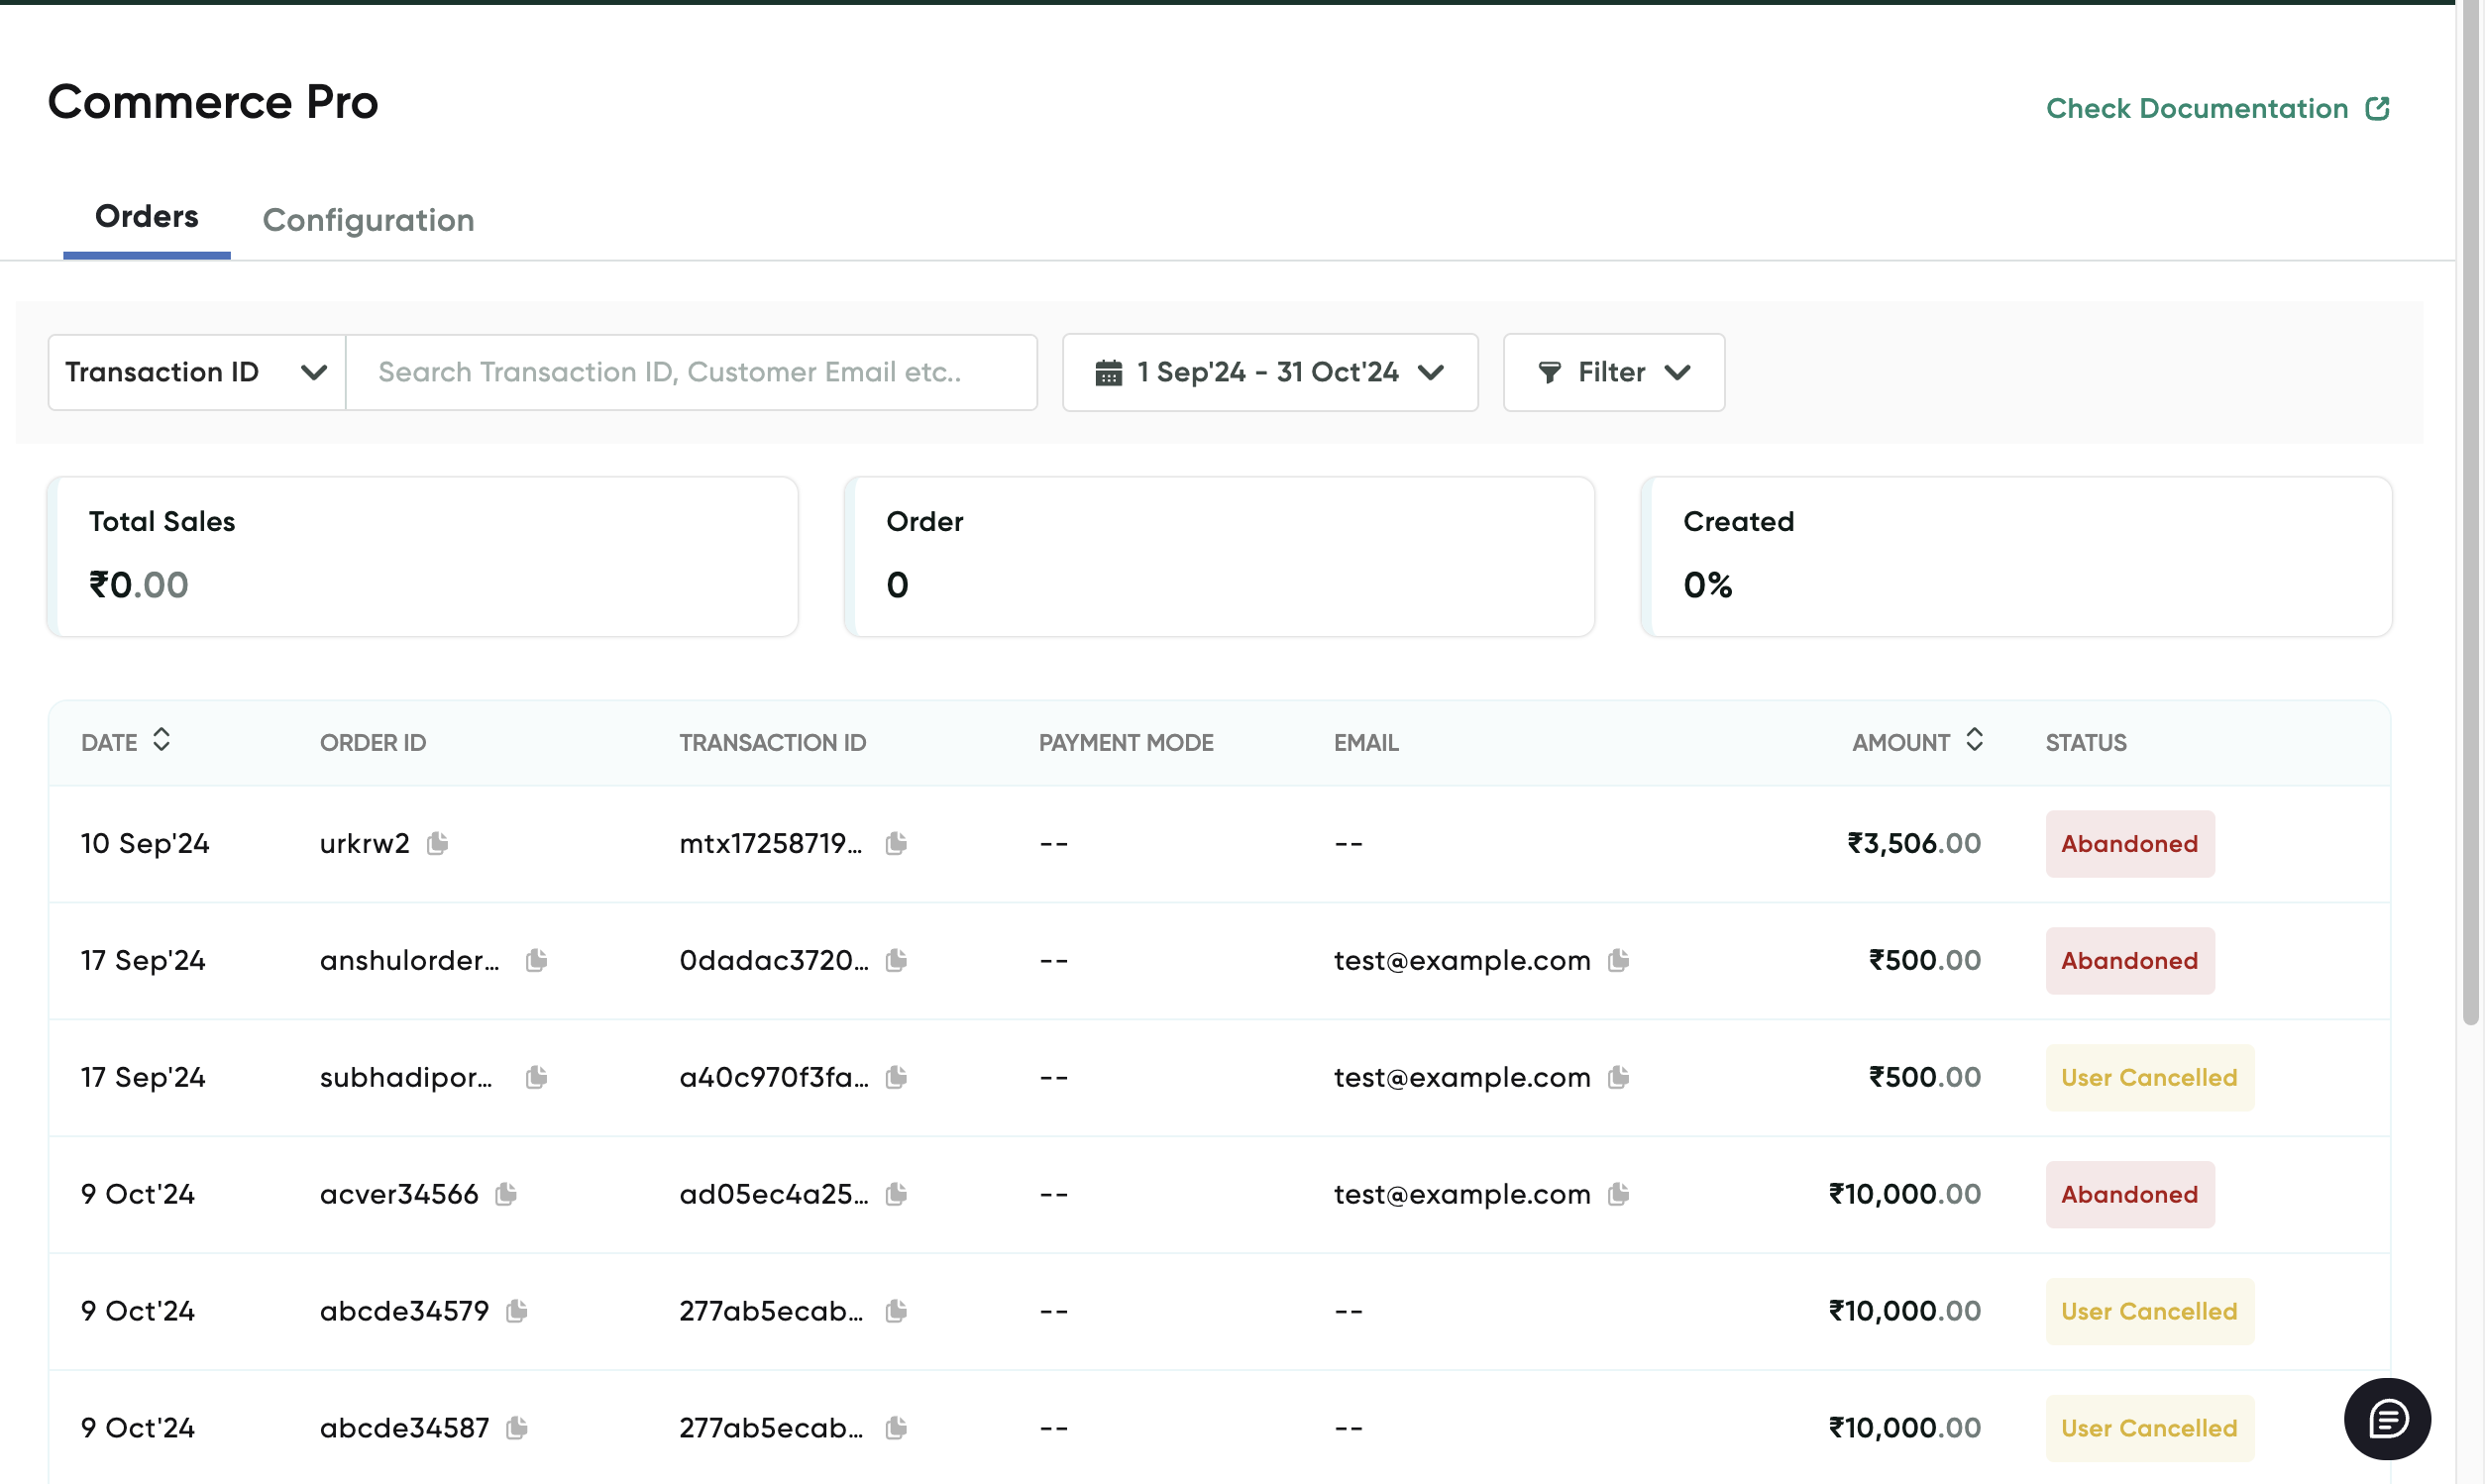
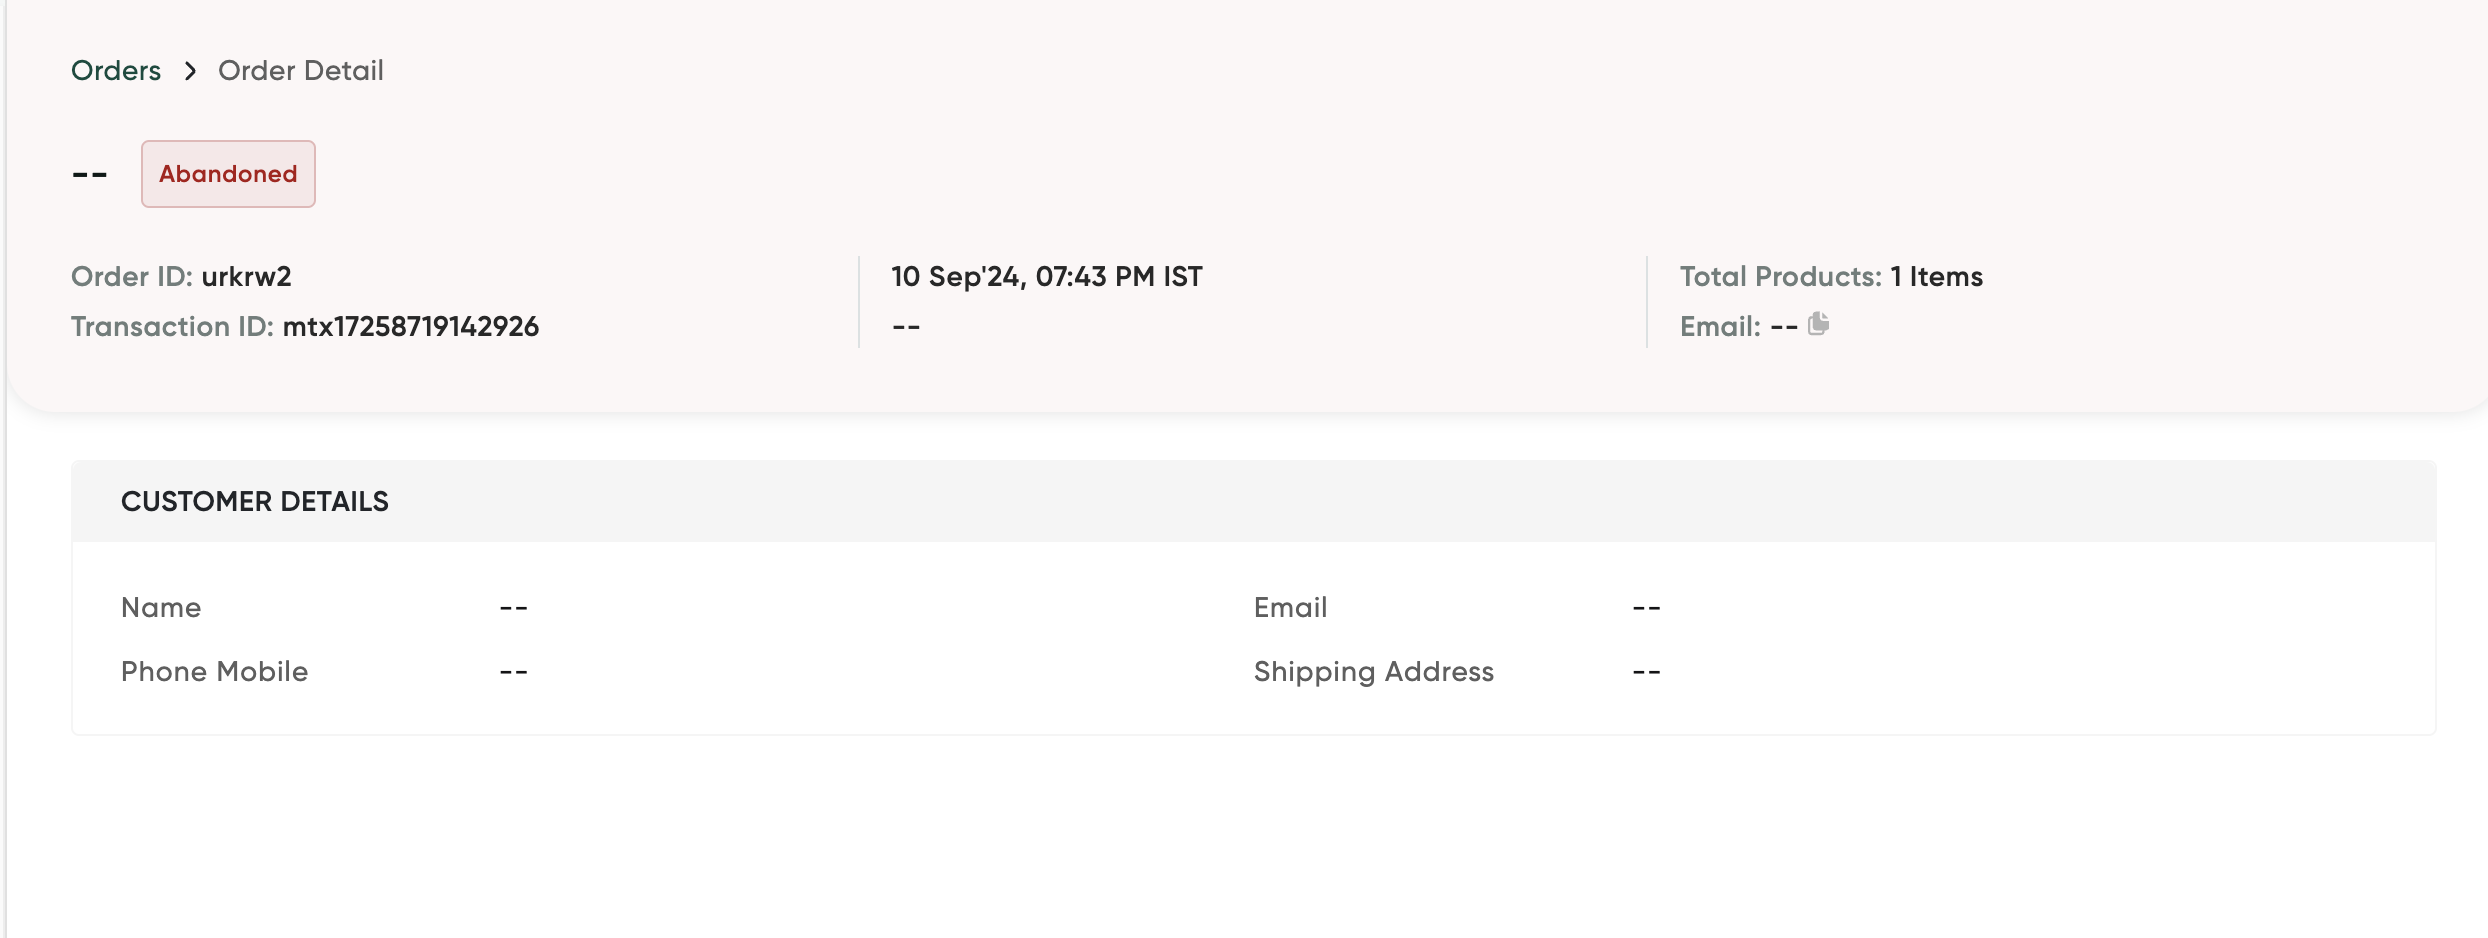
- Click any of the row on the grid to view the order details.
The order details are displayed for the selected order.
Manage COD Orders
After your customer successfully places an COD order, you can mark it as paid or cancel the order on your Shopify Admin Dashboard. This section describes how to mark an COD order as paid or cancel the order.
Mark an COD Order as Paid
To mark an COD order as paid:
-
Select Orders from the menu on left navigation pane.
The Orders page is displayed. You can look for the COD order with the "Payment pending" status under the Payment status column. For example, the first transaction in the following screenshot:
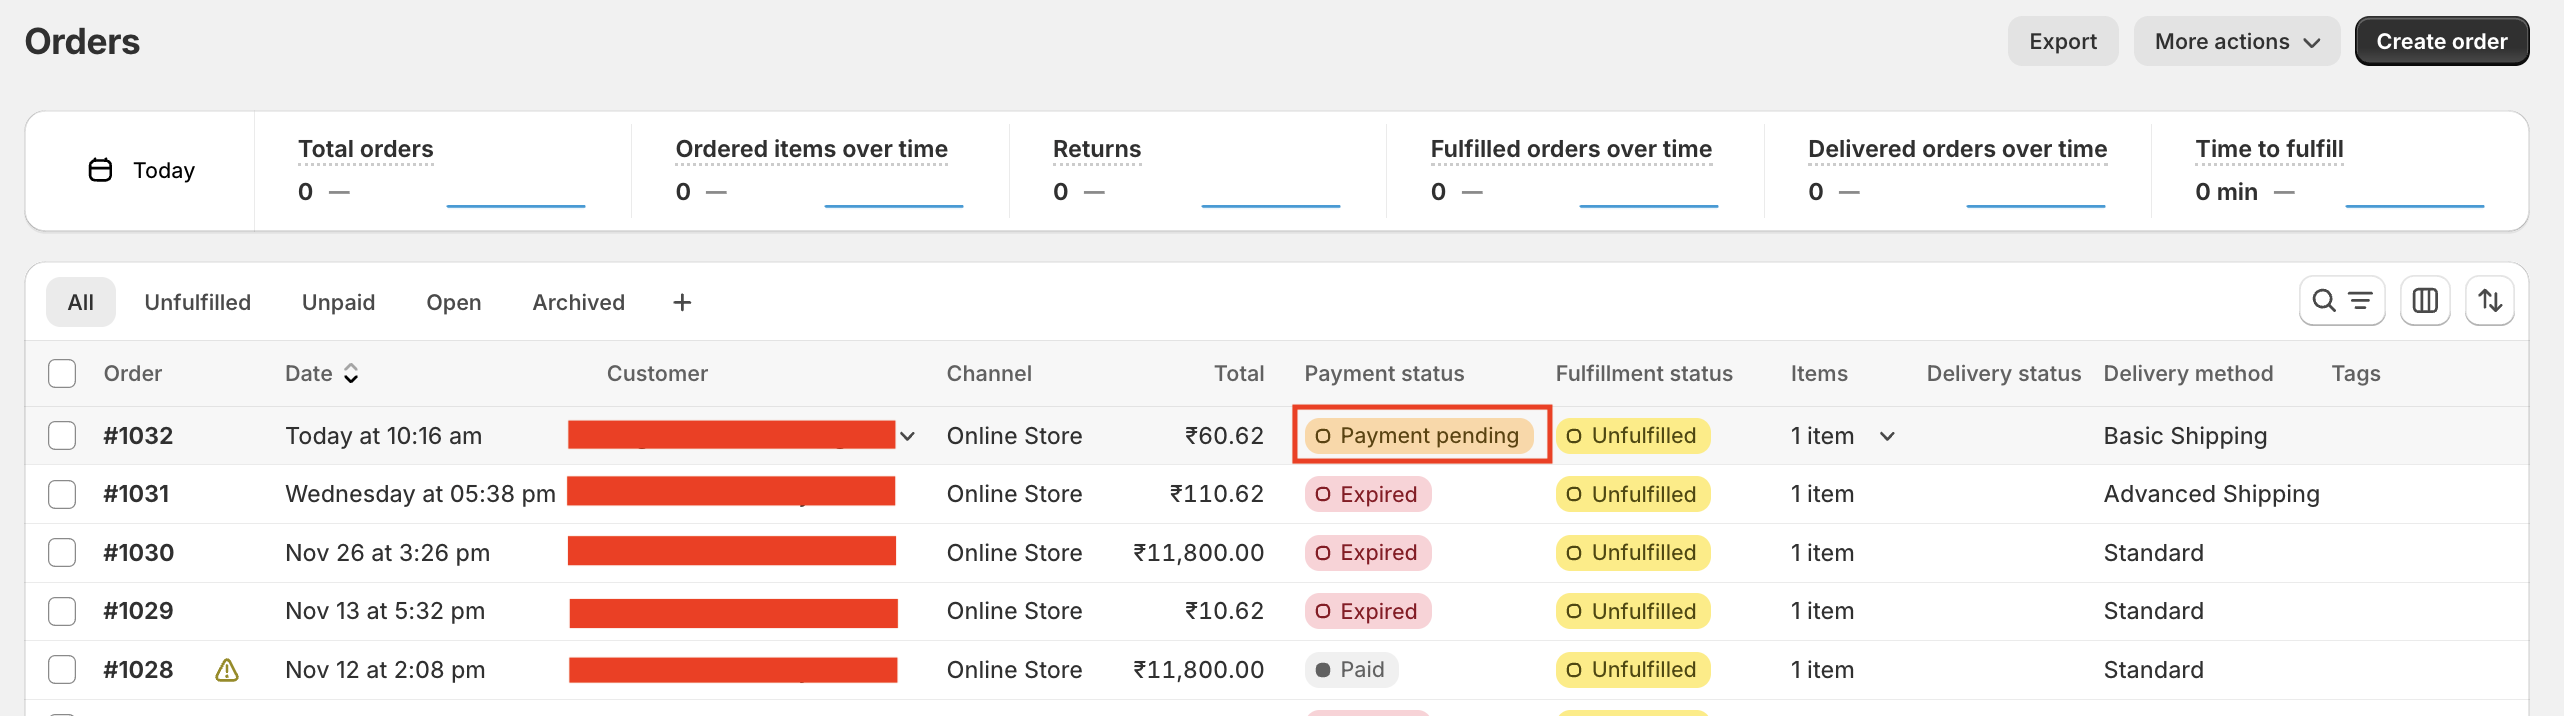
-
Open the COD order by clicking it.
The order details are displayed.
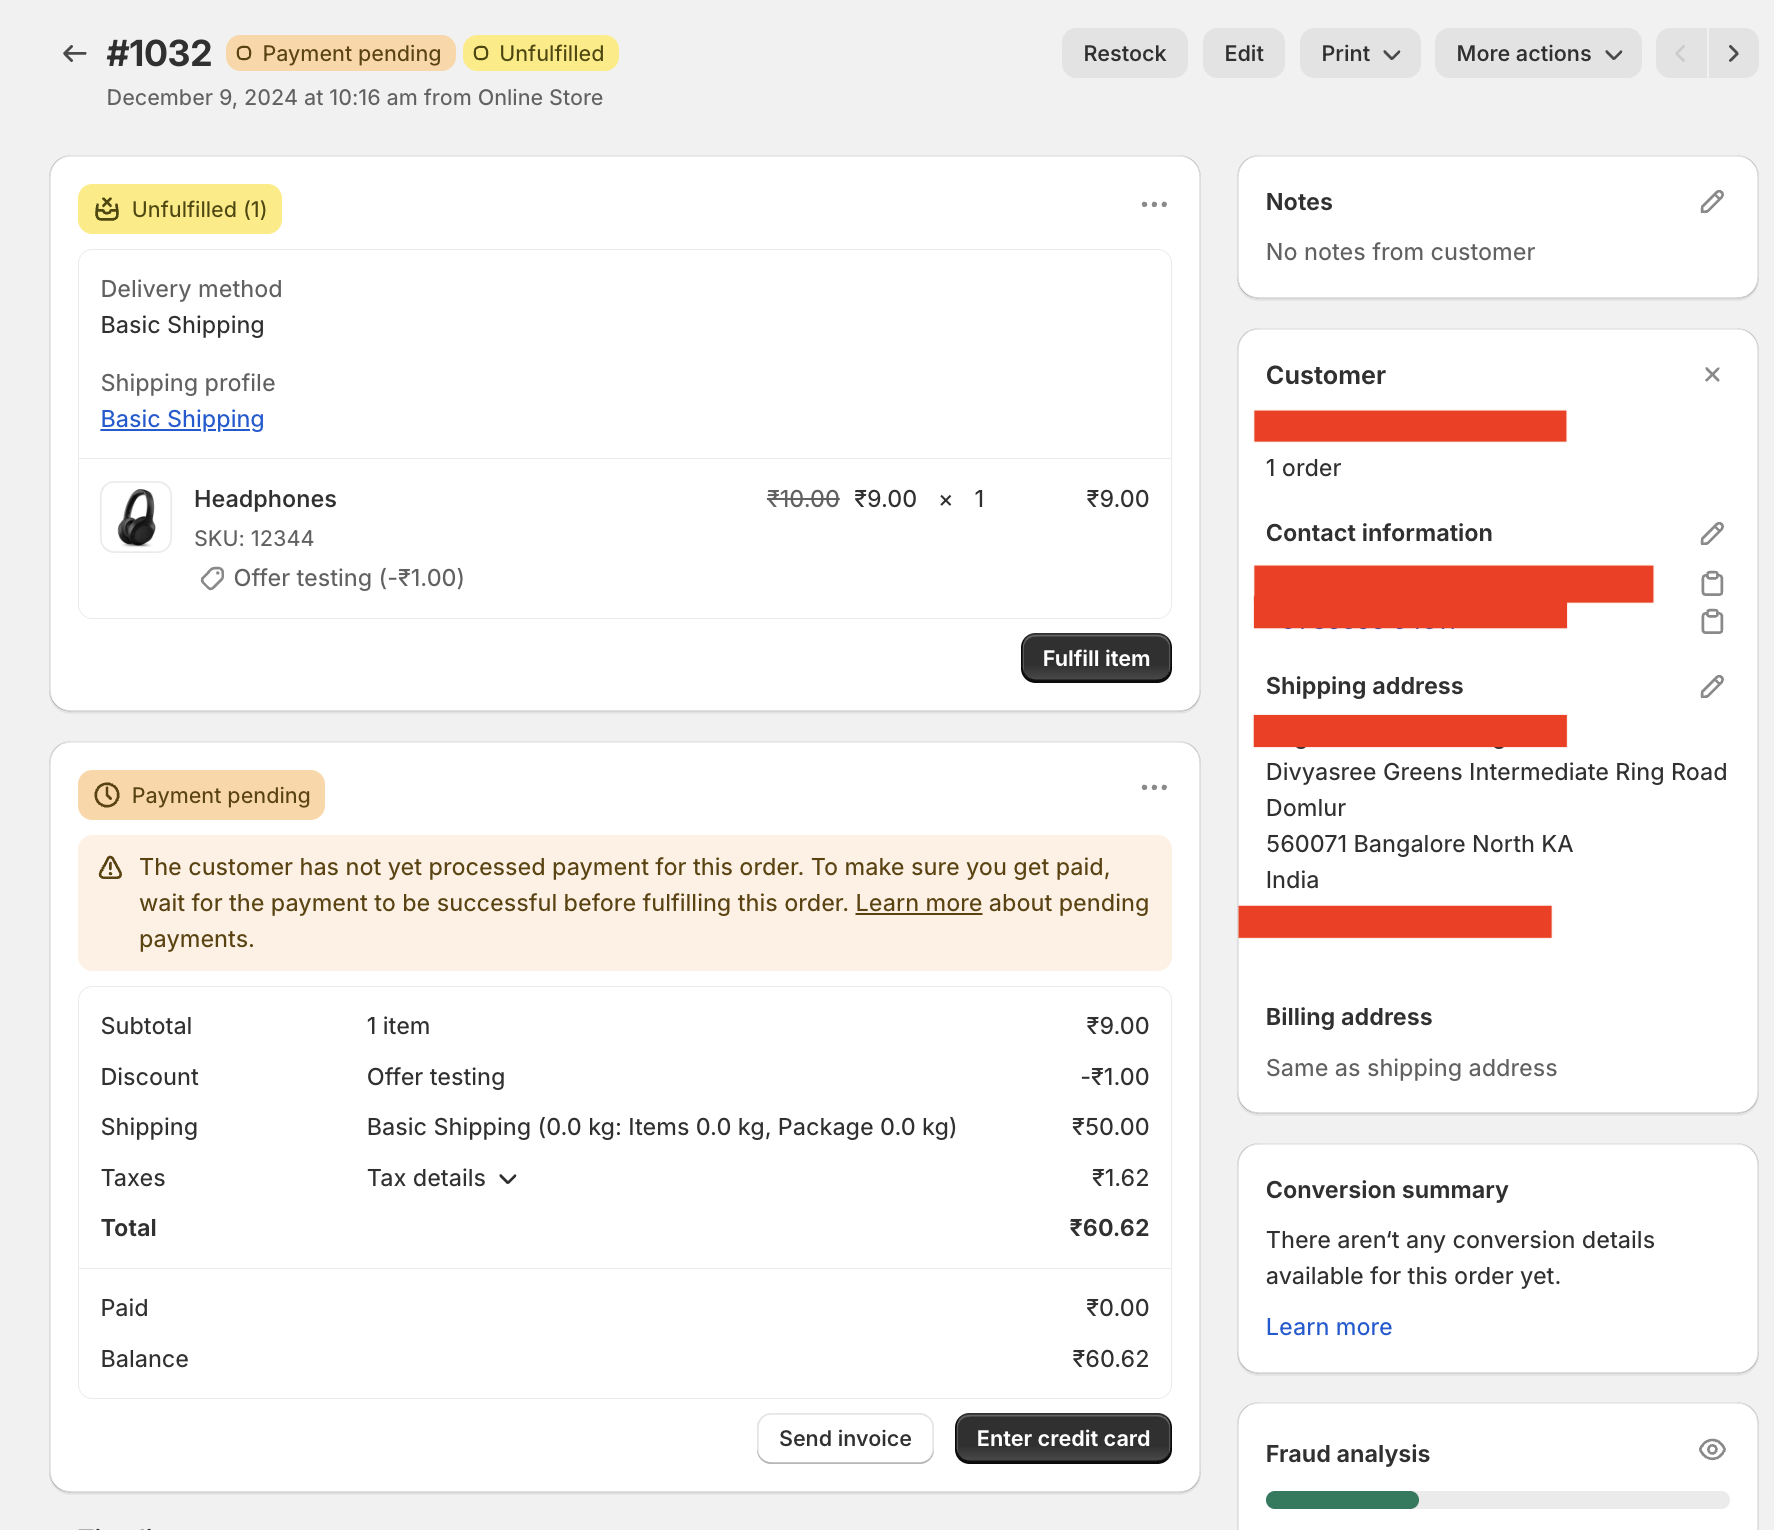
- Click the More actions drop-down menu and select Open PayU Payment app from the menu.
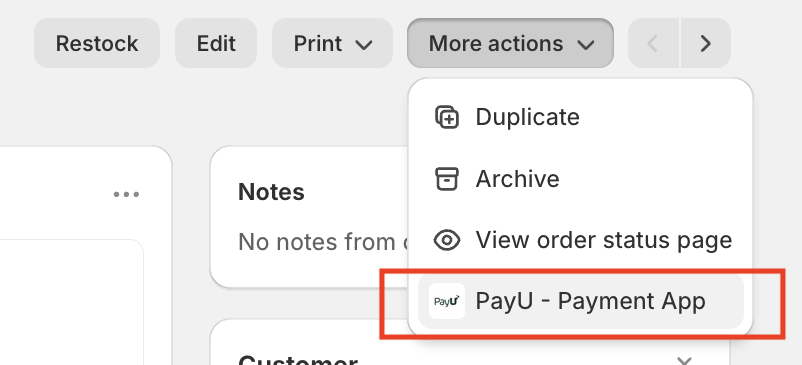
The PayU Transaction pop-up page is displayed.
-
Select the Mark as paid option.
-
Click Process.
The order is marked as "Paid" and it will be reflected under the Payment status column of the Orders page.
Cancel an COD Order
To cancel an COD order:
-
Select Orders from the menu on left navigation pane.
The Orders page is displayed. You can look for the COD order with the "Payment pending" status under the Payment status column. For example, the first transaction in the following screenshot:
-
Open the COD order by clicking it.
The order details are displayed.
- Click the More actions drop-down menu and select Open PayU Payment app from the menu.
The PayU Transaction pop-up page is displayed.
- Select the Cancel transaction option.
- Click Process.
The order is marked as "Cancelled" and it will be reflected under the Payment status column of the Orders page.
Updated 7 months ago