Create a Subscription Payment Link
In PayU Dashboard, you can create payment links with Standing Instructions. You can create payment links for all payment modes that includes:
- Cards
- UPI
- Enach
Step 1: Navigate to Subscriptions Bulk Upload Page
To create payment links with Standing Instruction on PayU Dashboard:
- Log on to Pay Dashboard.
- Navigate to Subscriptions.
- Click the Create Subscription Link button at the top-right corner.
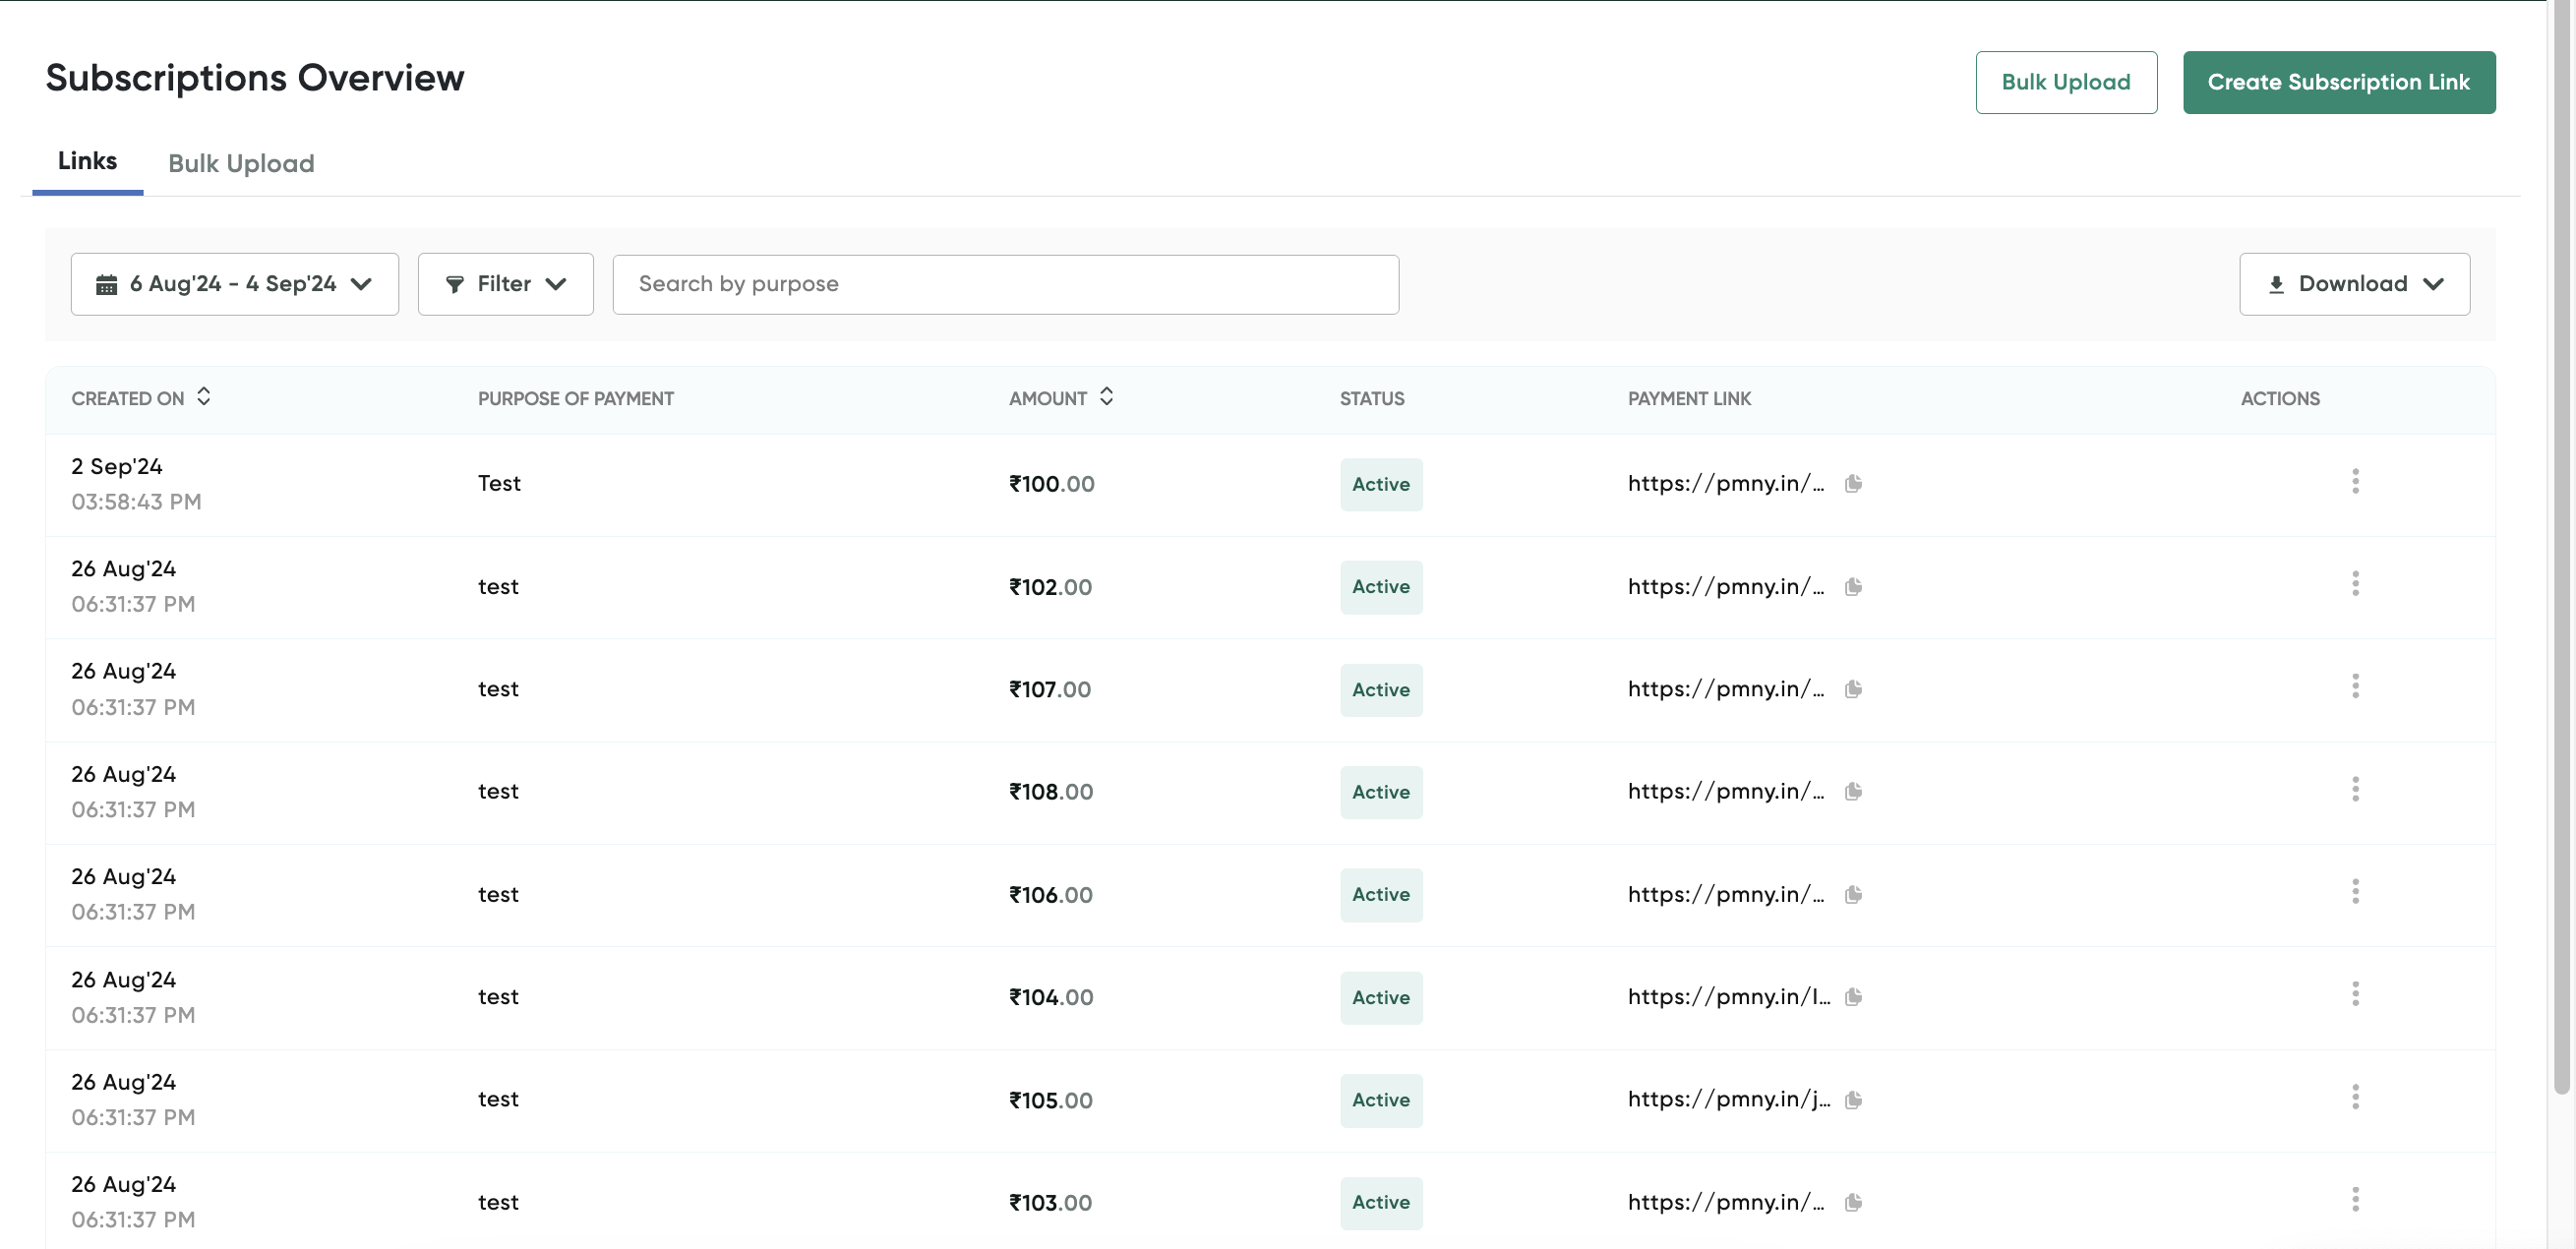
The Create Subscriptions pop-up page is displayed.
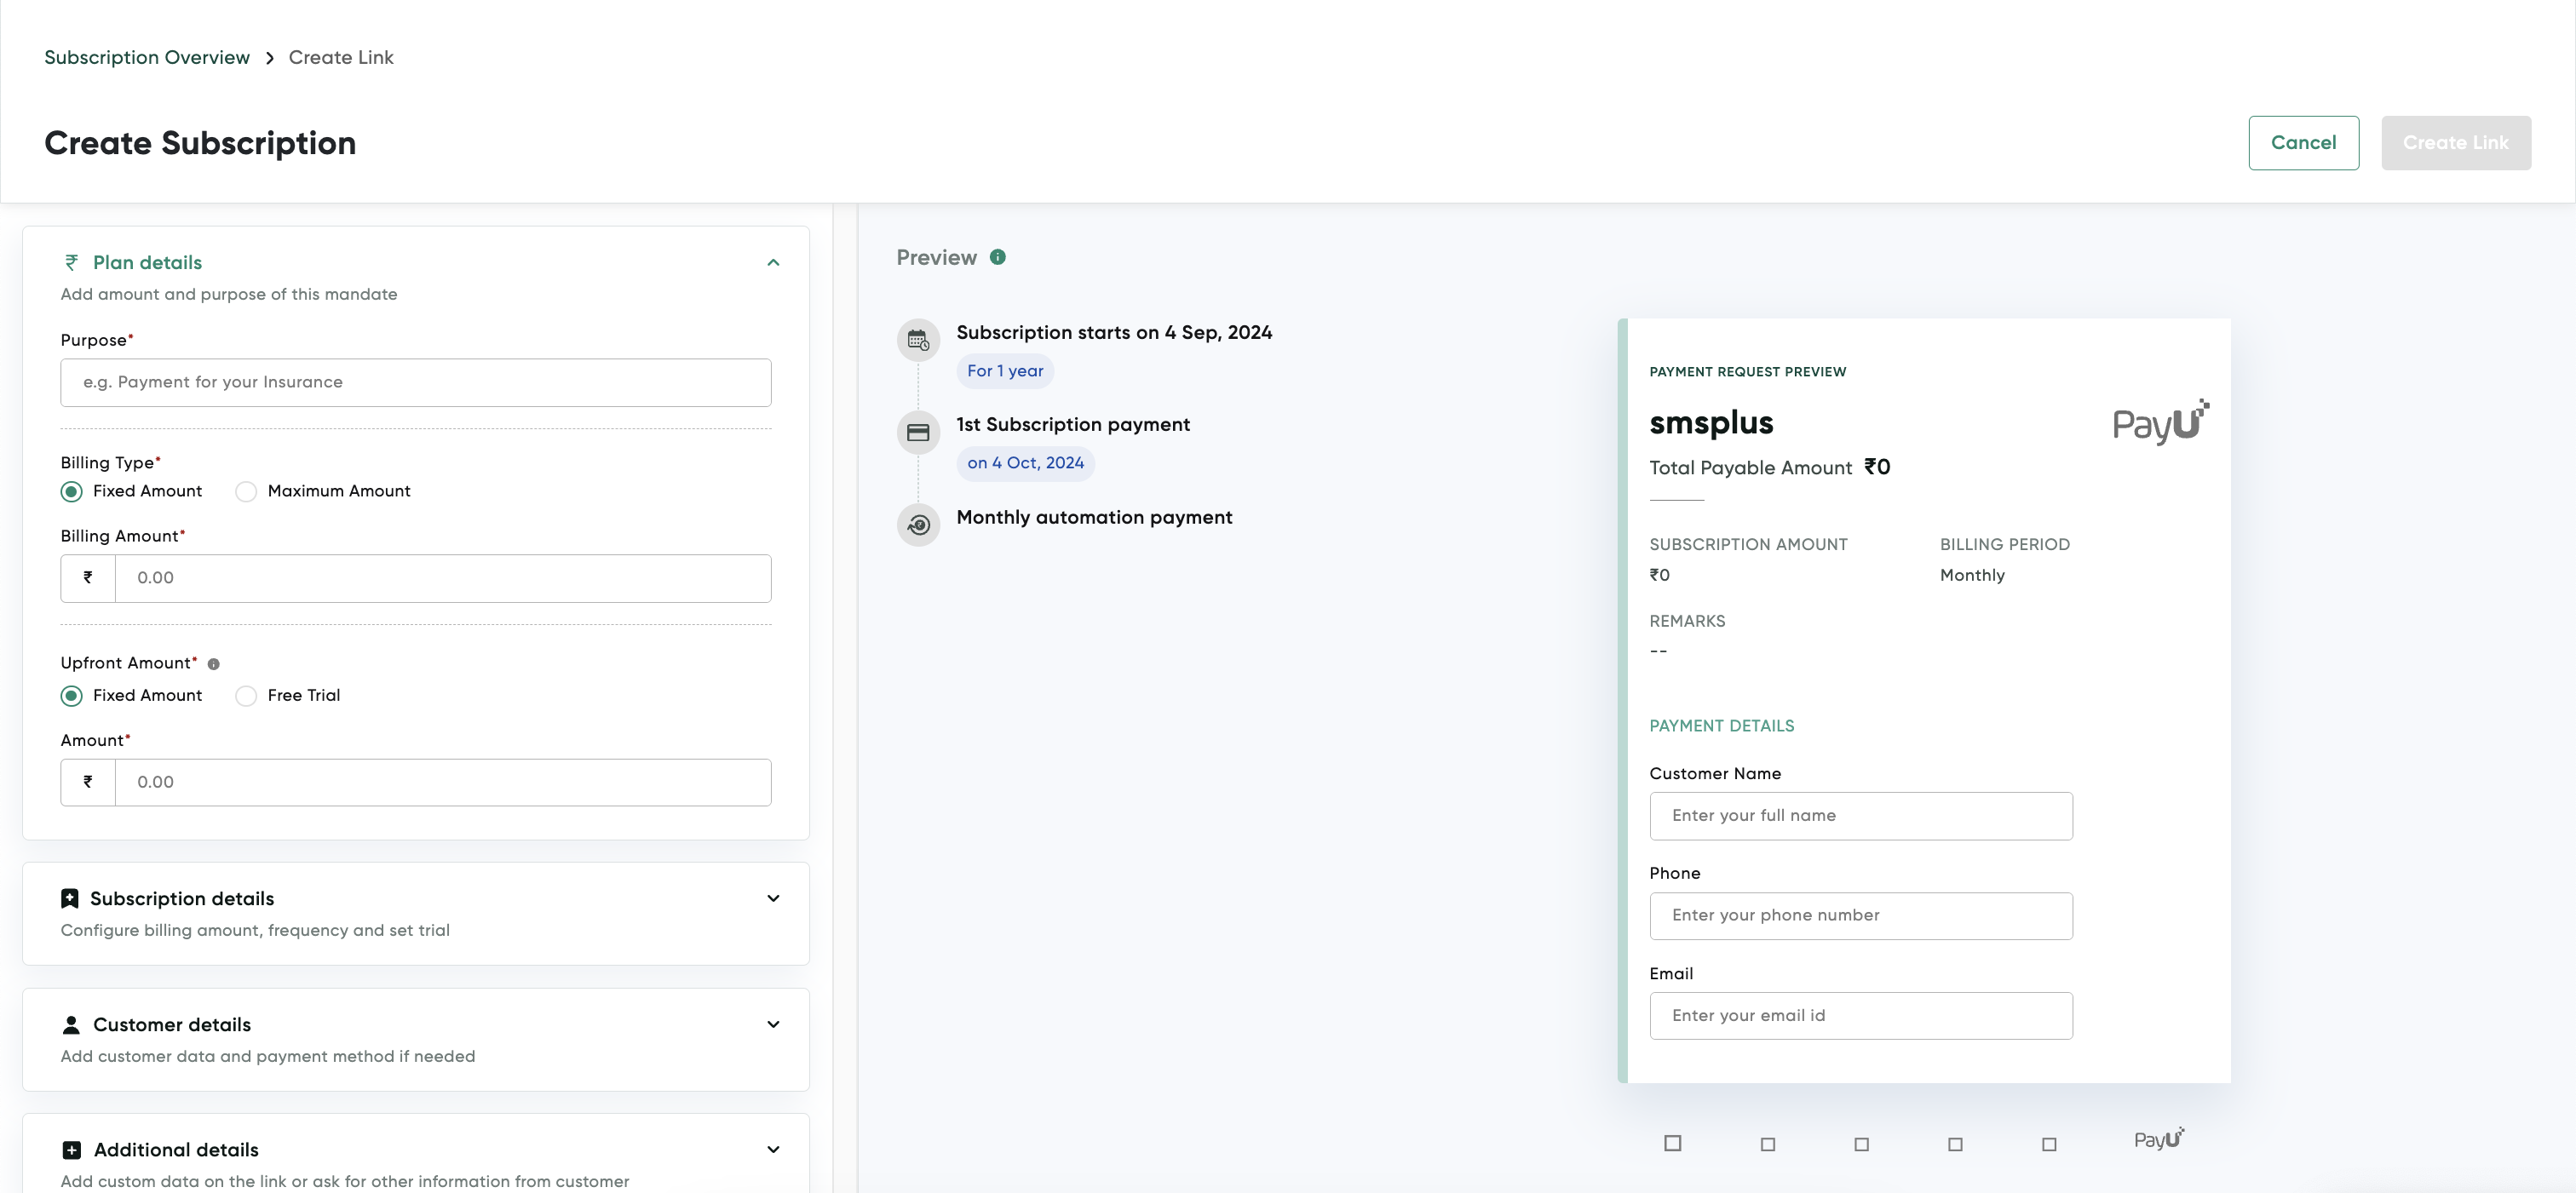
Step 2: Enter the Plan Details
- Enter the purpose of the subscription in the Purpose field.
- Choose the billing type in the Billing type field:
- Fixed Amount: The fixed amount to be debited in the specified interval. You must enter at least Rs.1 to proceed.
Note: Free trial option is not available for UPI payments. If you do choose a free trial, the UPI upfront amount will be automatically set to Rs. 1, and you must enter an amount equal to or greater than Re 1 to move forward.
- Maximum Amount: The maximum amount that you can debit in the specified interval.
Step 3: Enter the Subscription Details
- Expand the Subscription details pane.
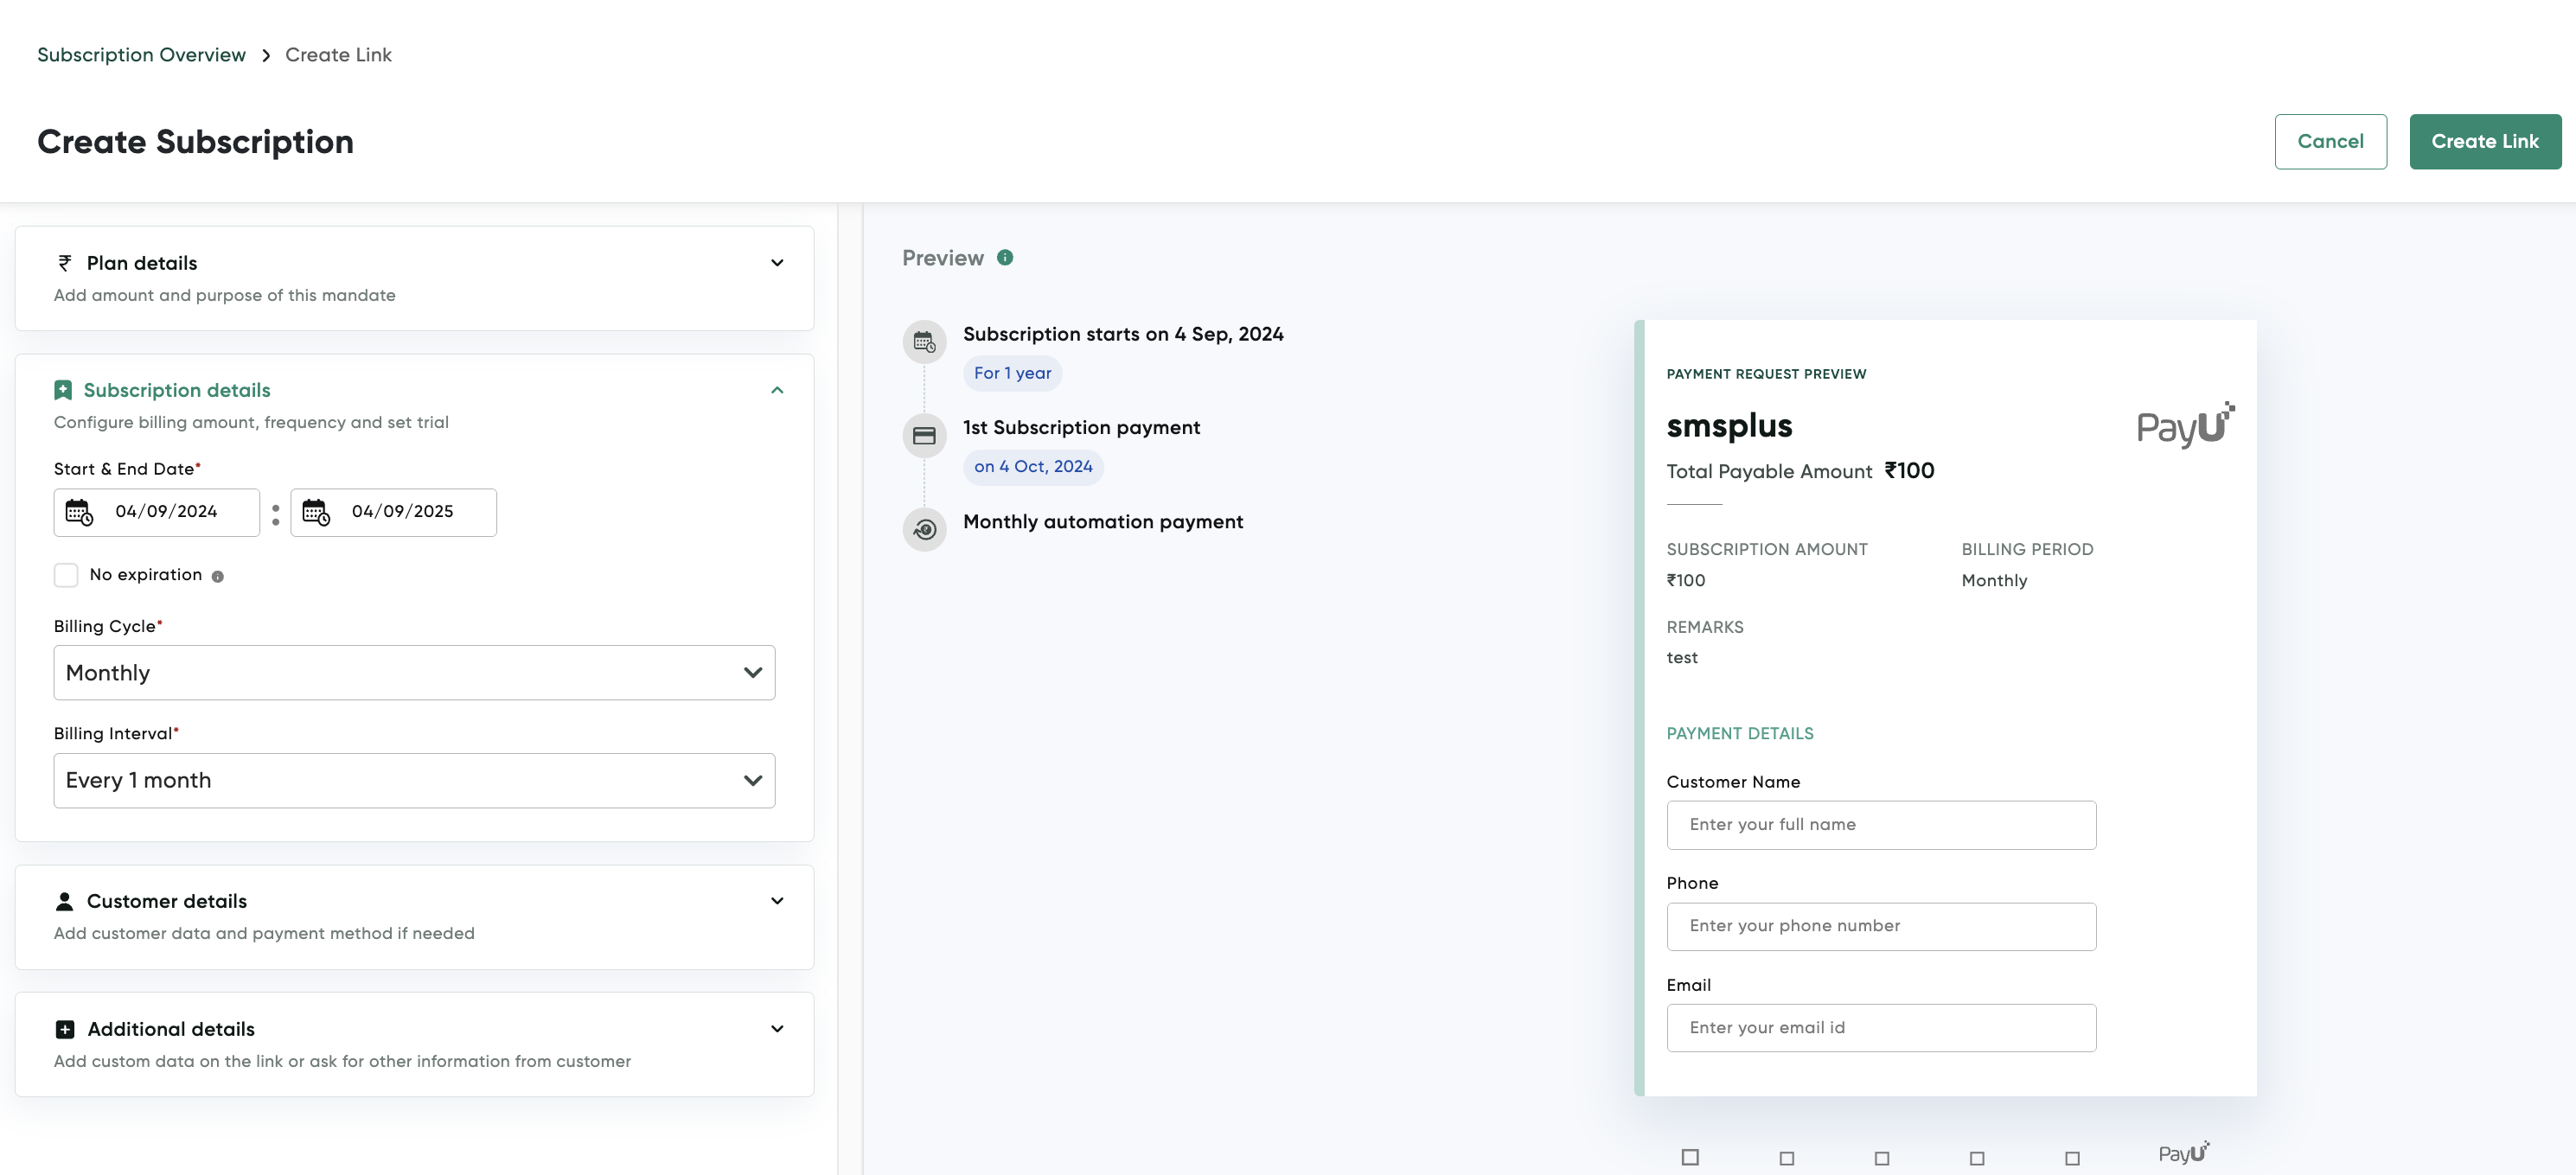
- Perform any of the following steps to select the subscription date:
- Select the start date and end date of the subscription in the Start & End Date field.
- Select the No expiration check box.
Note: If you select the No expiration check box, the end date is automaticatlly configured as 30 years from the start date.
- Select the billing cycle from the Billing Cycle drop-down list.
- Select the billing interval based on the cycle chosen from the Billing Interval drop-down list.
Notes:
- For eNACH, mandate start date needs to be atleast (T+1). Eg: In case the payment link is created today then the start date can be anything starting tomorrow.
- The seamless flow is only possible if eNACH is selected as the payment mode and all necessary beneficiary account details are added during the payment link creation process. It will not function if all Payment Modes or multiple payment modes are selected.
Step 4: Entering the Customer Details
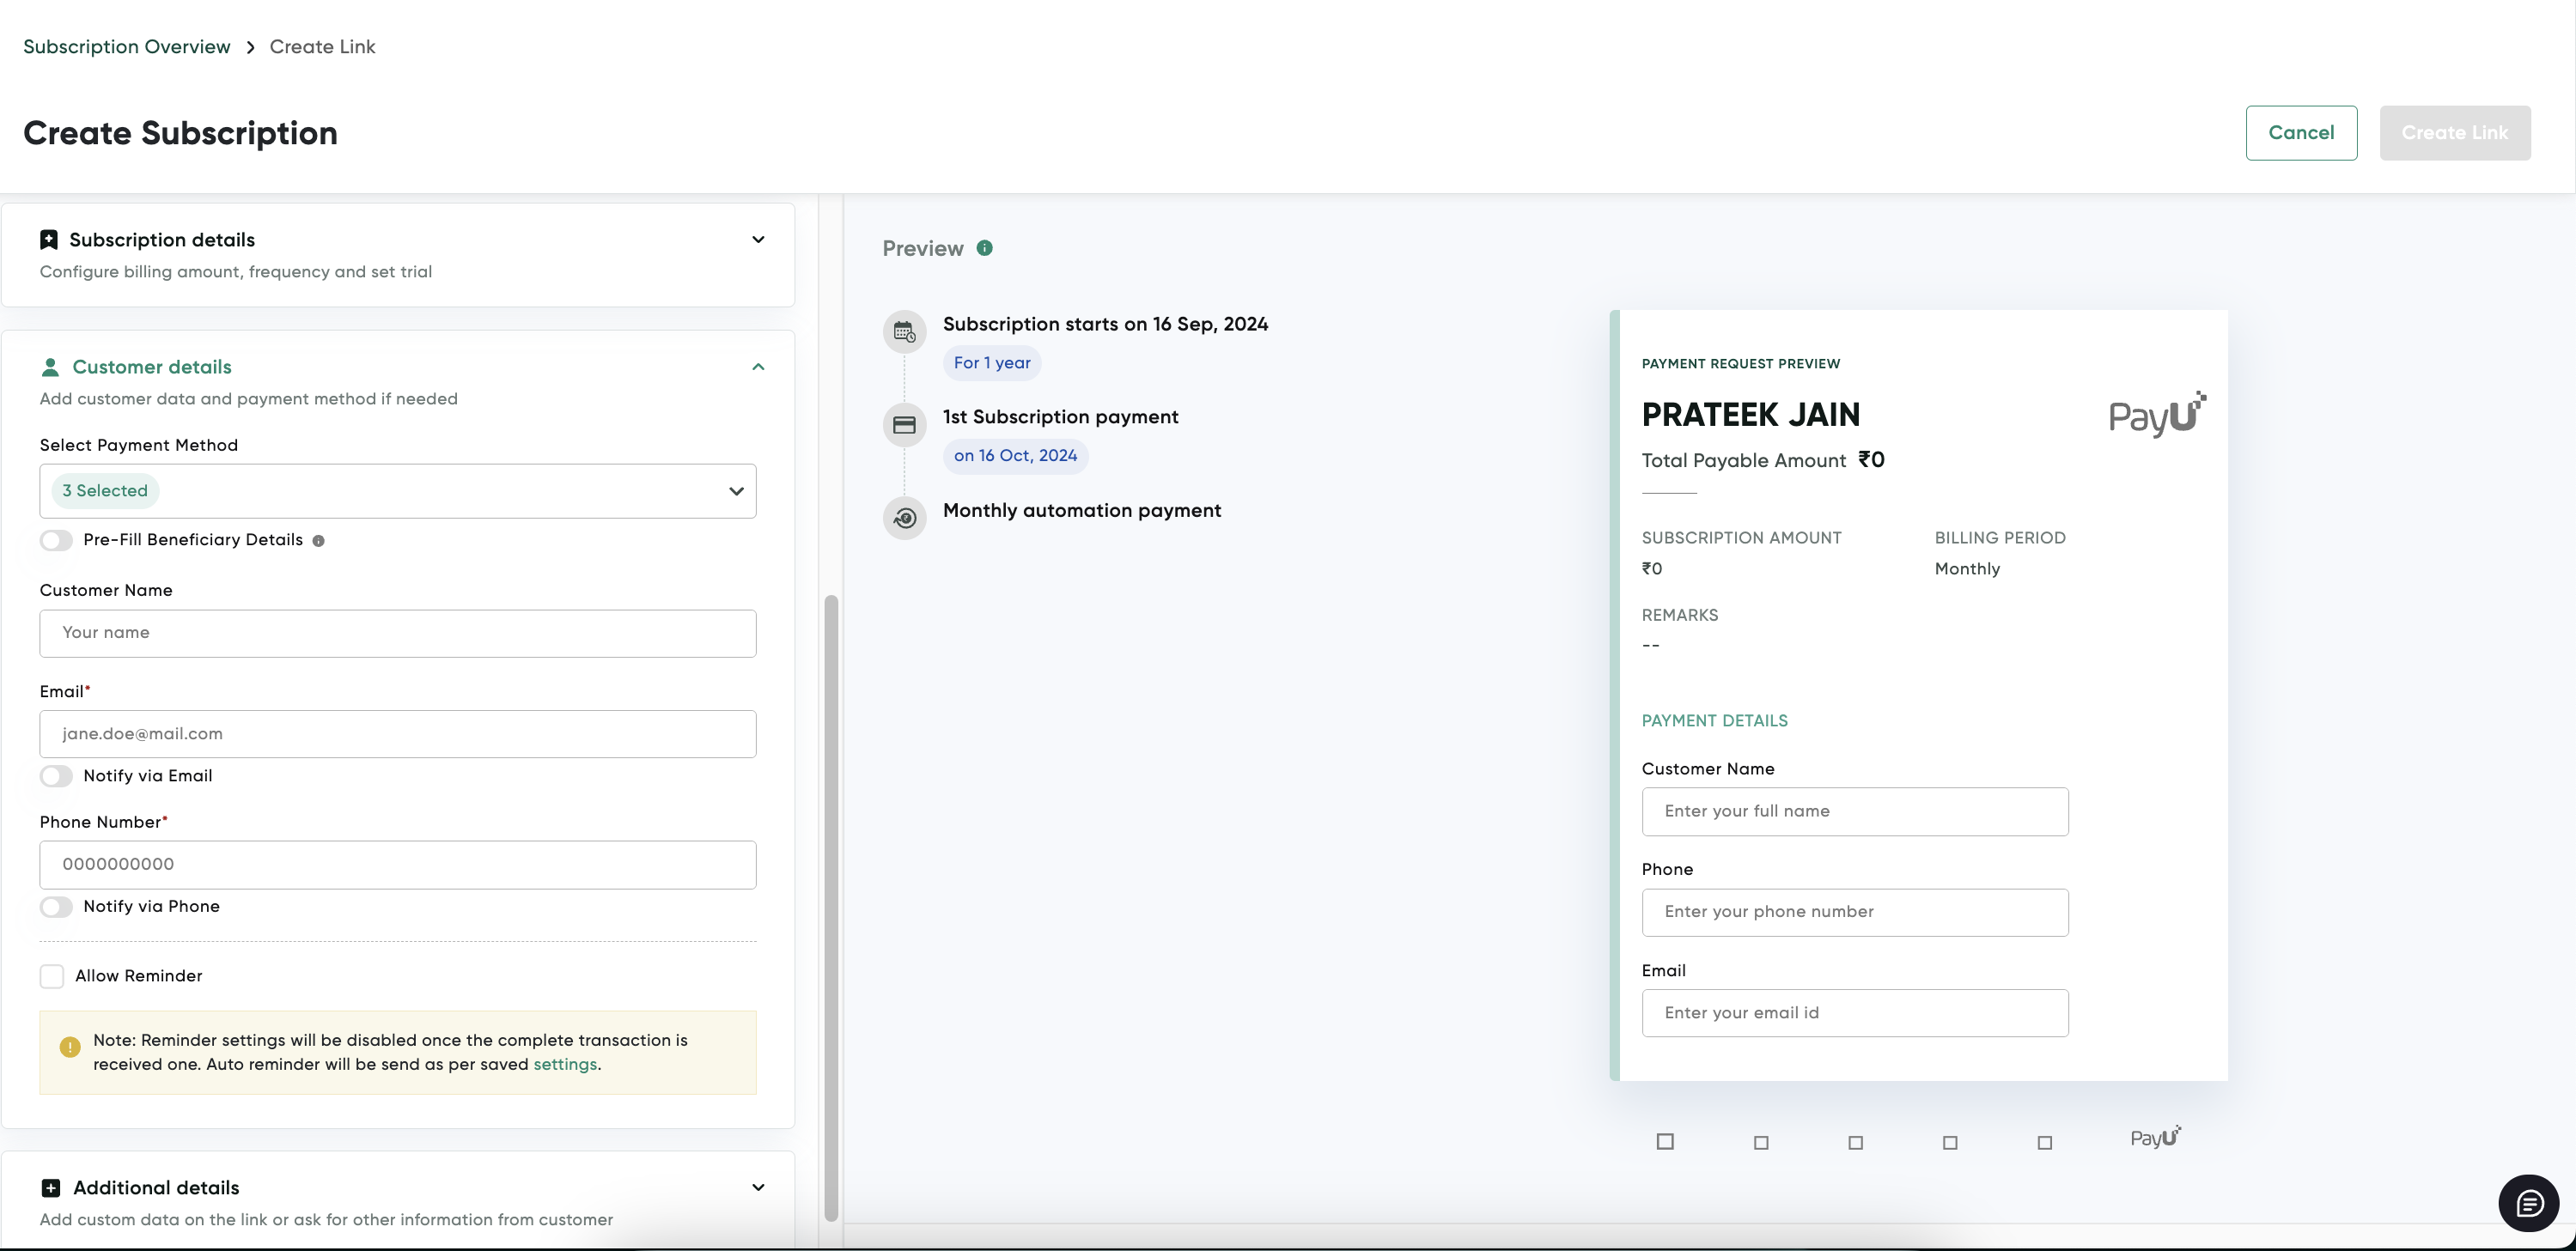
- Expand the Customer details pane.
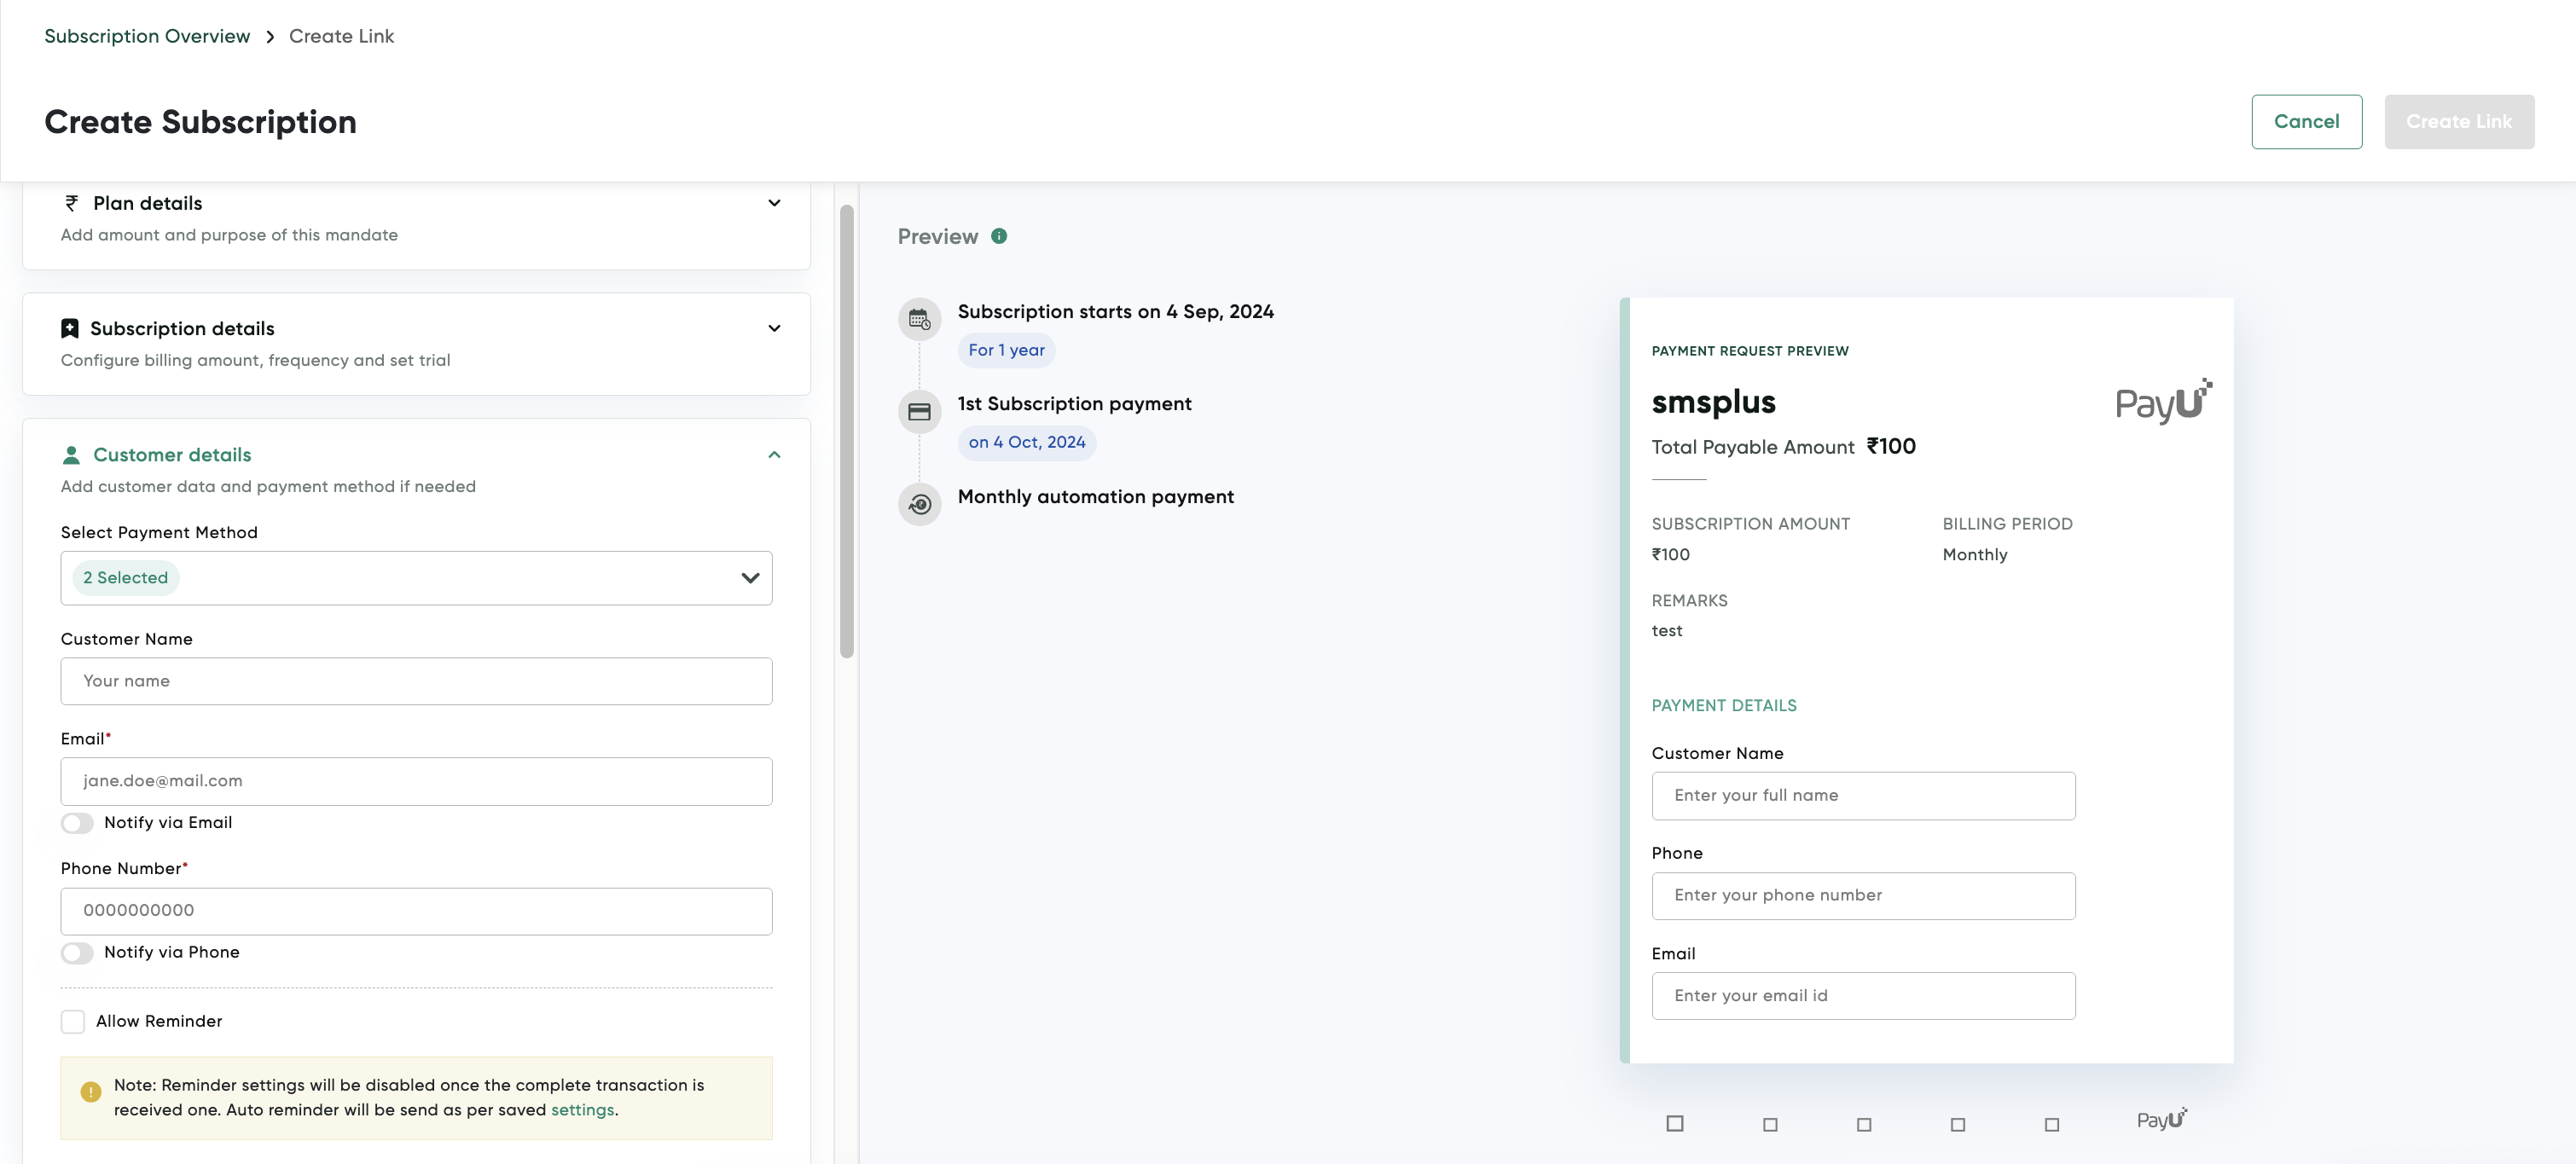
- Select the applicable payment methods from the Select Payment Method drop-down list:
- E-Nach
- Cards
- UPI
- Enter the following details:
- Customer Name: Enter the customer name.
- Email: Enter the customer email address and click the Notify via Email toggle to send notifications.
- Phone Number: Enter the customer mobile number and click the Notify via Phone toggle to send notifications.
- Allow Reminder: Select this check box to send reminders to the customer
- Enter the following details if you had selected ENACH as the payment method in Step 2 of Step 4: Entering the Customer Details
- Bank Name
- Bank Account Number
- IFSC
- Account Type
Step 5: Enter the Additional Details
- Expand the Addiitonal details pane.
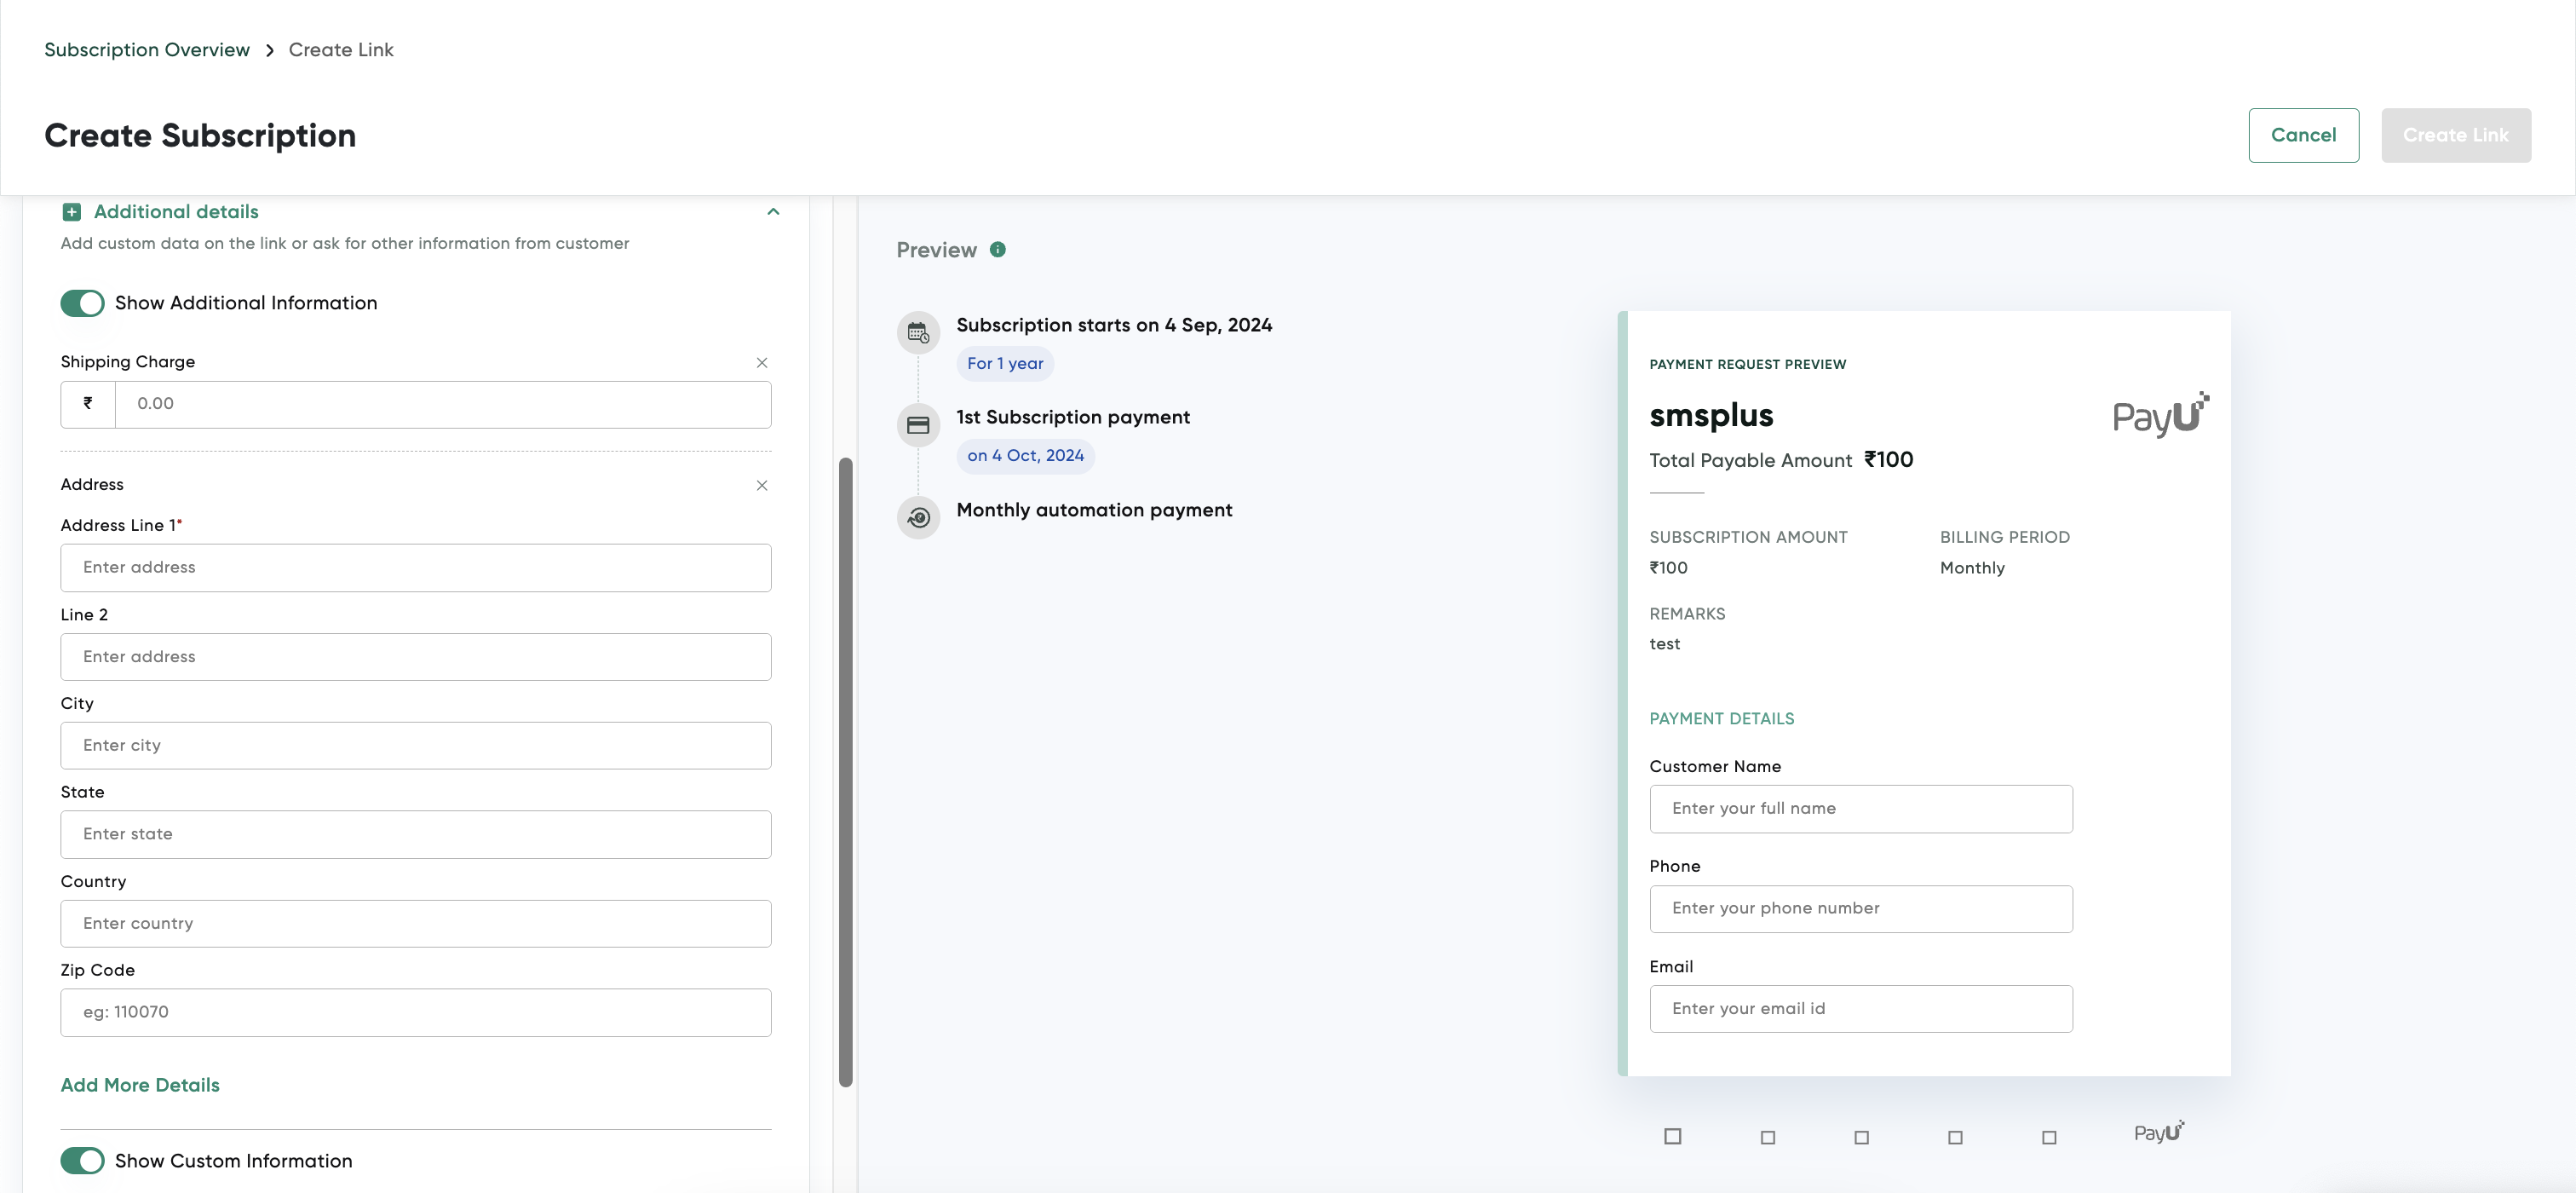
- Click the Show Additional Information toggle button and the enter the address details.
- Click the Show Customer Information toggle button and the select the following check boxes which must be shown:
- Customer Email
- Customer Phone
- Customer Name
- Customer Address
- Click the Create Link button at the top-right corner after you complete the above steps.
Updated 4 months ago
