Payment Invoices
Create professional invoices and email them to your customers. This helps your customers, wherever they are, can pay you faster. Use the Invoices module of PayU Dashboard to send or manage invoices.
Select Payment Tools > Invoices from the left pane of the Dashboard.
This part of the document covers how to use the payment invoices-related tasks:
Search invoices
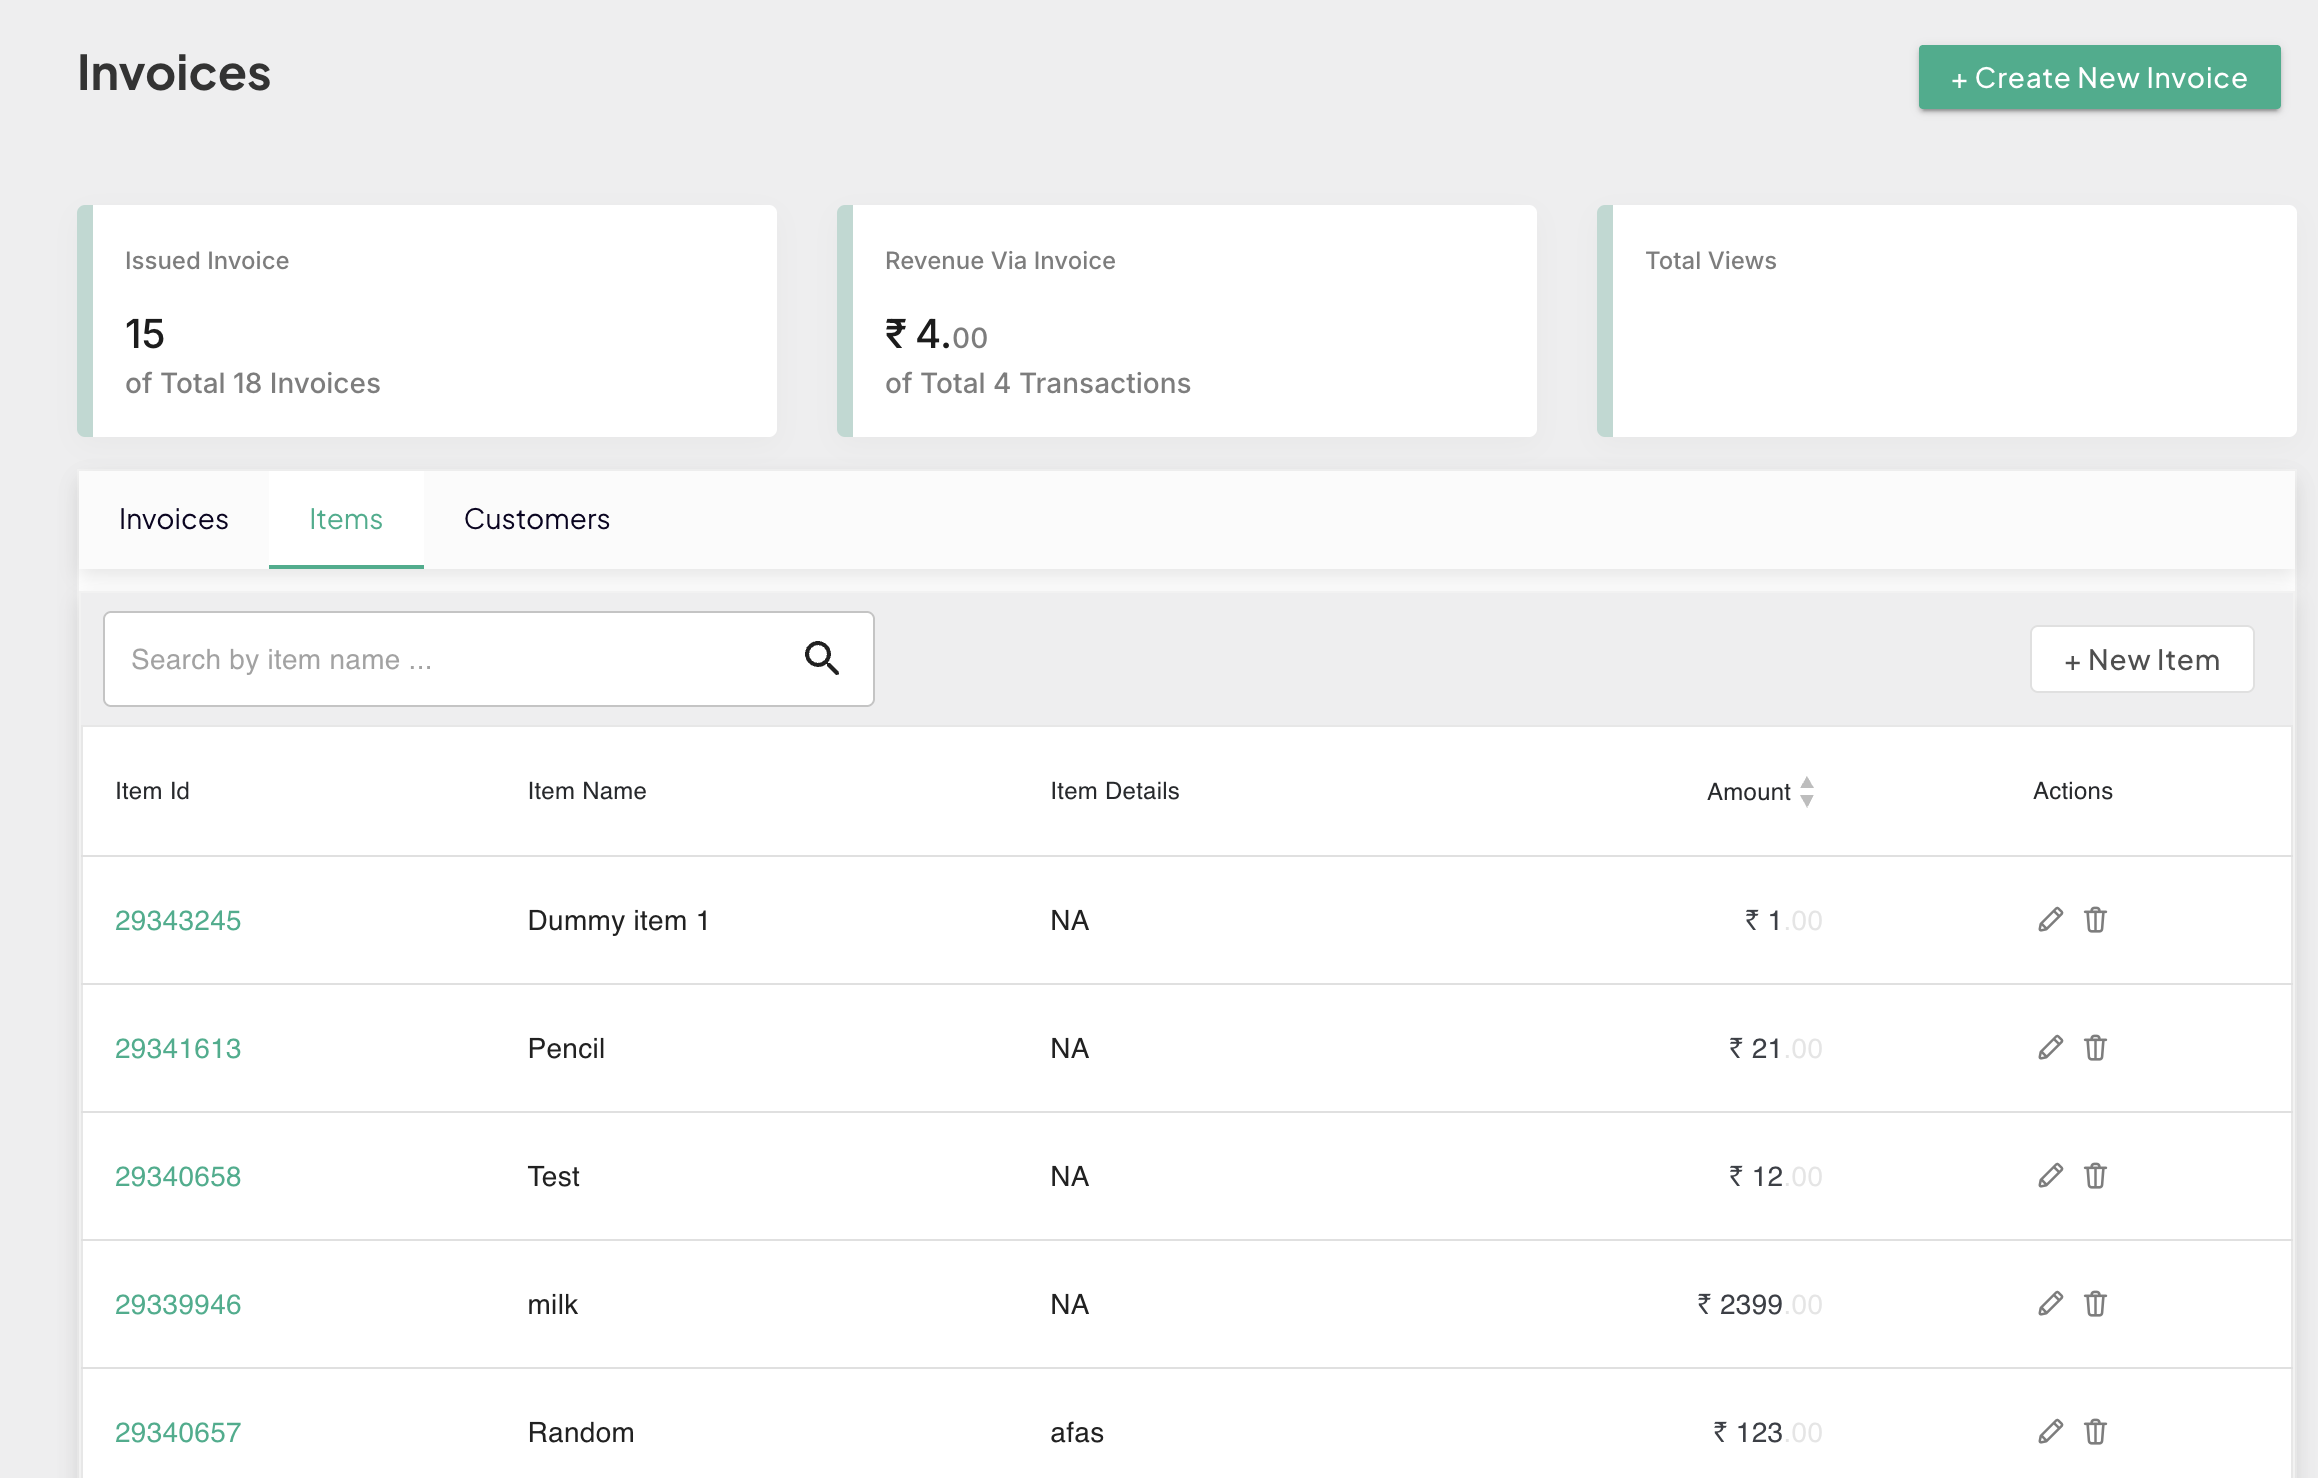
You can search for a specific invoice using the invoice number or title in the search field.
The Invoice page displays the records for the past seven days by default. You can select a particular date range or month or year using the calendar view option given in the dashboard.
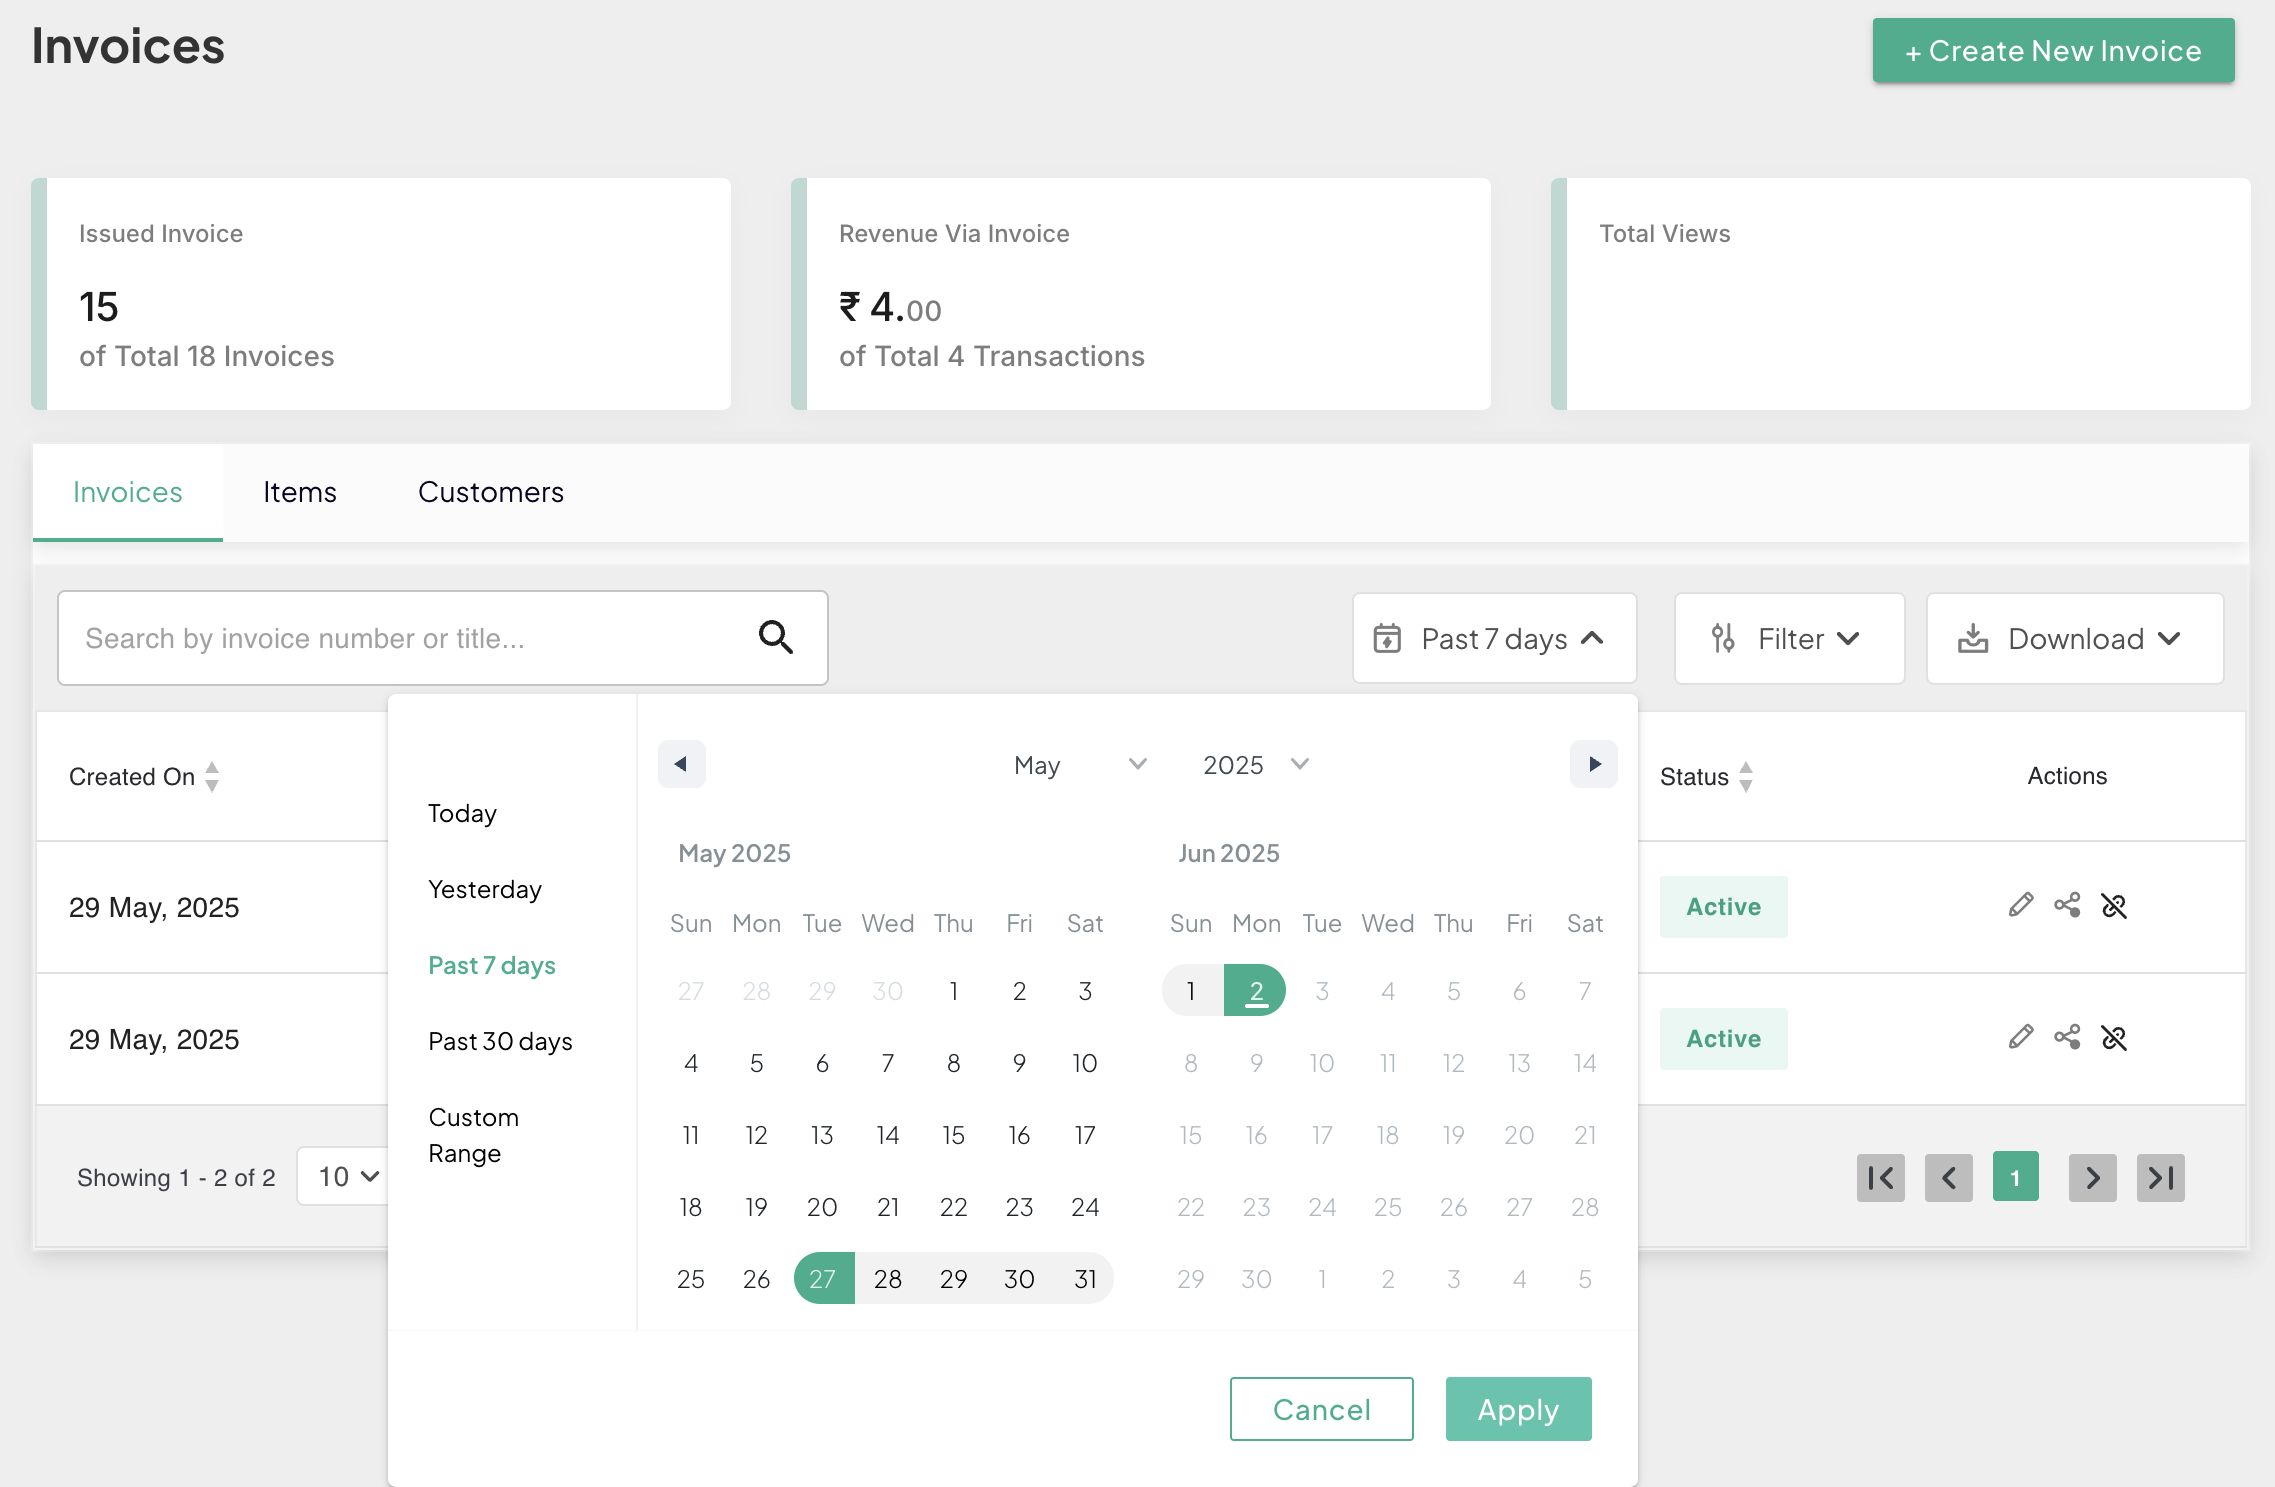
View by time frame
To set up the time frame:
- Click Calendar to open the calendar view.
- Click to select Today, Yesterday, Past 7 days, or Past 30 days to view the transactions for the mentioned period.
- Click Apply to view the results.
View by custom time frame
To customize the view based on a custom time frame:
- Click Custom Range option
- Select the desired month and year from the drop-down list given at the top of the calendar view.
- Click to select the desired date range for the selected month.
- Click Apply to view the results.
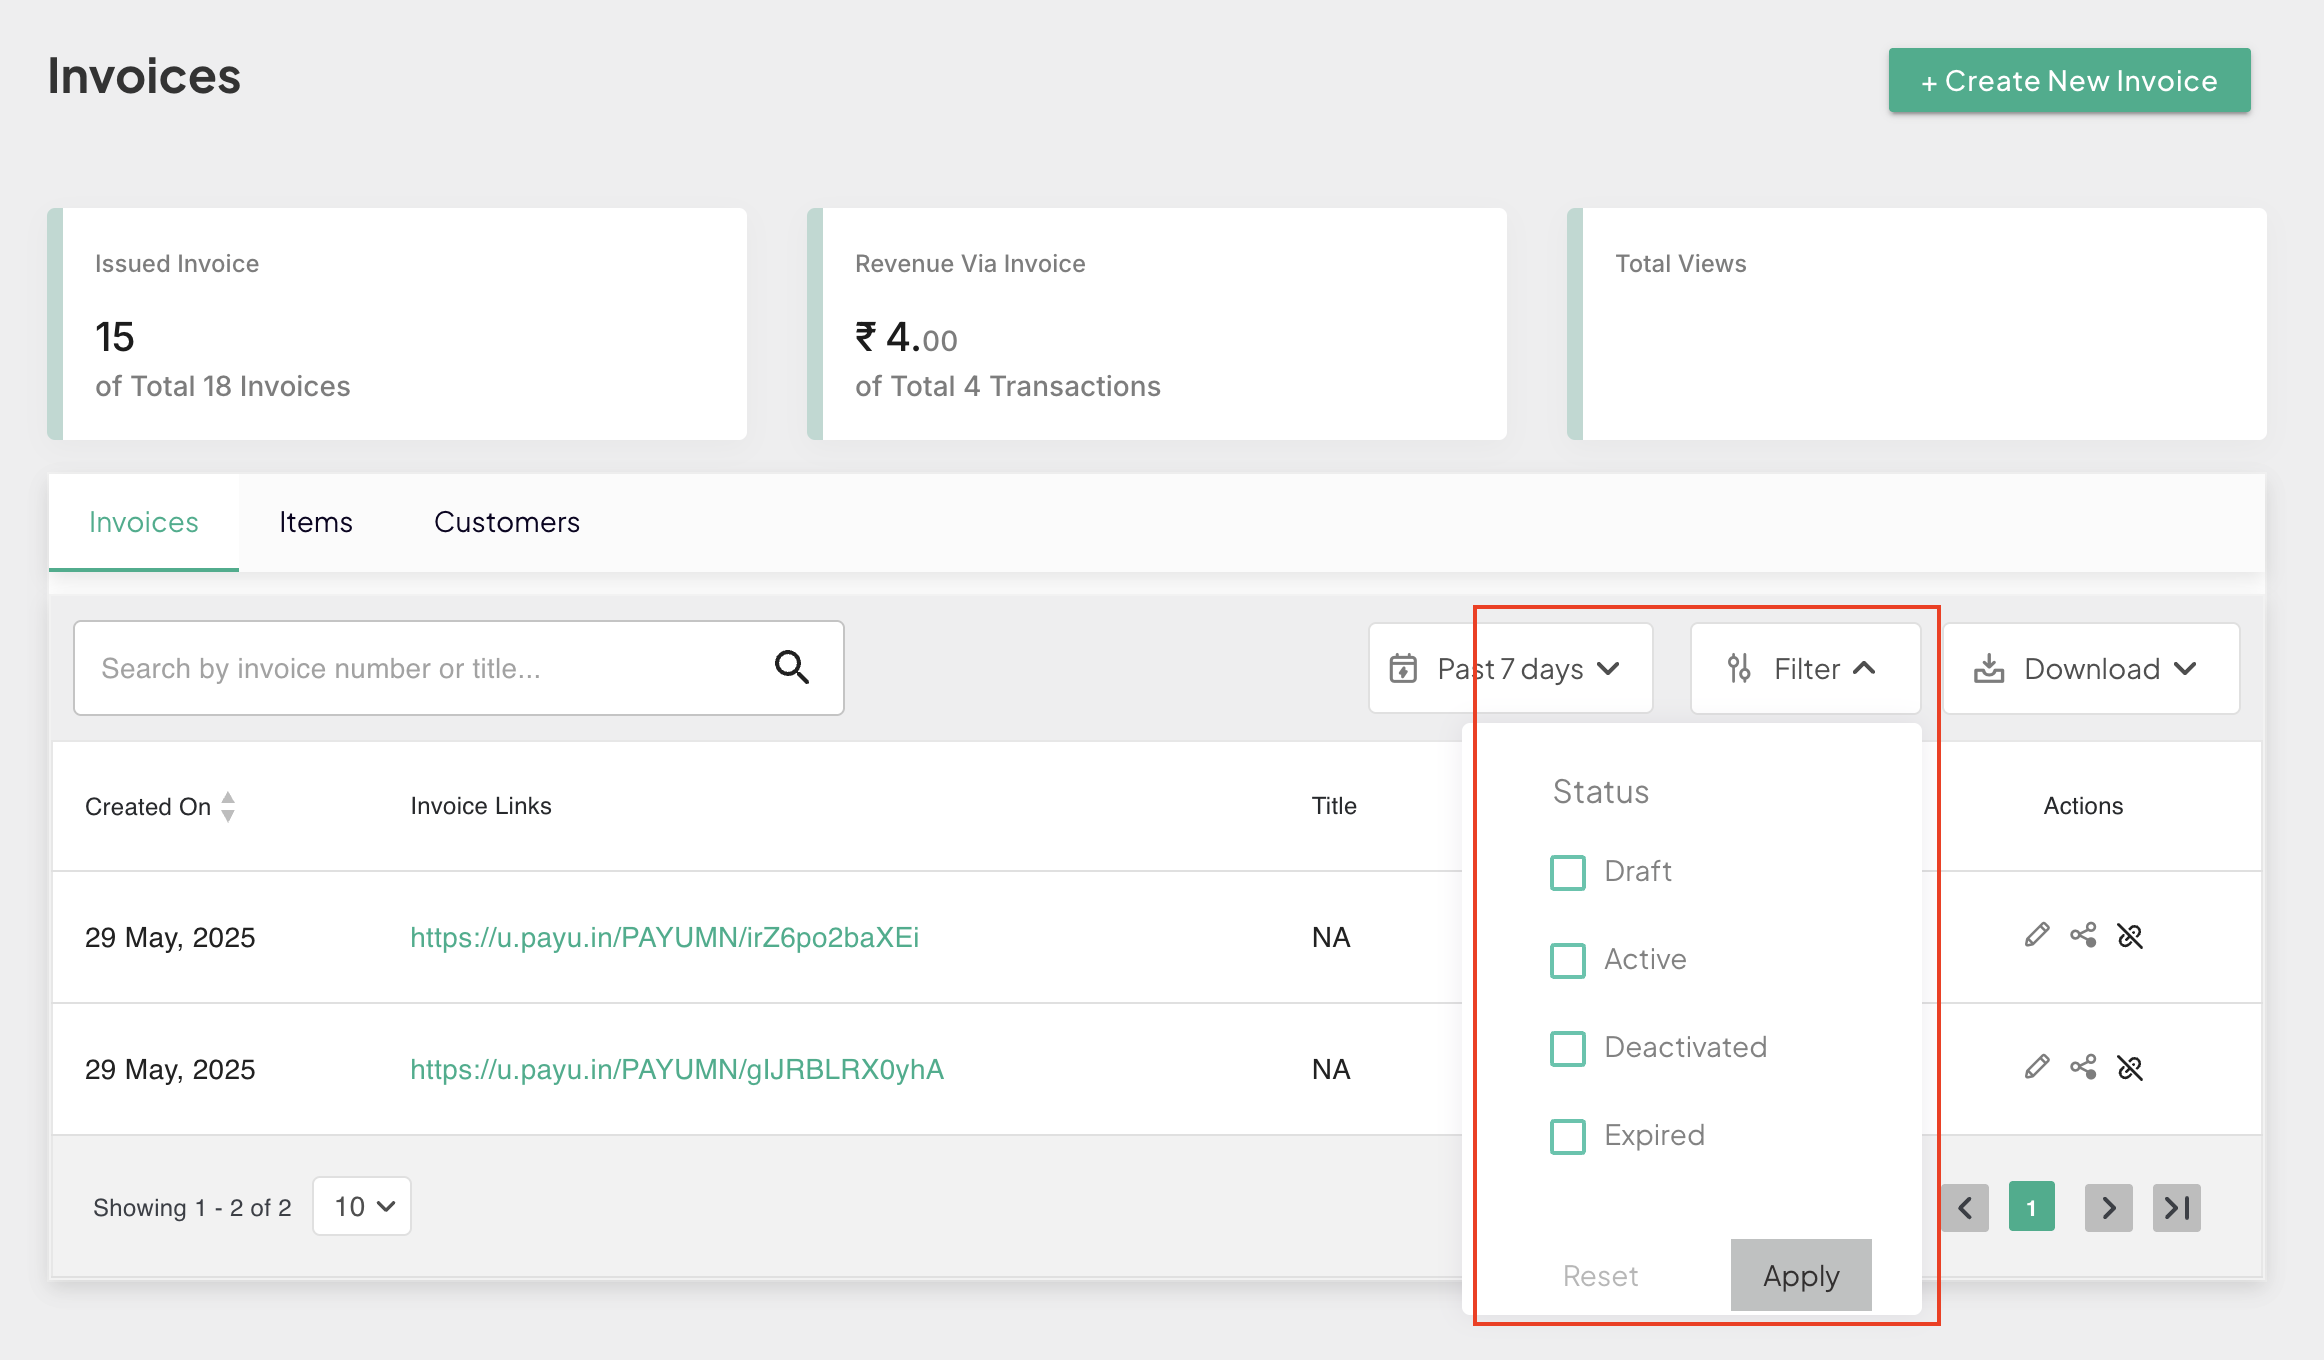
You can filter the invoice records by invoice status using the Filter option given on the page.
- Click to select the required invoice status from the drop-down list.
- Click Apply to get the results.
- Use the Reset to clear the selection if required.
Share or download invoices
You can export the results using the Download button on the Invoice page. After you search and view and invoice, to download an invoice:
-
Click Download tab to view the options.
-
Click required format (CSV, XLSX, TXNS-CSV or TXNS-XLSX) to generate the report.
A pop-up window will display the status of the generated report.
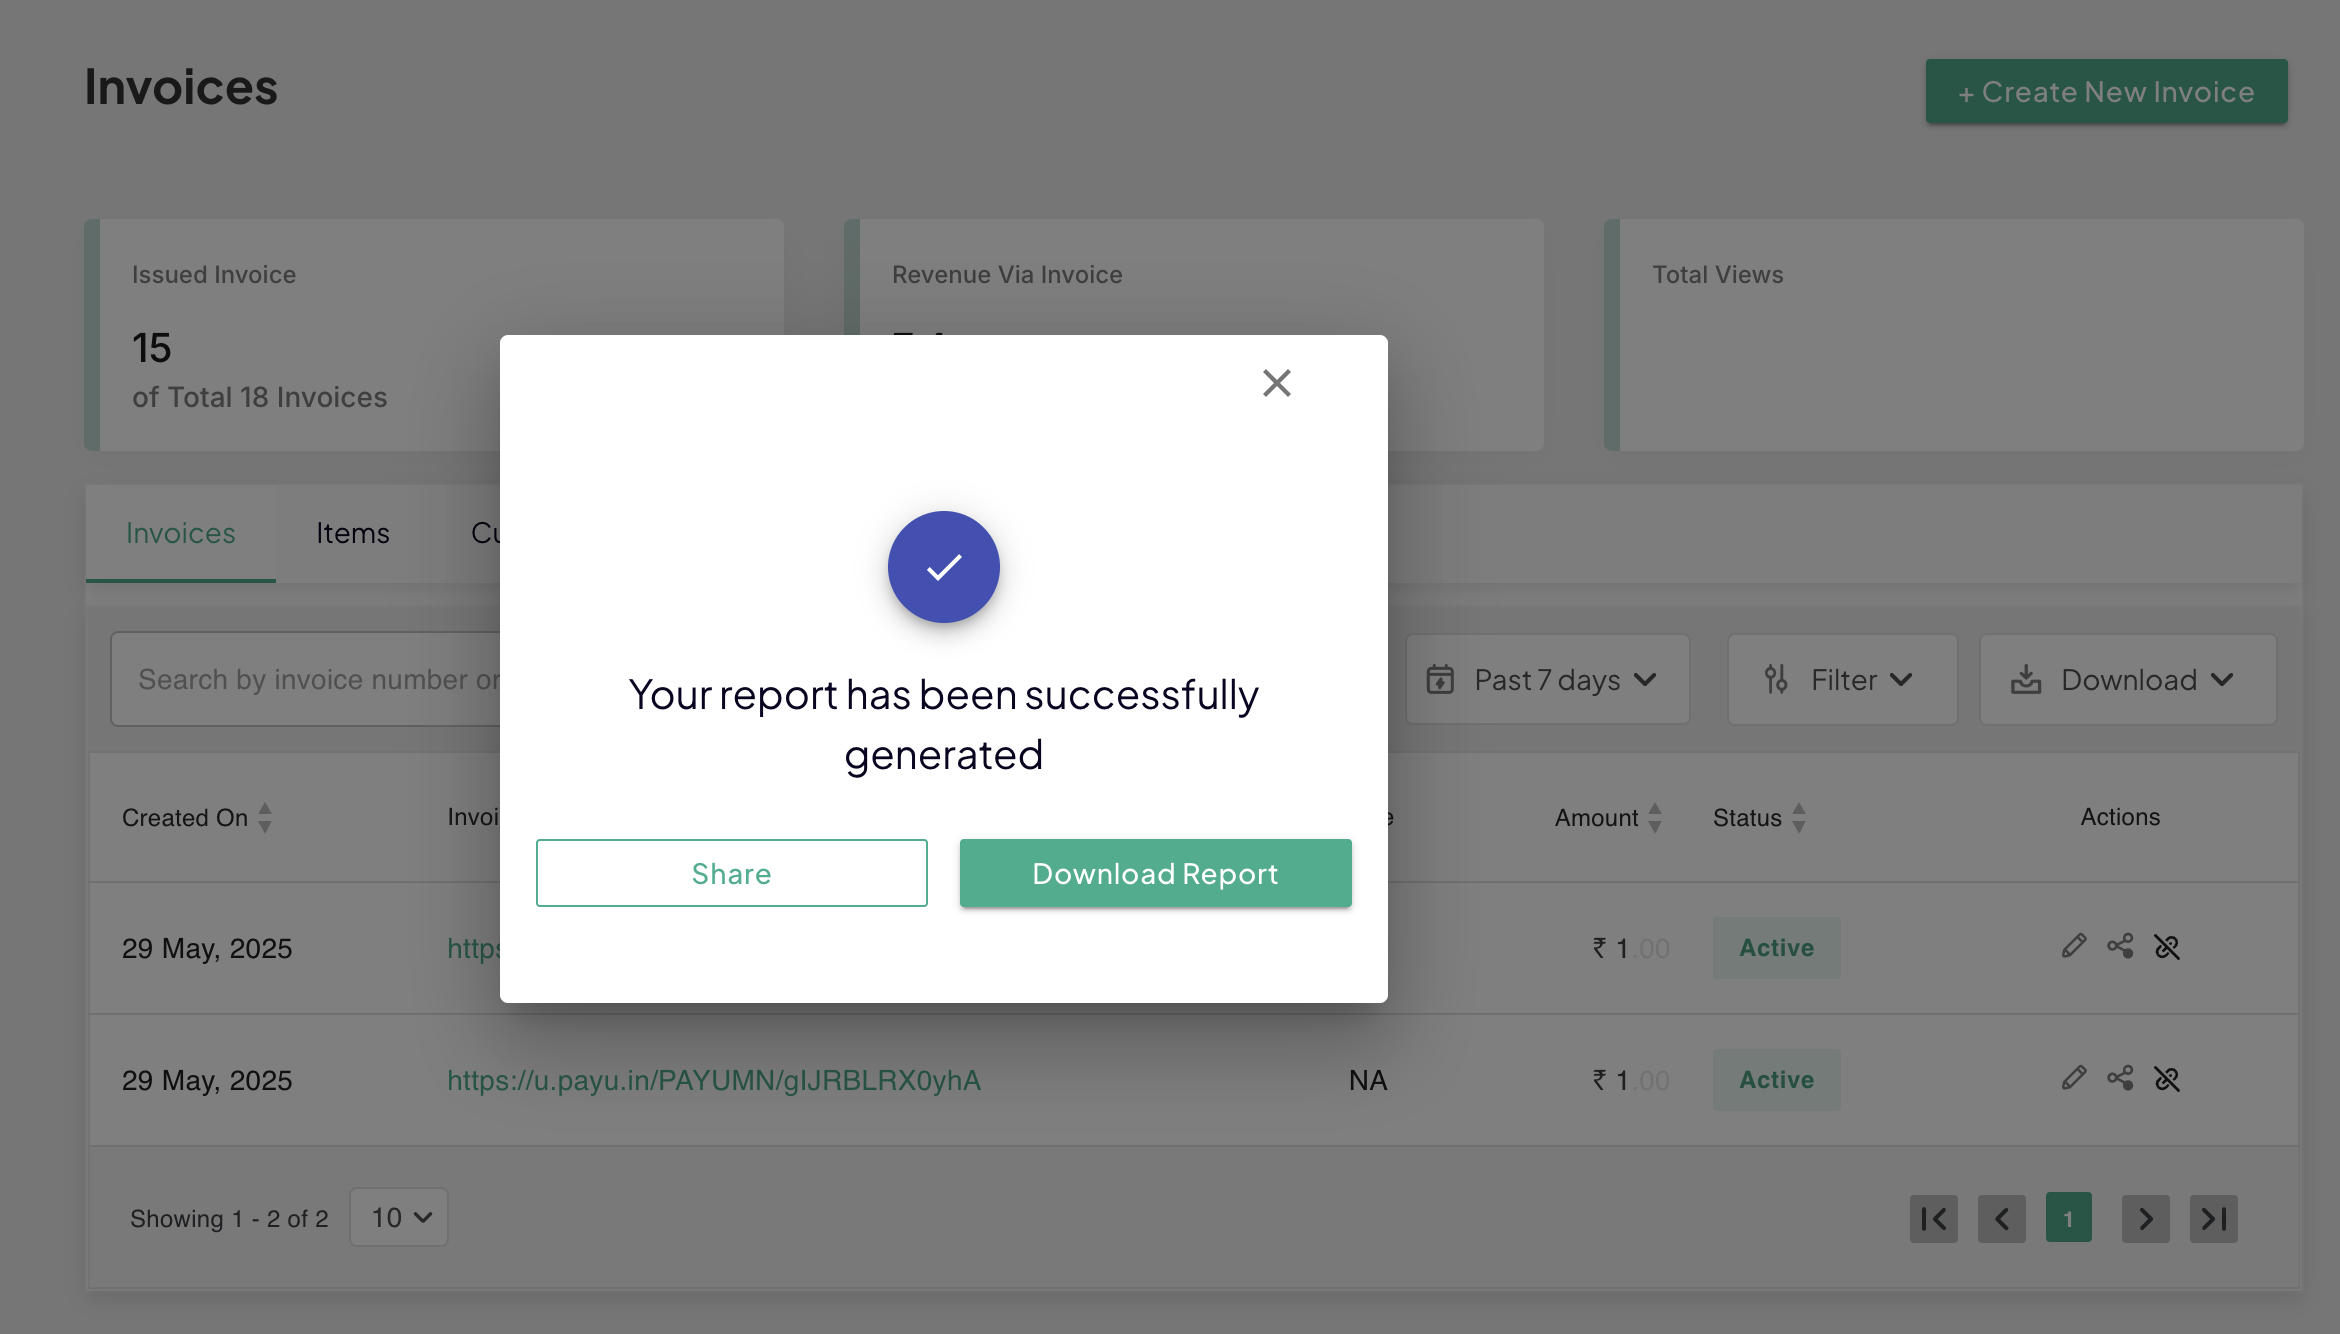
- Perform any of the following steps:
- Click Download Report to complete the action.
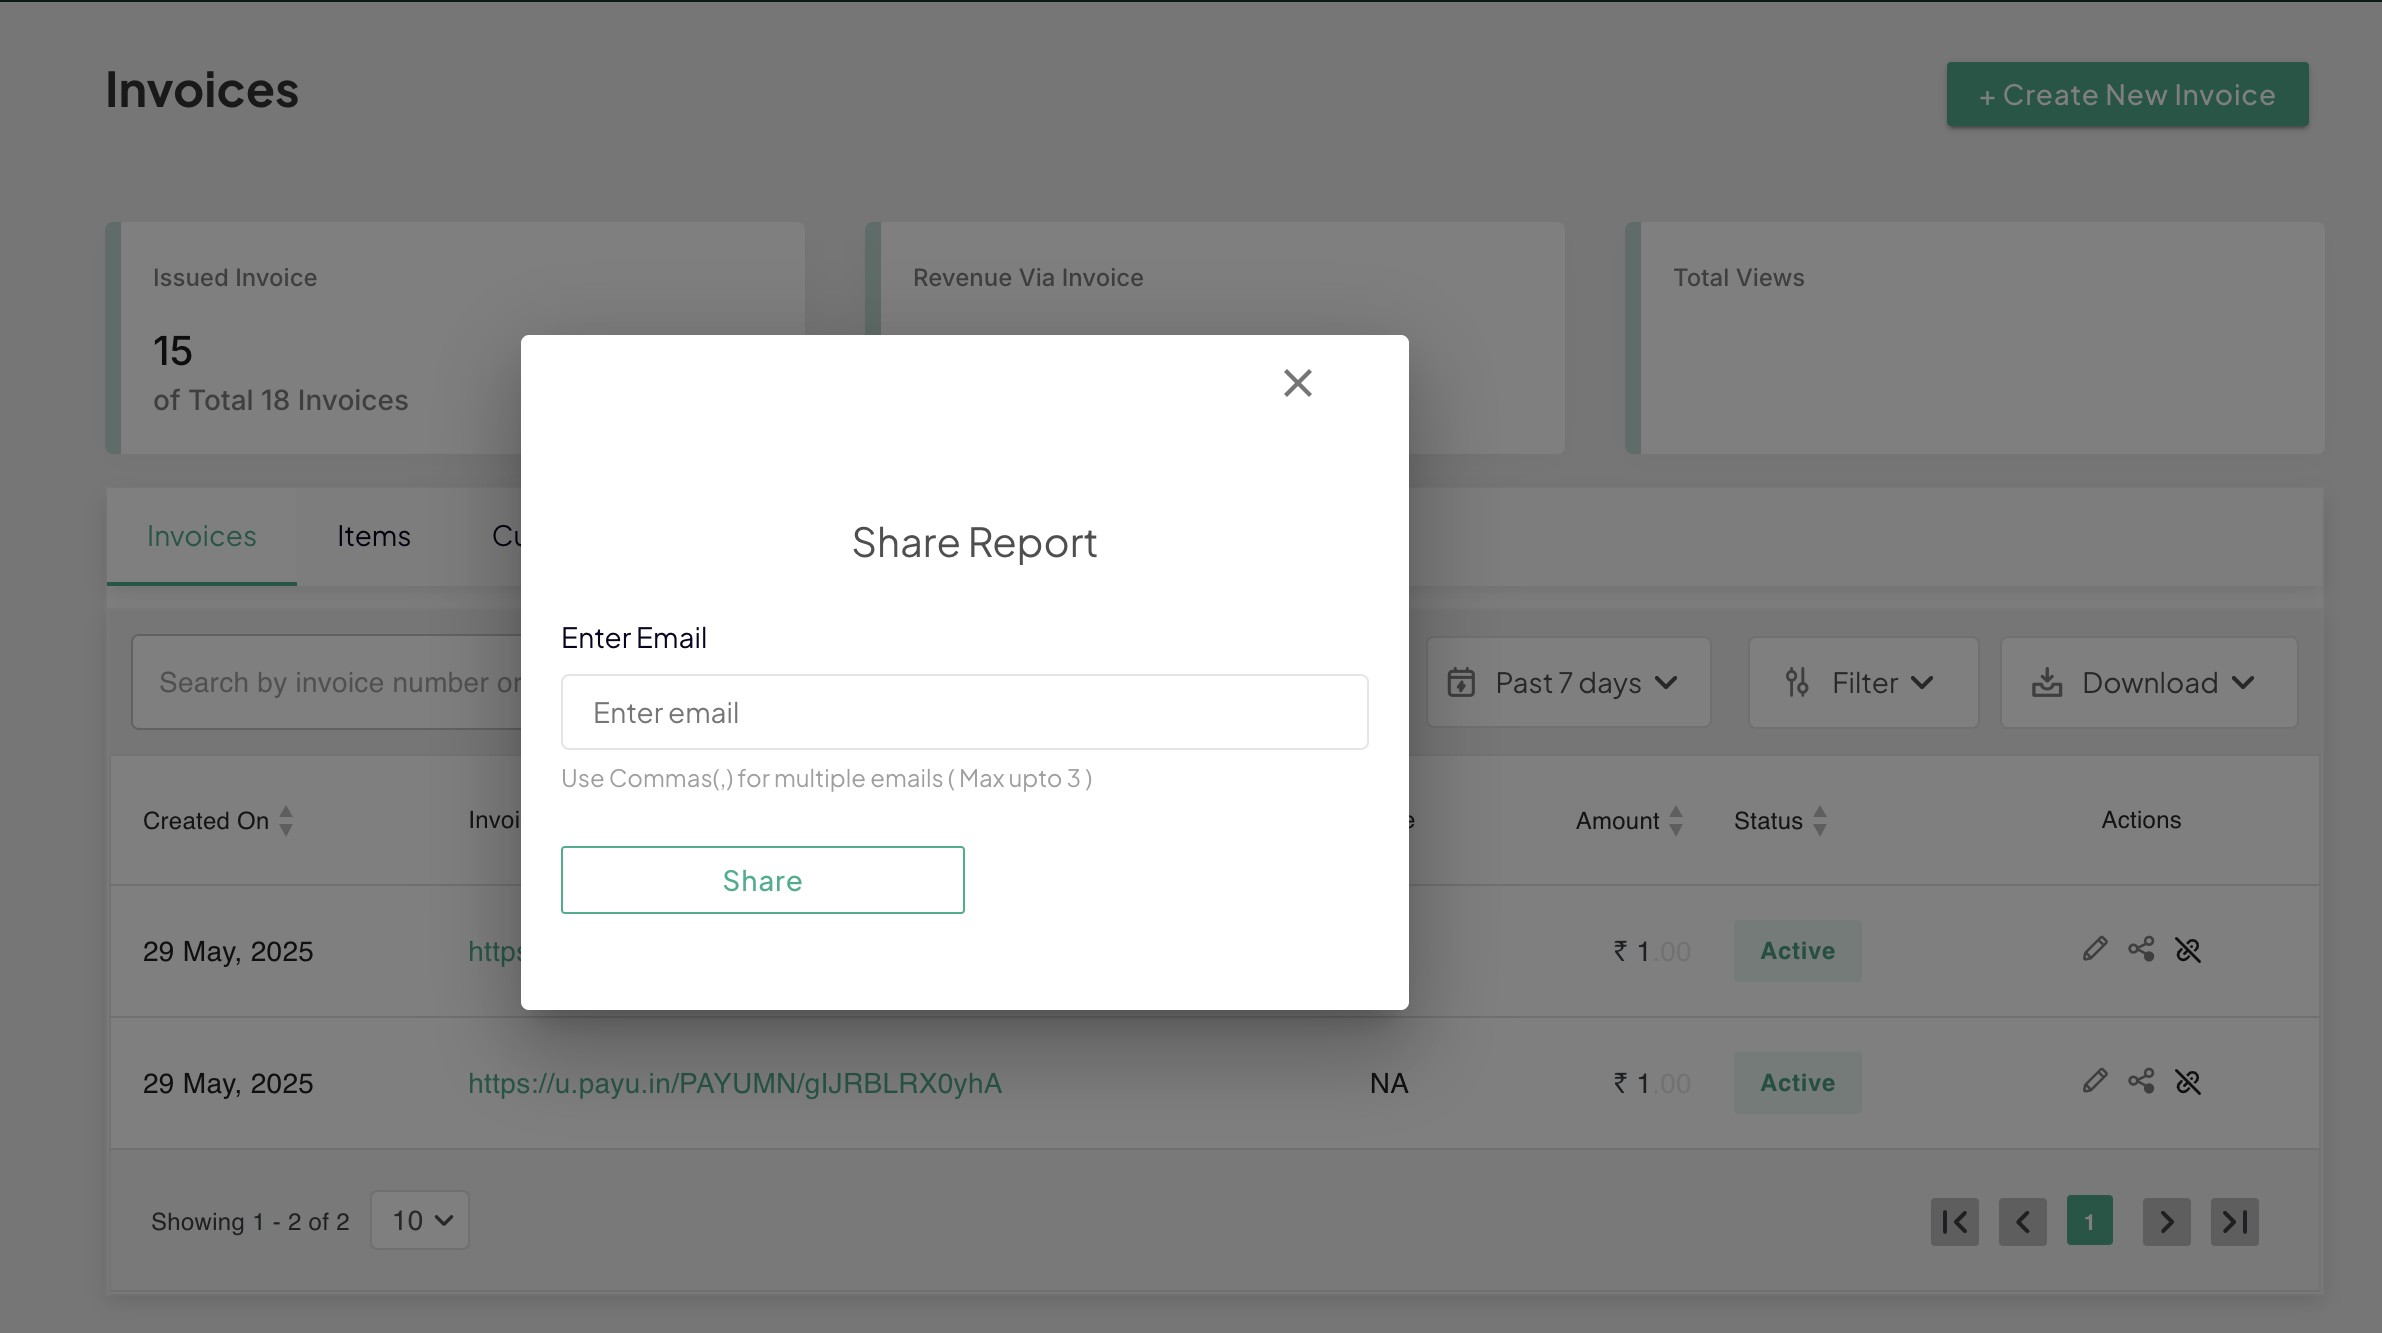
- Click Share and then enter the recipient email ID. You can share the generated report using an email ID using this button.
Note: You can share the report to multiple email IDs by entering the comma-separated entries_._
Updated 4 months ago