Configure Checkout Settings
You can customize your customer-facing checkout page that is displayed when you are using PayU Hosted Checkout integration. For more information on PayU hosted Checkout integration, refer to PayU Hosted Checkout.
To update your brand settings:
- Navigate to Dashboard > Settings > Checkout Settings.
The Set up your brand page is displayed.
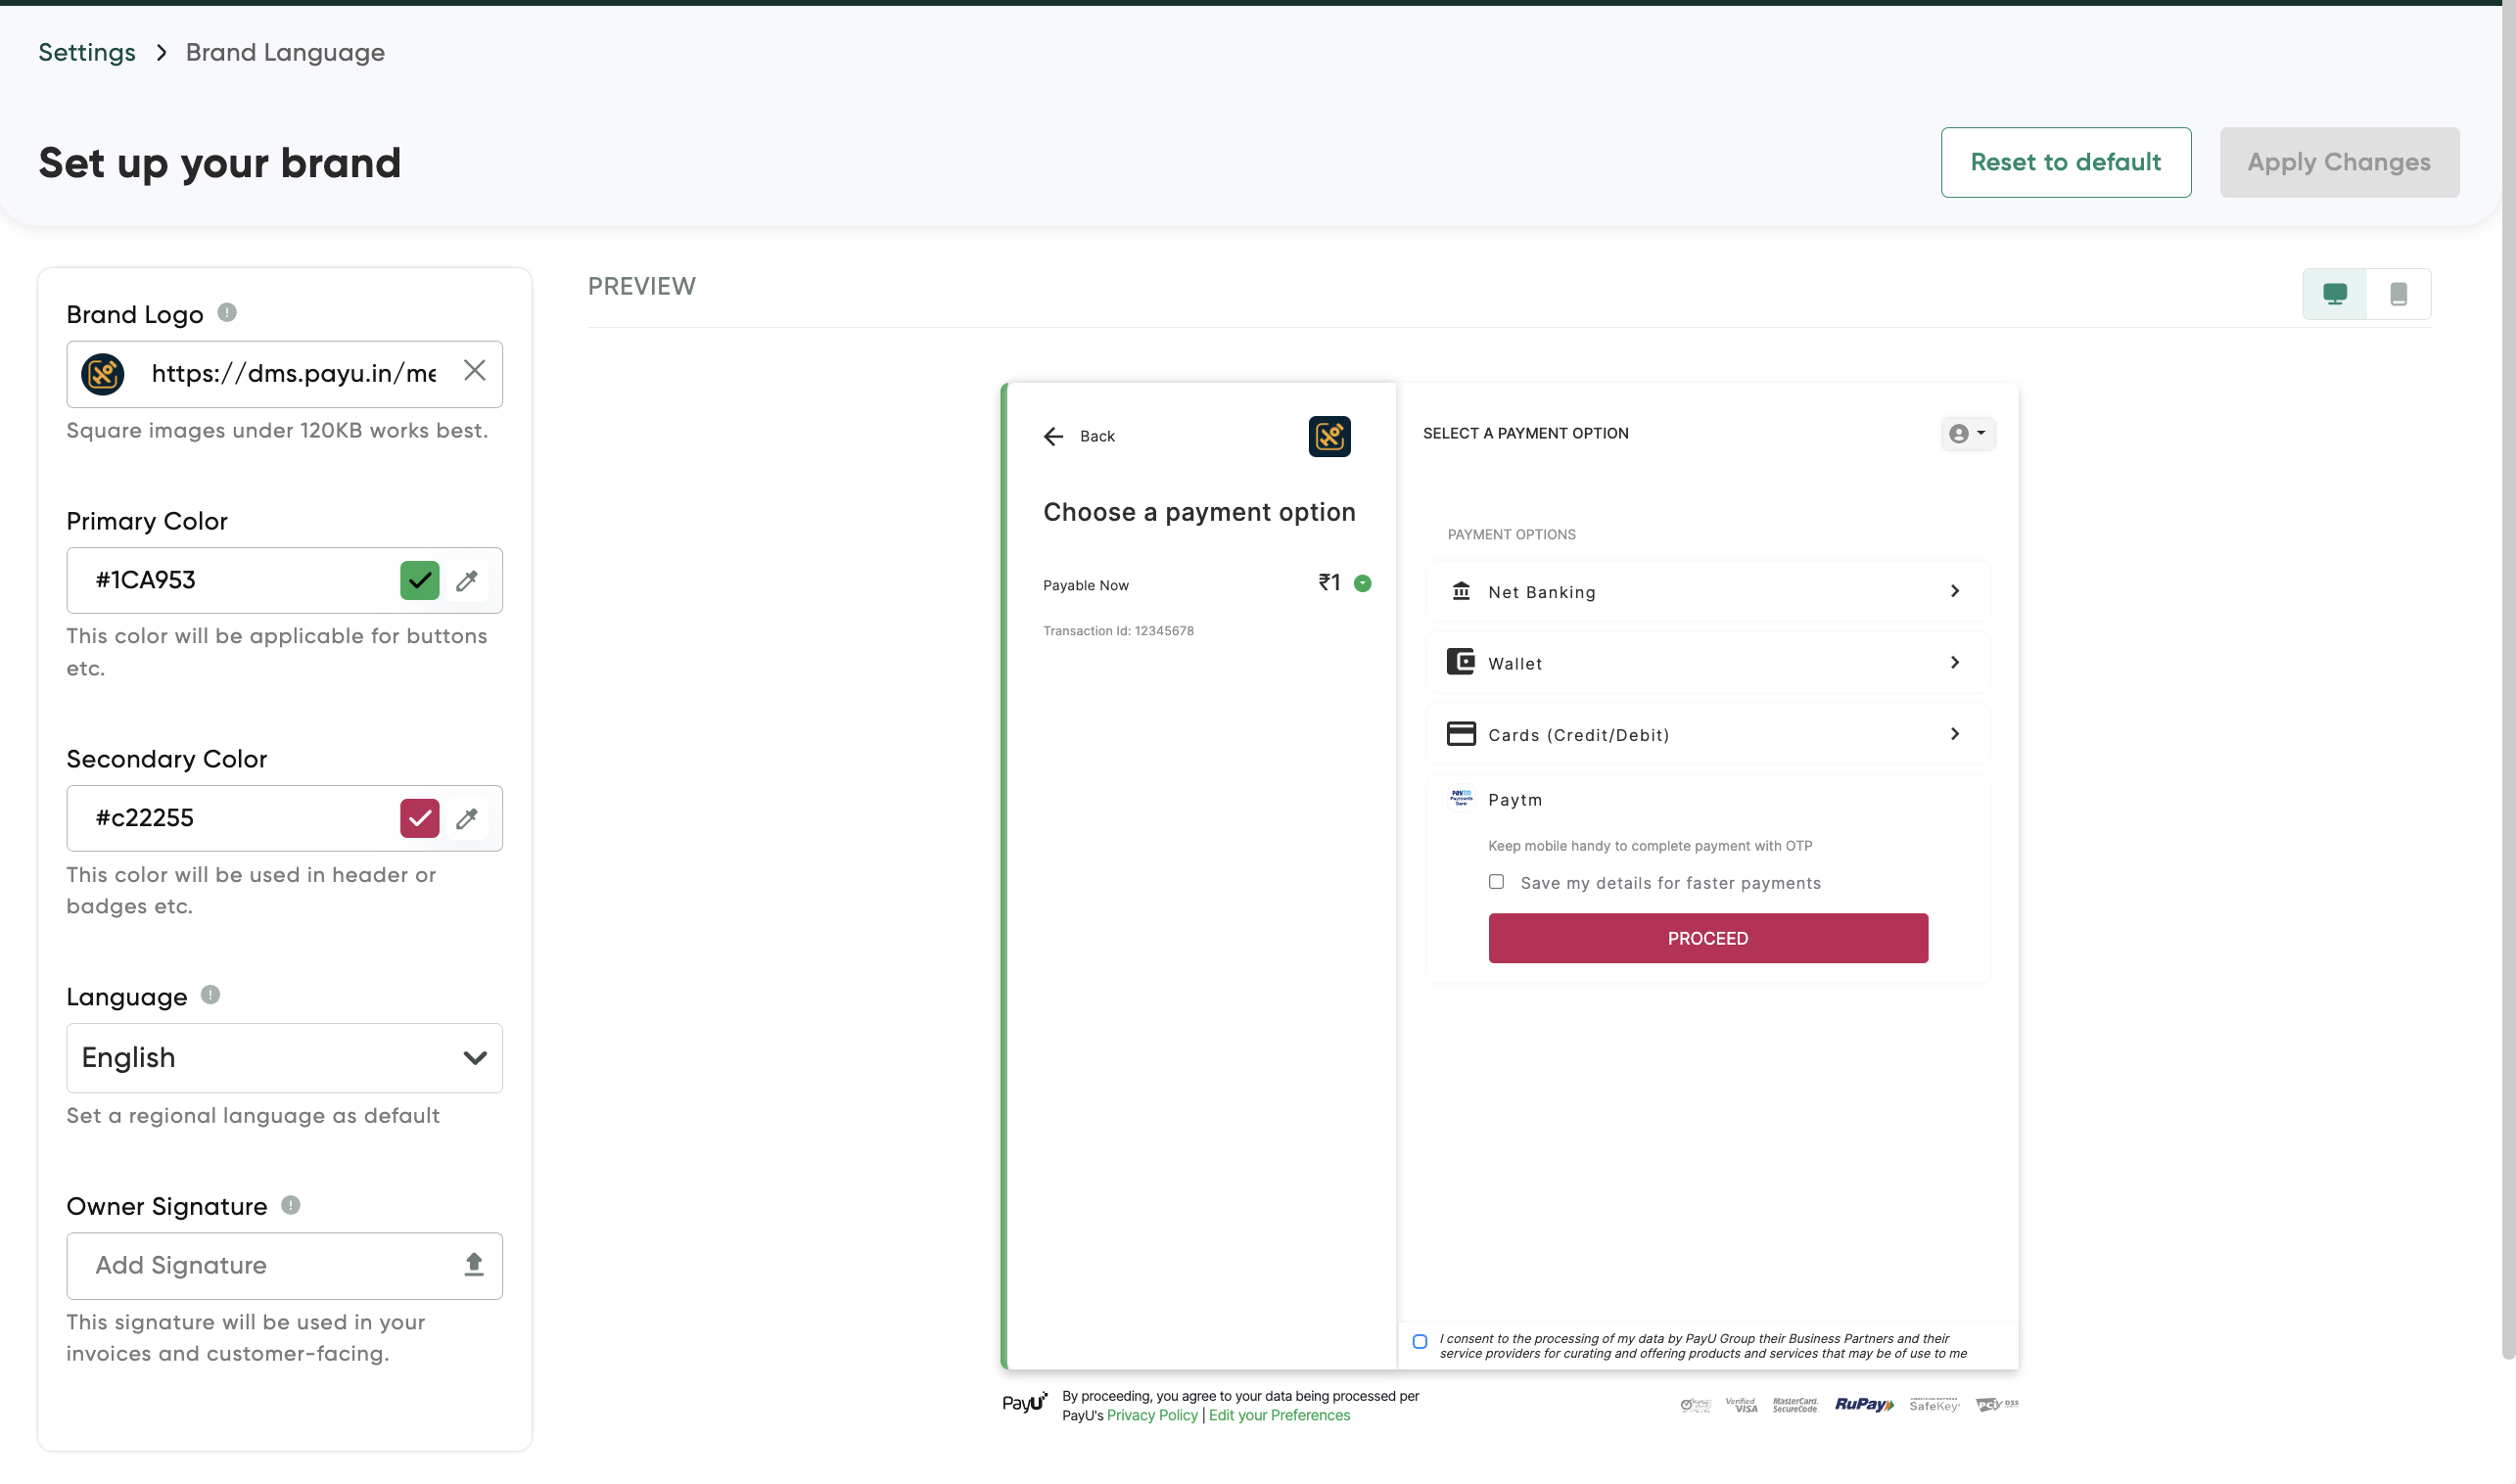
- Select or enter the details as described in the following table:
Field | Description |
|---|---|
Brand Logo | Enter the location or URL of the brand logo.
|
Secondary Color | Click the color chooser to choose the color theme for the checkout page. |
Language | Select the language from the Language drop-down list that has to be displayed on the Checkout page. |
Owner Signature | Click Select the file from your library to select the signature file and click Upload to complete the action. |
Note: While you configure each field above on the , you can see the preview in the right pane. For example, if you add or update the brand logo URL, it will be updated in the right pane preview.
Updated 6 days ago