Create an Instant Discount or Cashback Offer
The procedure to create an Instant Discount or Cashback Offer on PayU Dashboard is similar.
Steps to Create an Offer
- Add the basic details
- Configure payment modes
- Include the Offer rules
- Configure Offer Subvention Details
- Review of the Offer
After you create an Instant Discount or Cashback Offer, you can collect payments from your customers using PayU Hosted (Non-seamless) or Merchant Hosted (Seamless) Checkout integration as described in the following sections:
- PayU Hosted
- Merchant Hosted Checkout
Step 1: Add the basic details
-
Navigate to Offers Dashboard.
-
Click Create an Offer at the top-right corner.
The Create New Offer page is displayed.
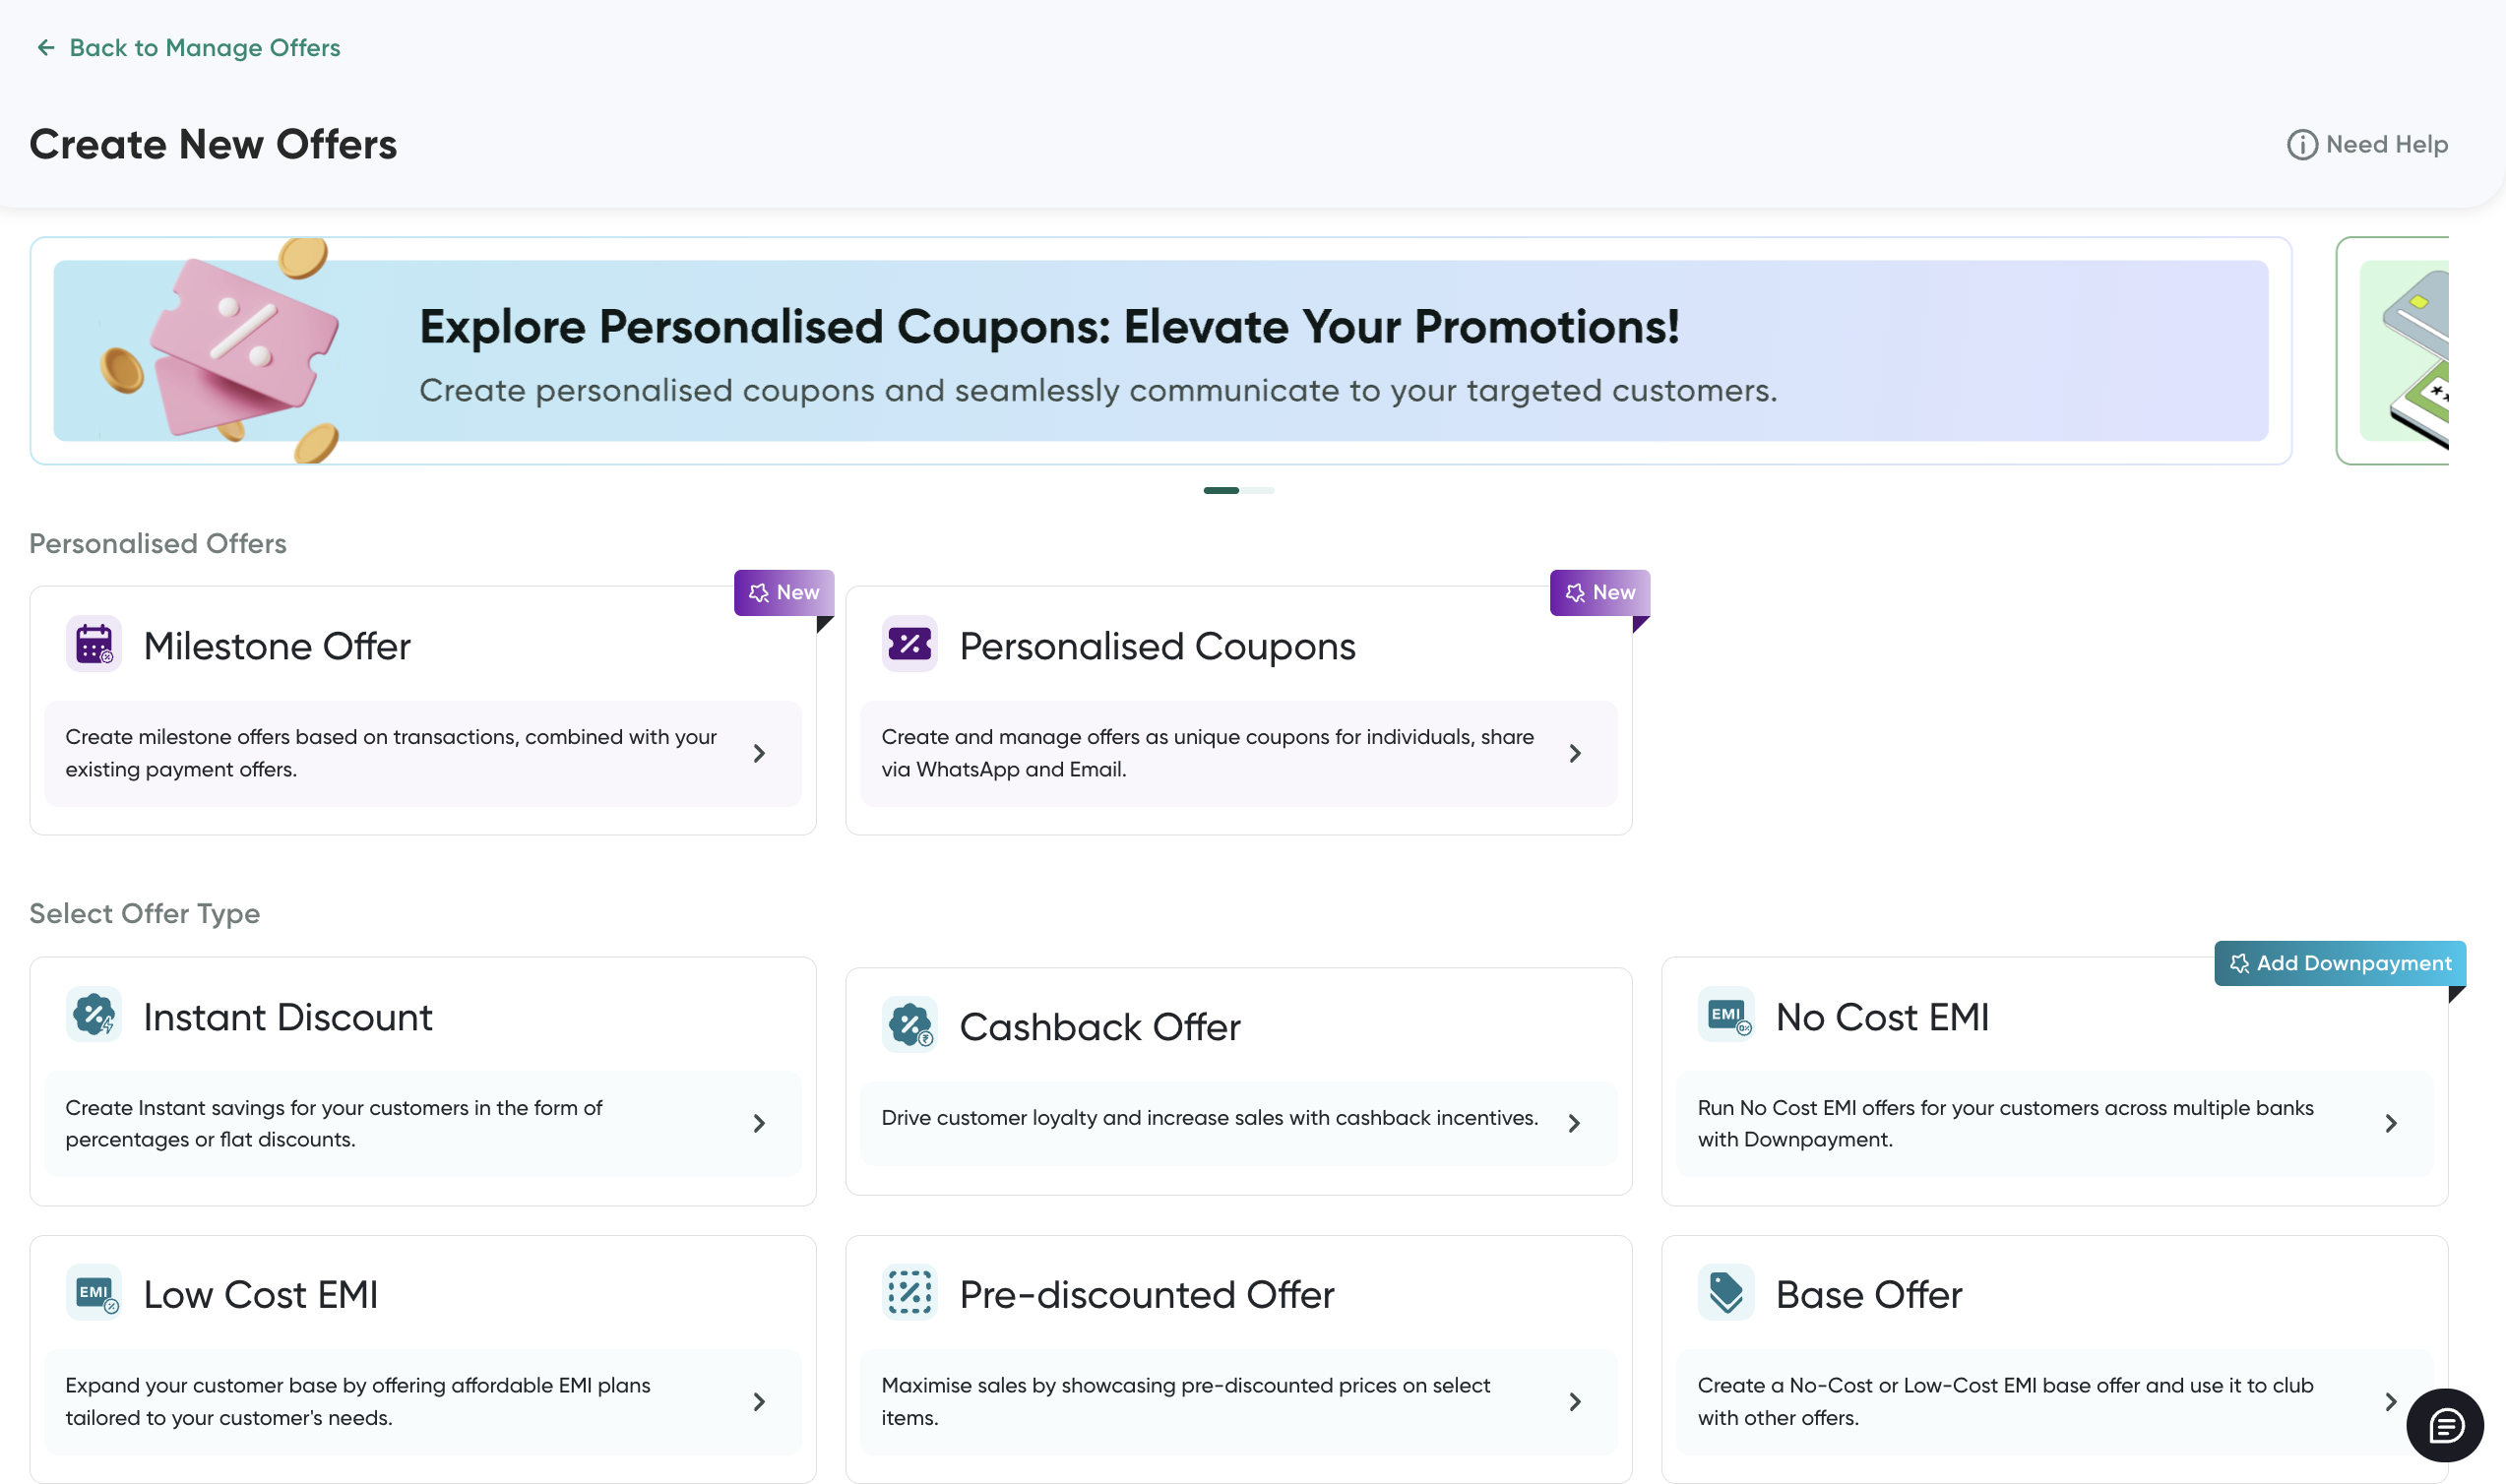
- Select the Instant Discount or Cashback Offer as the discount type.
The Basic Offer Details page is displayed.
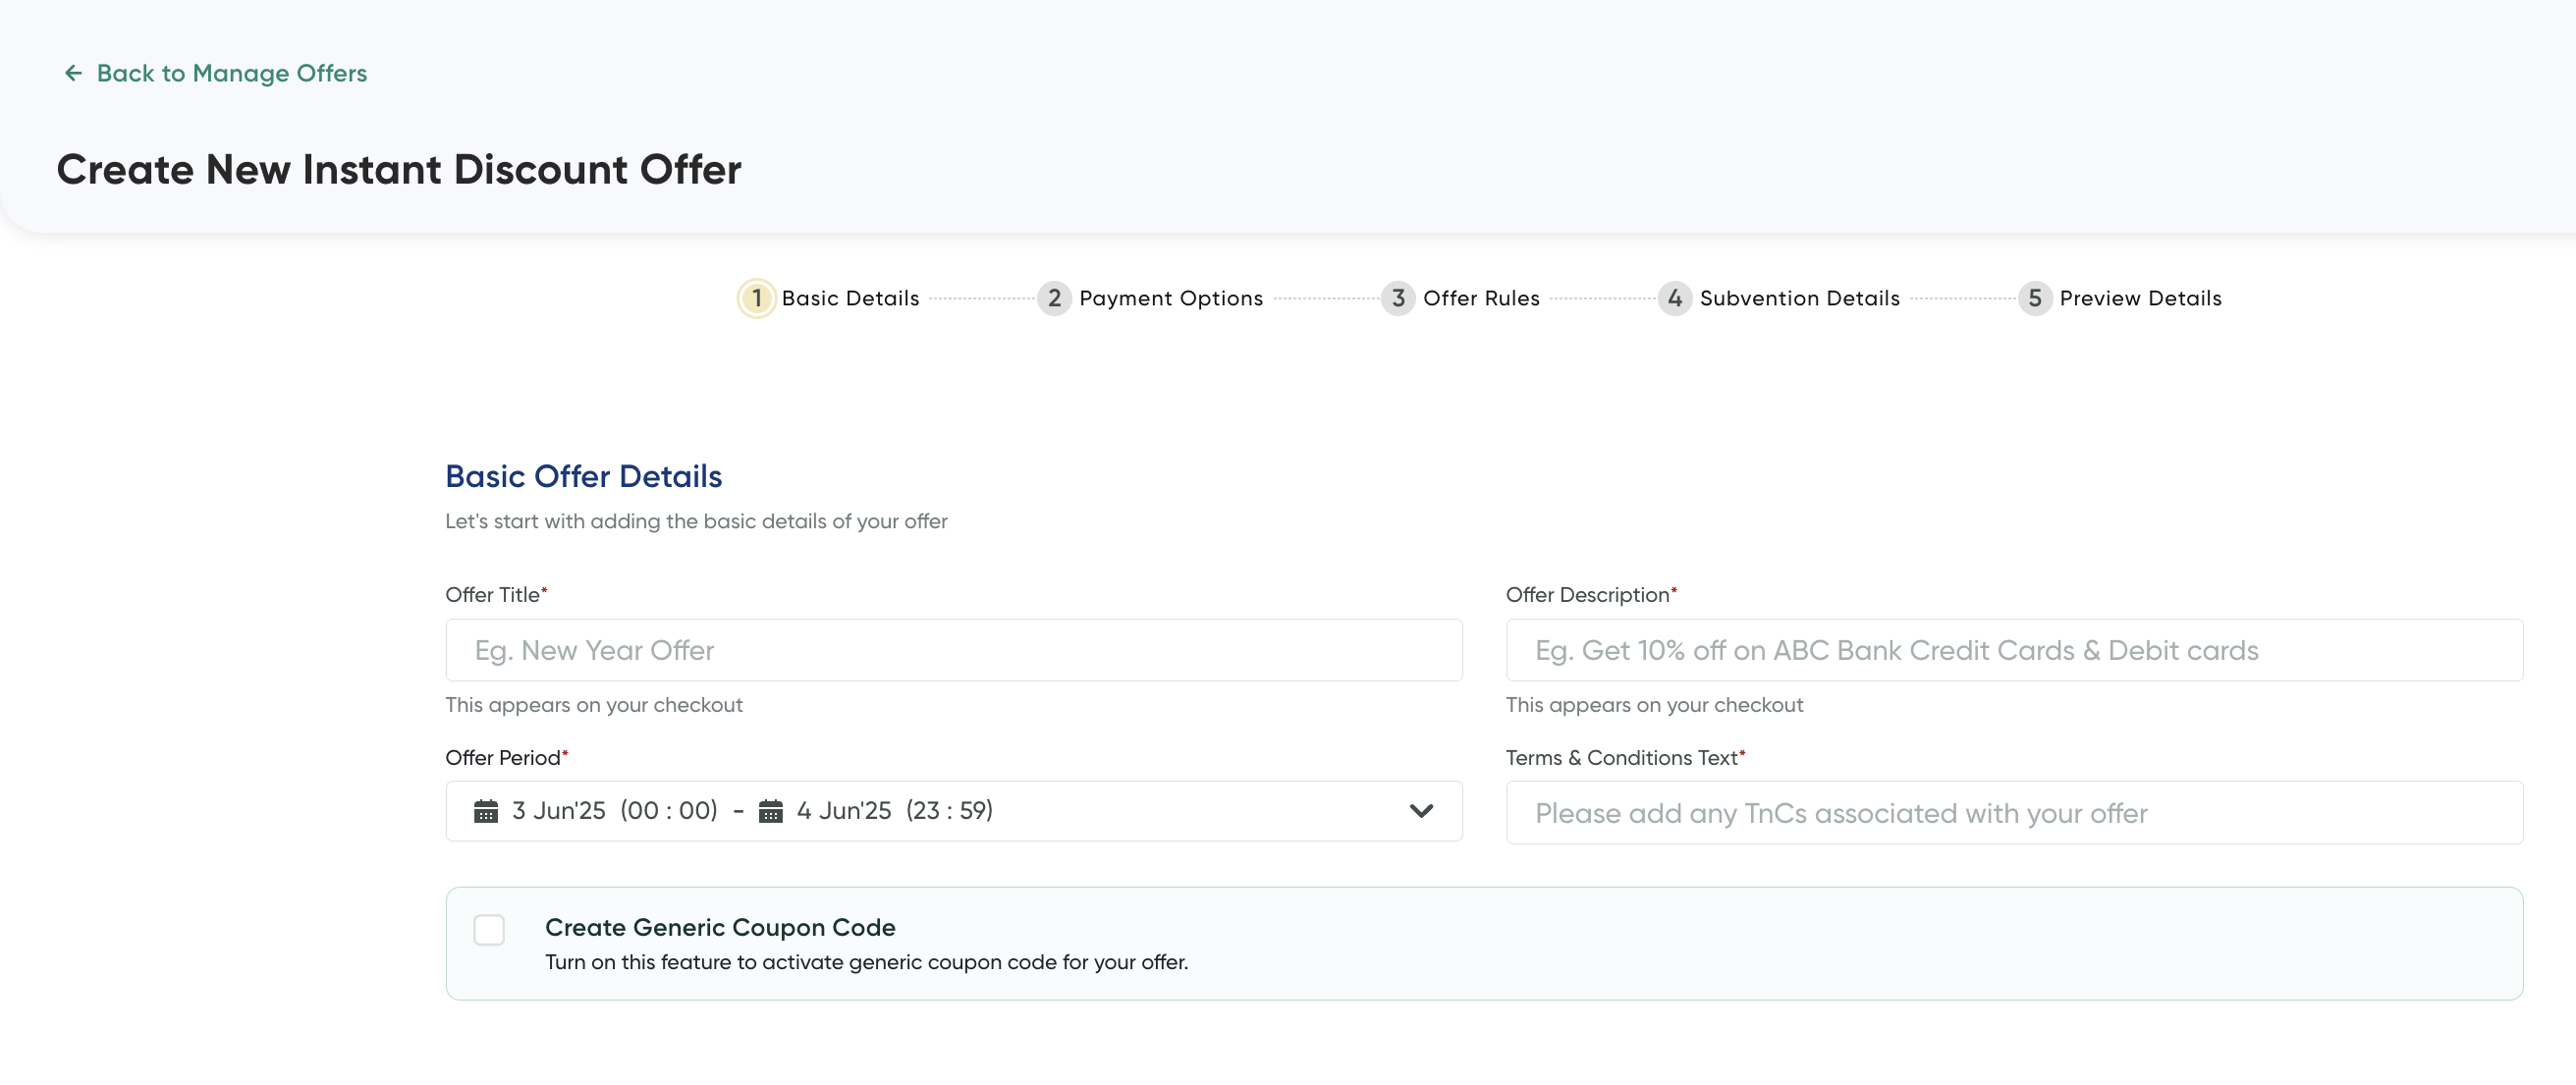
- Include the basic details as described in the following table and then click Save & Process:
| Field | Description |
|---|---|
| Offer Title | Enter a unique title for the offer. This would be displayed as the offer title on your Checkout page. |
| Offer Description | Enter the offer text that would be shown to your customer at checkout (for PayU Hosted Checkout Integration transactions). |
| Offer Period | Enter the offer validity date and time range. Your offer will be valid and visible to the customer between this time period. You can specify the time range up to the seconds detail. |
| Terms & Conditions | Enter the text content that should appear under the “Terms and Conditions” on the Checkout page for customers. |
- Select the Create Generic Coupon Code check box to create a coupon code.
The fields to collect coupon code details are displayed.
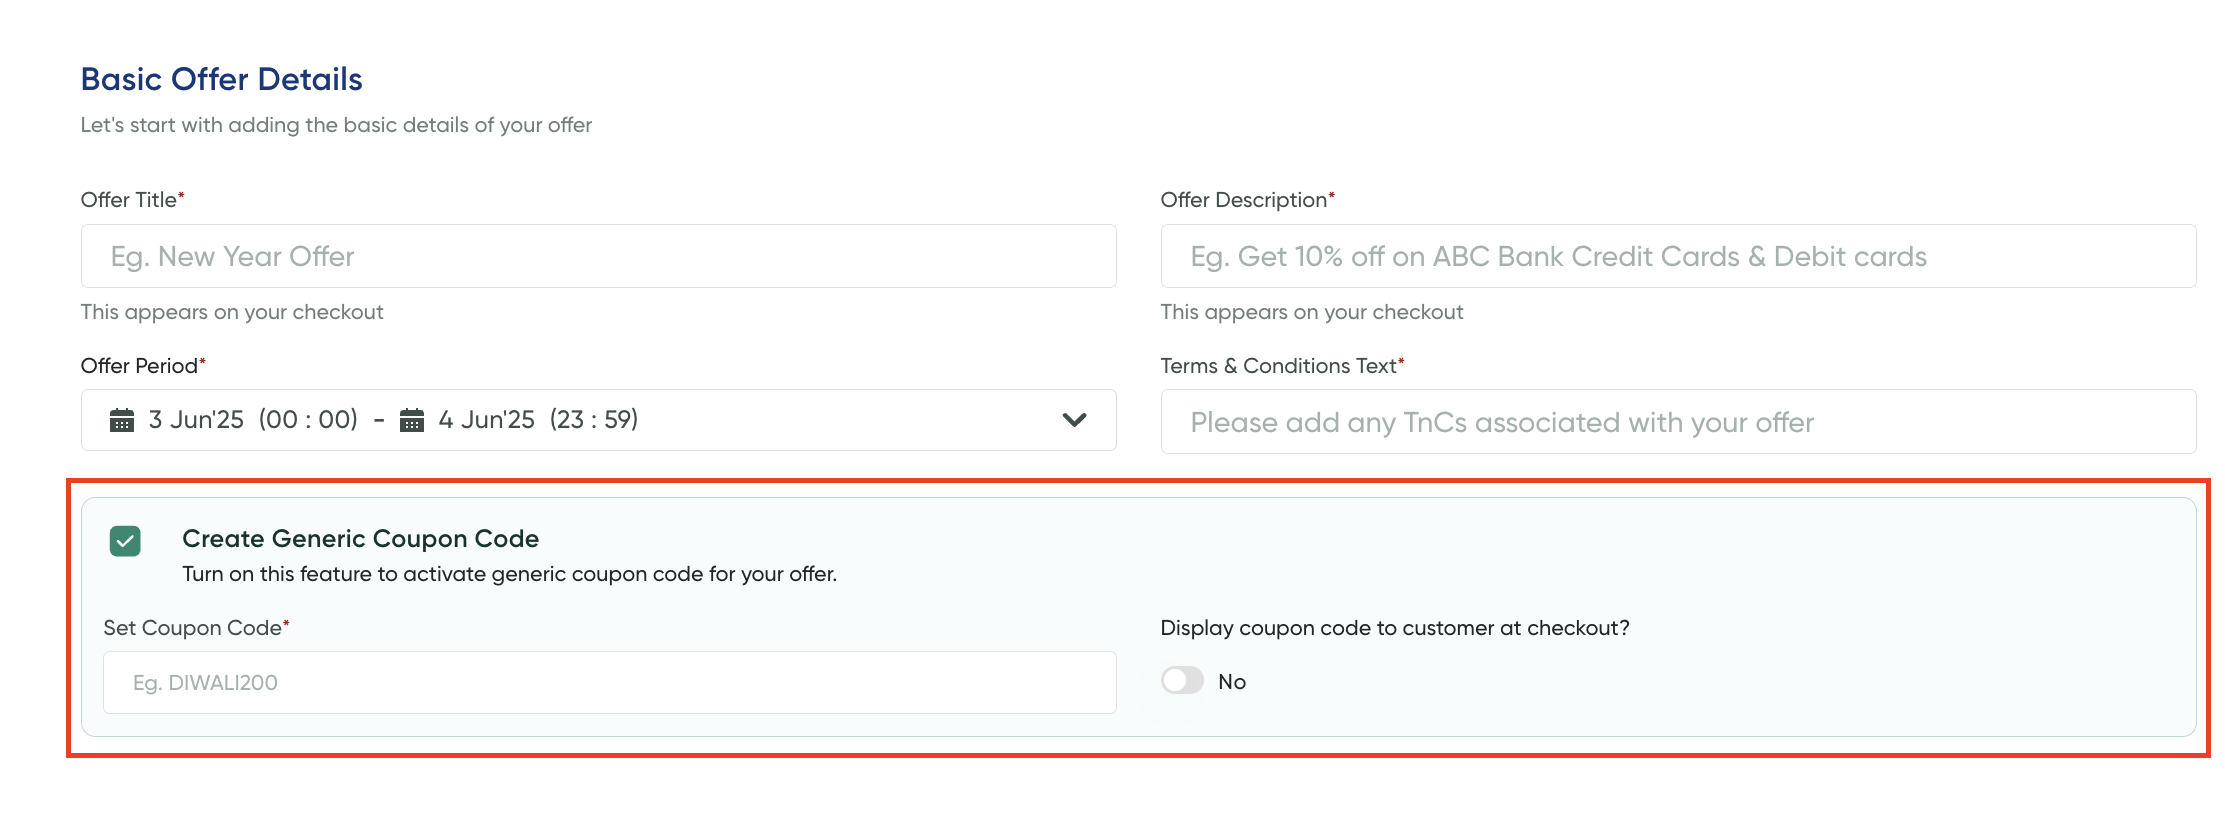
- Enter the coupon code in the Set Coupon Code field.
- Click the Display coupon to customer on checkout toggle button to display the coupon code on the PayU Checkout page.
- After you complete the above details and click Next.
The Payment Options page is displayed.
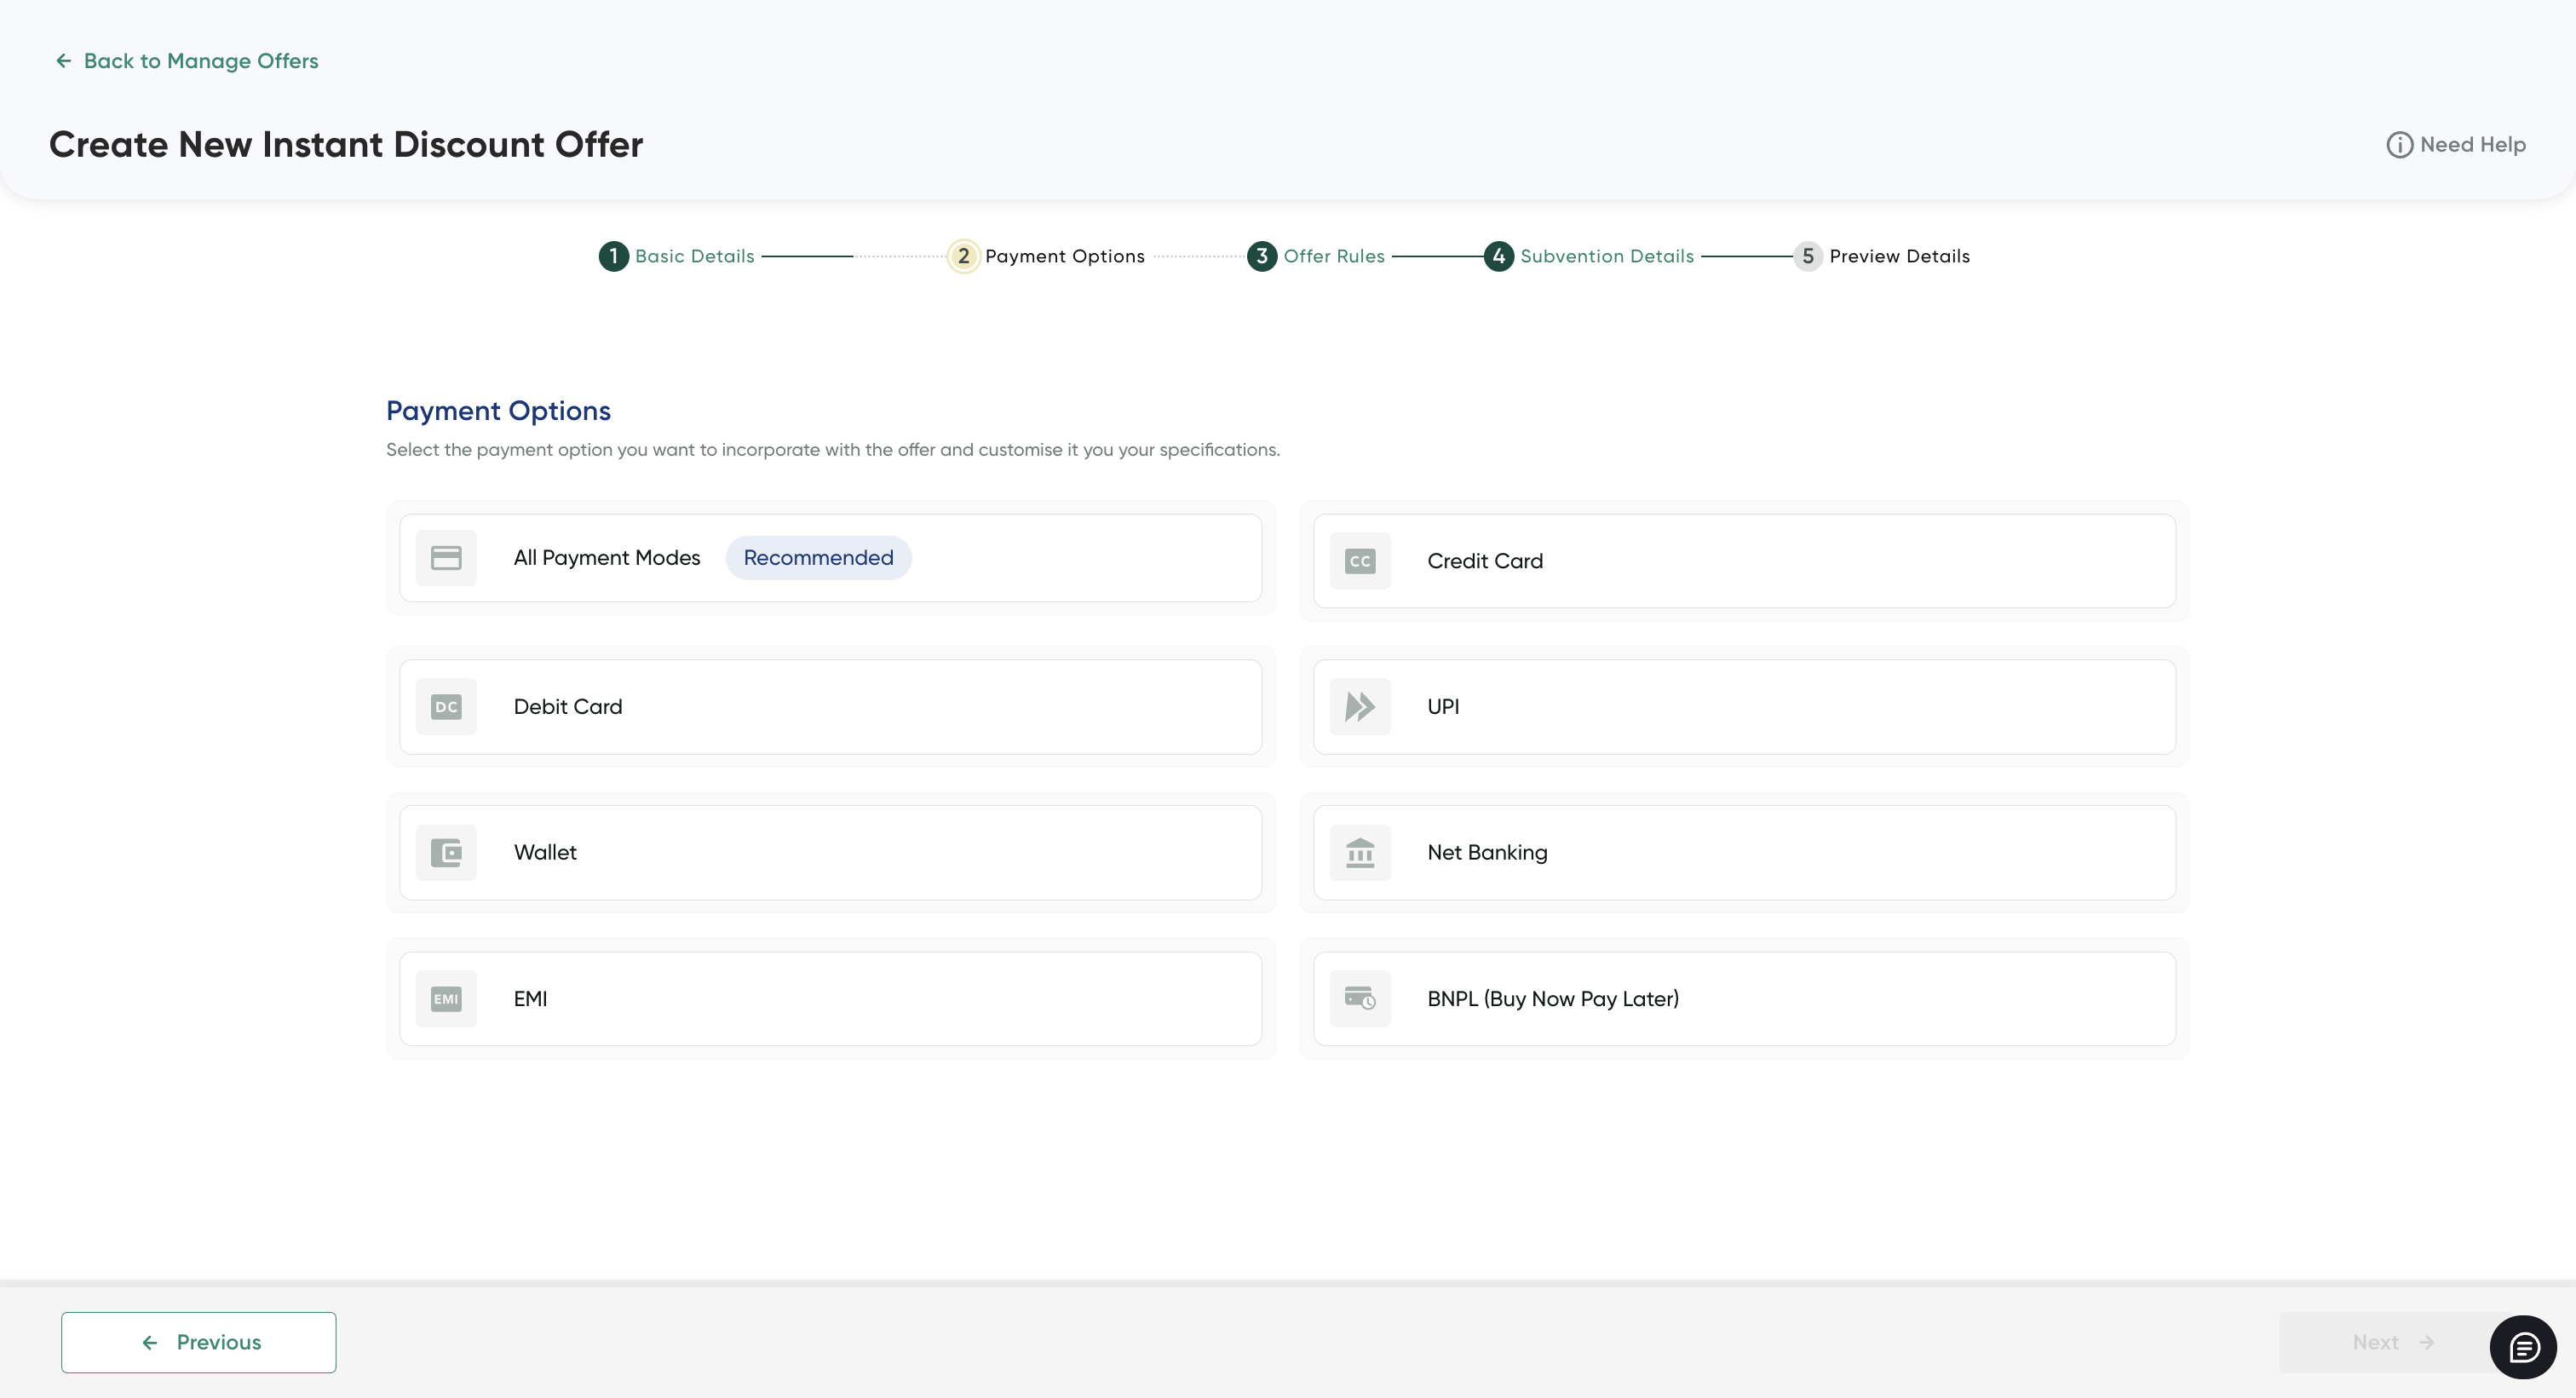
Step 2: Configure payment modes
Select any of the following payment modes to configure offer details that is explained in the corresponding tabs:
Note:You can configure one or multiple payment options for an offer. For example, the “HDFC Diwali Offer” can contain 10% discount for HDFC debit or credit cards, HDFC UPI, and a 3-month interest-free EMI for HDFC cards.
Debit Cards
- Click the Edit button on the Debit Cards tile.
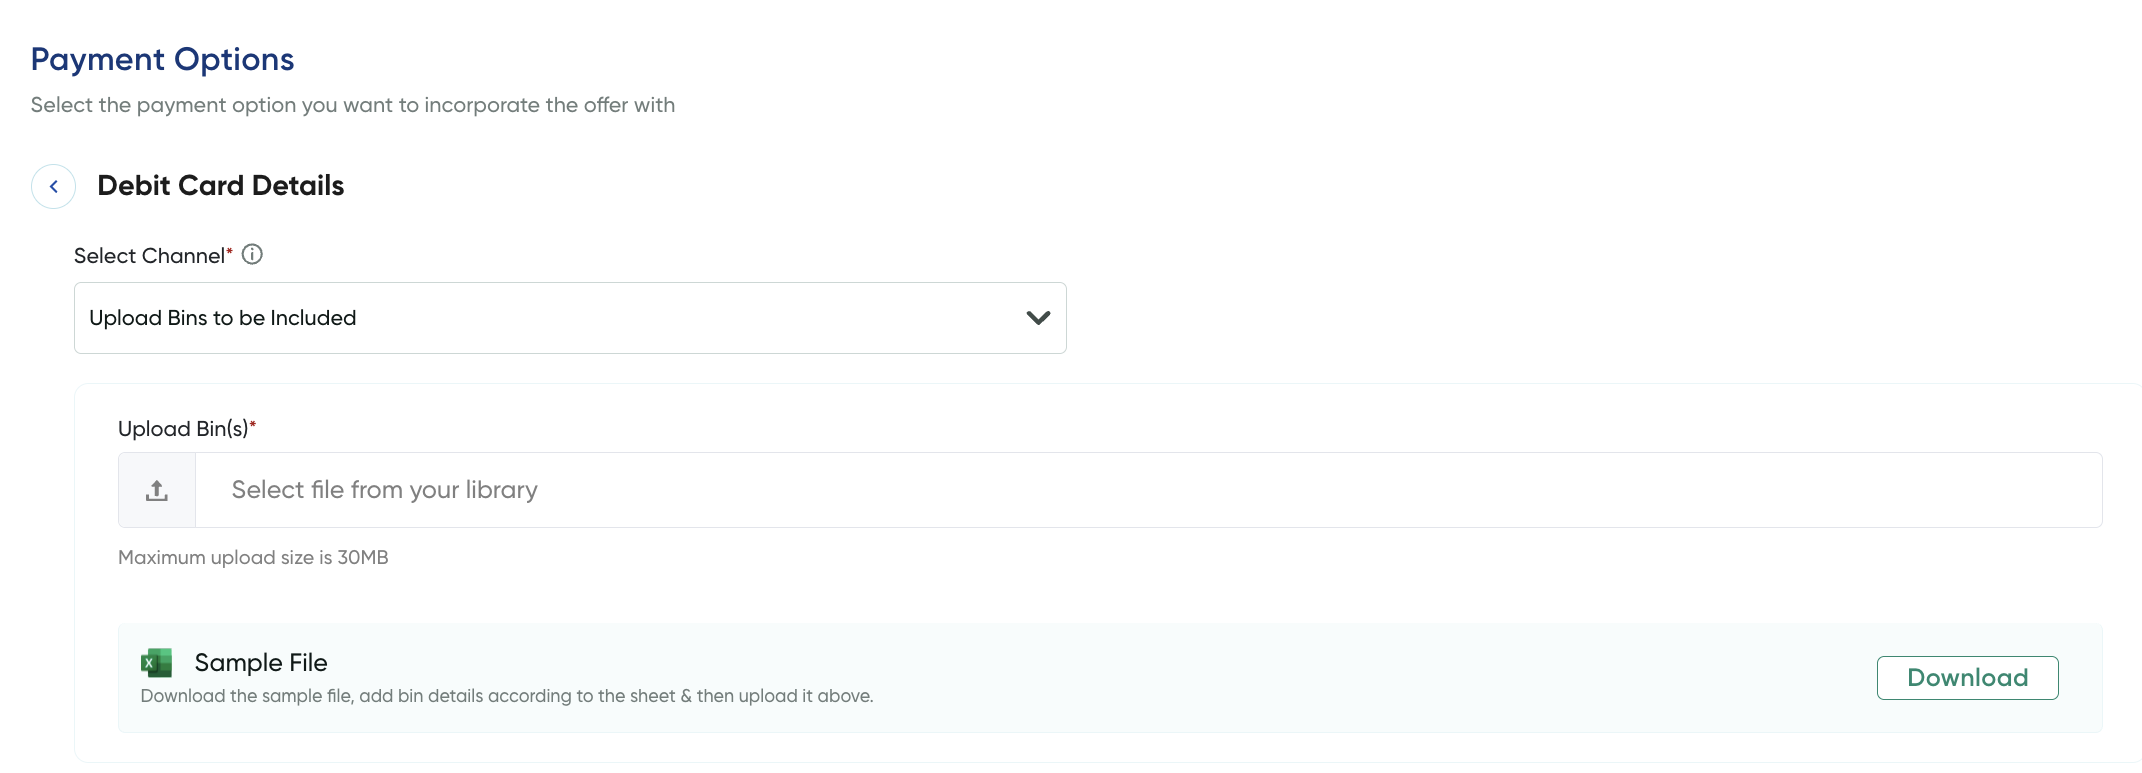
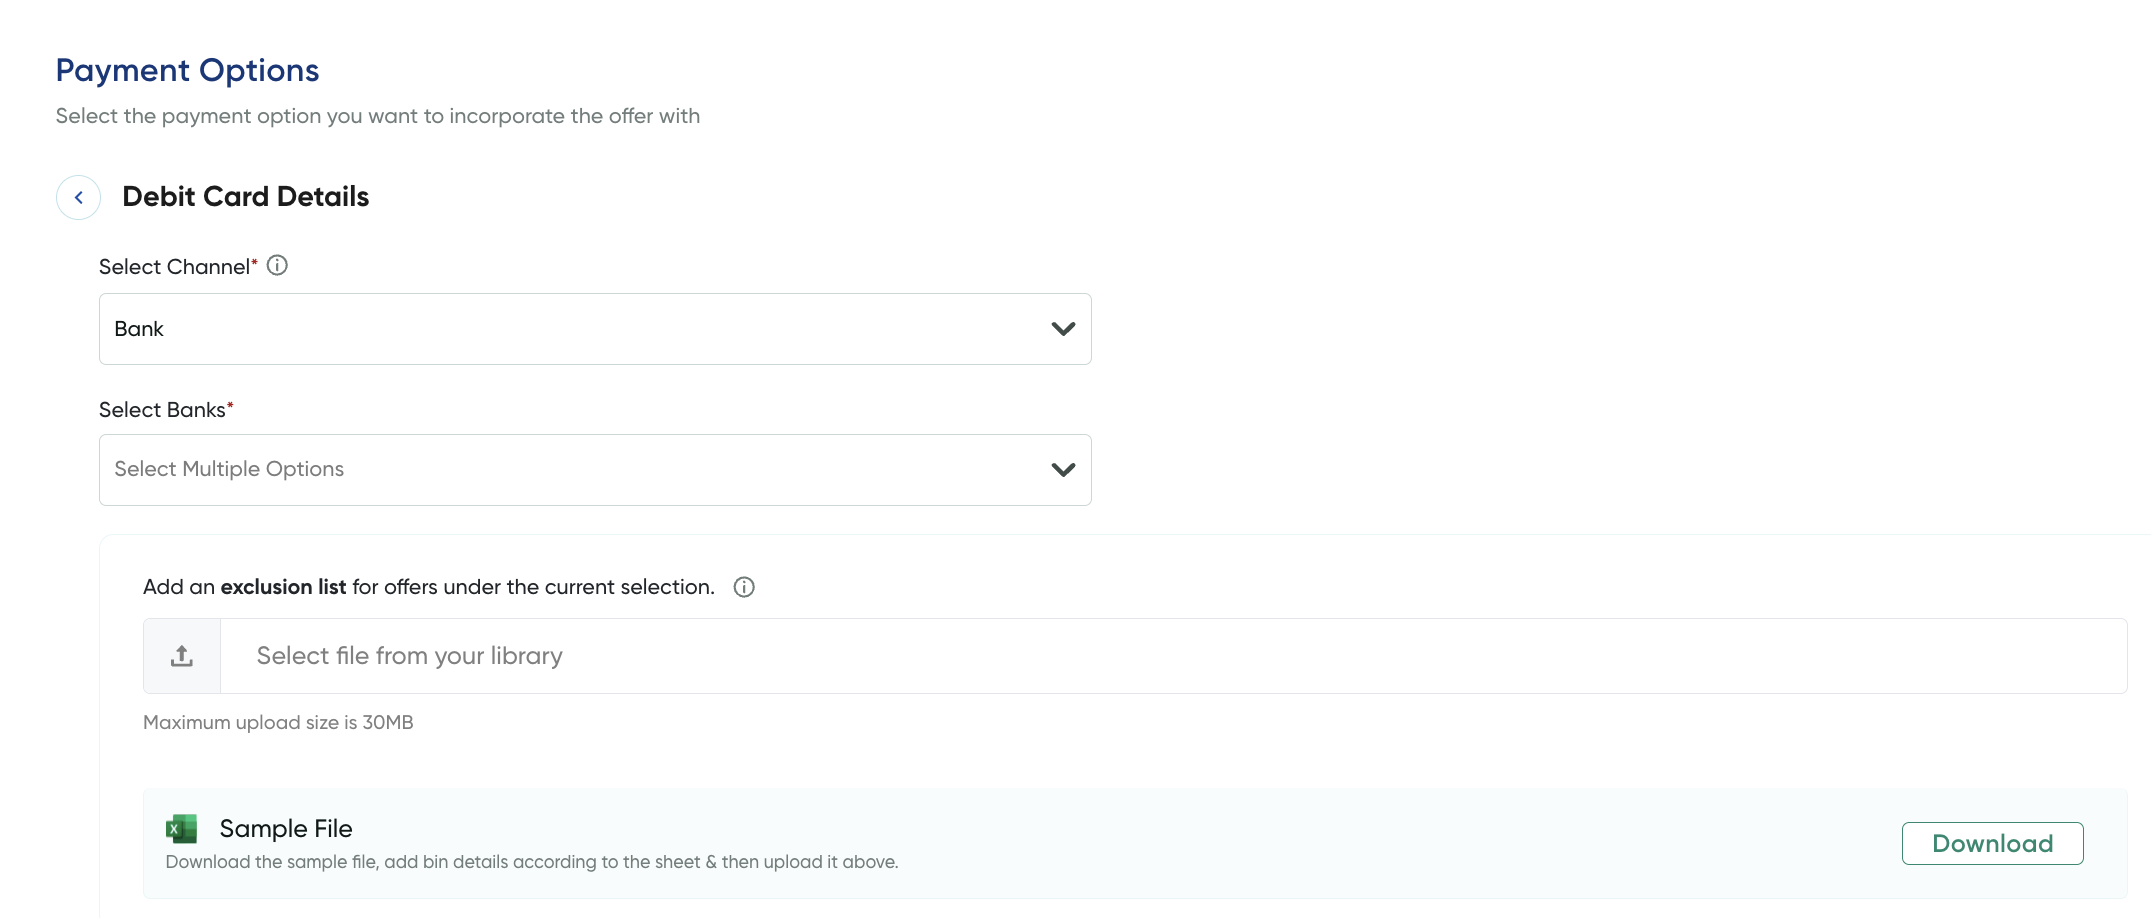
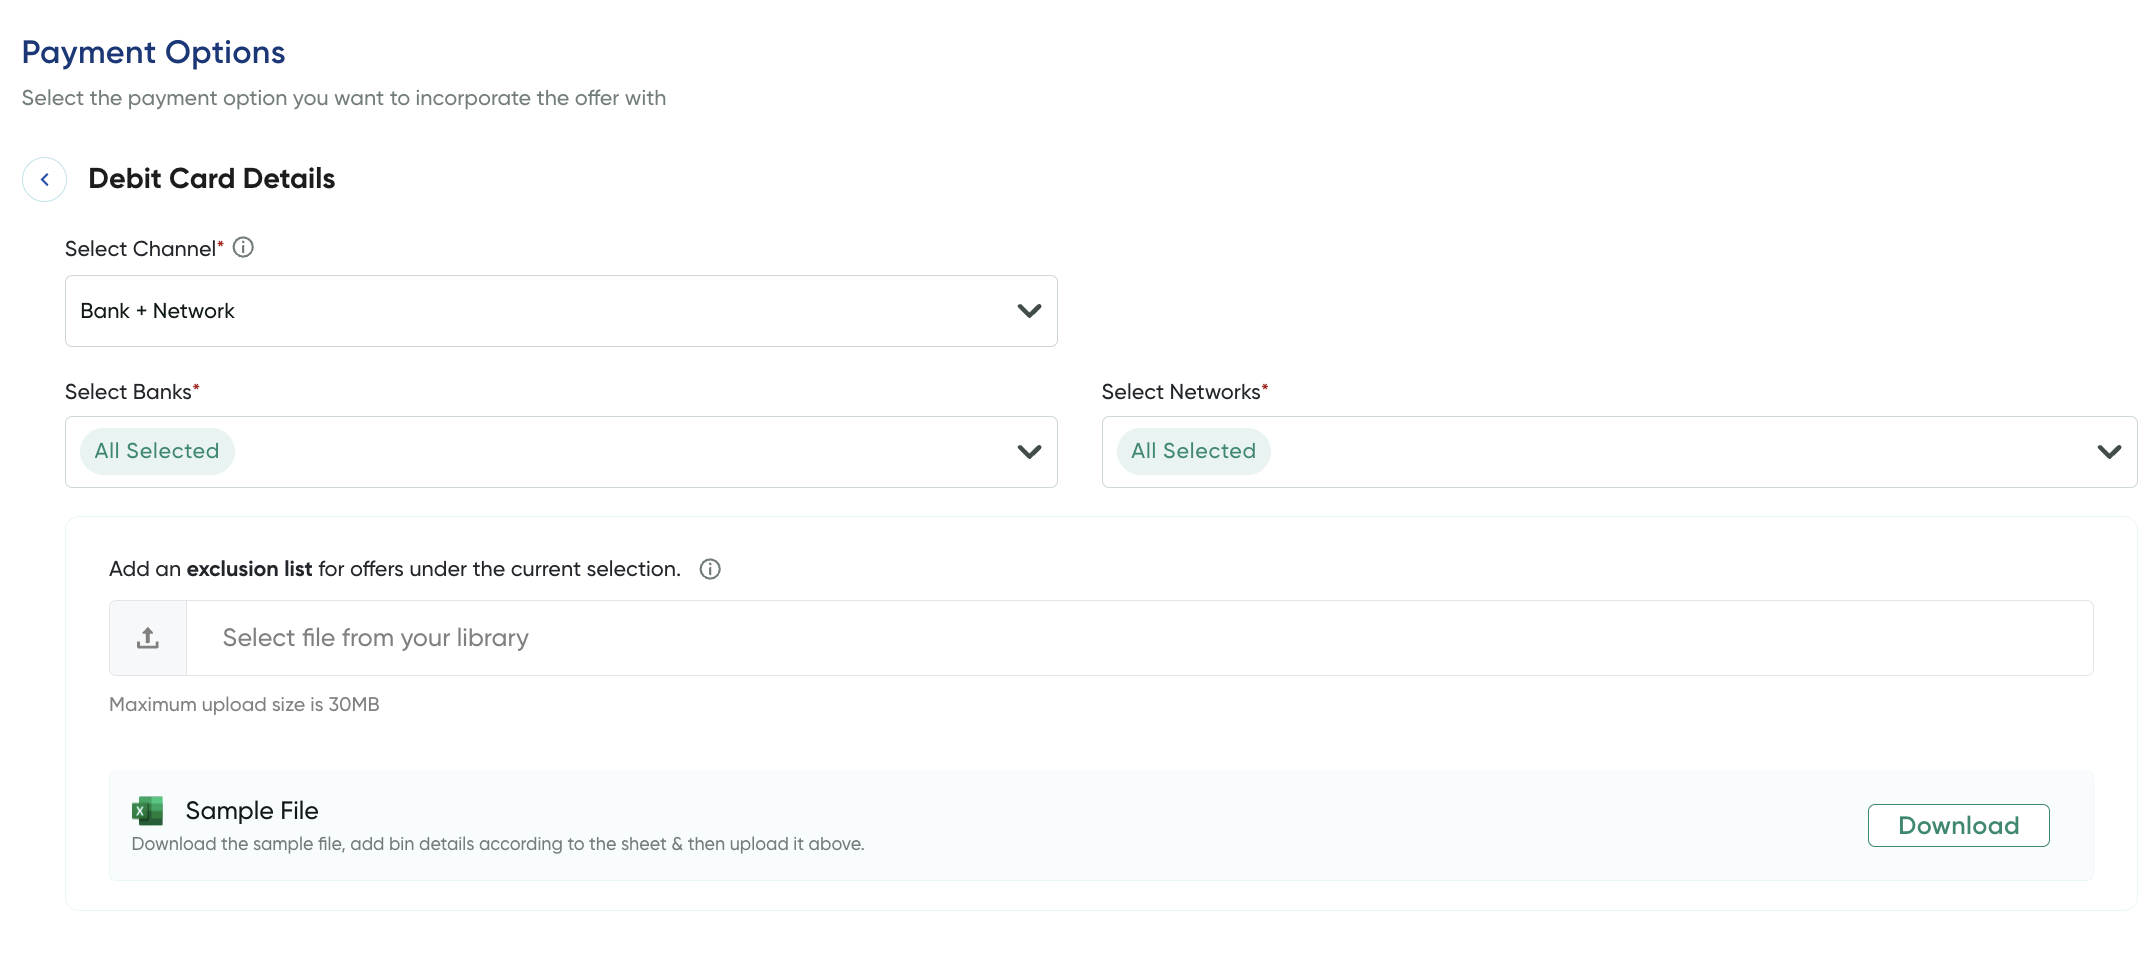
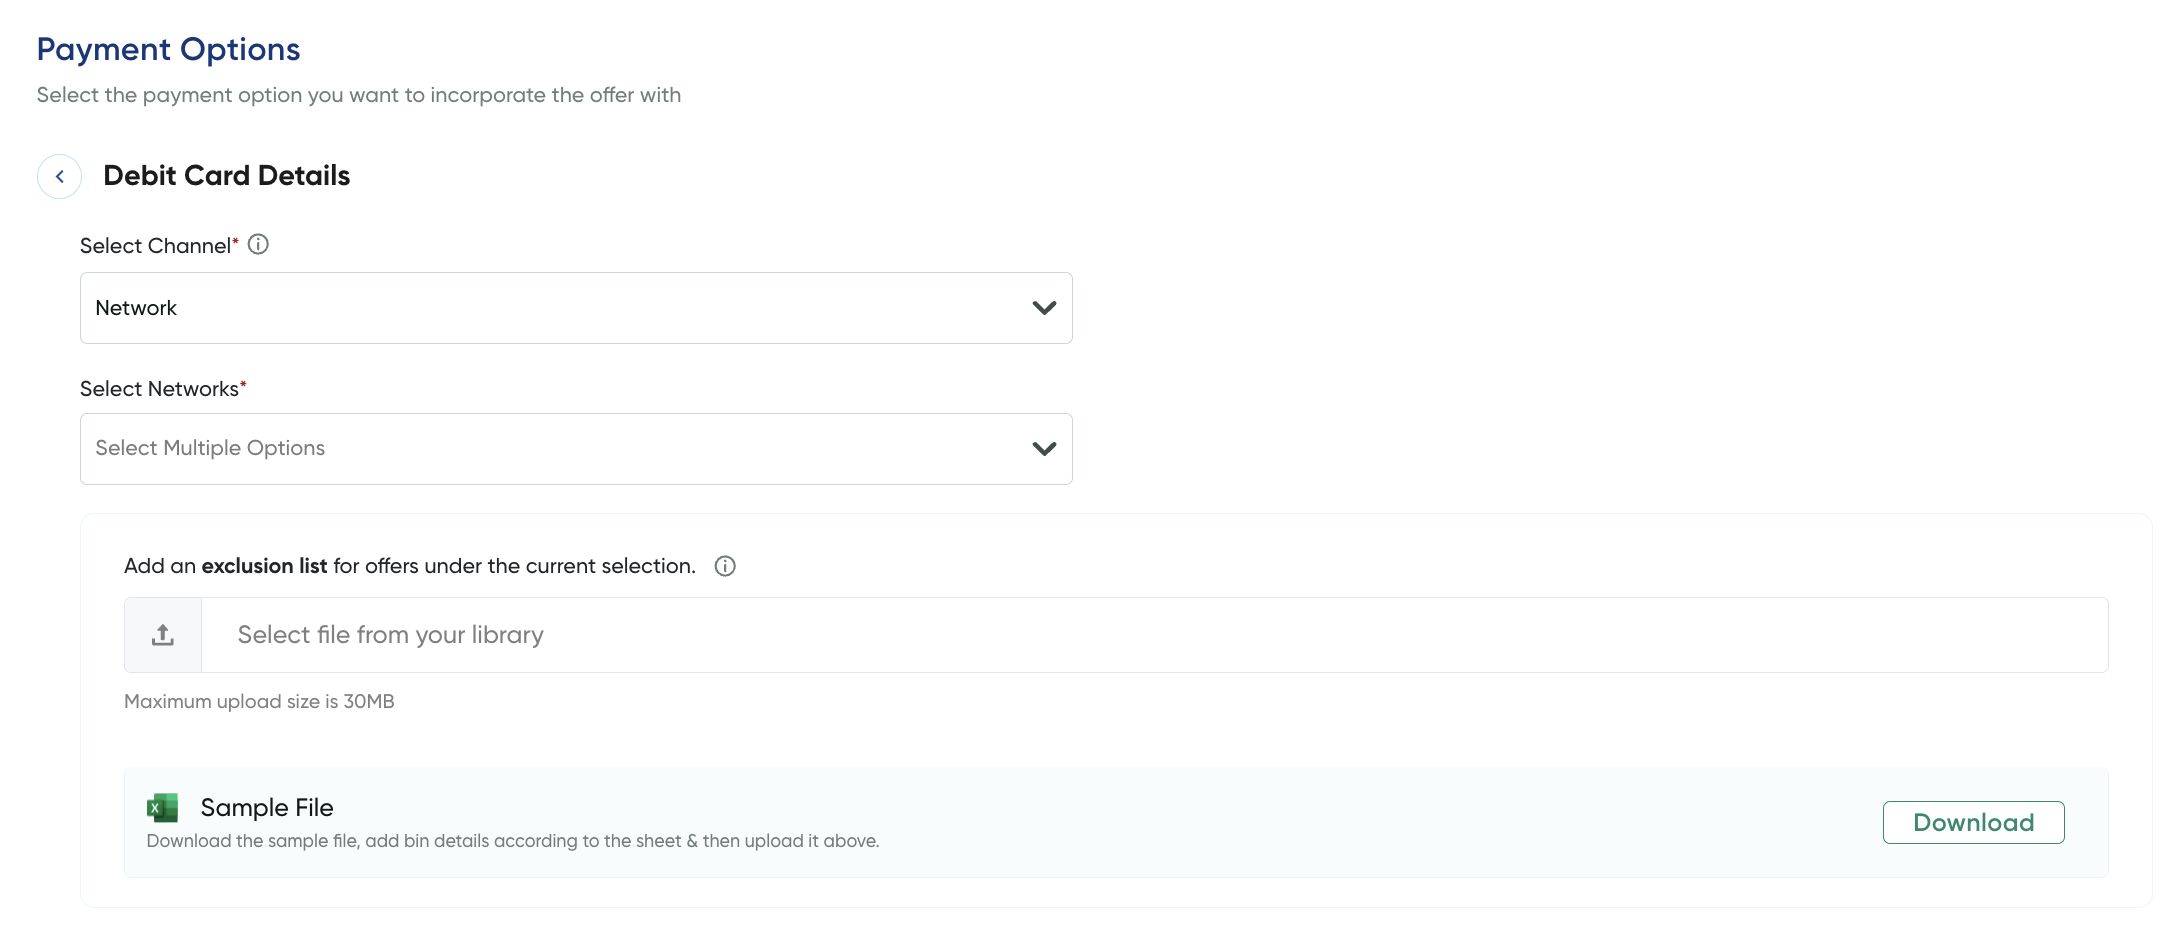
The Debit Card Details page is displayed.
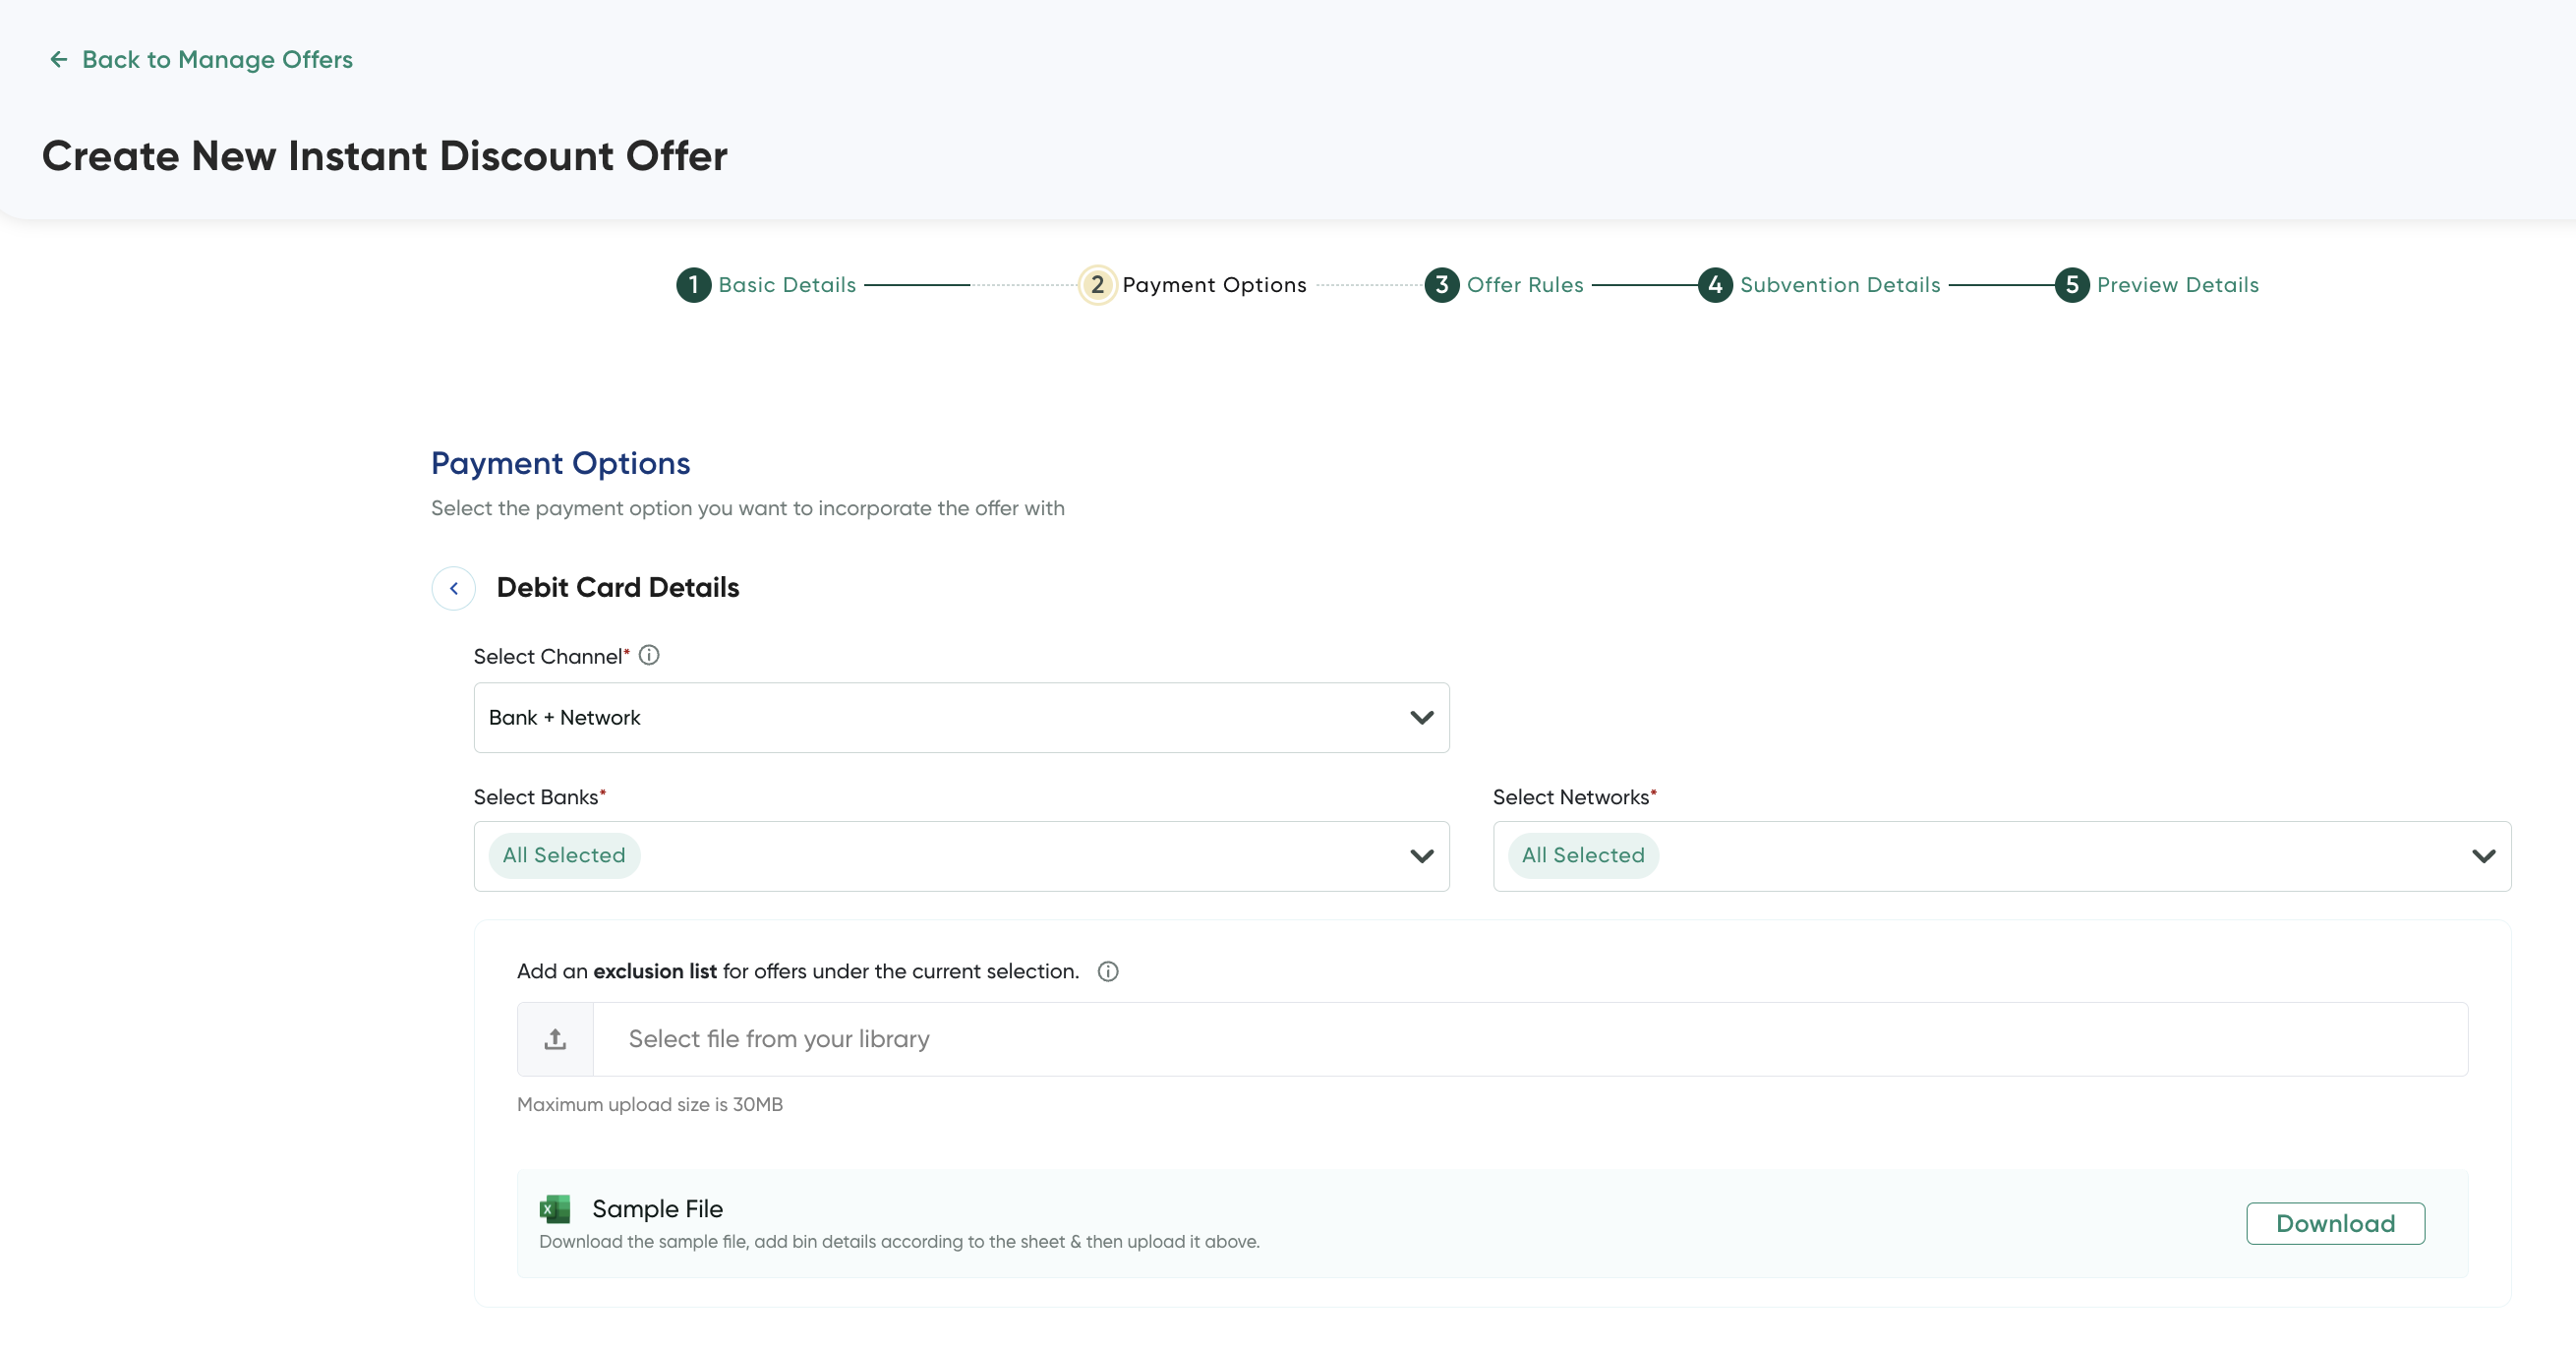
- Perform any of the following based on the method you want to select the bank and network:
| Channel | Description |
|---|---|
| Upload Bins to be include |
|
| Bank | Select the banks for which the offer is applicable from Select Banks drop-down list. Note: You can include exclusion list for offers. For the sample exclusion list file, click Download . |
| Bank + Network | - Select the banks for which the offer is applicable from Select Banks drop-down list.
|
| Network | Search and select a network from the Select Networks drop-down list.
Note: You can include exclusion list for offers. For the sample exclusion list file, click Download . |
- Click the Back button to go back to the payment options list.
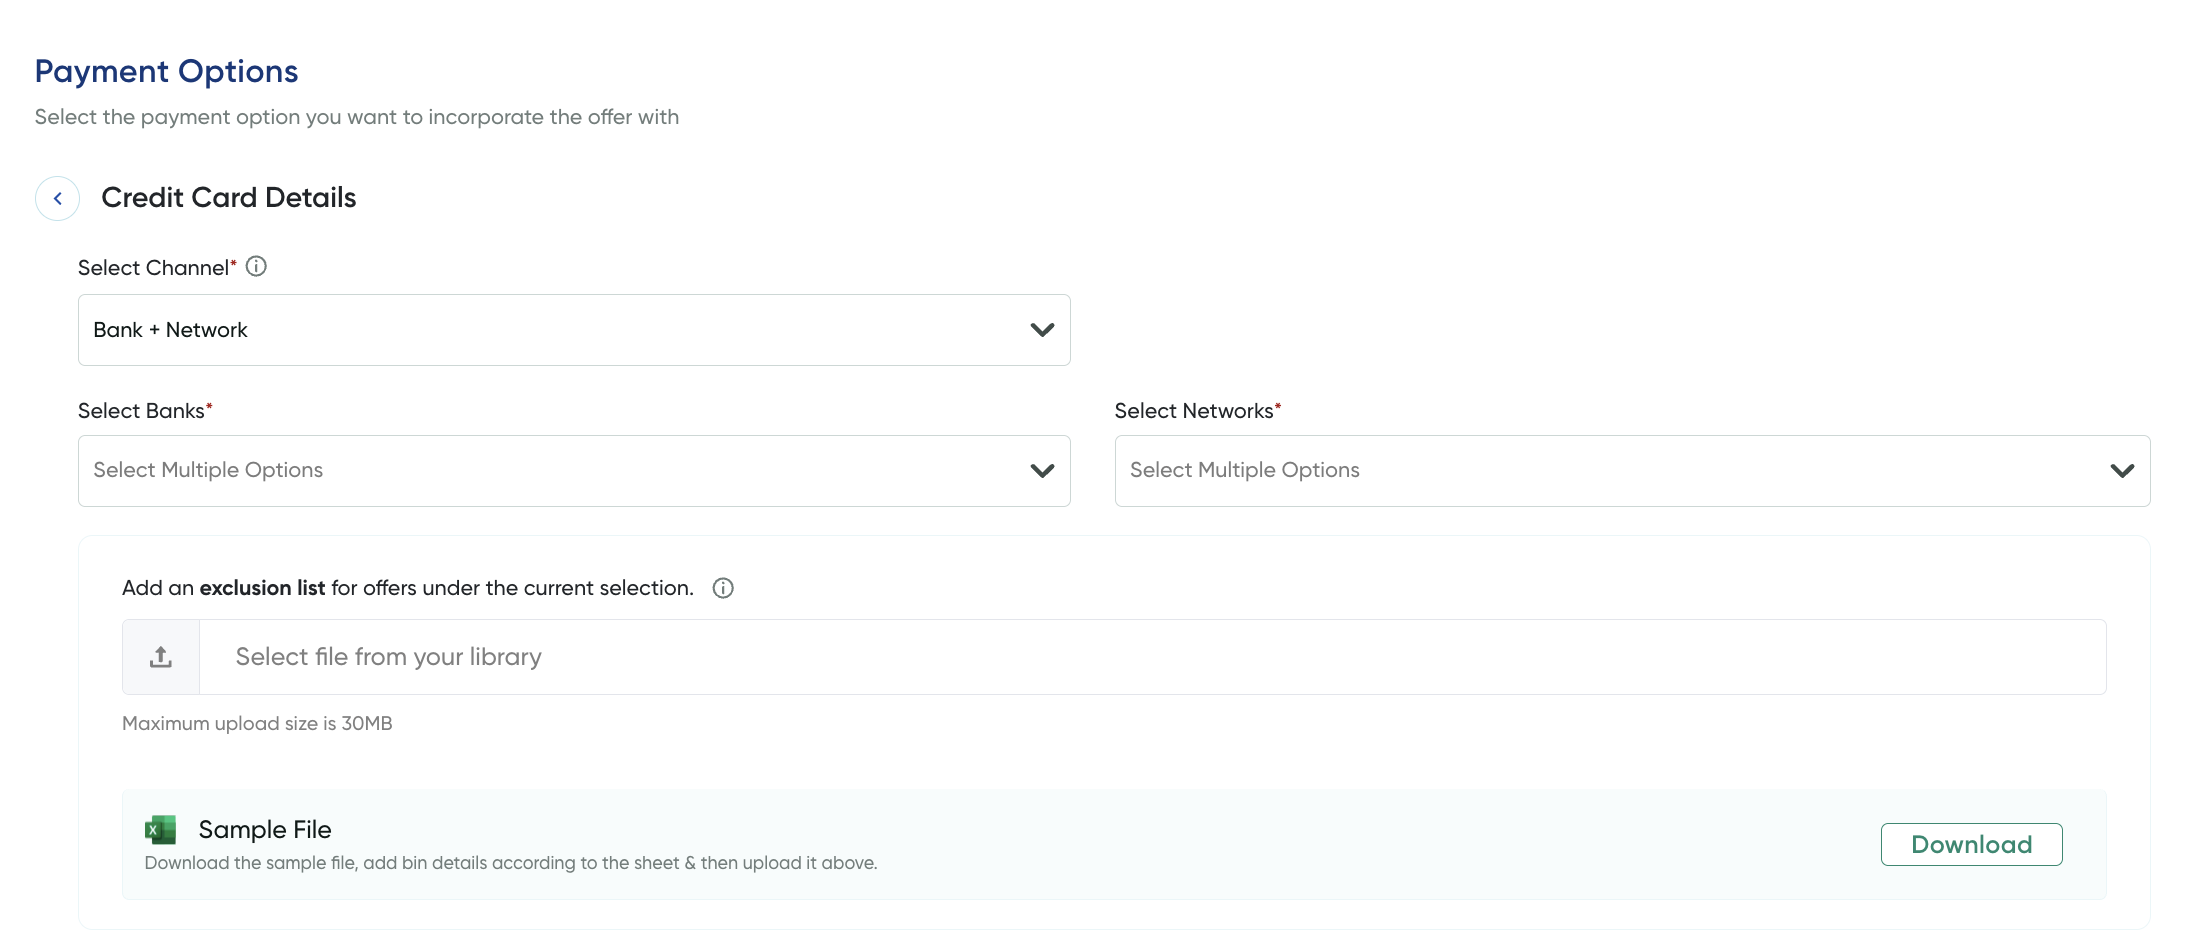
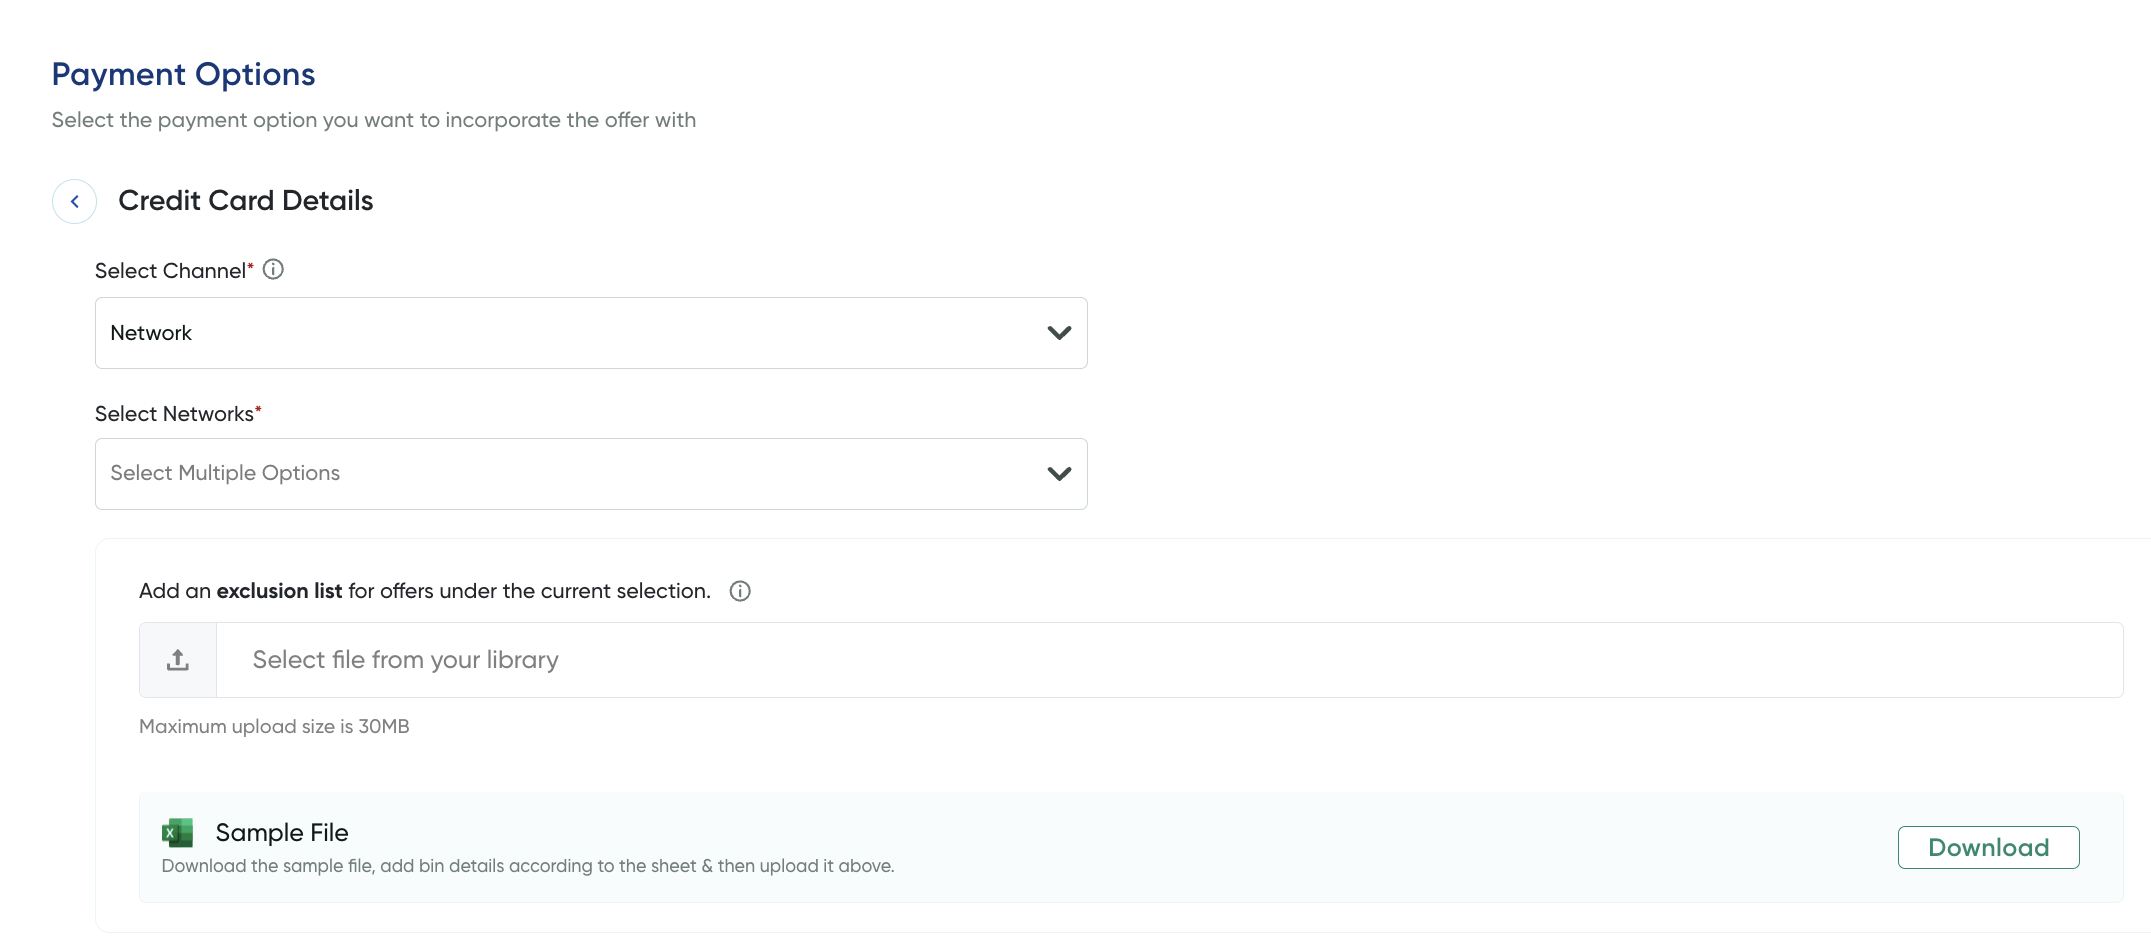
Credit Cards
- Click the Edit button on the Credit Cards.
The Credit Card Details page is displayed.
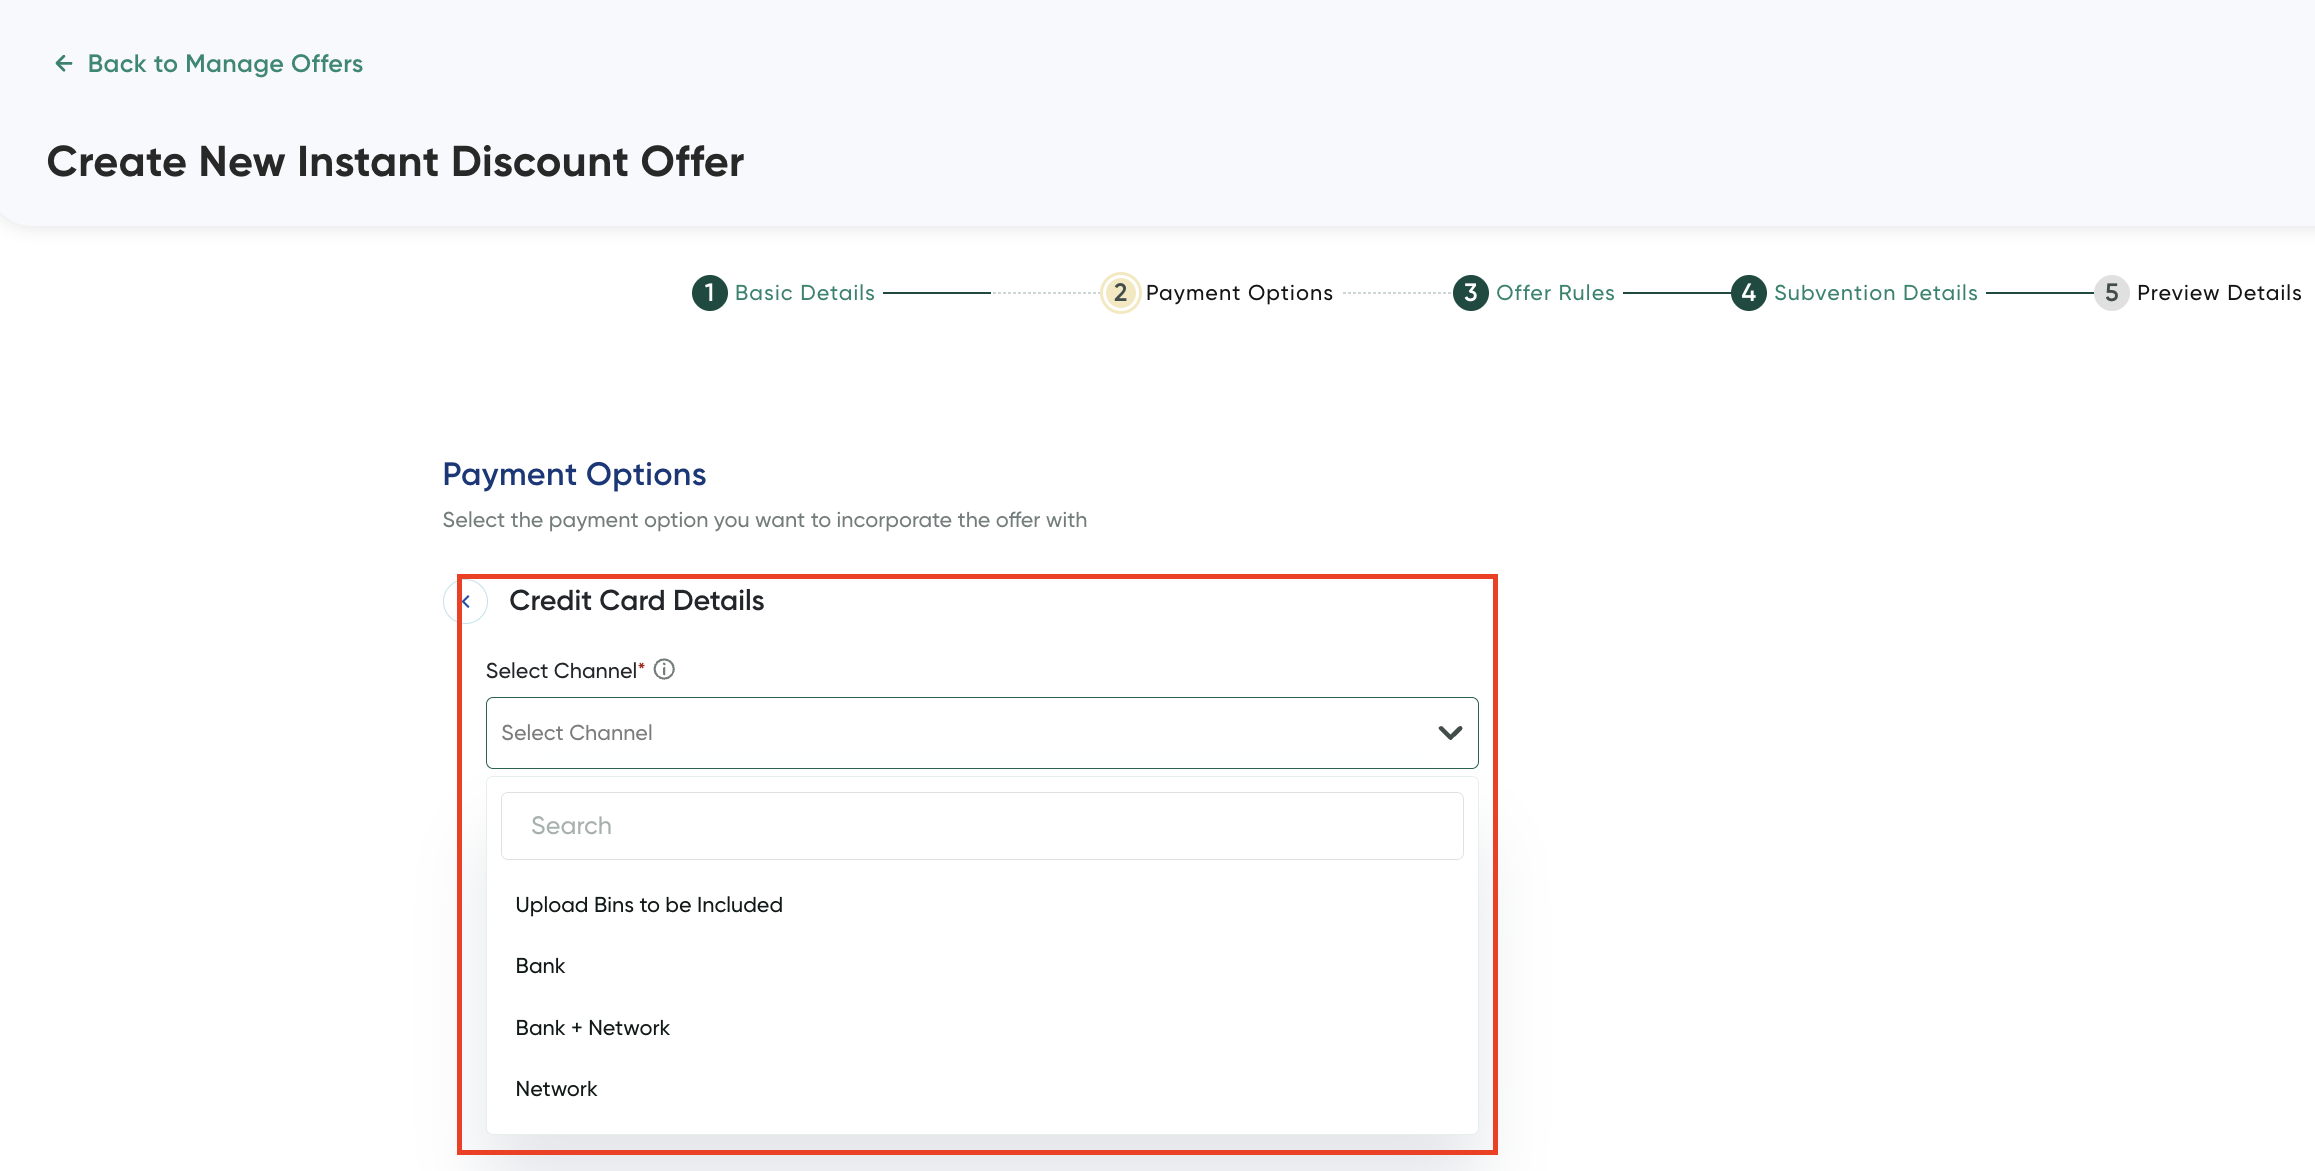
- Perform any of the following based on the method you want to select the bank and network:
| Channel | Description |
|---|---|
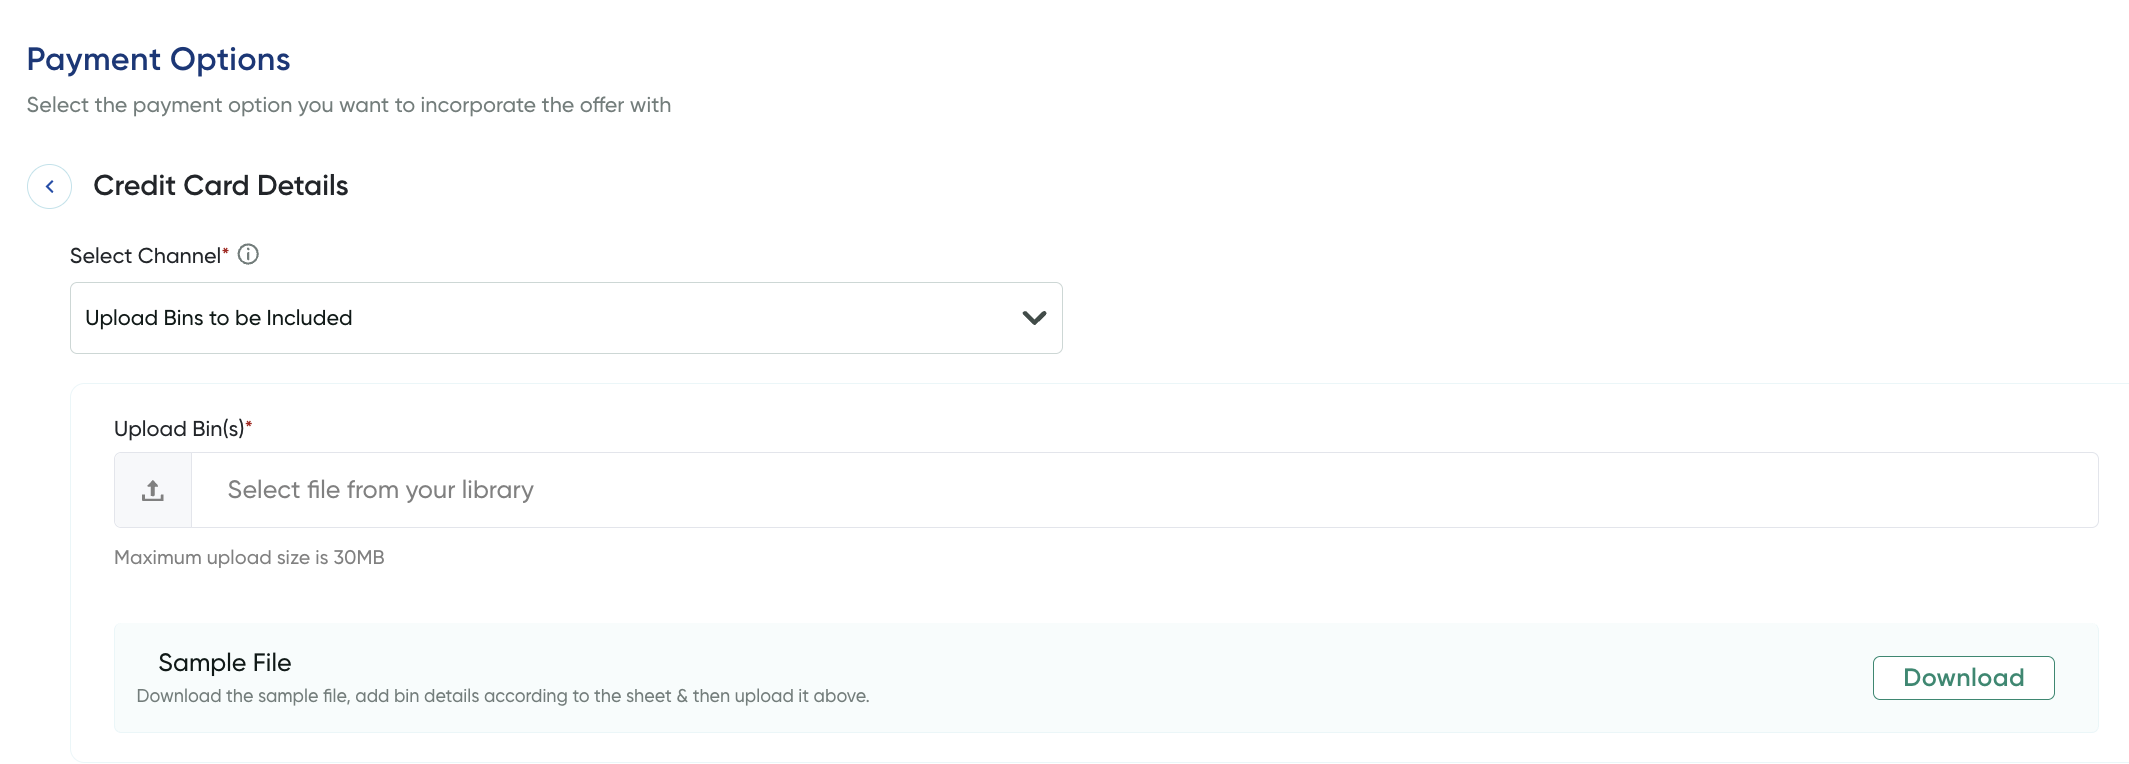
| Upload Bins to be include |
|
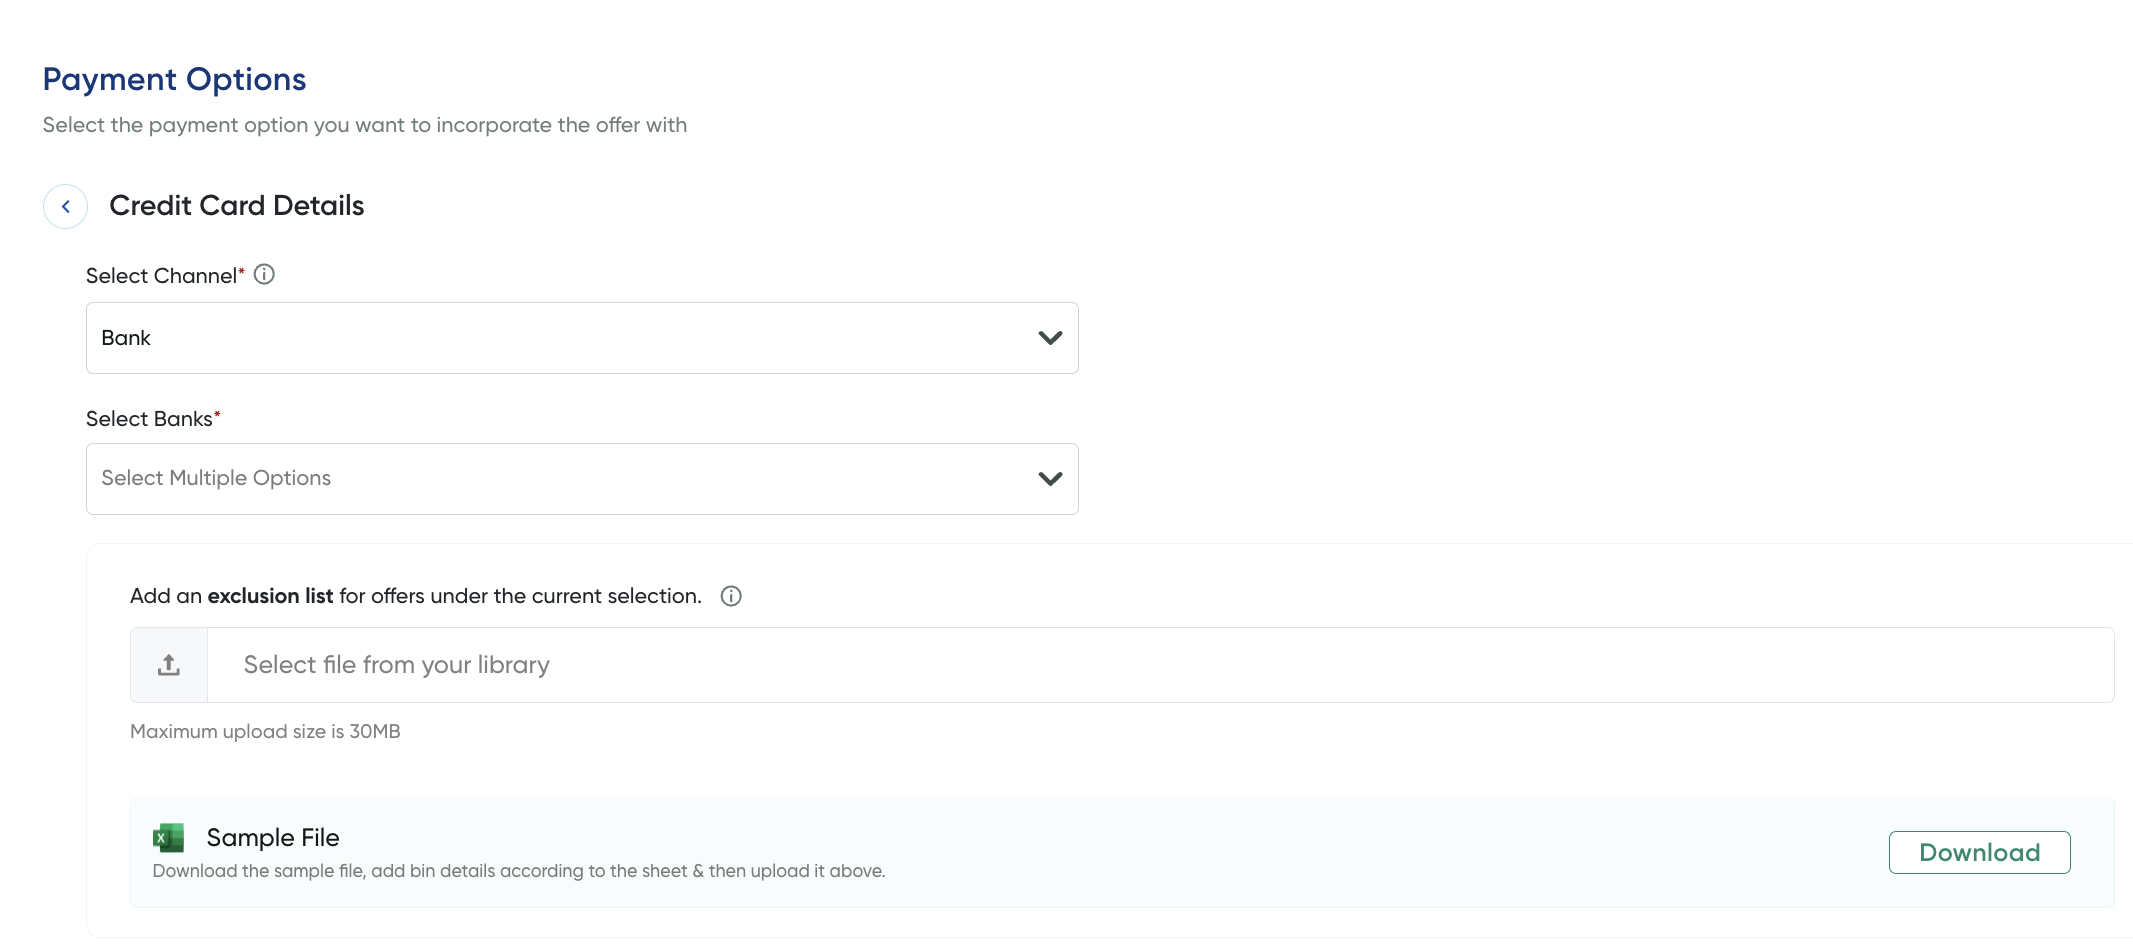
| Bank | Select the banks for which the offer is applicable from Select Banks drop-down list. Note: You can include exclusion list for offers. For the sample exclusion list file, click Download . |
| Bank + Network | - Select the banks for which the offer is applicable from Select Banks drop-down list.
|
| Network | Search and select a network from the Select Networks drop-down list.
Note: You can include exclusion list for offers. For the sample exclusion list file, click Download . |
- Click the Back button to go back to the Payment Options page.
UPI
-
Click the Edit button on the UPIs tile.
The UPI Details page is displayed.

- Select the check boxes for the UPIs you wish to enable the offer from the **Select UPI Channel **drop-down list.
- Click the Back button to go back to the payment options list.
Wallets
-
Click the Edit button on the the Wallets option.
The Select Wallets page is displayed.
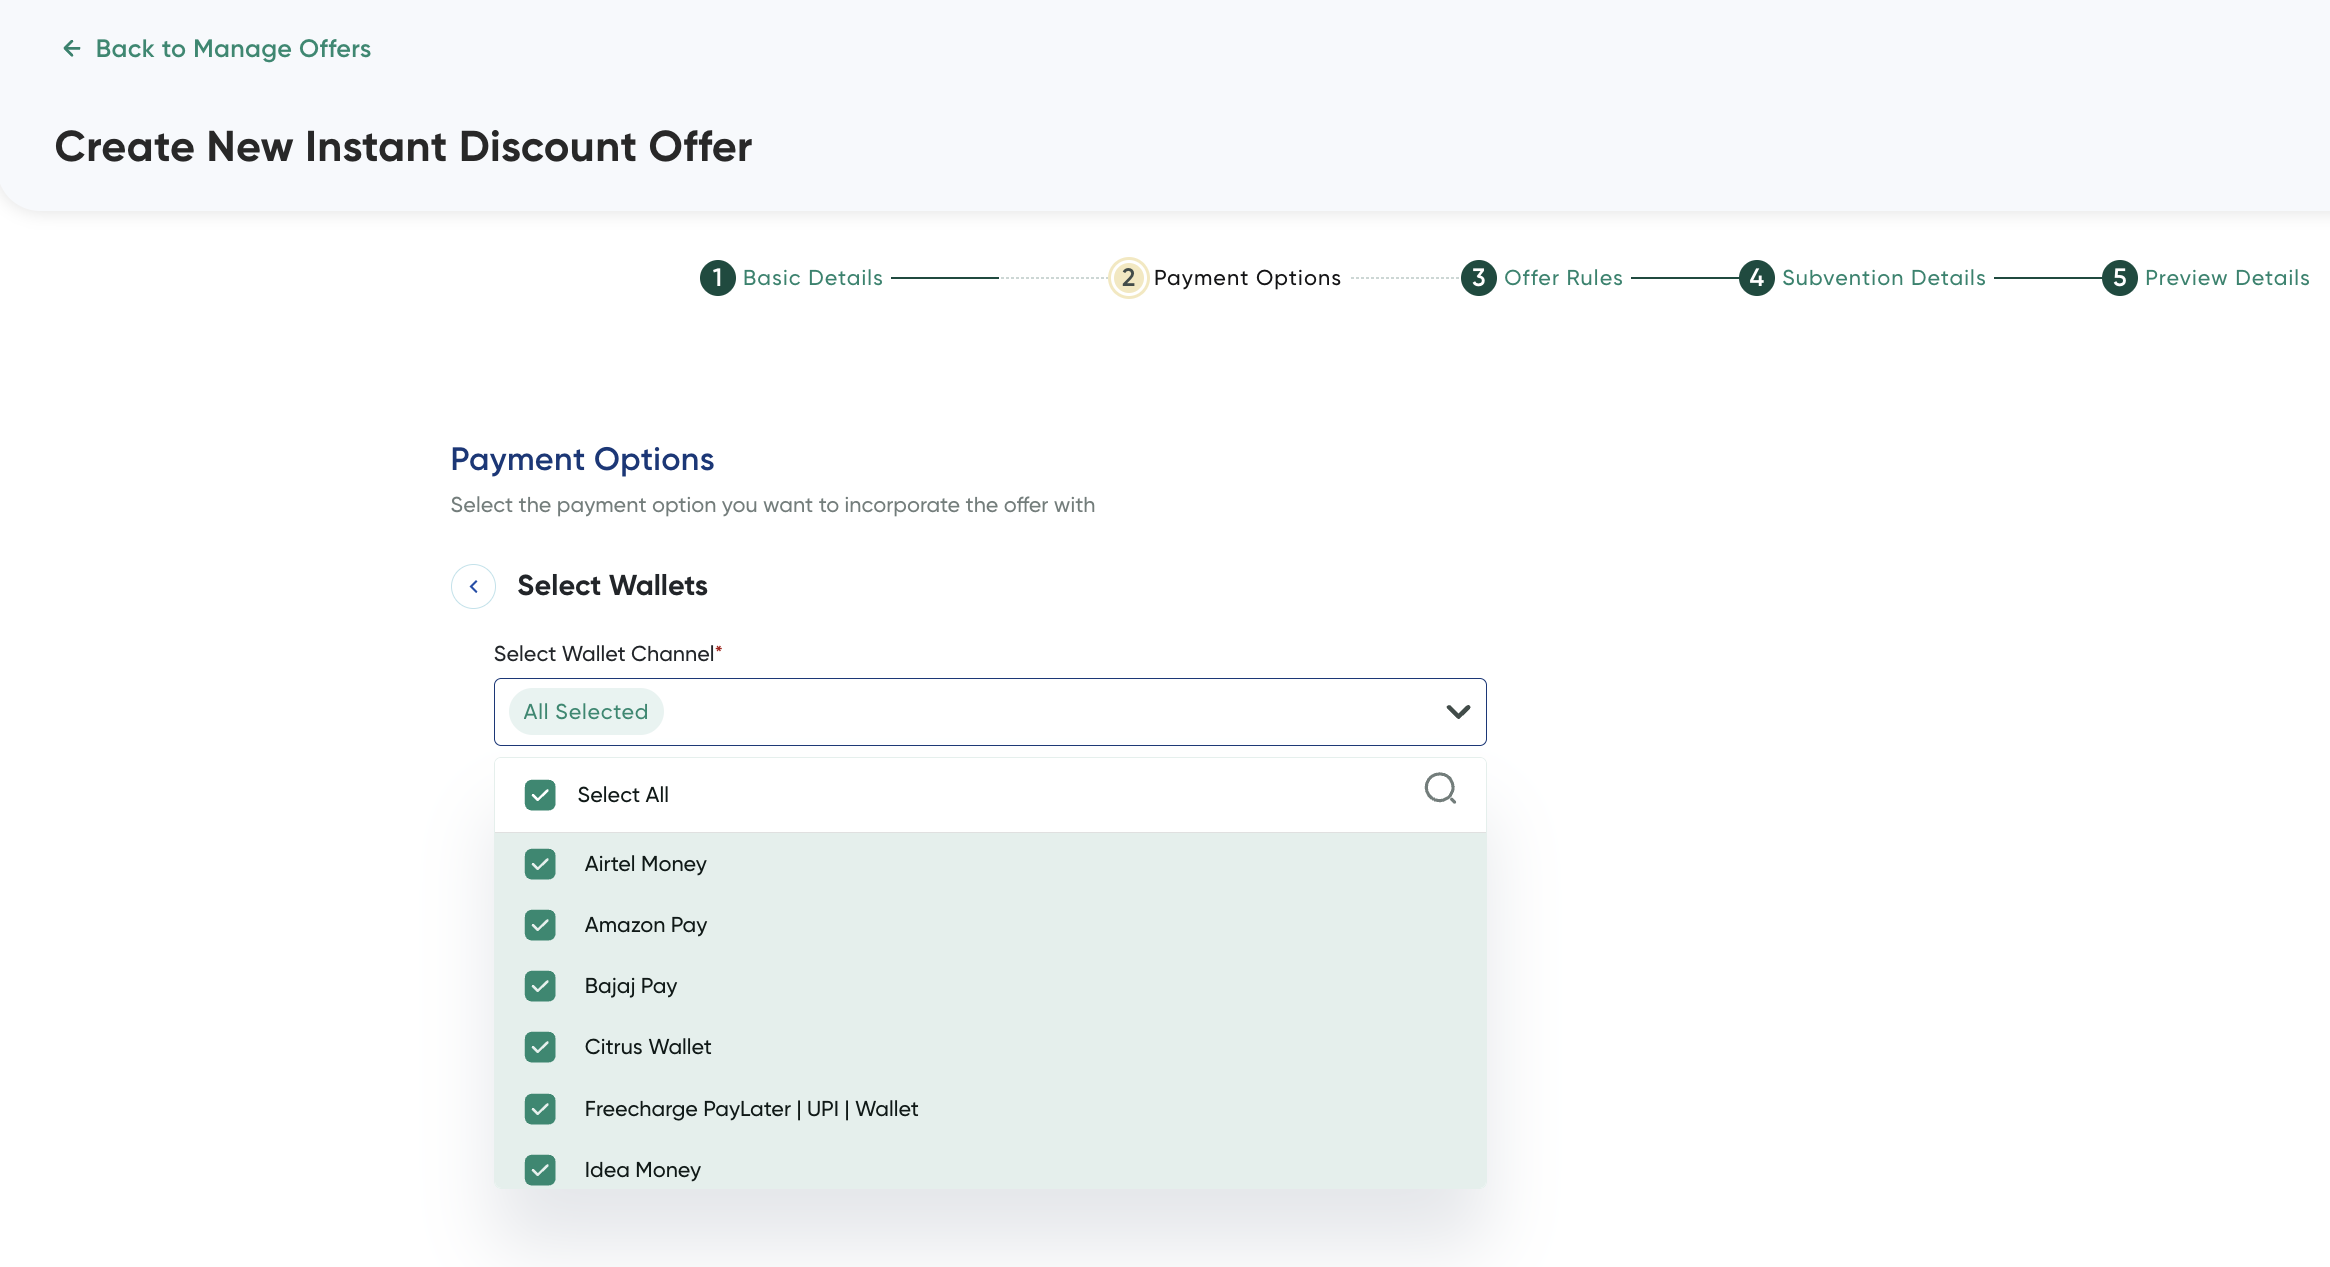
- Select the check boxes for the wallets you wish to enable the offer.
- Click the Back button to return to the Payment Options page.
EMI
-
Click the Edit button on the the EMI option.
The EMI Offer page is displayed.
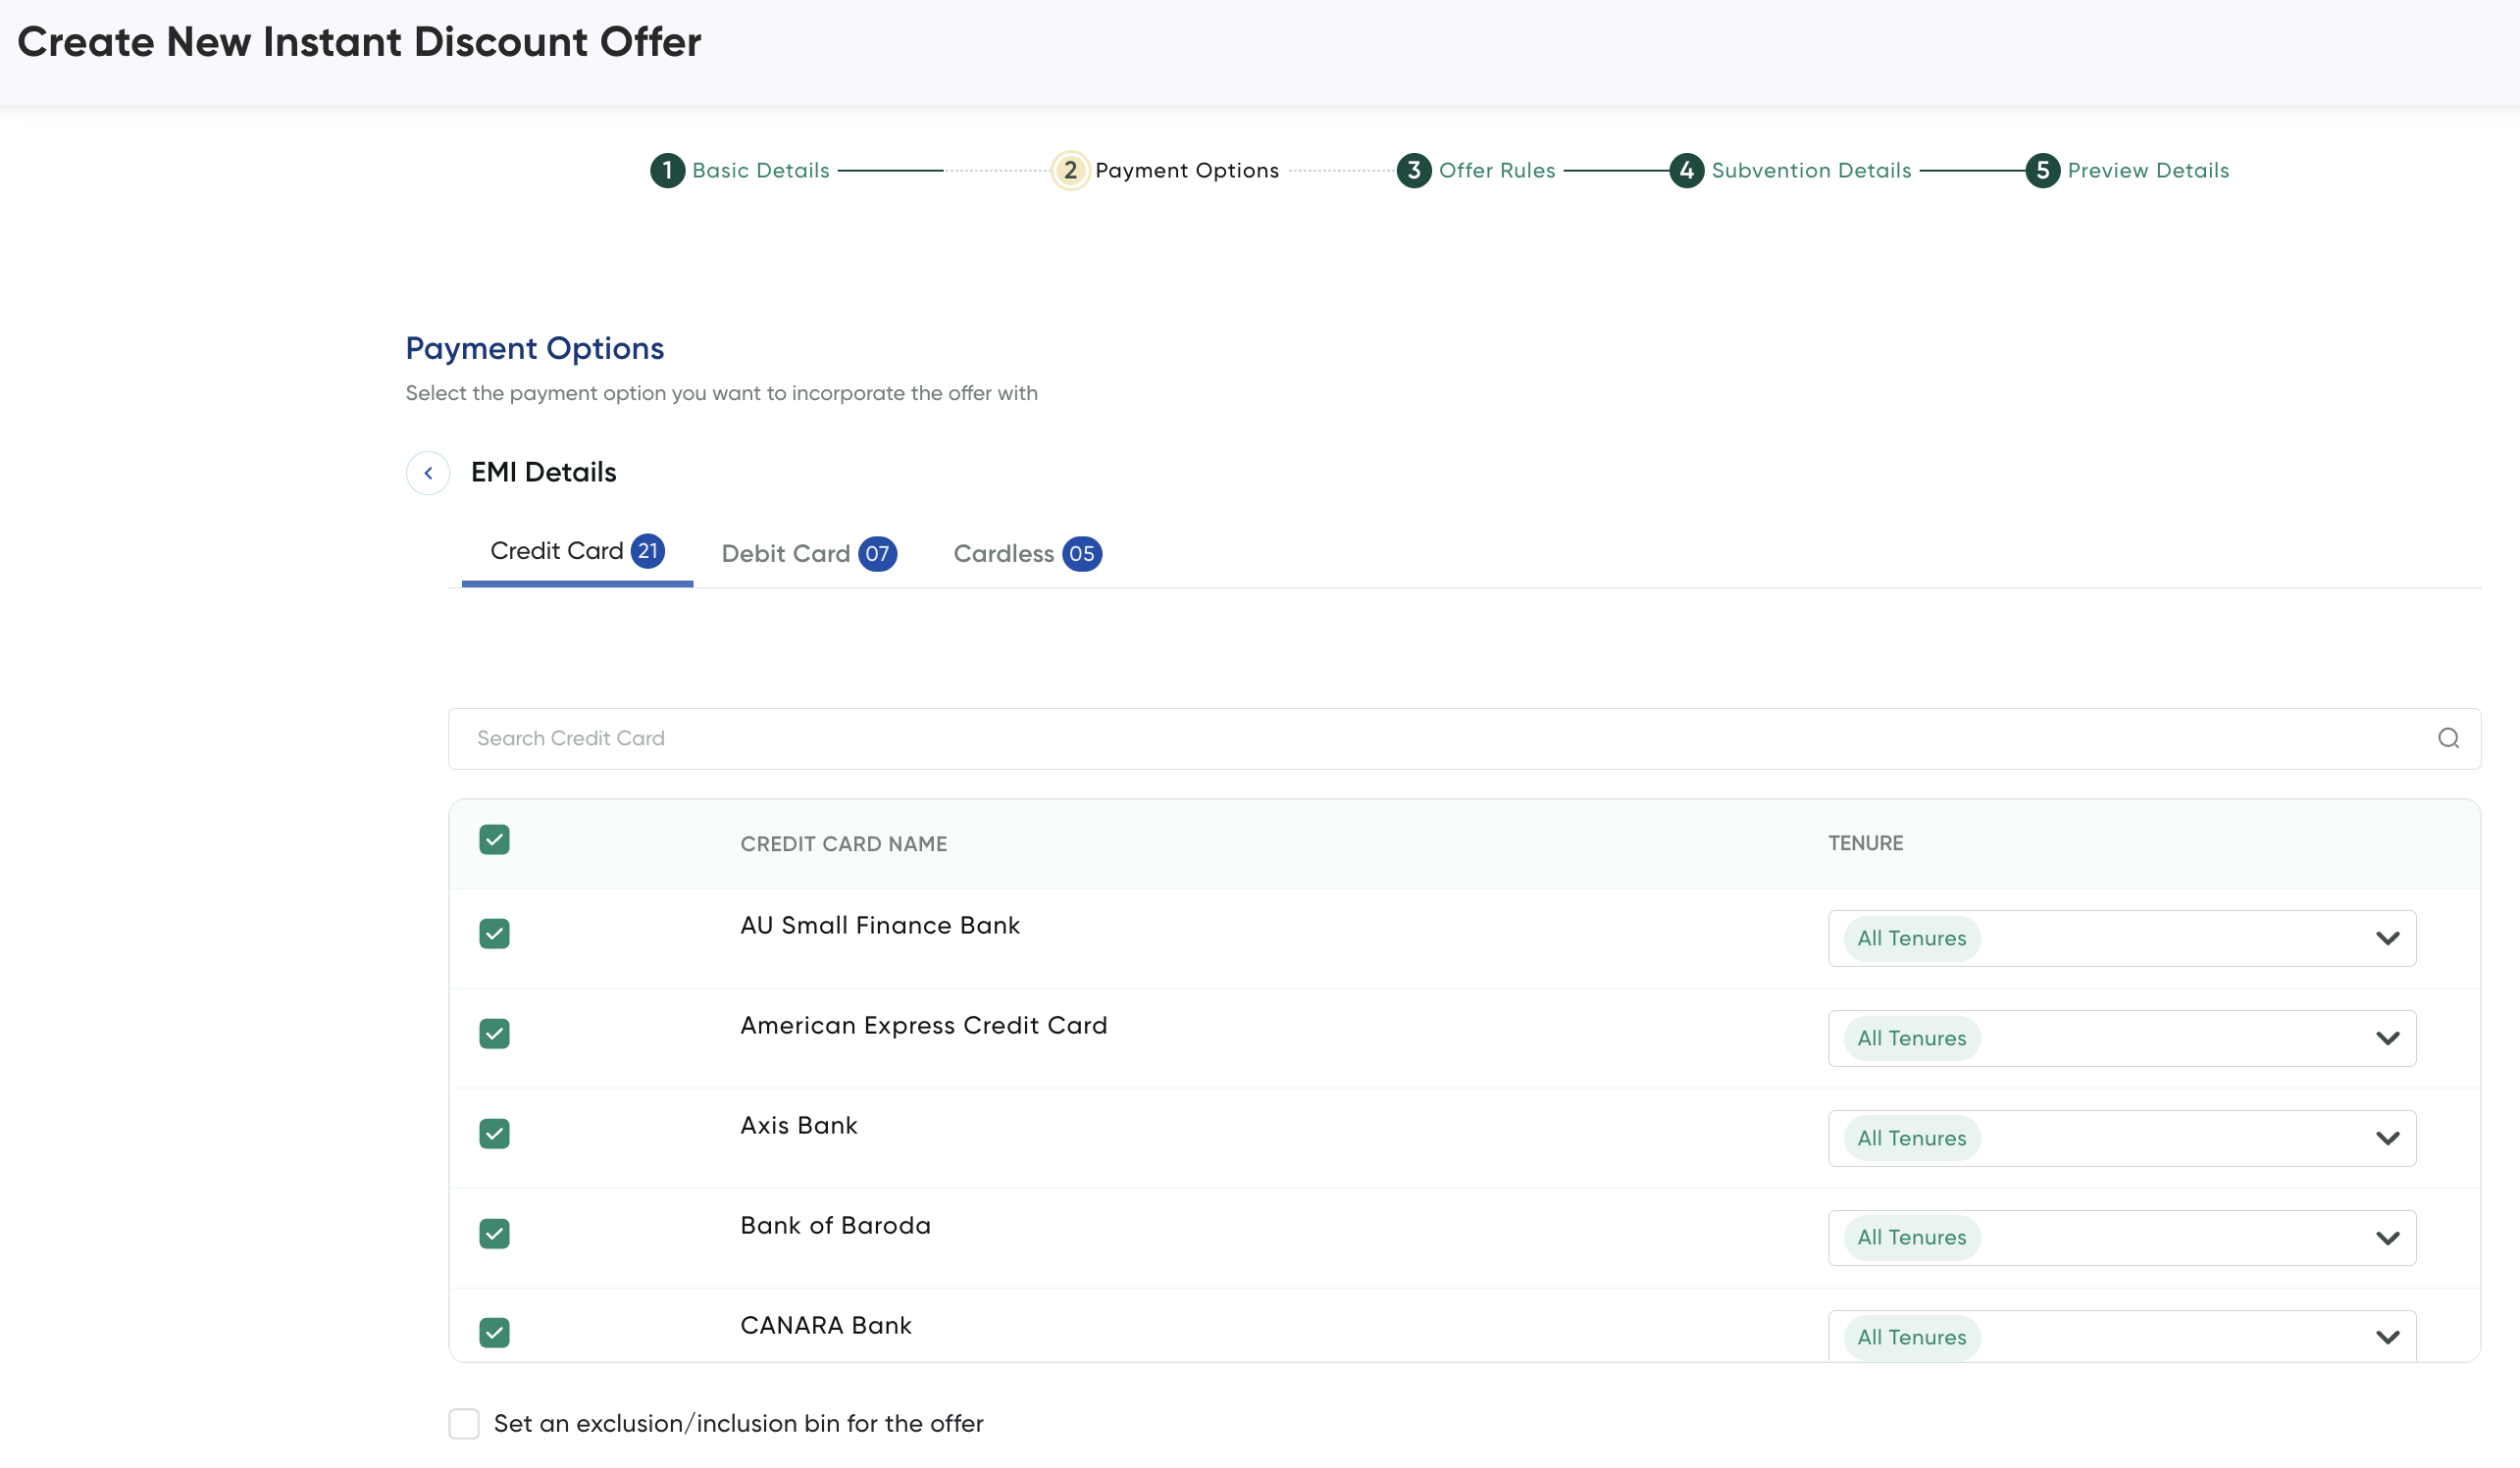
- For each of the following sub tabs, select the desired item on first column and Tenures column on which you wish to enable the offer. You can select all tenures of a specific bank and choose specific tenures for each bank.
- Credit Card
- Debit Card
- Cardless
- Select the Set an exclusion/inclusion bin for the offer check box to include/exclude the offer on a select list of BINs on the banks that were selected in Step 2 using the following steps in each Exclusion Bin and Inclusion Bin sub tabs:
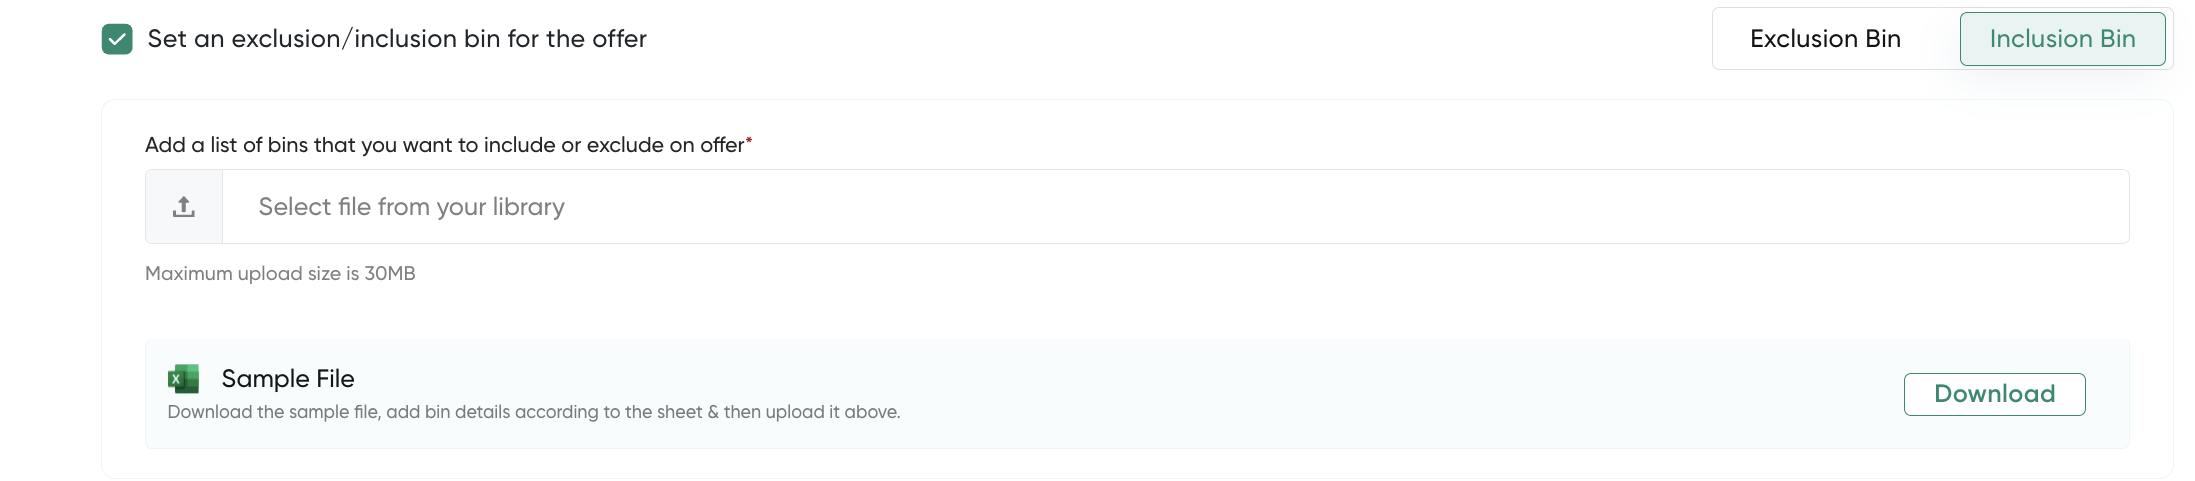
- Click Download Sample File if you are not having the sample file or CSV file template. The CSV file contains some sample BIN numbers (first 6 digits of Debit Card or Credit Cards), which you need to update according to your requirements.
- Update the CSV or text file to include the BIN details. For updating the CSV file, you can use Microsoft Excel or any other Spreadsheet tool.
- Click the browse button in the Add a list of bins that you want to include or exclude on offer to upload the updated CSV file.
- Click the Back button to go to Payment Options page.
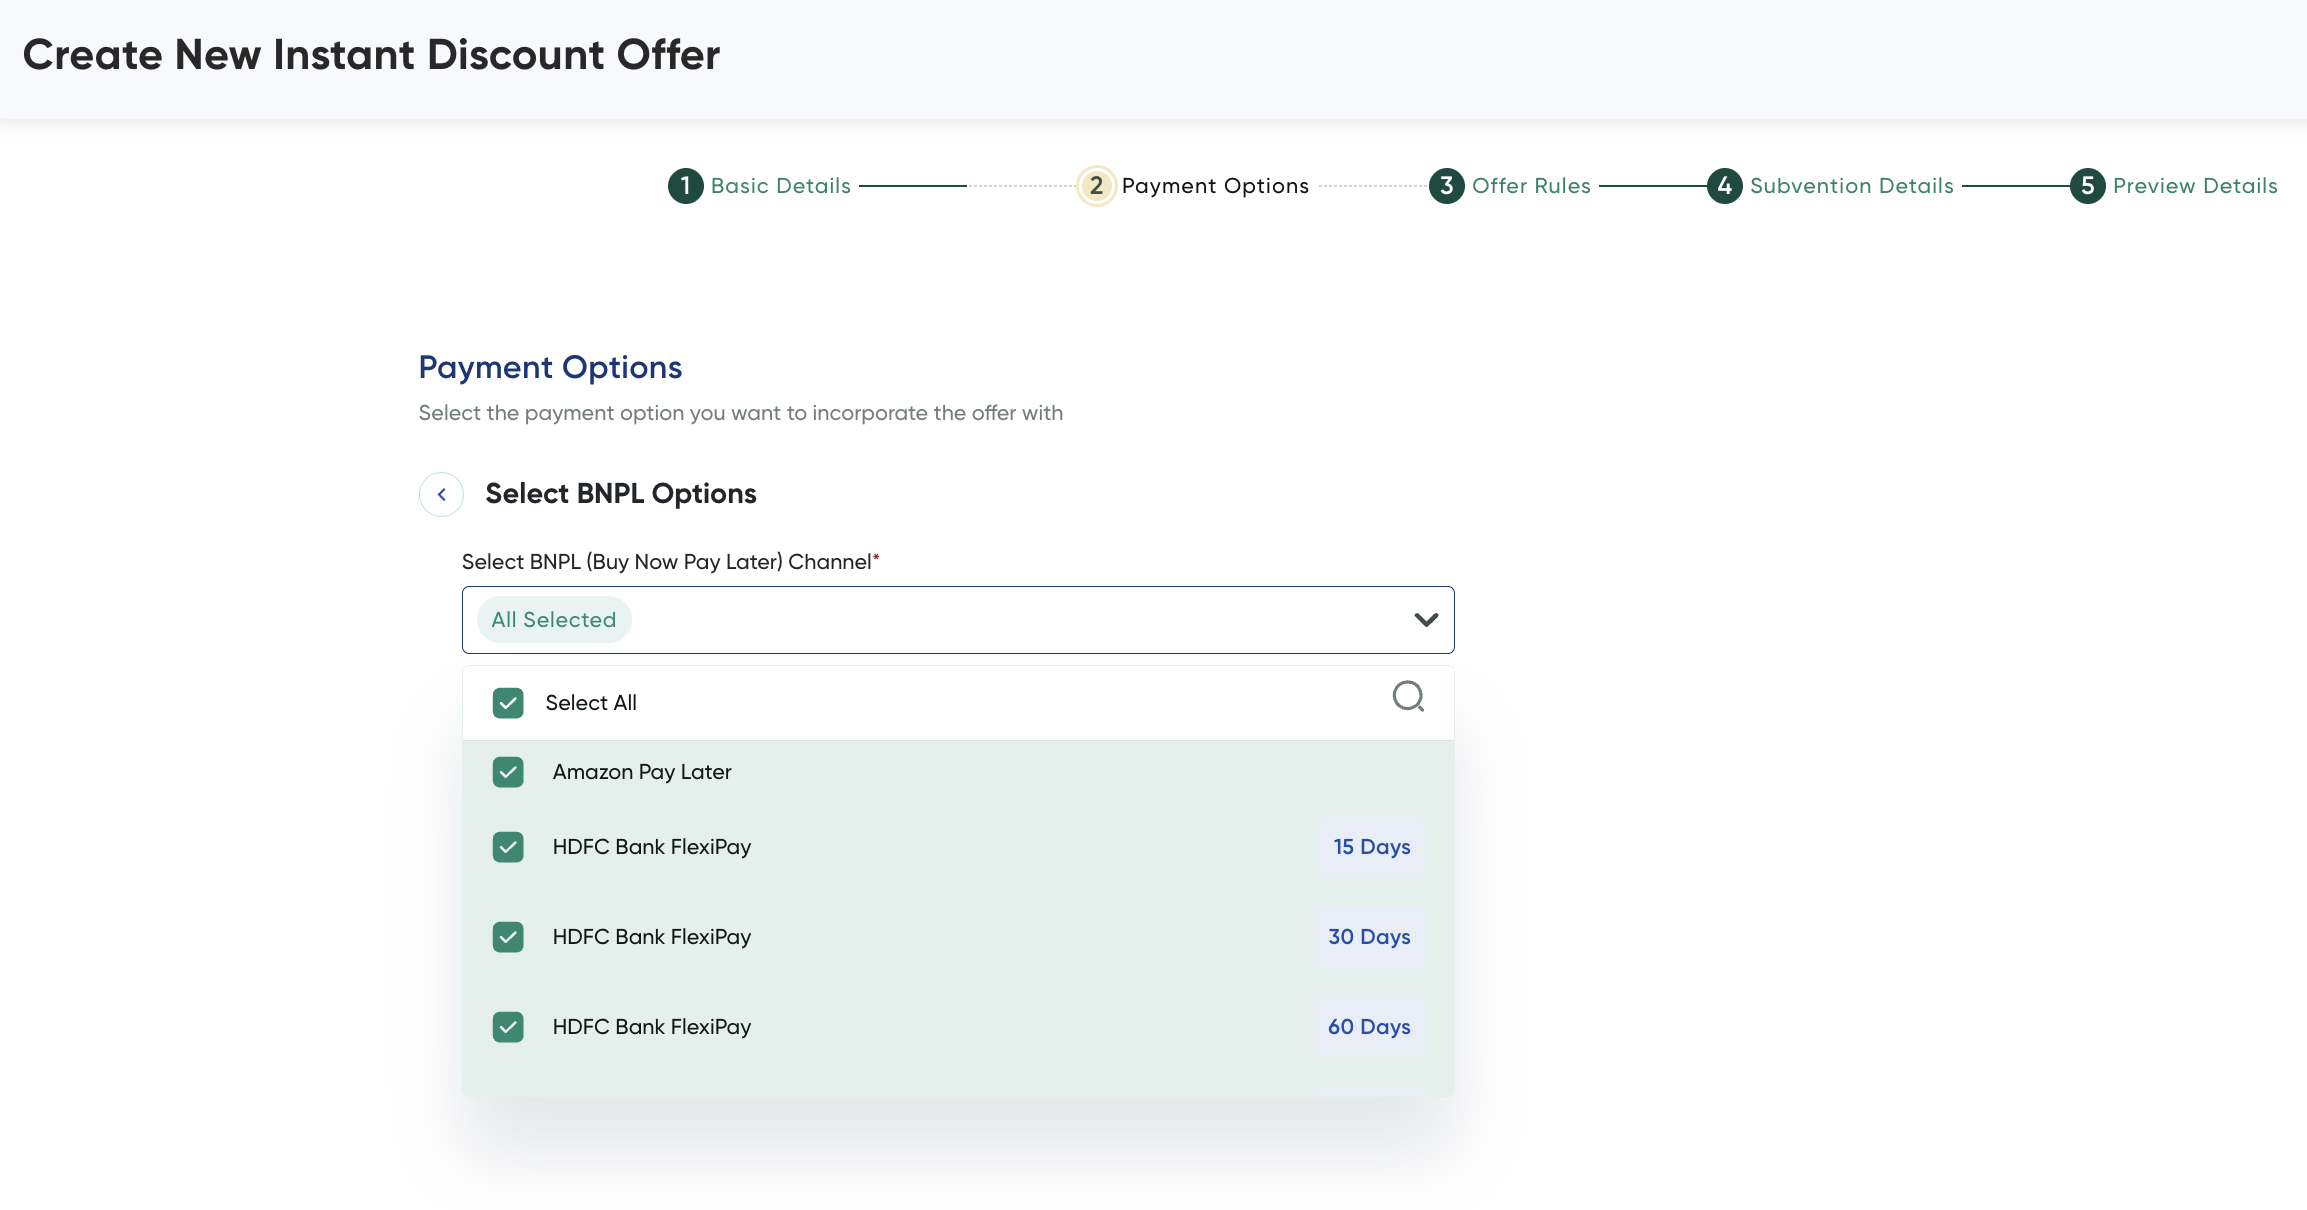
BNPL
Select the BNPL option on the Setup Payment options of your offer page.
The Select BNPL Options page is displayed.
After you complete adding any one or combination of the offers involving various payment options, click Next.
References:
- No-Cost EMI offers can be created on Credit and Debit Card EMIs. For more information, refer to Create a No-Cost EMI Offer.
- Low-Cost EMI offers can create on Credit and Debit Card EMIs. For more information, refer to Create a Low-Cost EMI Offer.
The offer for the payment options you configured gets added to the Setup Payment options of your offer page.
- Select the applicable payment options and click Next.
The Offer Rules page is displayed.
Note:When you are creating an offer, you can choose to save the incomplete offer details in the Draft state using the Save as Draft & Exit button at the top-right corner and publish it later.
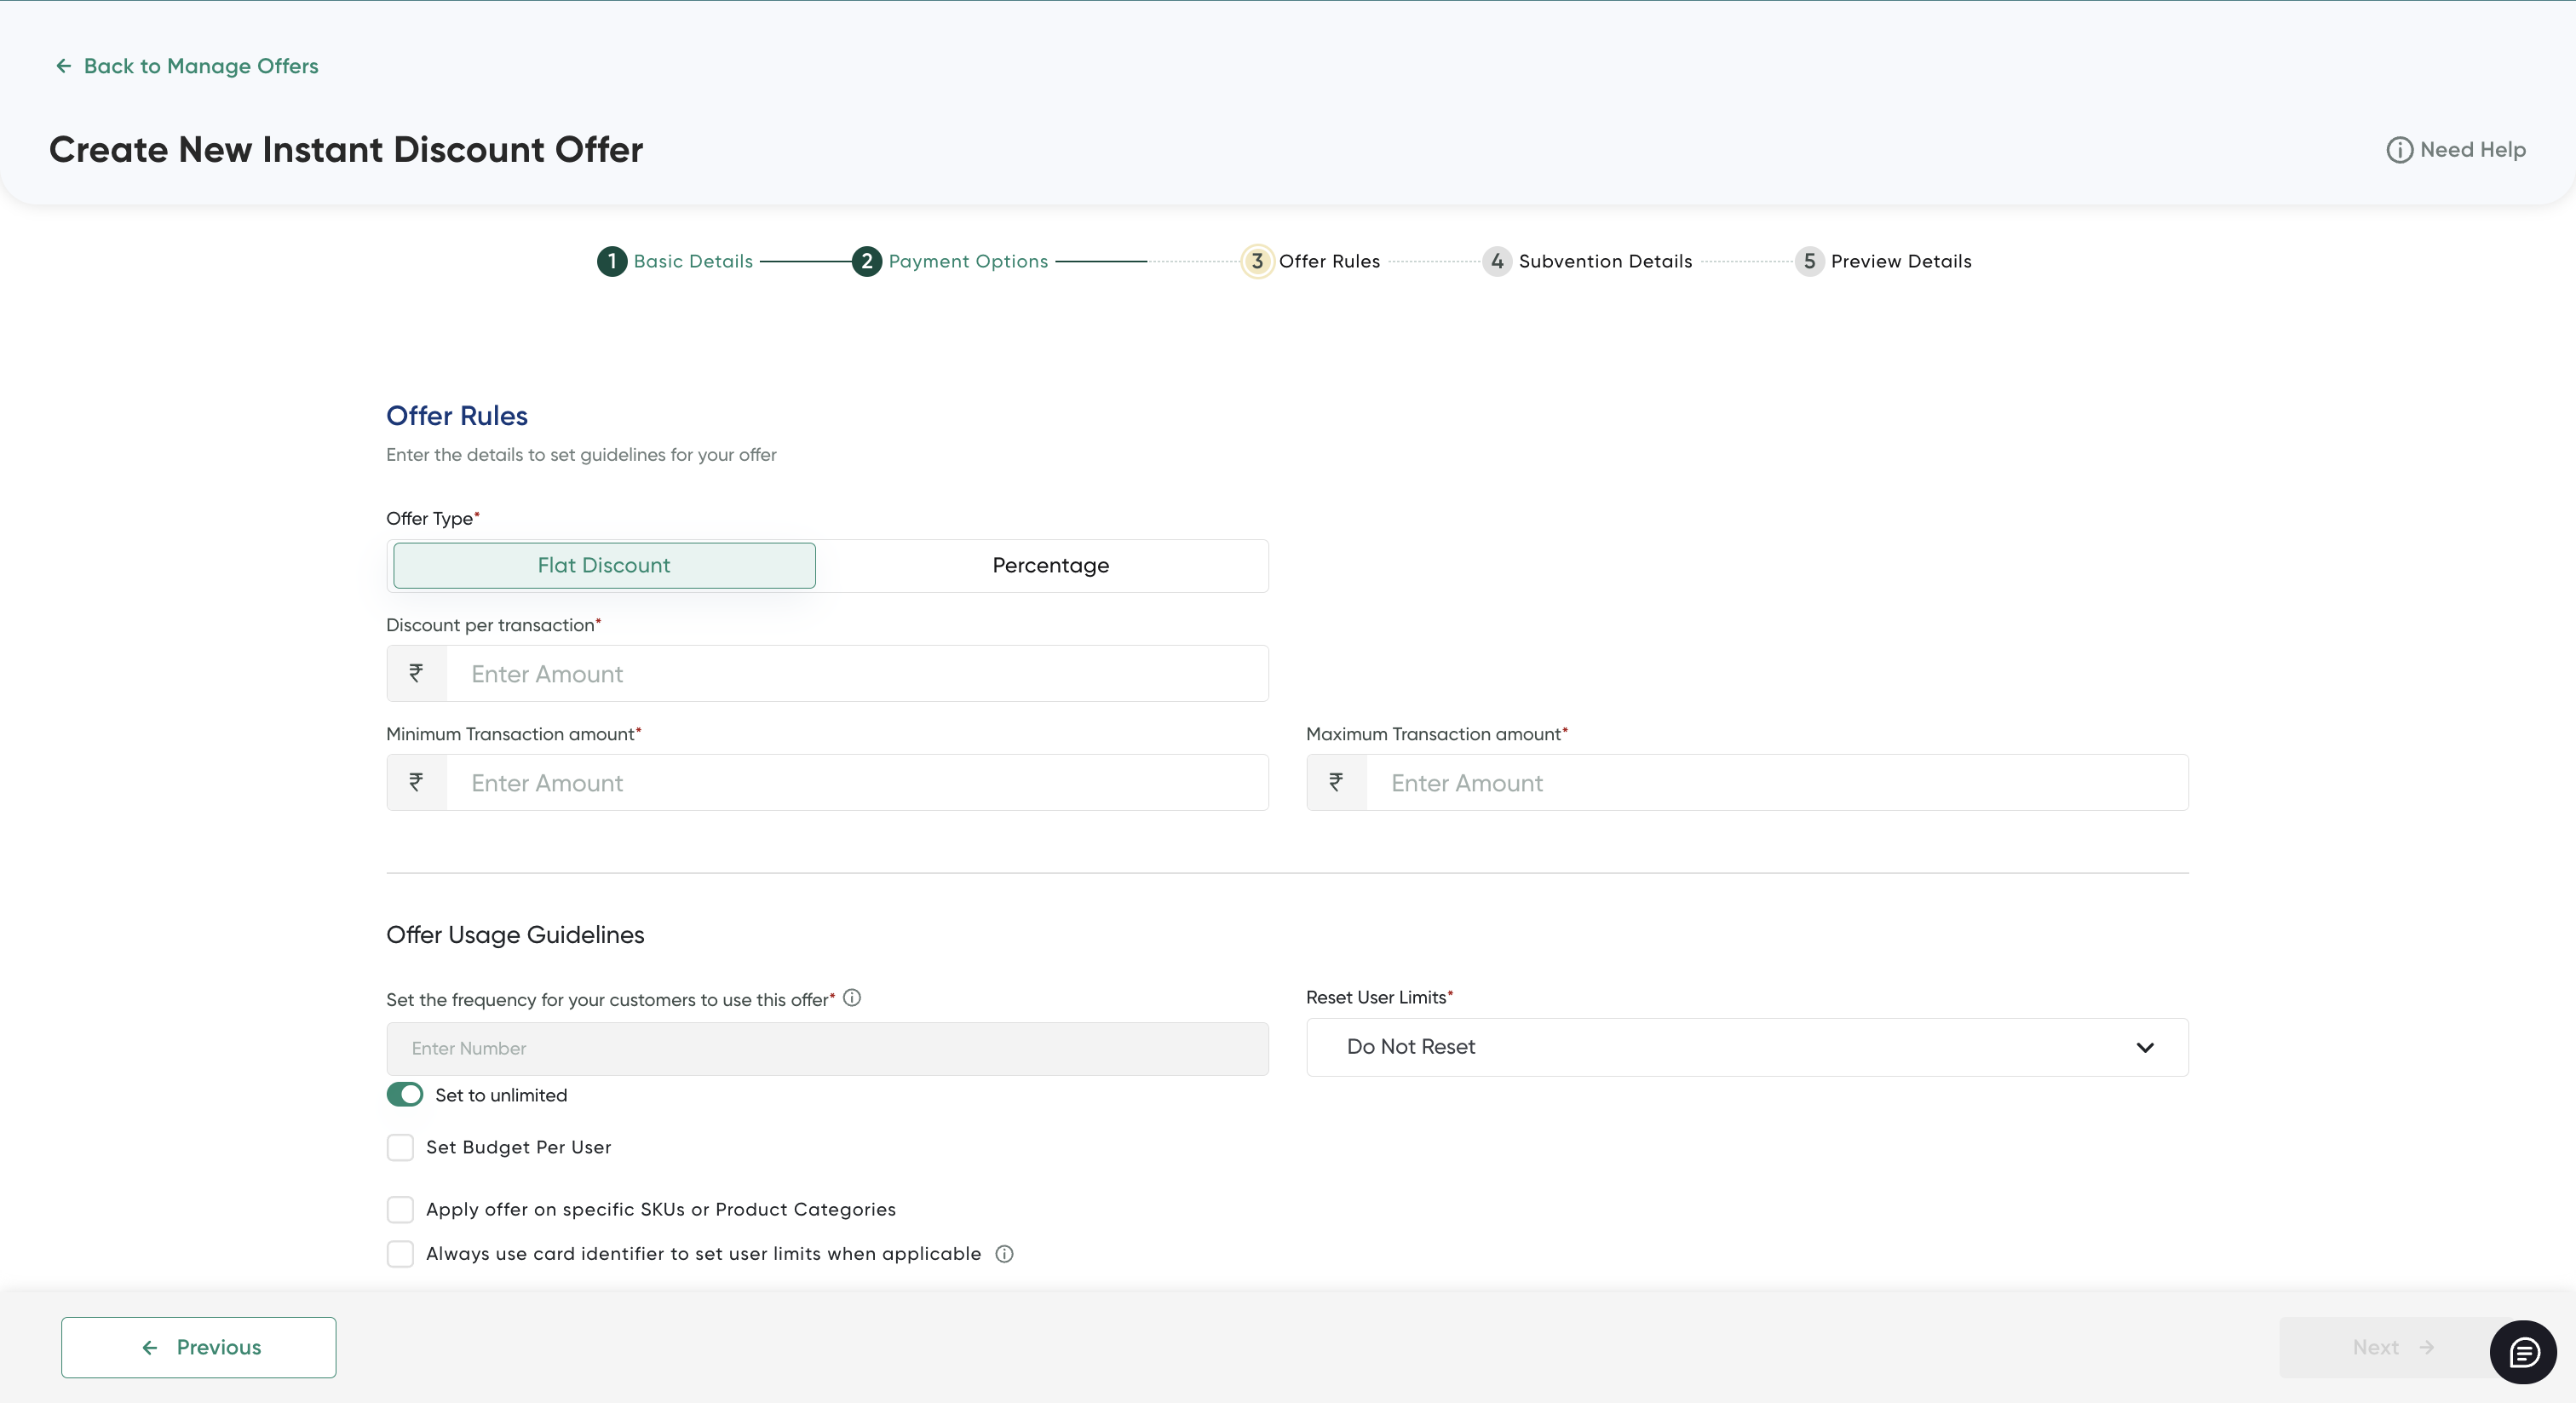
Step 3: Include the Offer rules
- Select the Flat Discount or Percentage tab to specify the discount is in terms of a flat discount or percentage of the transaction amount.
- Enter the following details on the Set Offer Rules page.
| Field | Description |
|---|---|
| Discount per transaction/Offer Percentage | Specify the value that has to applied in in terms of discount or discount in flat. |
| Minimum transaction amount & Maximum transaction amount | Specify the threshold or range for a transaction to be applicable for the offer. |
Offer Usage Guidelines
| Field | Description |
|---|---|
| User Limits | |
| Set the frequency for your customers to use this offer | Select any of the following options from the drop-down list to specify the maximum number of transactions the user can avail this offer:
|
| Set Budget per user | Click this toggle button (if required) and then enter the budget amount per user. |
| Reset User Limits | Select any of the following options from the drop-down list to reset the user limit for specified frequency:
|
- After you complete the above details and click Next.
The Set Offer Subvention Details page is displayed.
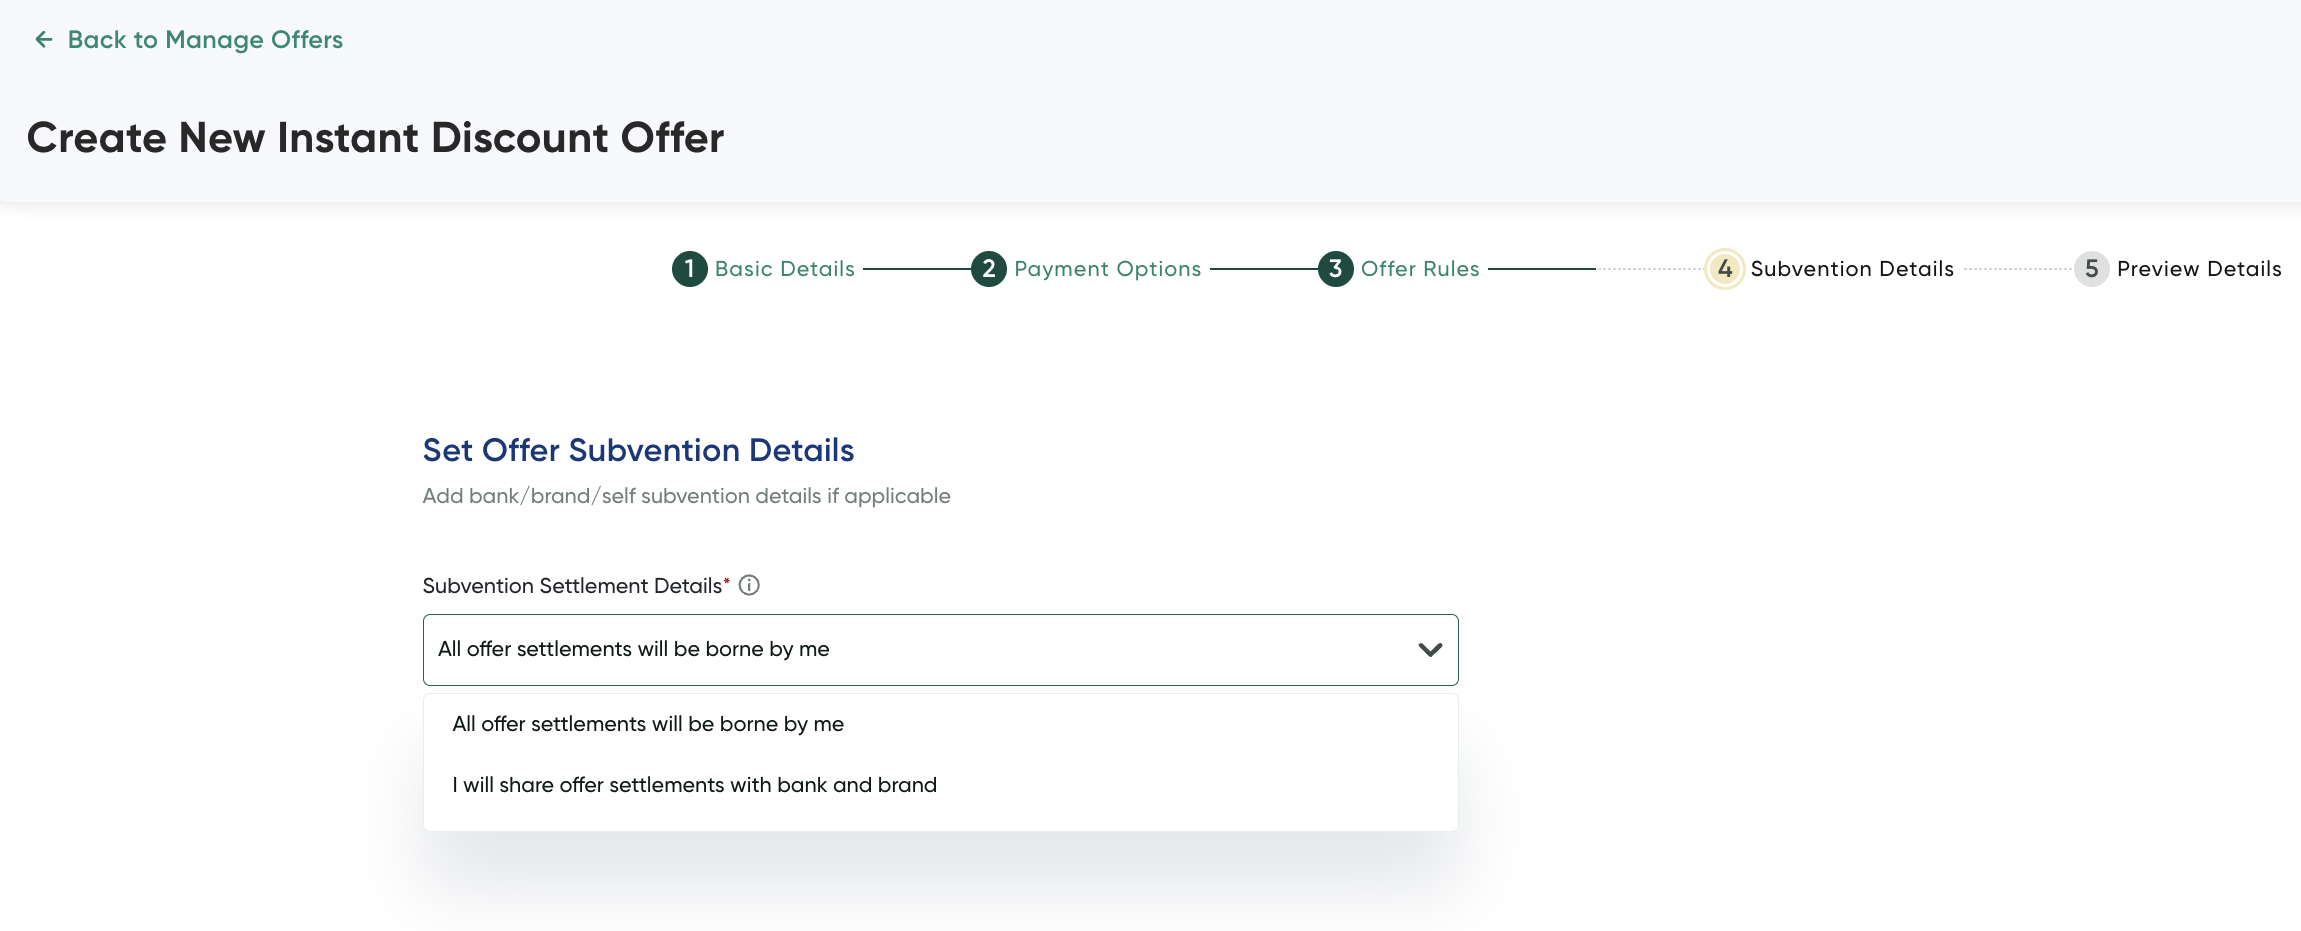
Step 4: Configure Offer Subvention Details
-
Select any of the following options from the Set Offer Subvention Details drop-down list.
- All offer settlements will be borne by me: Choose this option if you want to make the cashback settlements by yourself to the customer.
- I will share offer settlements with bank and brand: Choose this option if you want to make the cashback settlements to bank or brand.
-
After you complete the above details and click Next.
The Preview Details page is displayed.
Step 5: Review of the Offer
The Preview of Cashback Offer page summarizes the details you provided in Step 2 to Step 4.
- Review all the configurations added before you make the offer available to your customers.
- Click the Edit button in the relevant areas return back to the corresponding page and update the configuration.
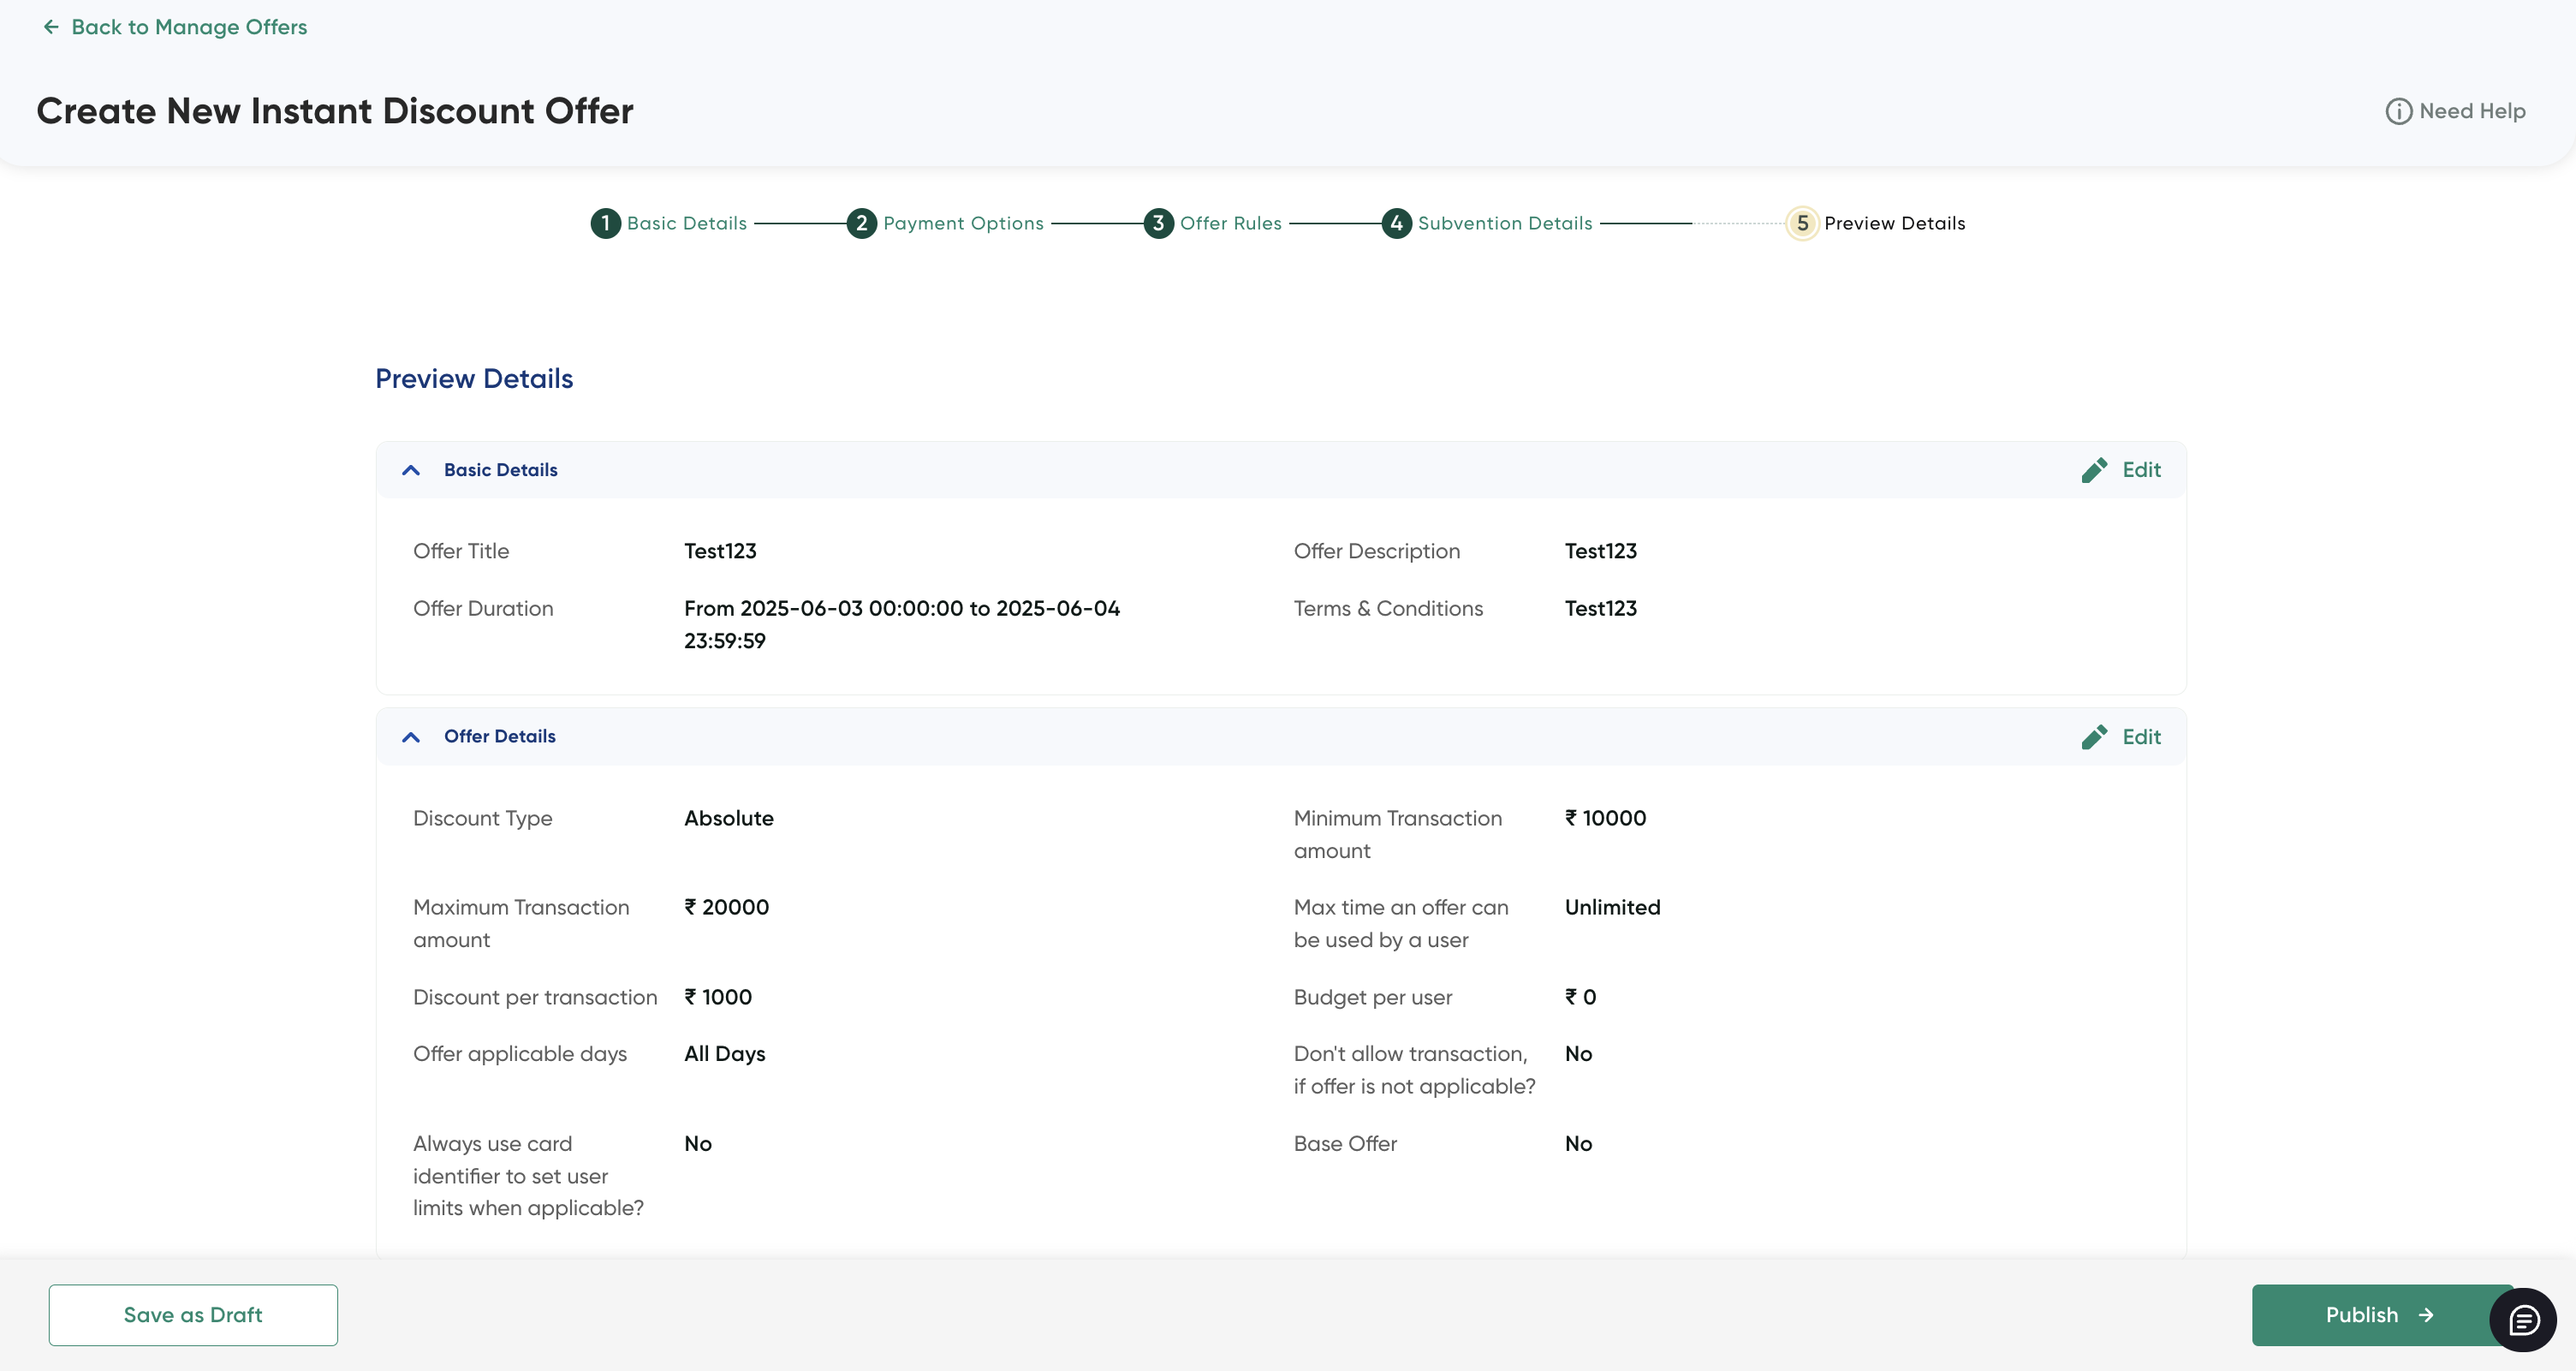
- Click Publish to make it available to customers.
Updated 3 days ago