Launch a Loyalty Program using Dashboard
The Loyalty Rewards on Dashboard provides you with comprehensive tools to manage and analyse your loyalty programs, featuring key components like summary views, graphical representations, and detailed reports. It facilitates configurable settings, and easy navigation to boost customer engagement and optimize loyalty strategies. These settings help you easily configure the PayU Checkout page with PayU Hosted Checkout integration.
Enable Loyalty Edge:
Refer to Enable Loyalty Edge to enable Loyalty Edge. If you are not able to see it on Dashboard, contact you PayU Key Account Manager (KAM) or raise a ticket with PayU Support.
The Loyalty Rewards on PayU Dashboard provides the following features:
- General:
- Highlights the potential benefits for merchants, such as increasing Average Revenue Per User (ARPU) and Customer Lifetime Value (CLTV).
- A call-to-action (CTA) button available to guide merchants through the initial setup of their loyalty program.
- Displays Gross Merchandise Value (GMV) associated with loyalty points, total points issued, and details on redemption transactions.
- Highlights the number of customers who used points, new customers earning points for the first time, and the overall redemption rate.
- Graphical Representation: Provides a visual breakdown of redeemed and earned points on a day-to-day basis, enabling easy analysis and tracking of trends.
- Loyalty Activity: Offers the ability to filter or search loyalty activities based on user phone numbers, arranged in a paginated list. Displays detailed information such as transaction dates, event types (earn or redemption), and available loyalty points.
- Burn Rule Display: Displays a card with the current active burn rule, including the conversion ratio. Also,. provides option for you to edit and update the burn rule as needed.
- Loyalty Settings:: You can configure settings related to point expiry, customer limits for earning and redemption, and notifications for various loyalty events.
Steps to launch a loyalty program using PayU Dashboard:
Step 1. Setup Loyalty
The Set-up Loyalty page is designed to help you configure the loyalty programs by setting up how points are branded, and redeemed. It includes options for defining point naming, branding visuals, redemption rules, and allowing for a tailored loyalty experience that aligns with the merchant's brand and objectives.
Reference:
After you complete the setting up a loyalty, you can start creating campaigns. For more information, refer to Create a New Campaign.
To set up loyalty:
-
Log In to PayU Dashboard
-
Select Loyalty and Offers Suite> Loyalty on the navigation pane.
The Loyalty page with Loyalty Campaigns tab is displayed.
-
Click Edit Loyalty at the top-right corner of the Loyalty Campaigns tab.
A confirmation message is displayed similar to the following screenshot:
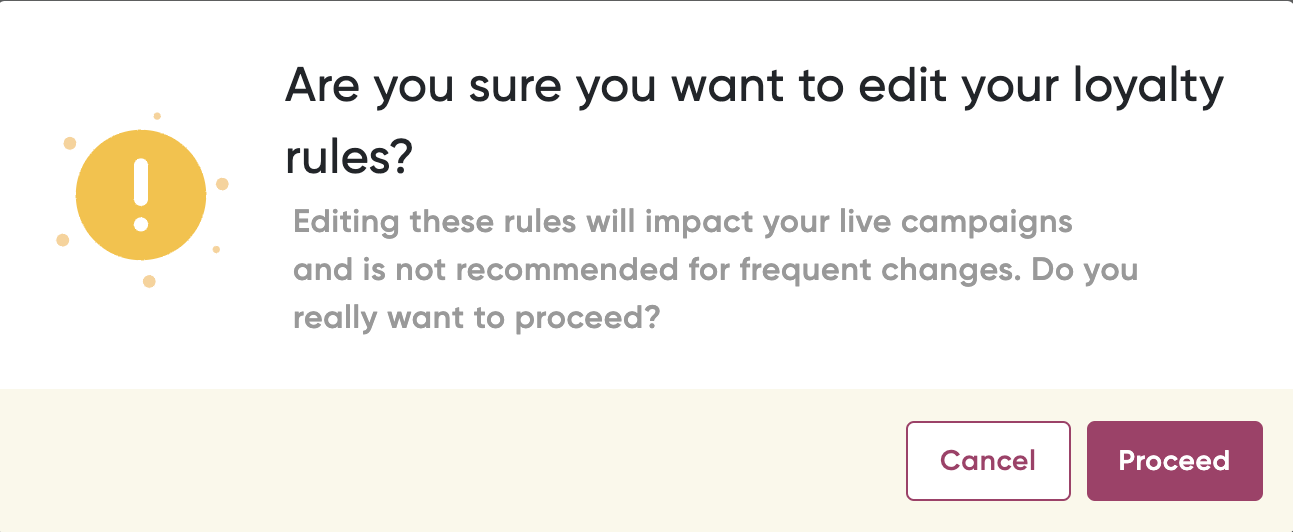
- Click Proceed.
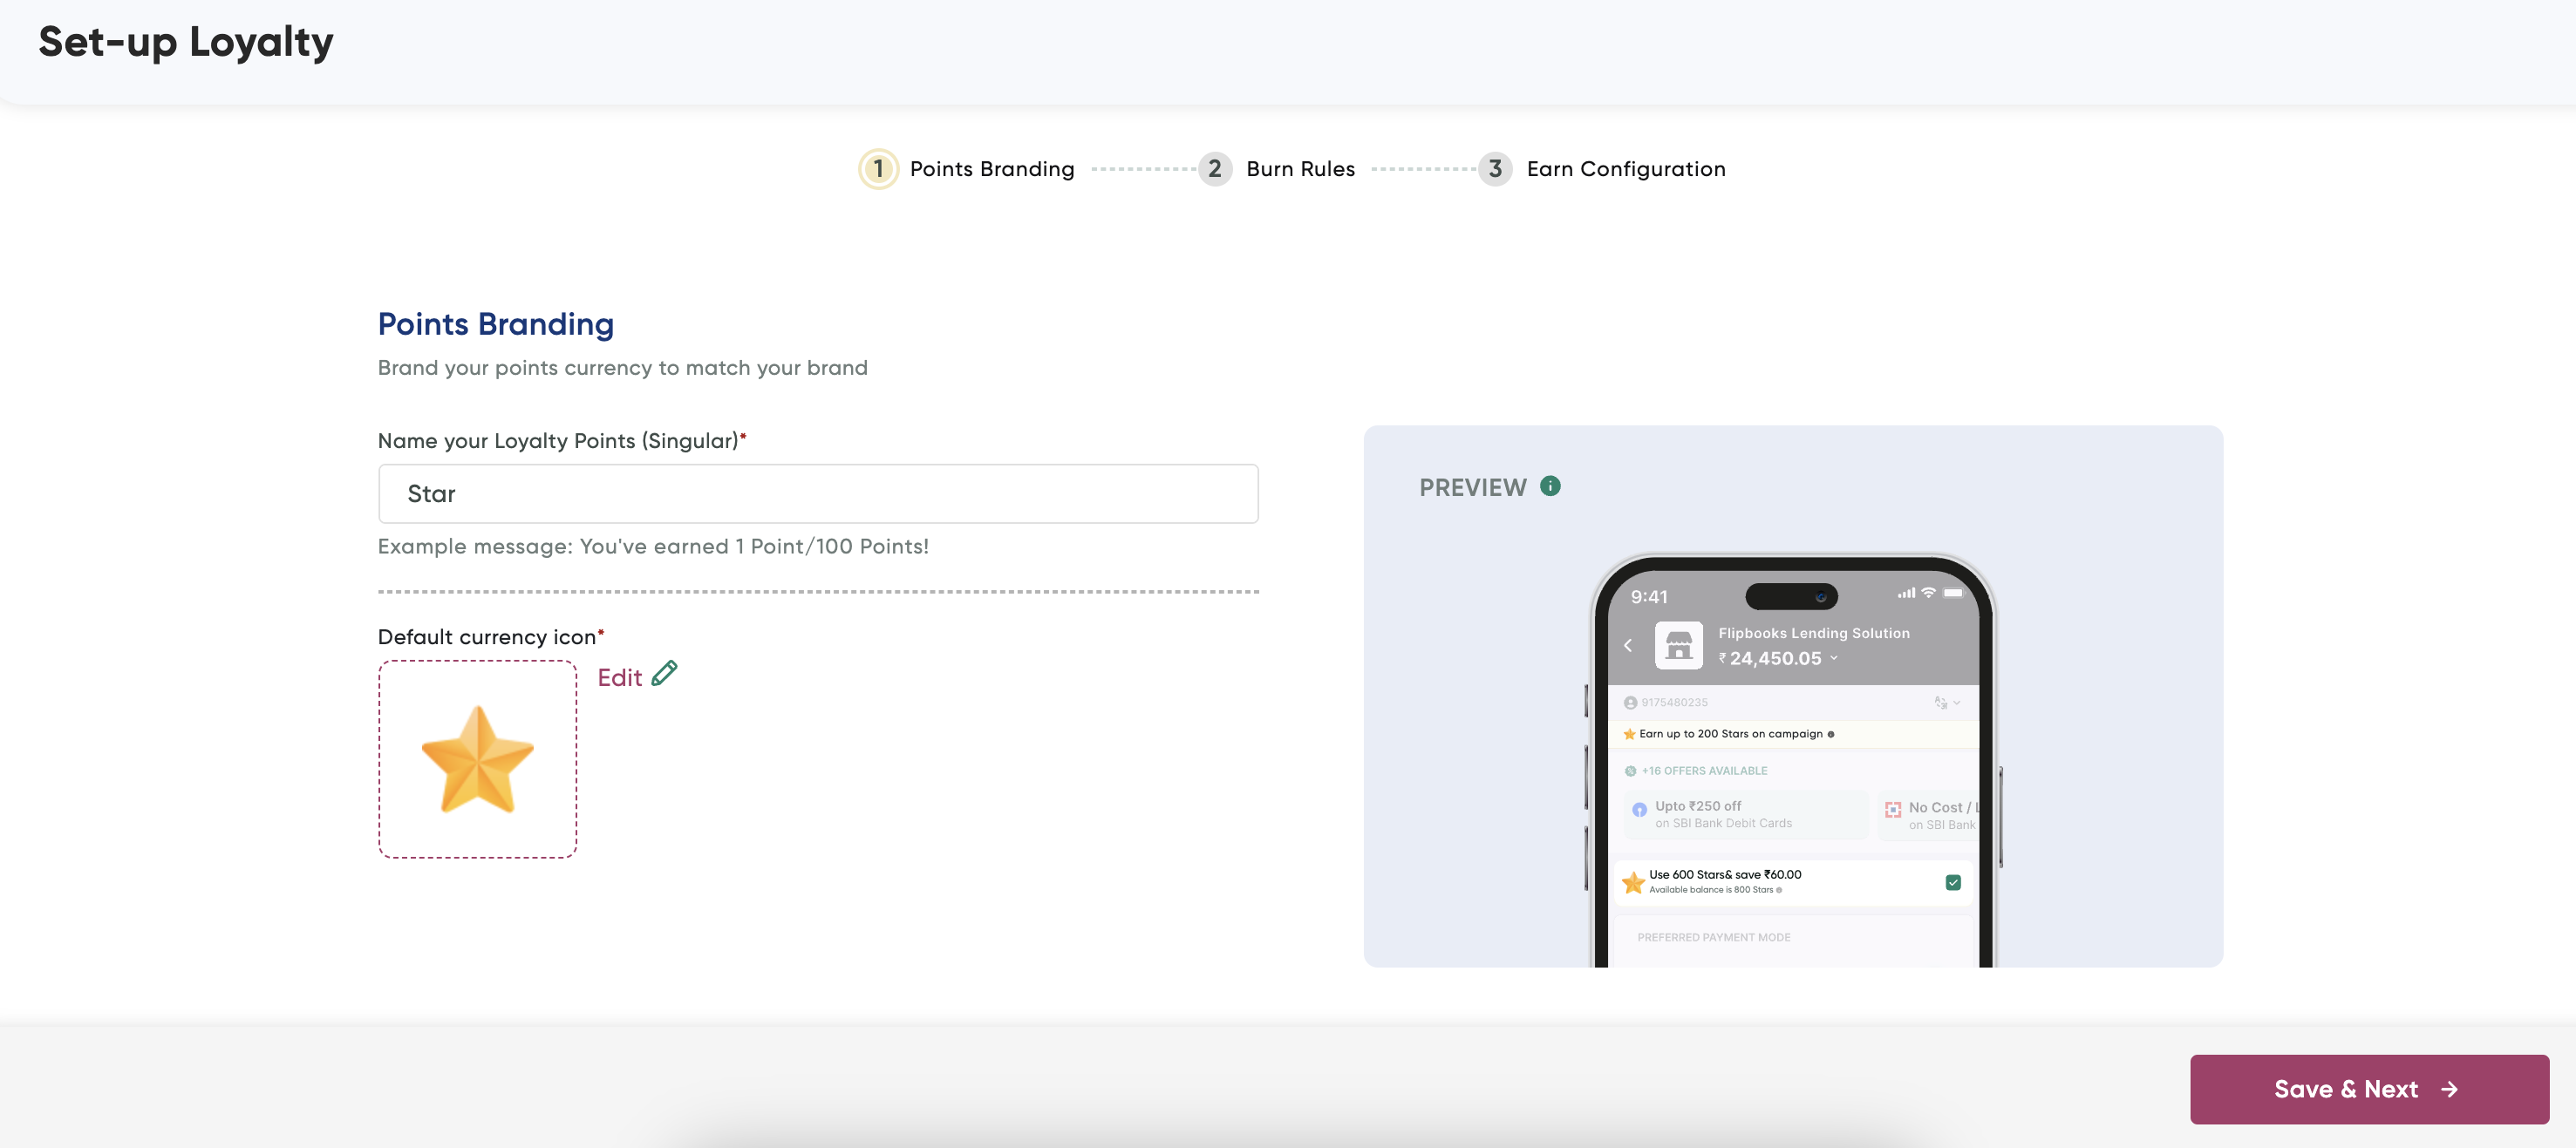
The Set-up Loyalty wizard is displayed with Step 1 - Points Branding page.
-
Enter a short name for your loyalty points in the Name Your Loyalty Points field that will be visible to your customers. For example, Star.
-
Select or customize an icon in the Default Currency Icon: field to visually represent your loyalty points.
-
Click Save & Next.
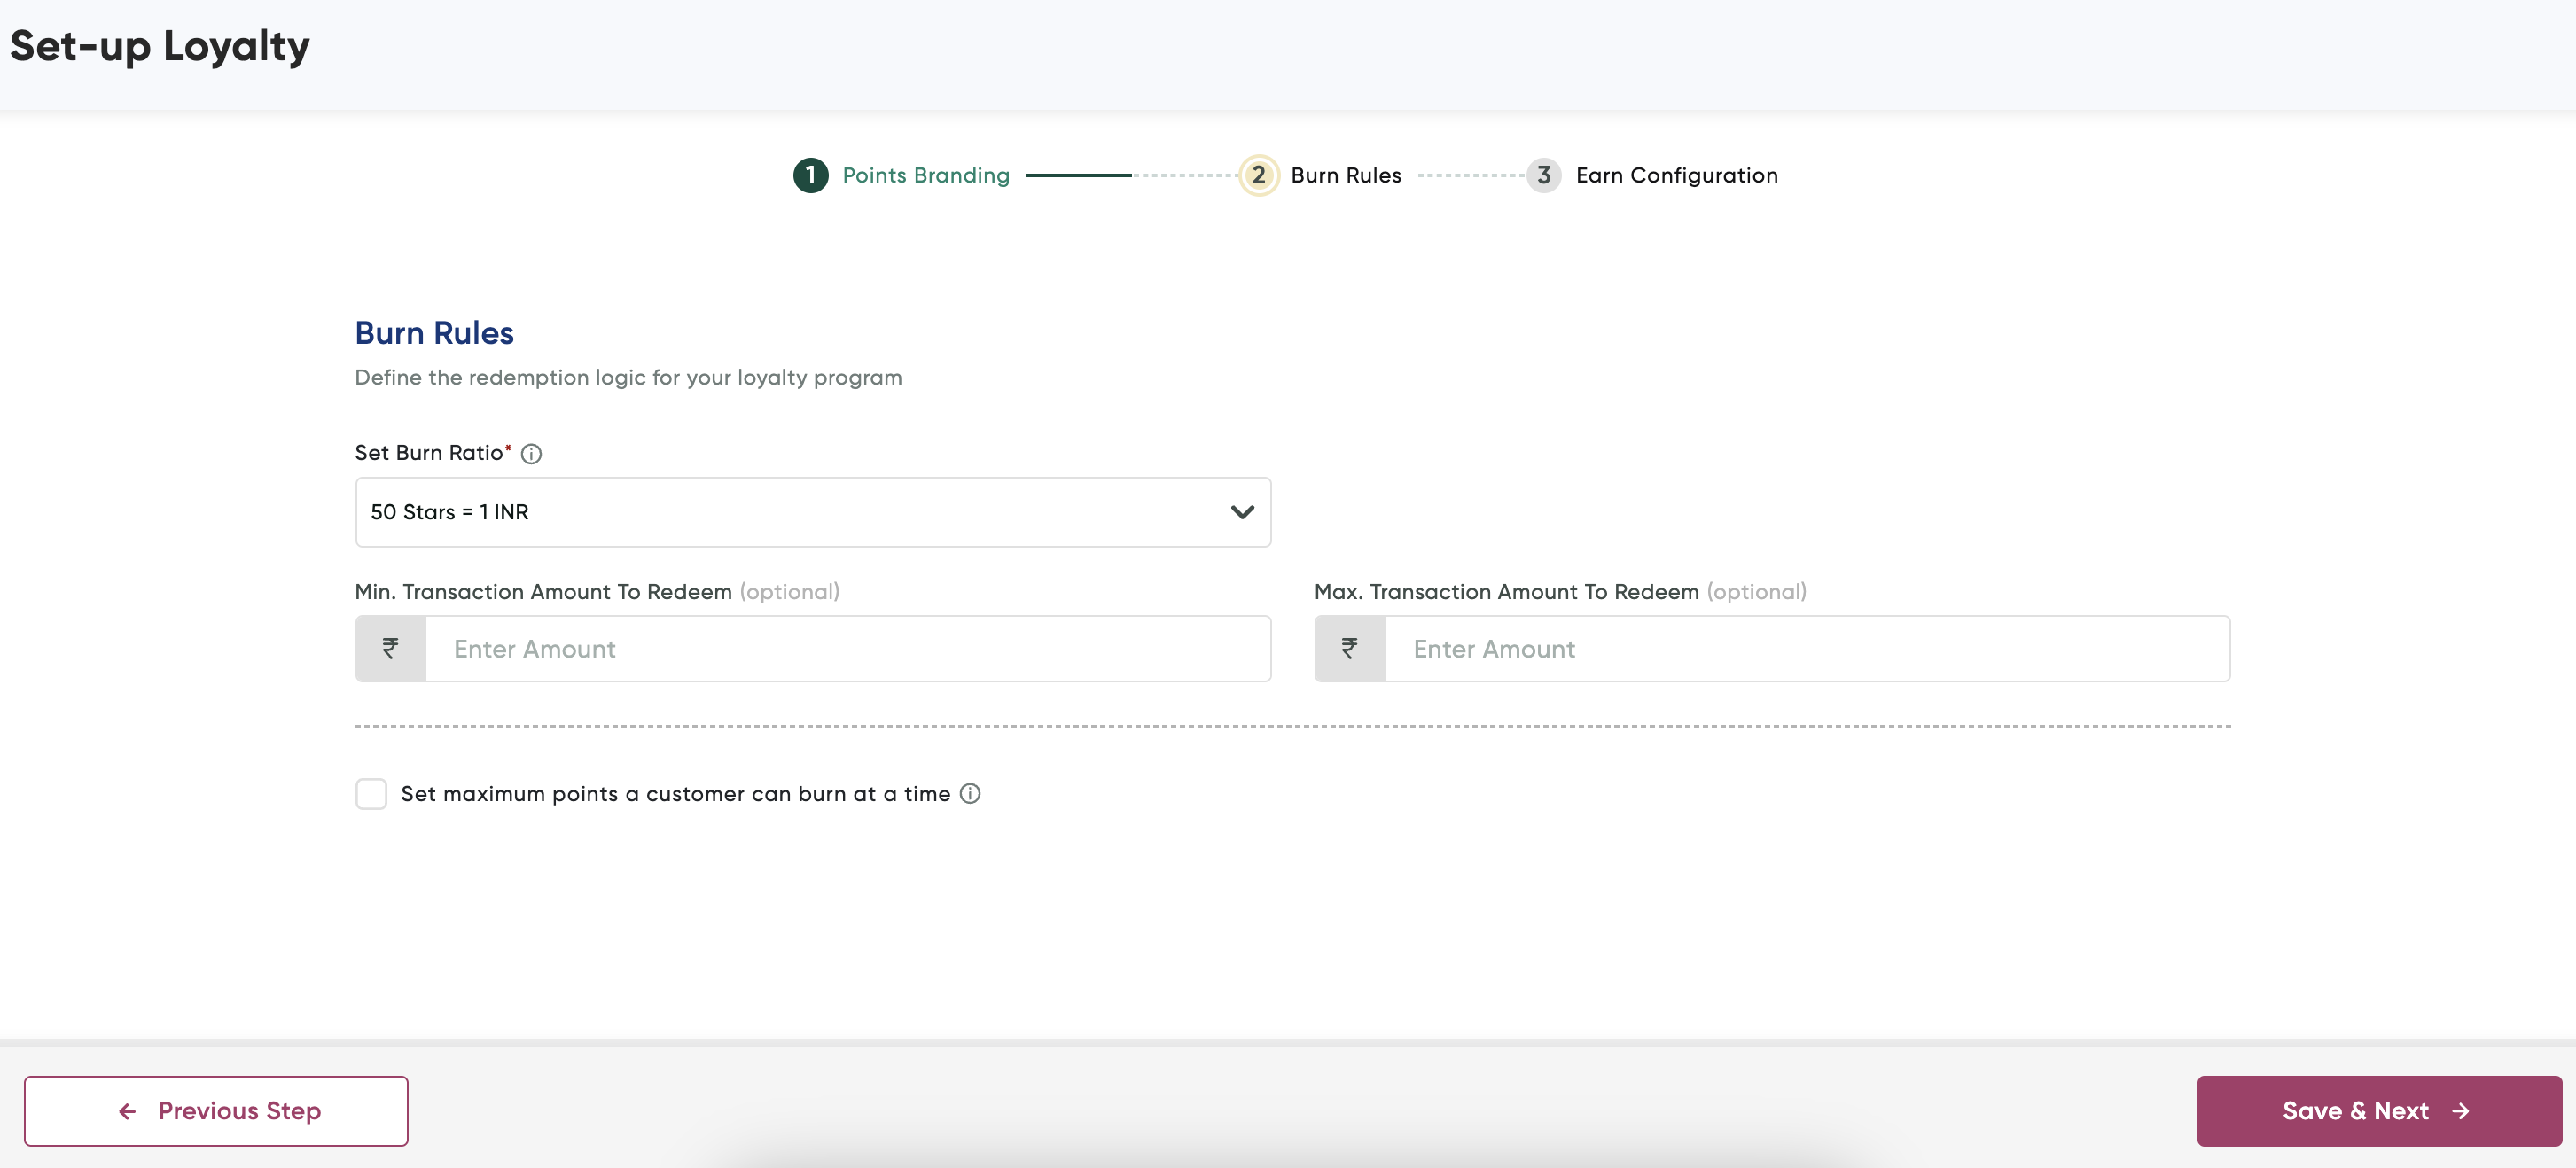
The Step 2:Burn Loyalty page of Set-up Loyalty wizard is displayed.
-
Enter the following details to configure the redemption logic:
Field Description Set Burn Ratio Define the conversion rate for redeeming points. For example, "50 Stars = 1 INR". It specifies how many points are needed to redeem for currency. Min. Transaction Amount To Redeem (optional) Specify the minimum transaction amount required for redeeming points. Max. Transaction Amount To Redeem (optional) Specify the maximum transaction amount for which points can be redeemed. Set Maximum Points a Customer Can Burn at a Time Check this option to limit the maximum number of points a customer can redeem in a single transaction. -
Click Save & Next.
The Step 3: Earn Configuration page of Set-up Loyalty wizard is displayed.
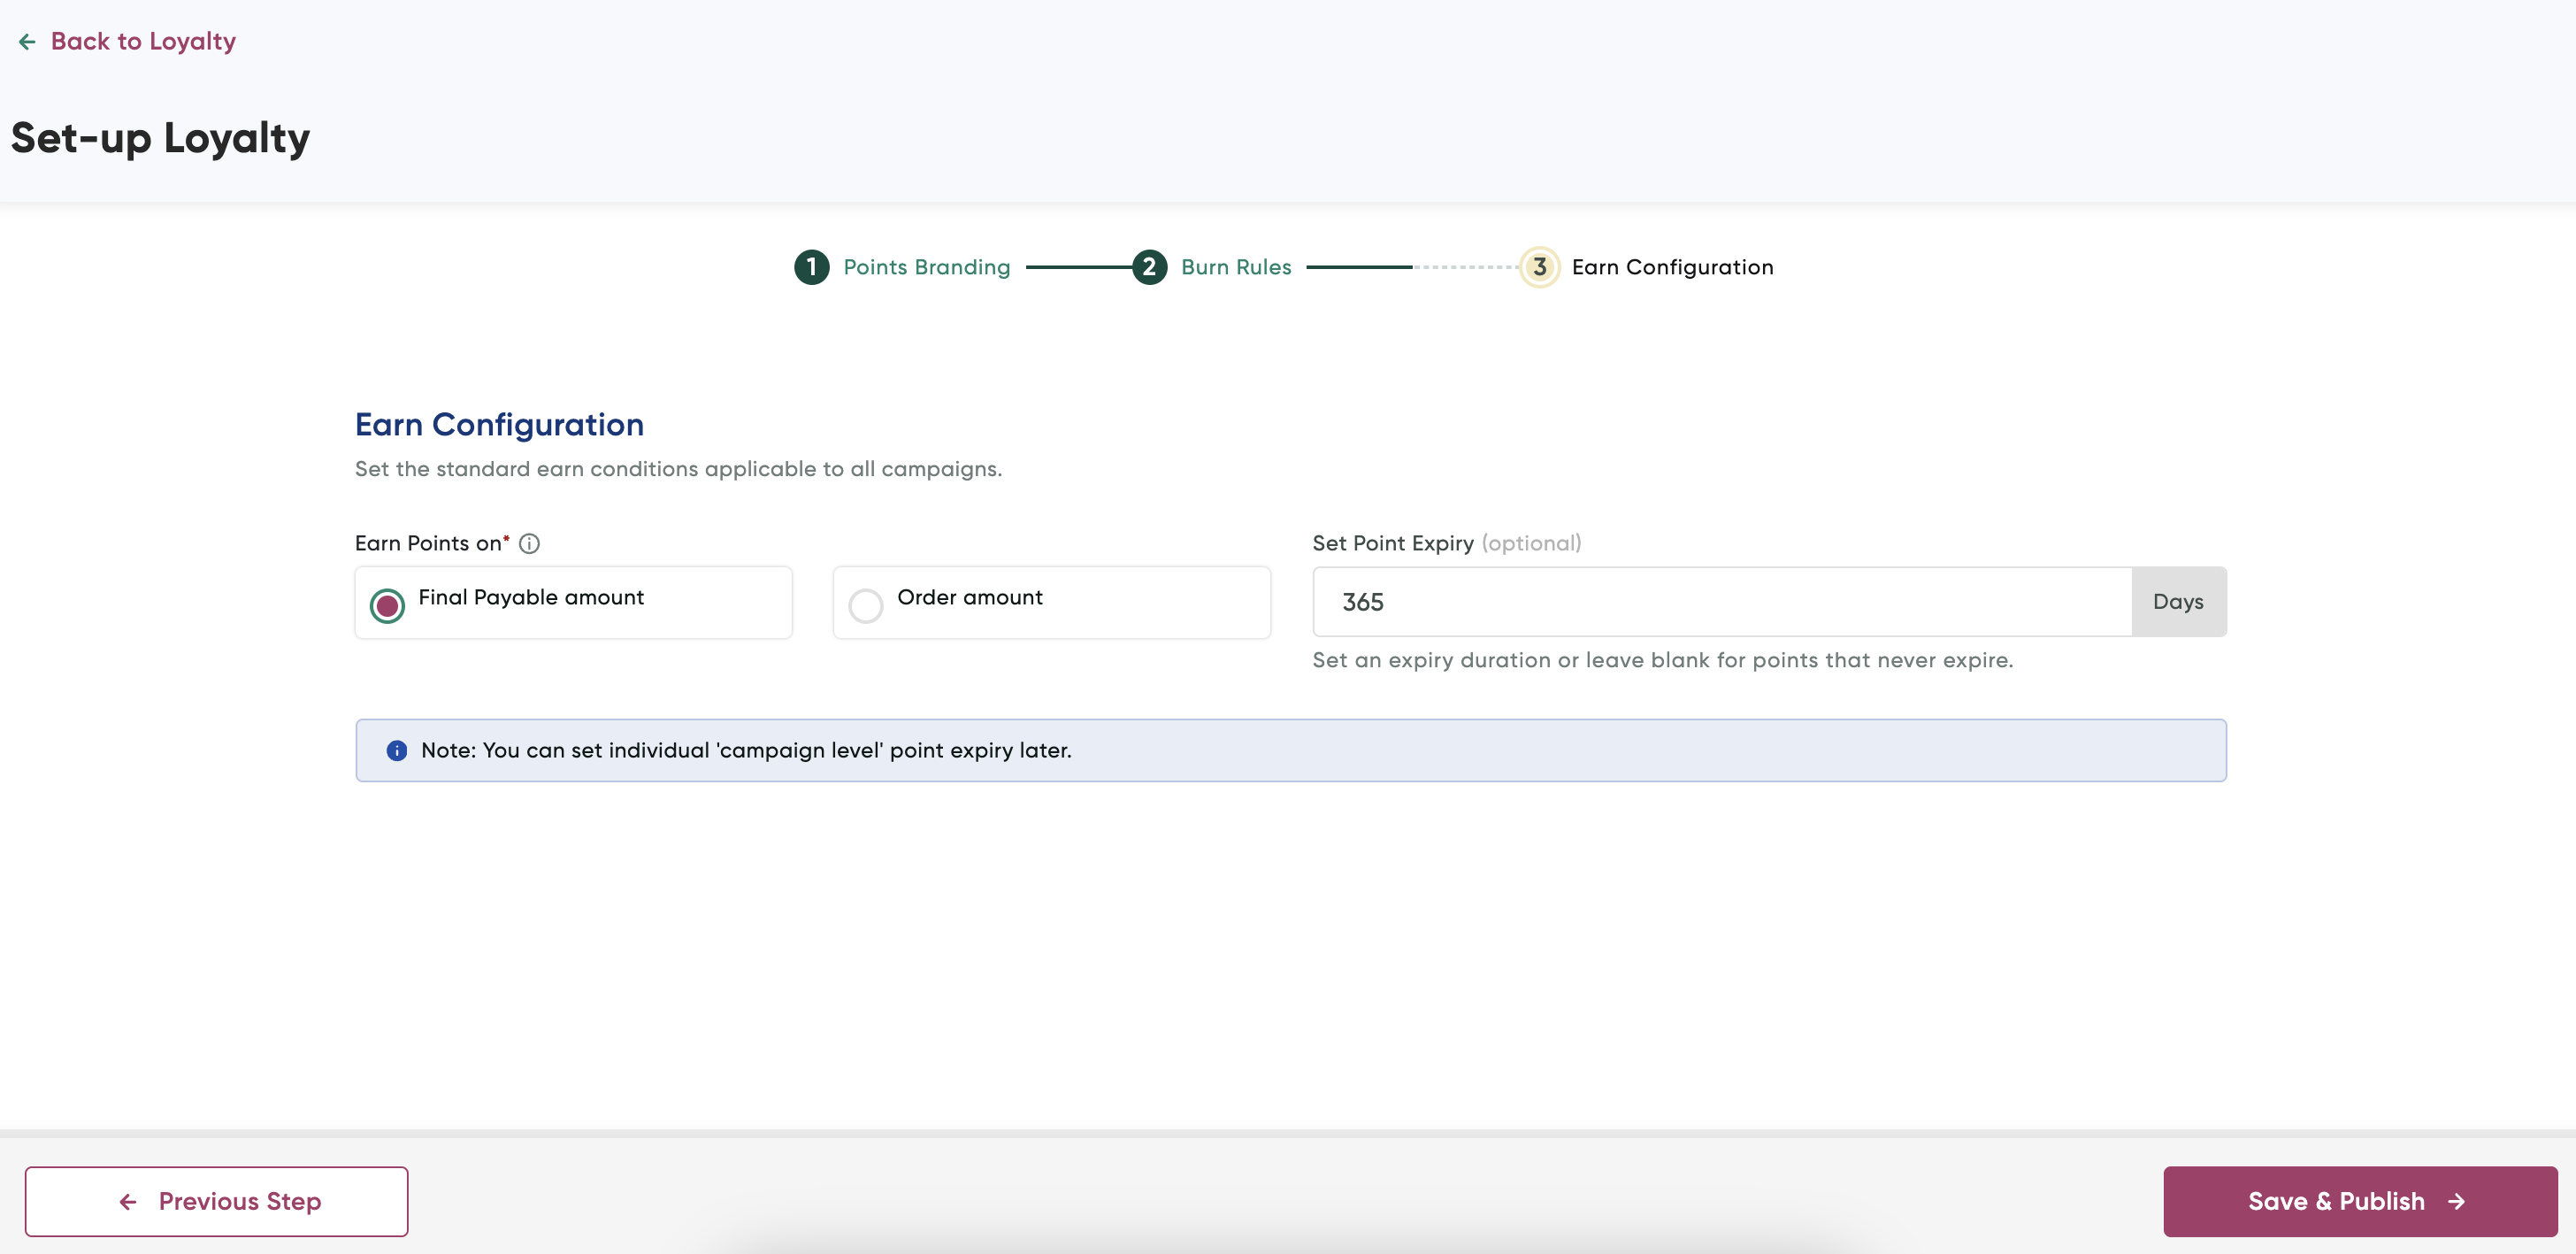
- Select any of the following to specify earn points based on
- Final Payable amount
- Order amount
-
Specify the duration in days or when points will expire in the Set Point Expiry field. You may choose to leave blank for no expiry.
-
Click Save & Publish.
Step 2. Create a New Campaign
To set up a campaign:
- Log In to PayU Dashboard
- Select Loyalty and Offers Suite> Loyalty on the navigation pane.
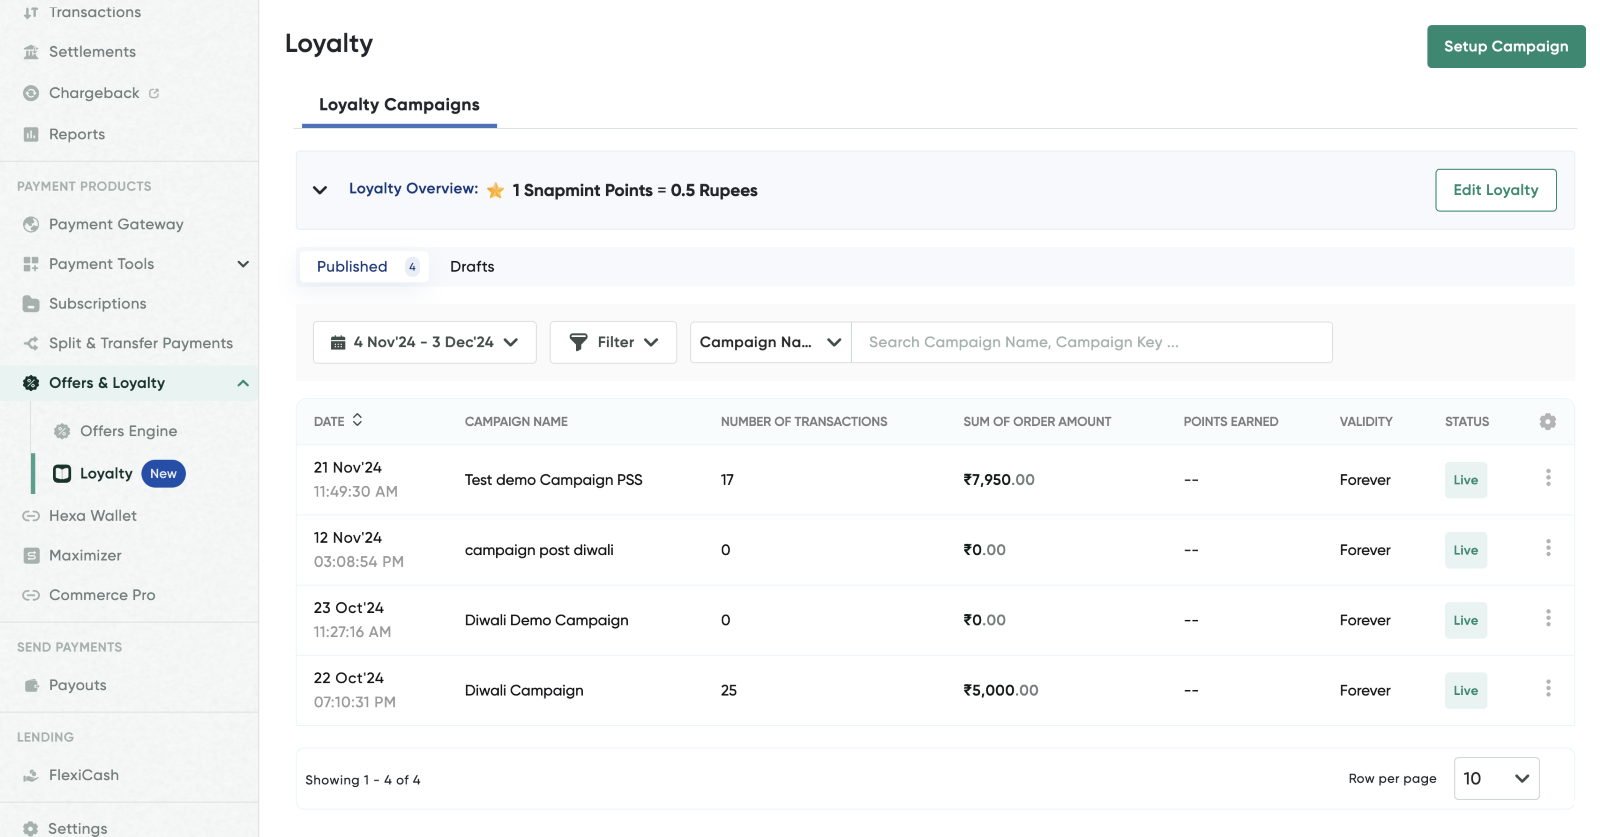
- Click Setup Campaign to begin creating a new campaign.
The Create a New Campaign page is displayed.
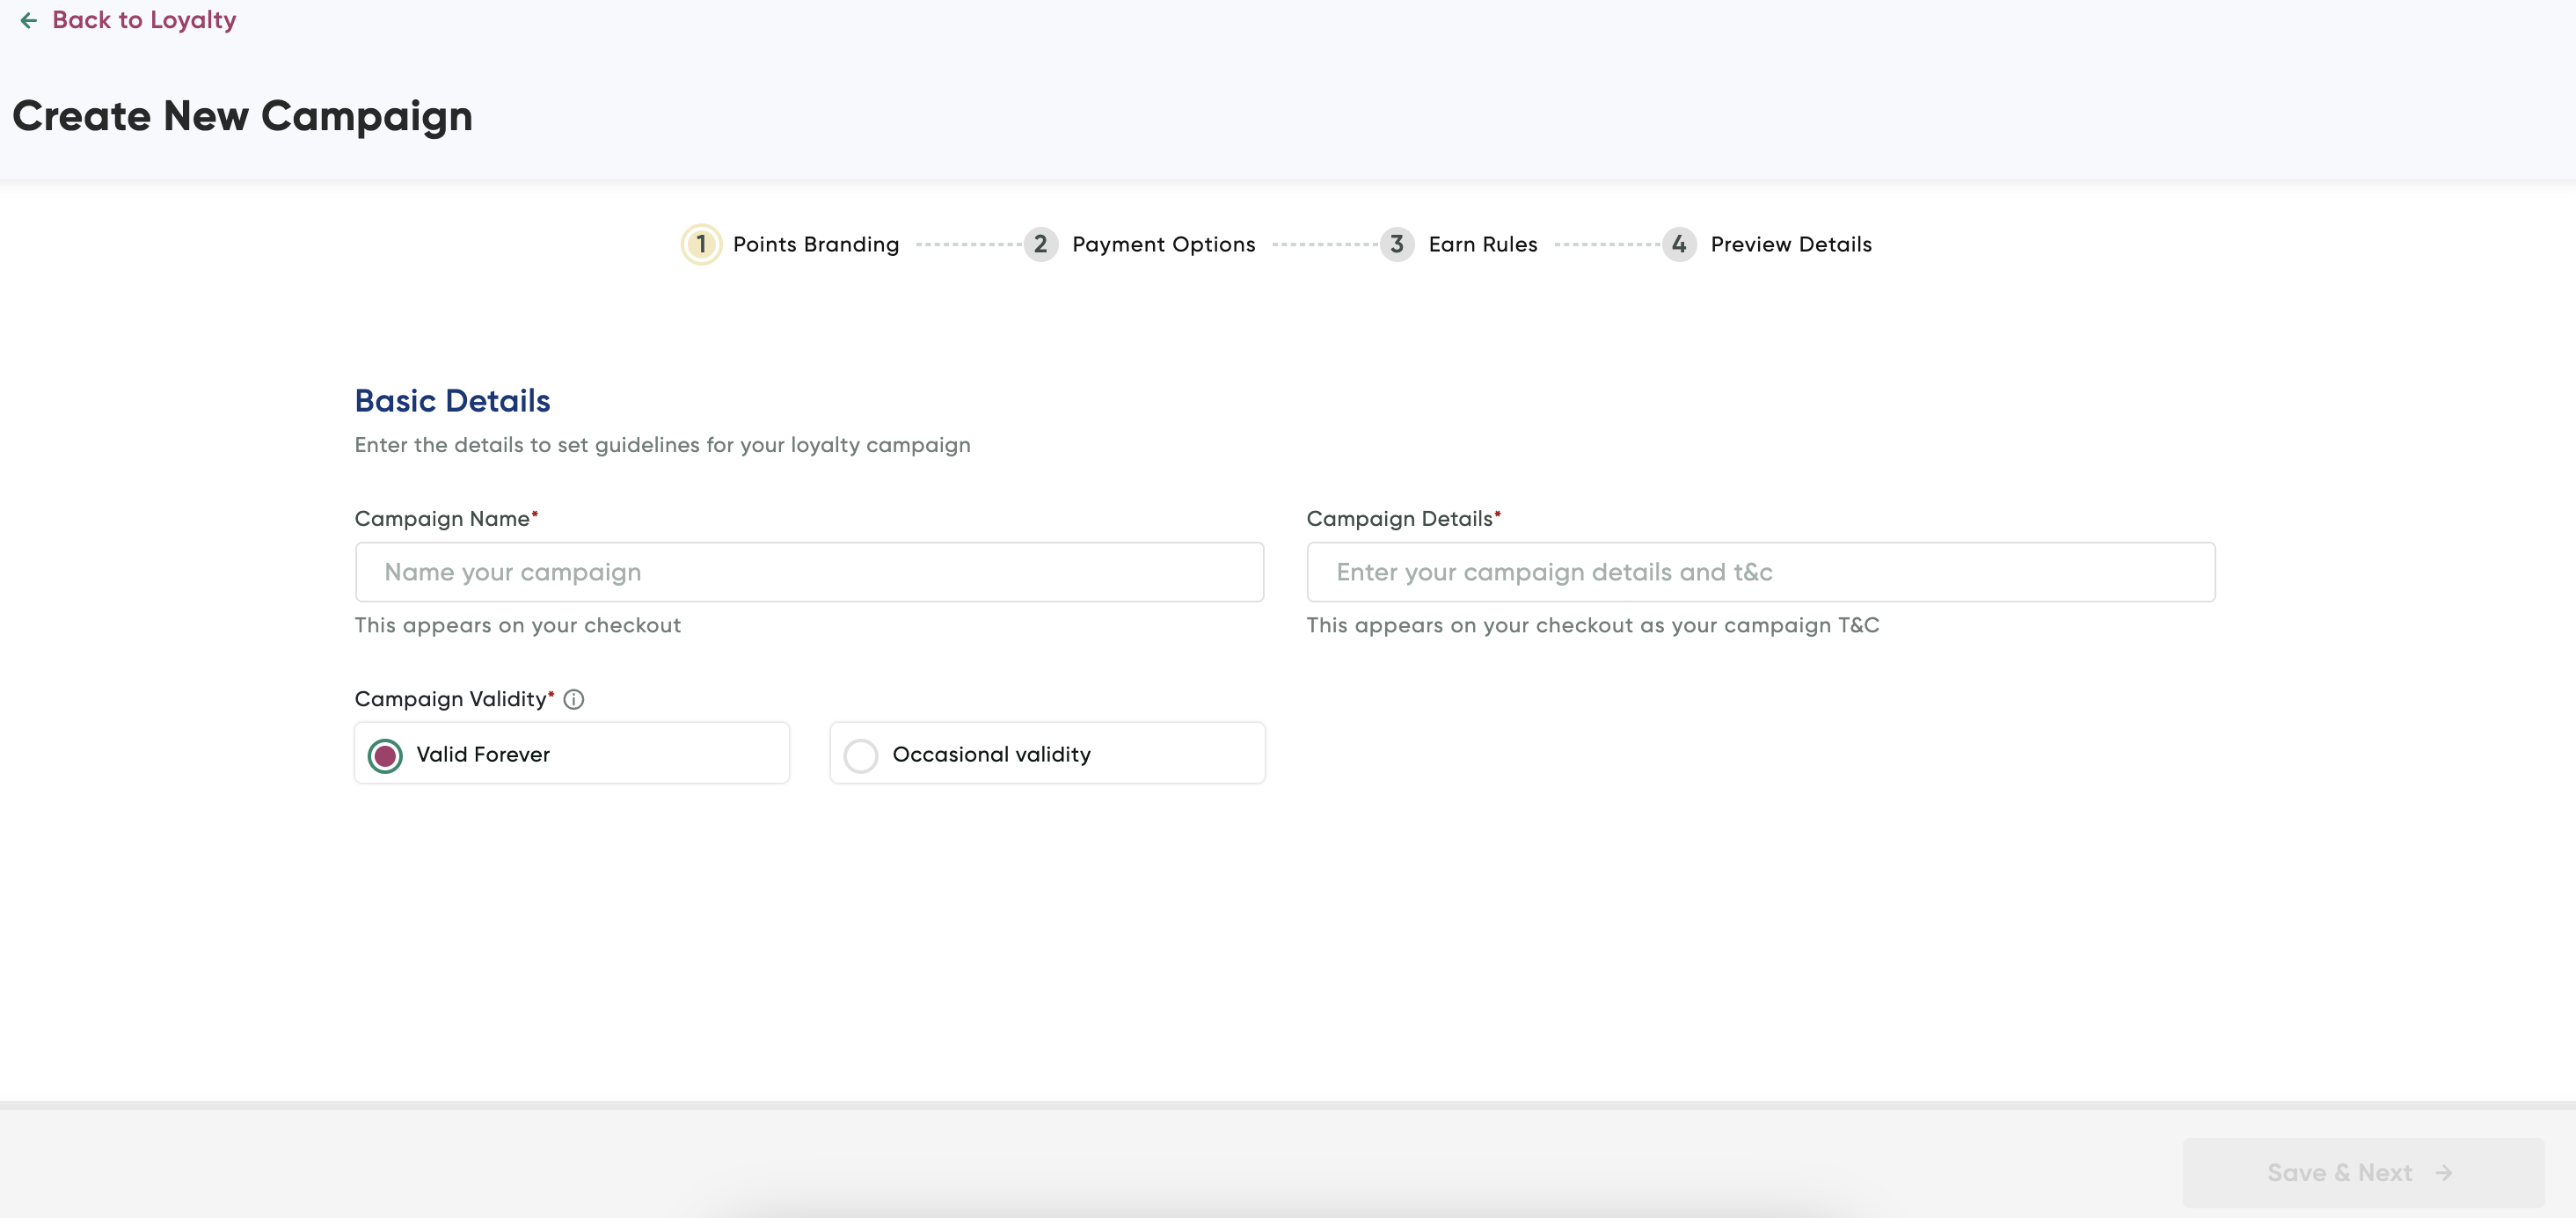
- Enter the basic campaign details as described in the following table:
| Field | Description |
|---|---|
| Campaign Name | Enter a name for your campaign and this name will appear during checkout. |
| Campaign Details | Enter any specific details or terms and conditions. This will also be visible during checkout. |
| Campaign Validity | Select either Valid Forever or Occasional Validity to set how long the campaign will remain active. |
- Click Save & Next.
The Payment options page is displayed.
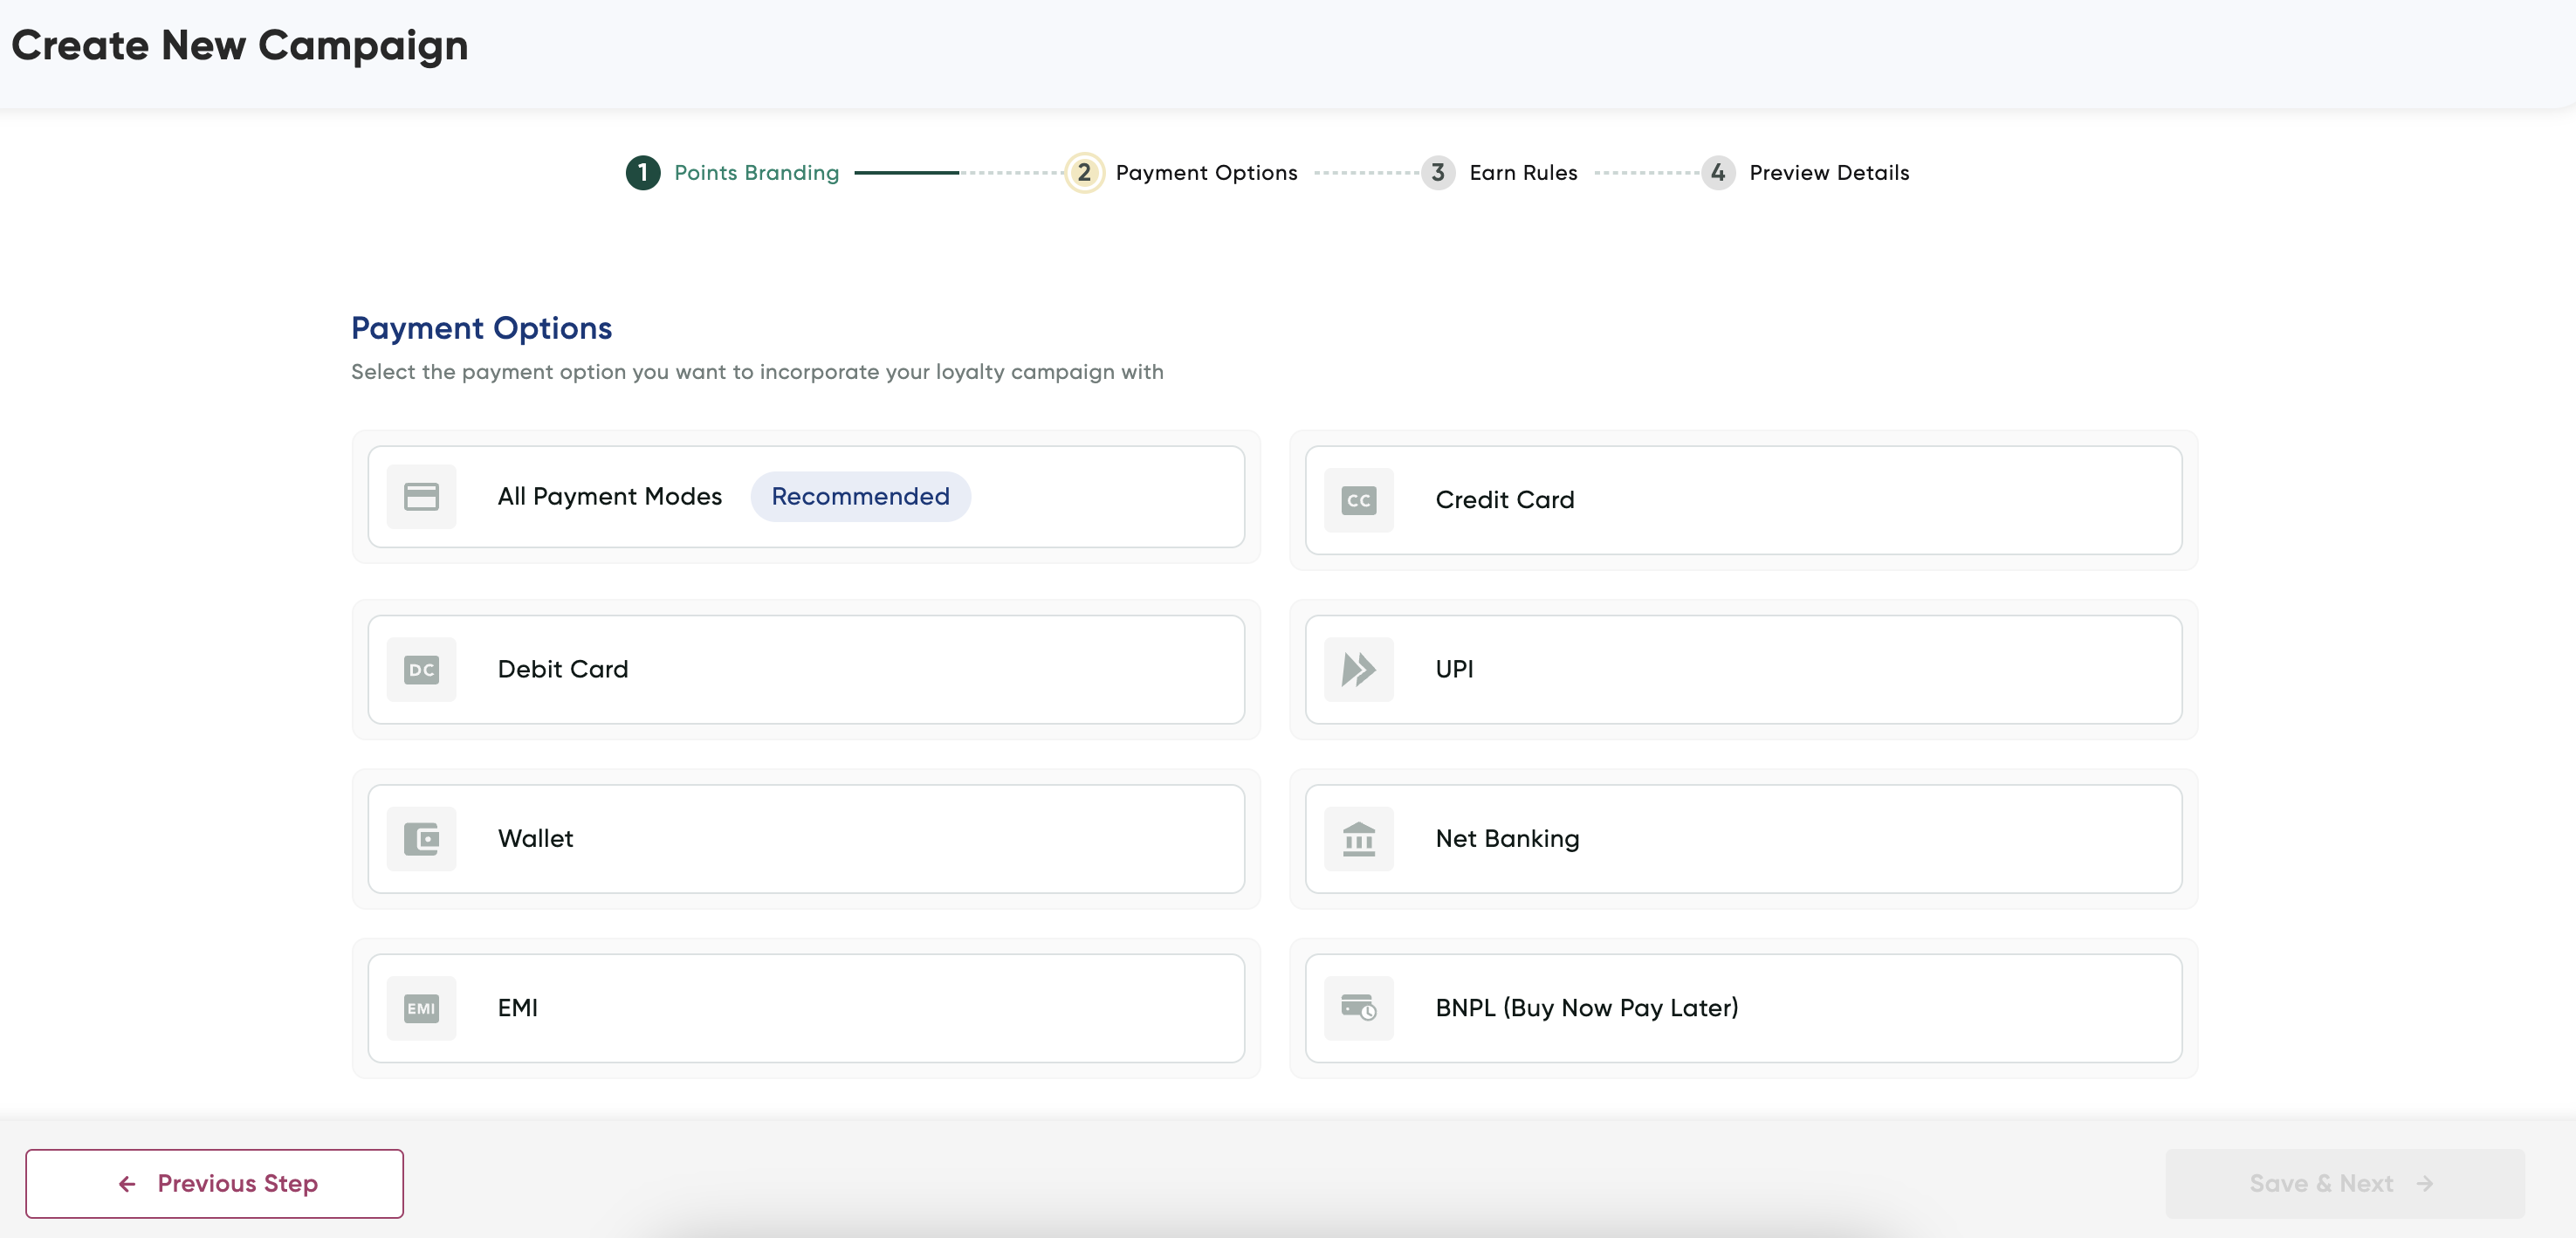
- Select the relevant payment modes to configure offer details that is explained in the corresponding tabs and then click Save & Next after you have selected payment options.
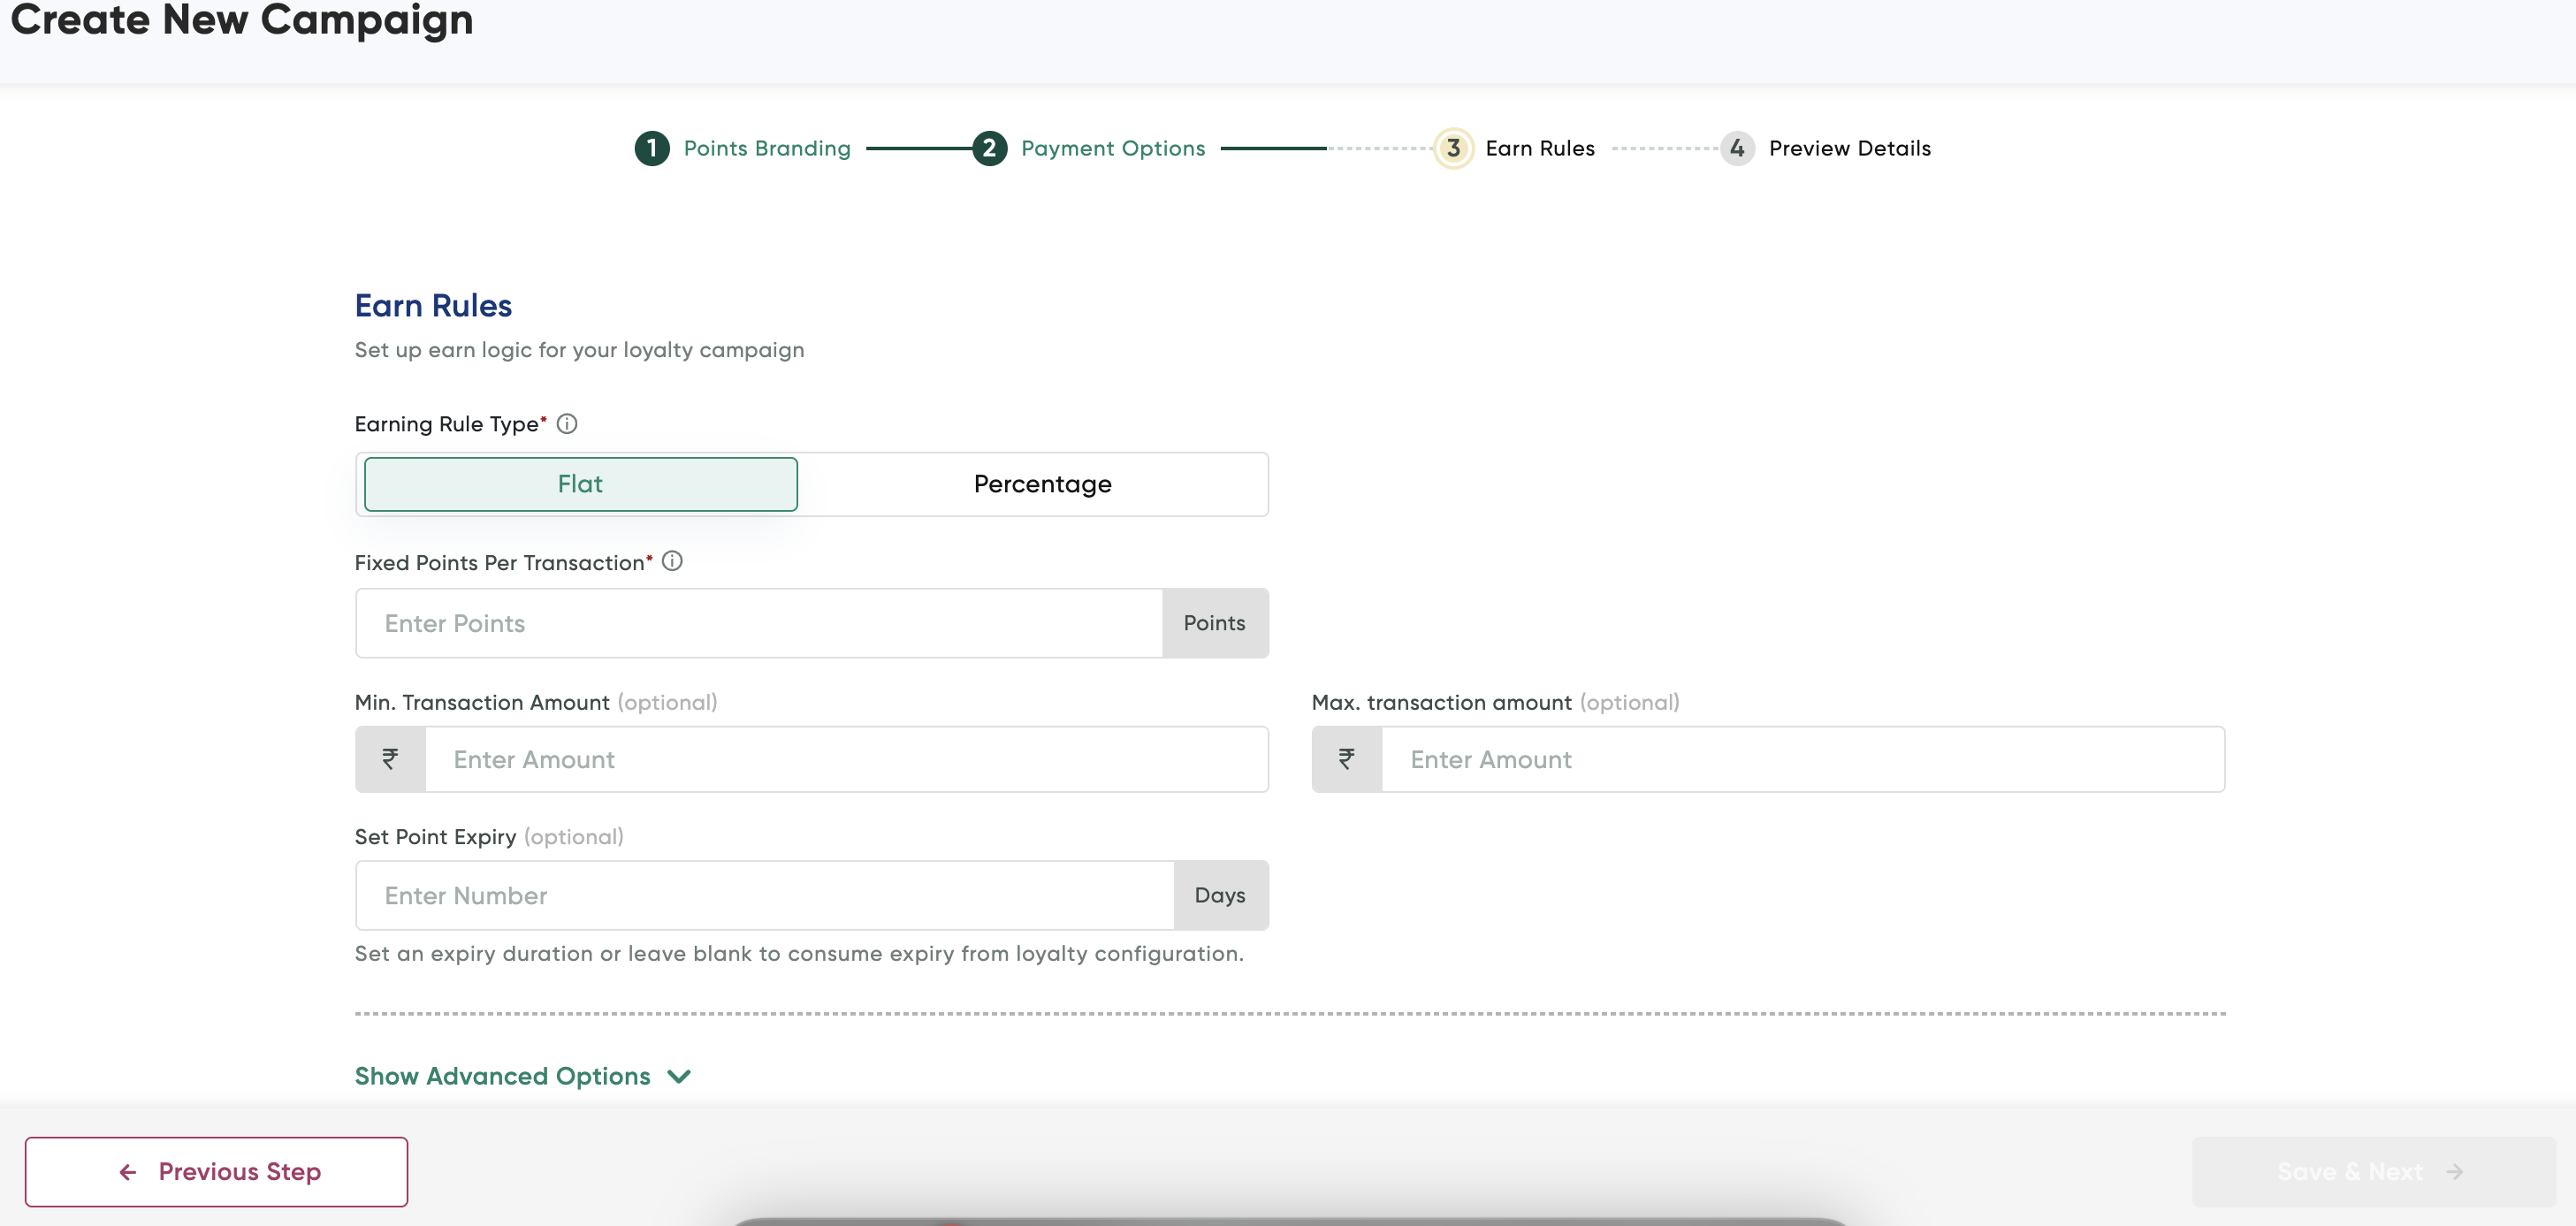
- Configure the campaign settings as described in the following table:
| Field | Description |
|---|---|
| Earning Rule Type | Select Flat or Percentage to define how points are earned per transaction. |
| Fixed Points Per Transaction | Enter the number of points awarded for each transaction if the "Flat" earning type is selected. |
| Min. Transaction Amount (Optional) | Enter the minimum transaction amount required to earn points. |
| Max. Transaction Amount (Optional) | Enter the maximum transaction amount for earning eligible points. |
| Set Point Expiry (Optional) | Enter the duration in days for point expiry, or leave blank to use the default expiry setting from loyalty configuration. |
- Click Show Advanced Options at bottom and configure the following advance options (if required):
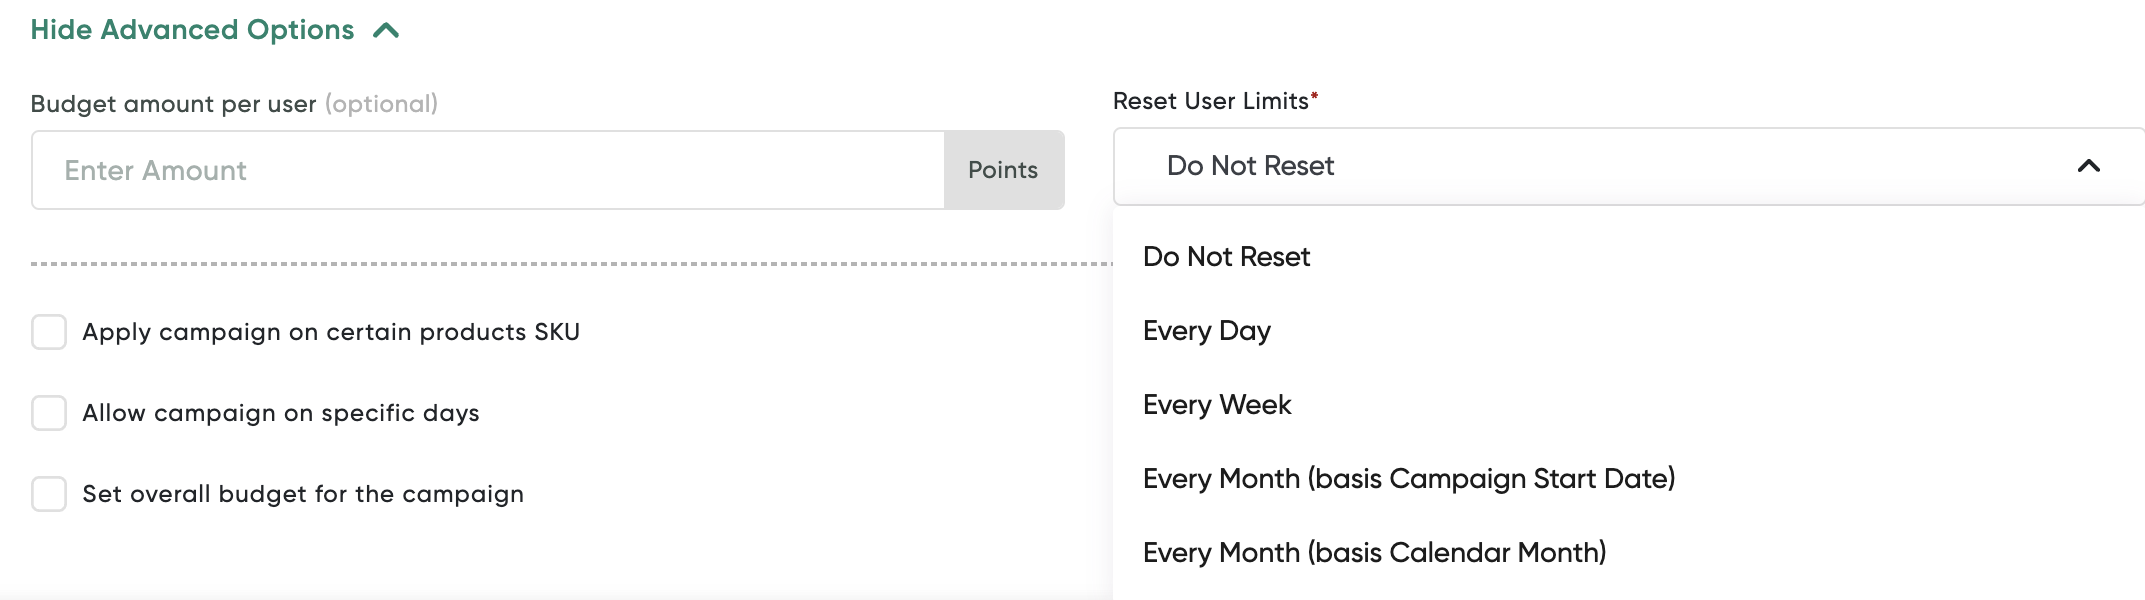
| Field | Description |
|---|---|
| Budget Amount per User (optional) | Enter the points limit you want to set per user for the campaign. |
| Apply Campaign on Certain Products SKU | Select this check box if the campaign should apply only to specific product SKUs, enabling targeted promotions. |
| Allow Campaign on Specific Days | Select this check box to restrict the campaign to operate on particular days, enabling scheduling flexibility. |
| Set Overall Budget for the Campaign | Select this check box to set a total points budget for the campaign, capping the total point distribution. |
| Reset User Limits | Select how often to reset user limits from the drop-down list, with the following options:
|
- Click Save & Next.
- Click Publish to go live with the campaign.
Manage Loyalty Edge Campaigns
You can check or update the details of an existing campaign and customer transactions as a result of a campaign as described in the following sections:
View Campaign Transactions
To view the transactions due to campaign:
- Navigate to the Loyalty Edge page.
- Select the campaign for which you wish to view the transactions
The campaign details are displayed.
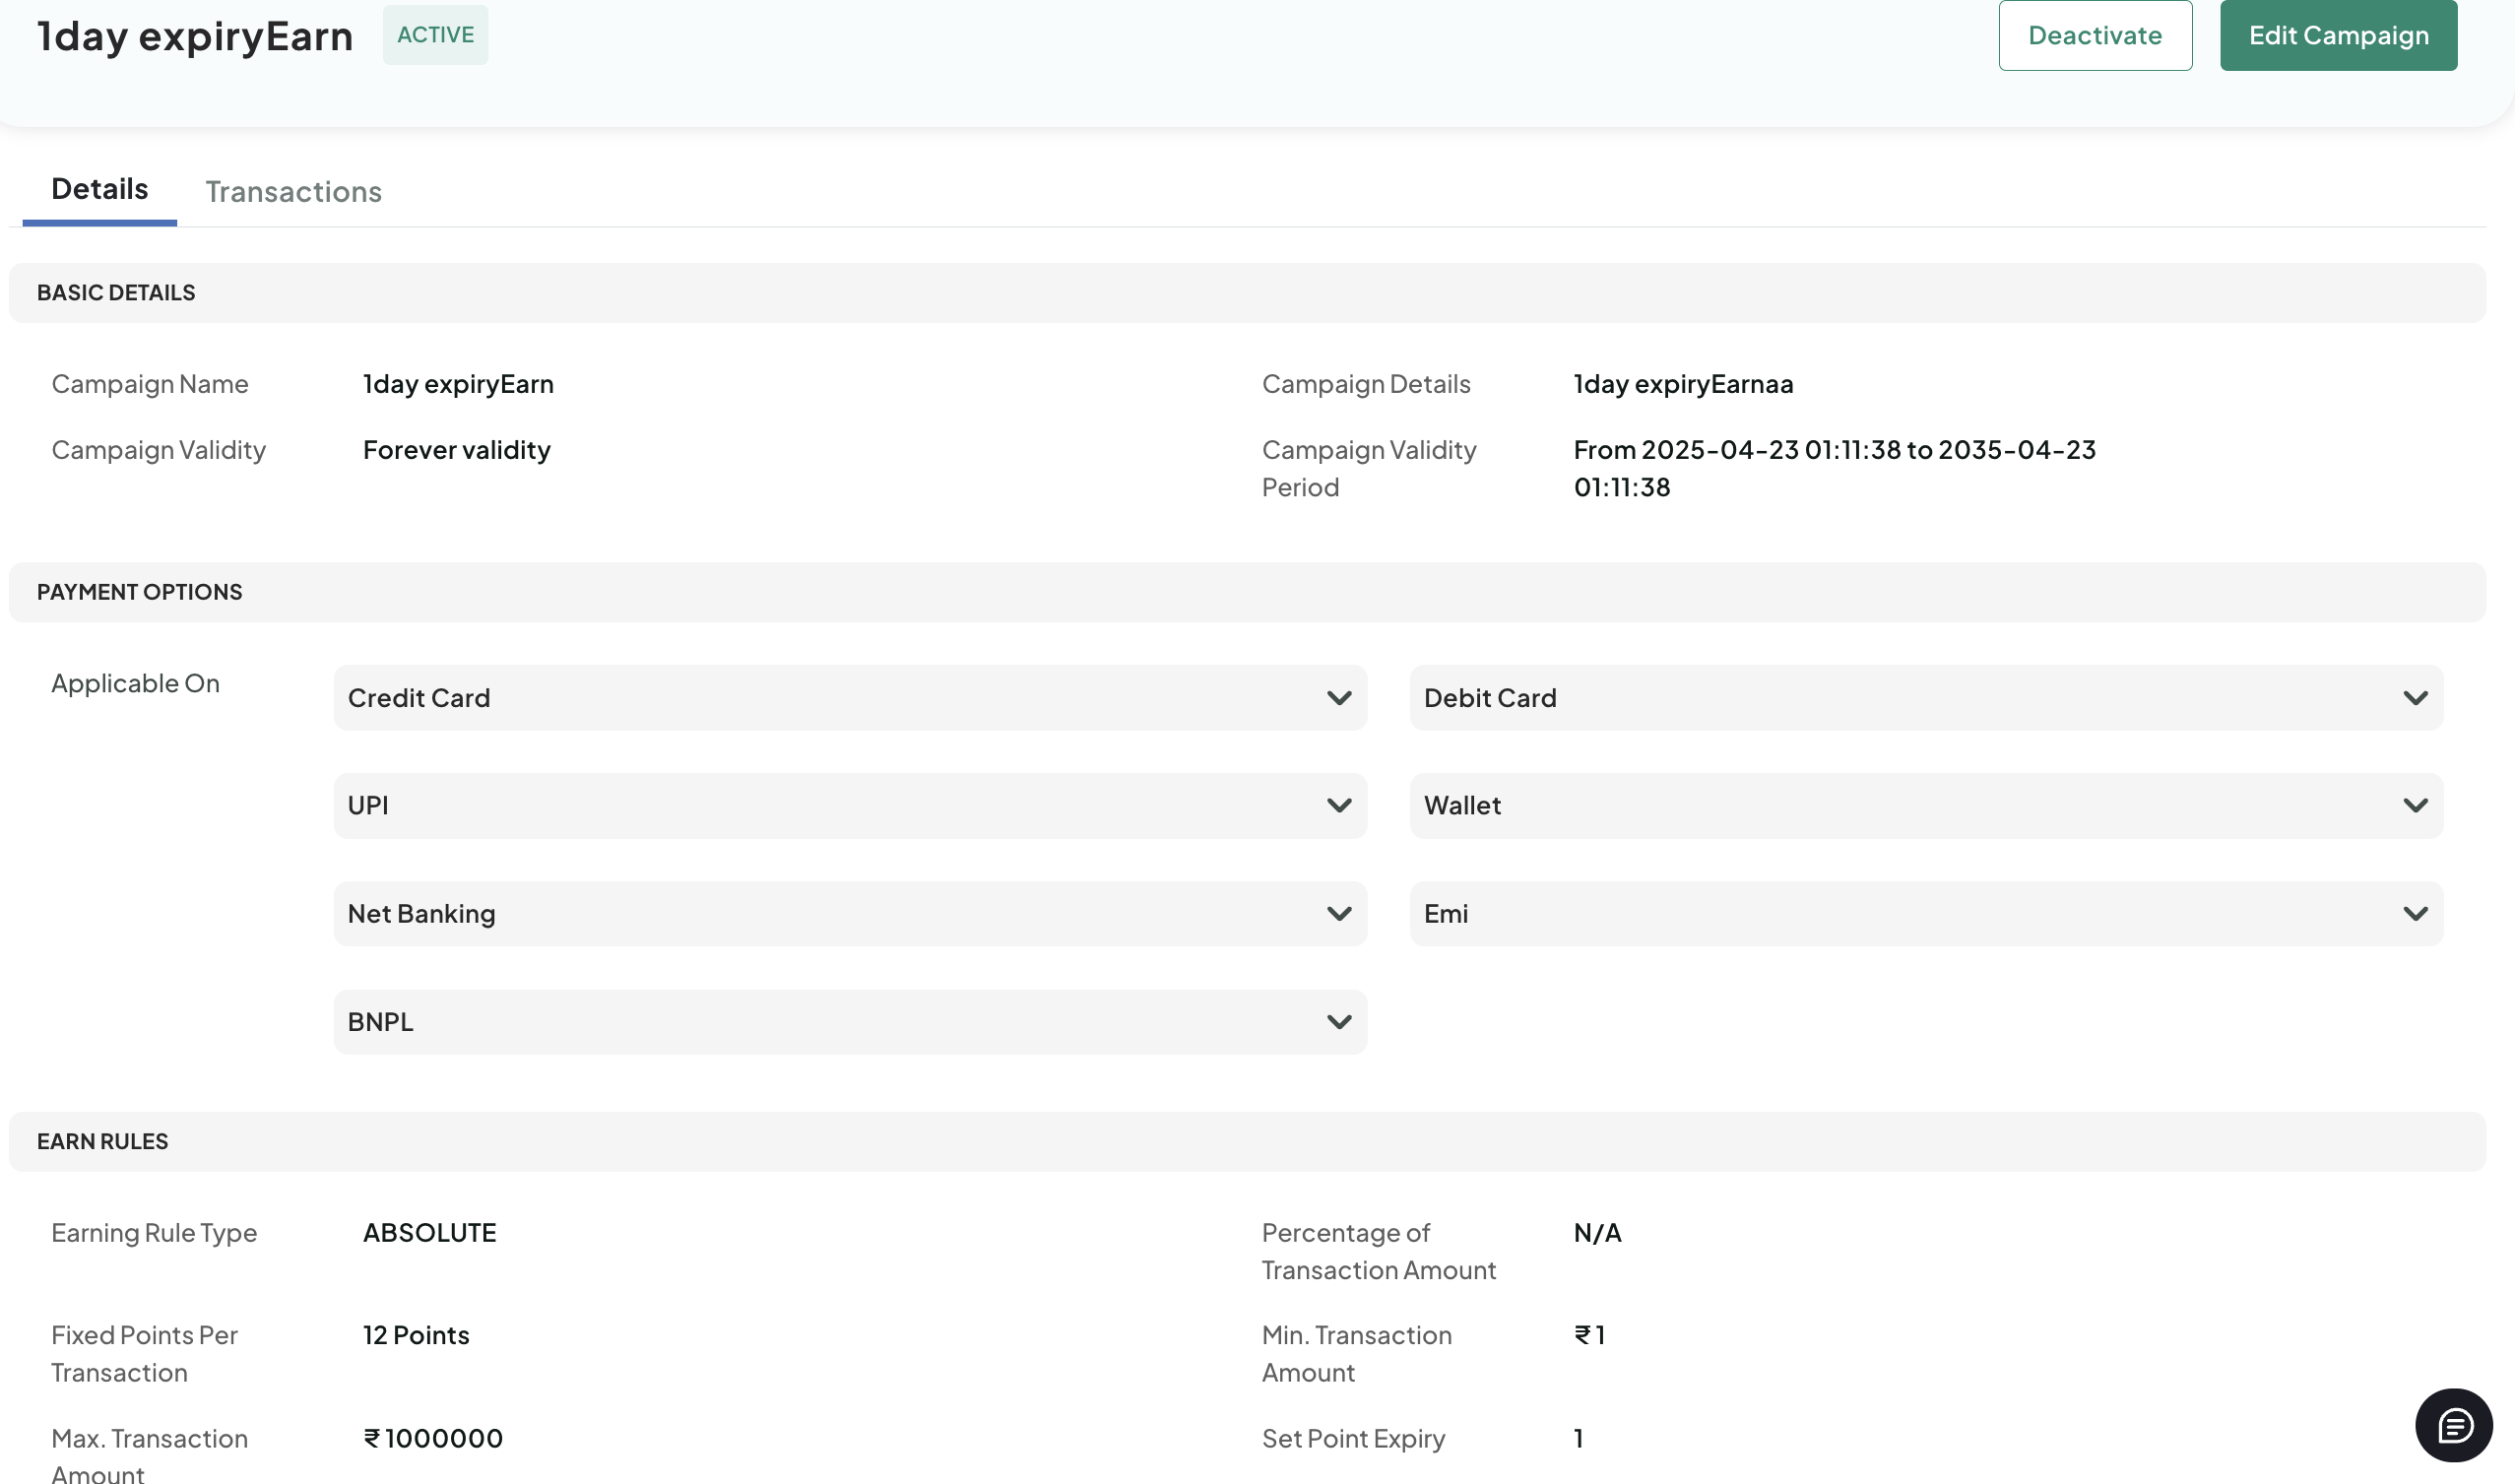
- Select the Transactions tab.
- Perform any of the following:
- Use the Filter drop-down menu to filter the transactions.
- Use the Calendar drop-down menu to view the transactions for a period.
- Search using the transaction ID, order ID or phone number in the Search field.
Update Campaign Details
To update the campaign details:
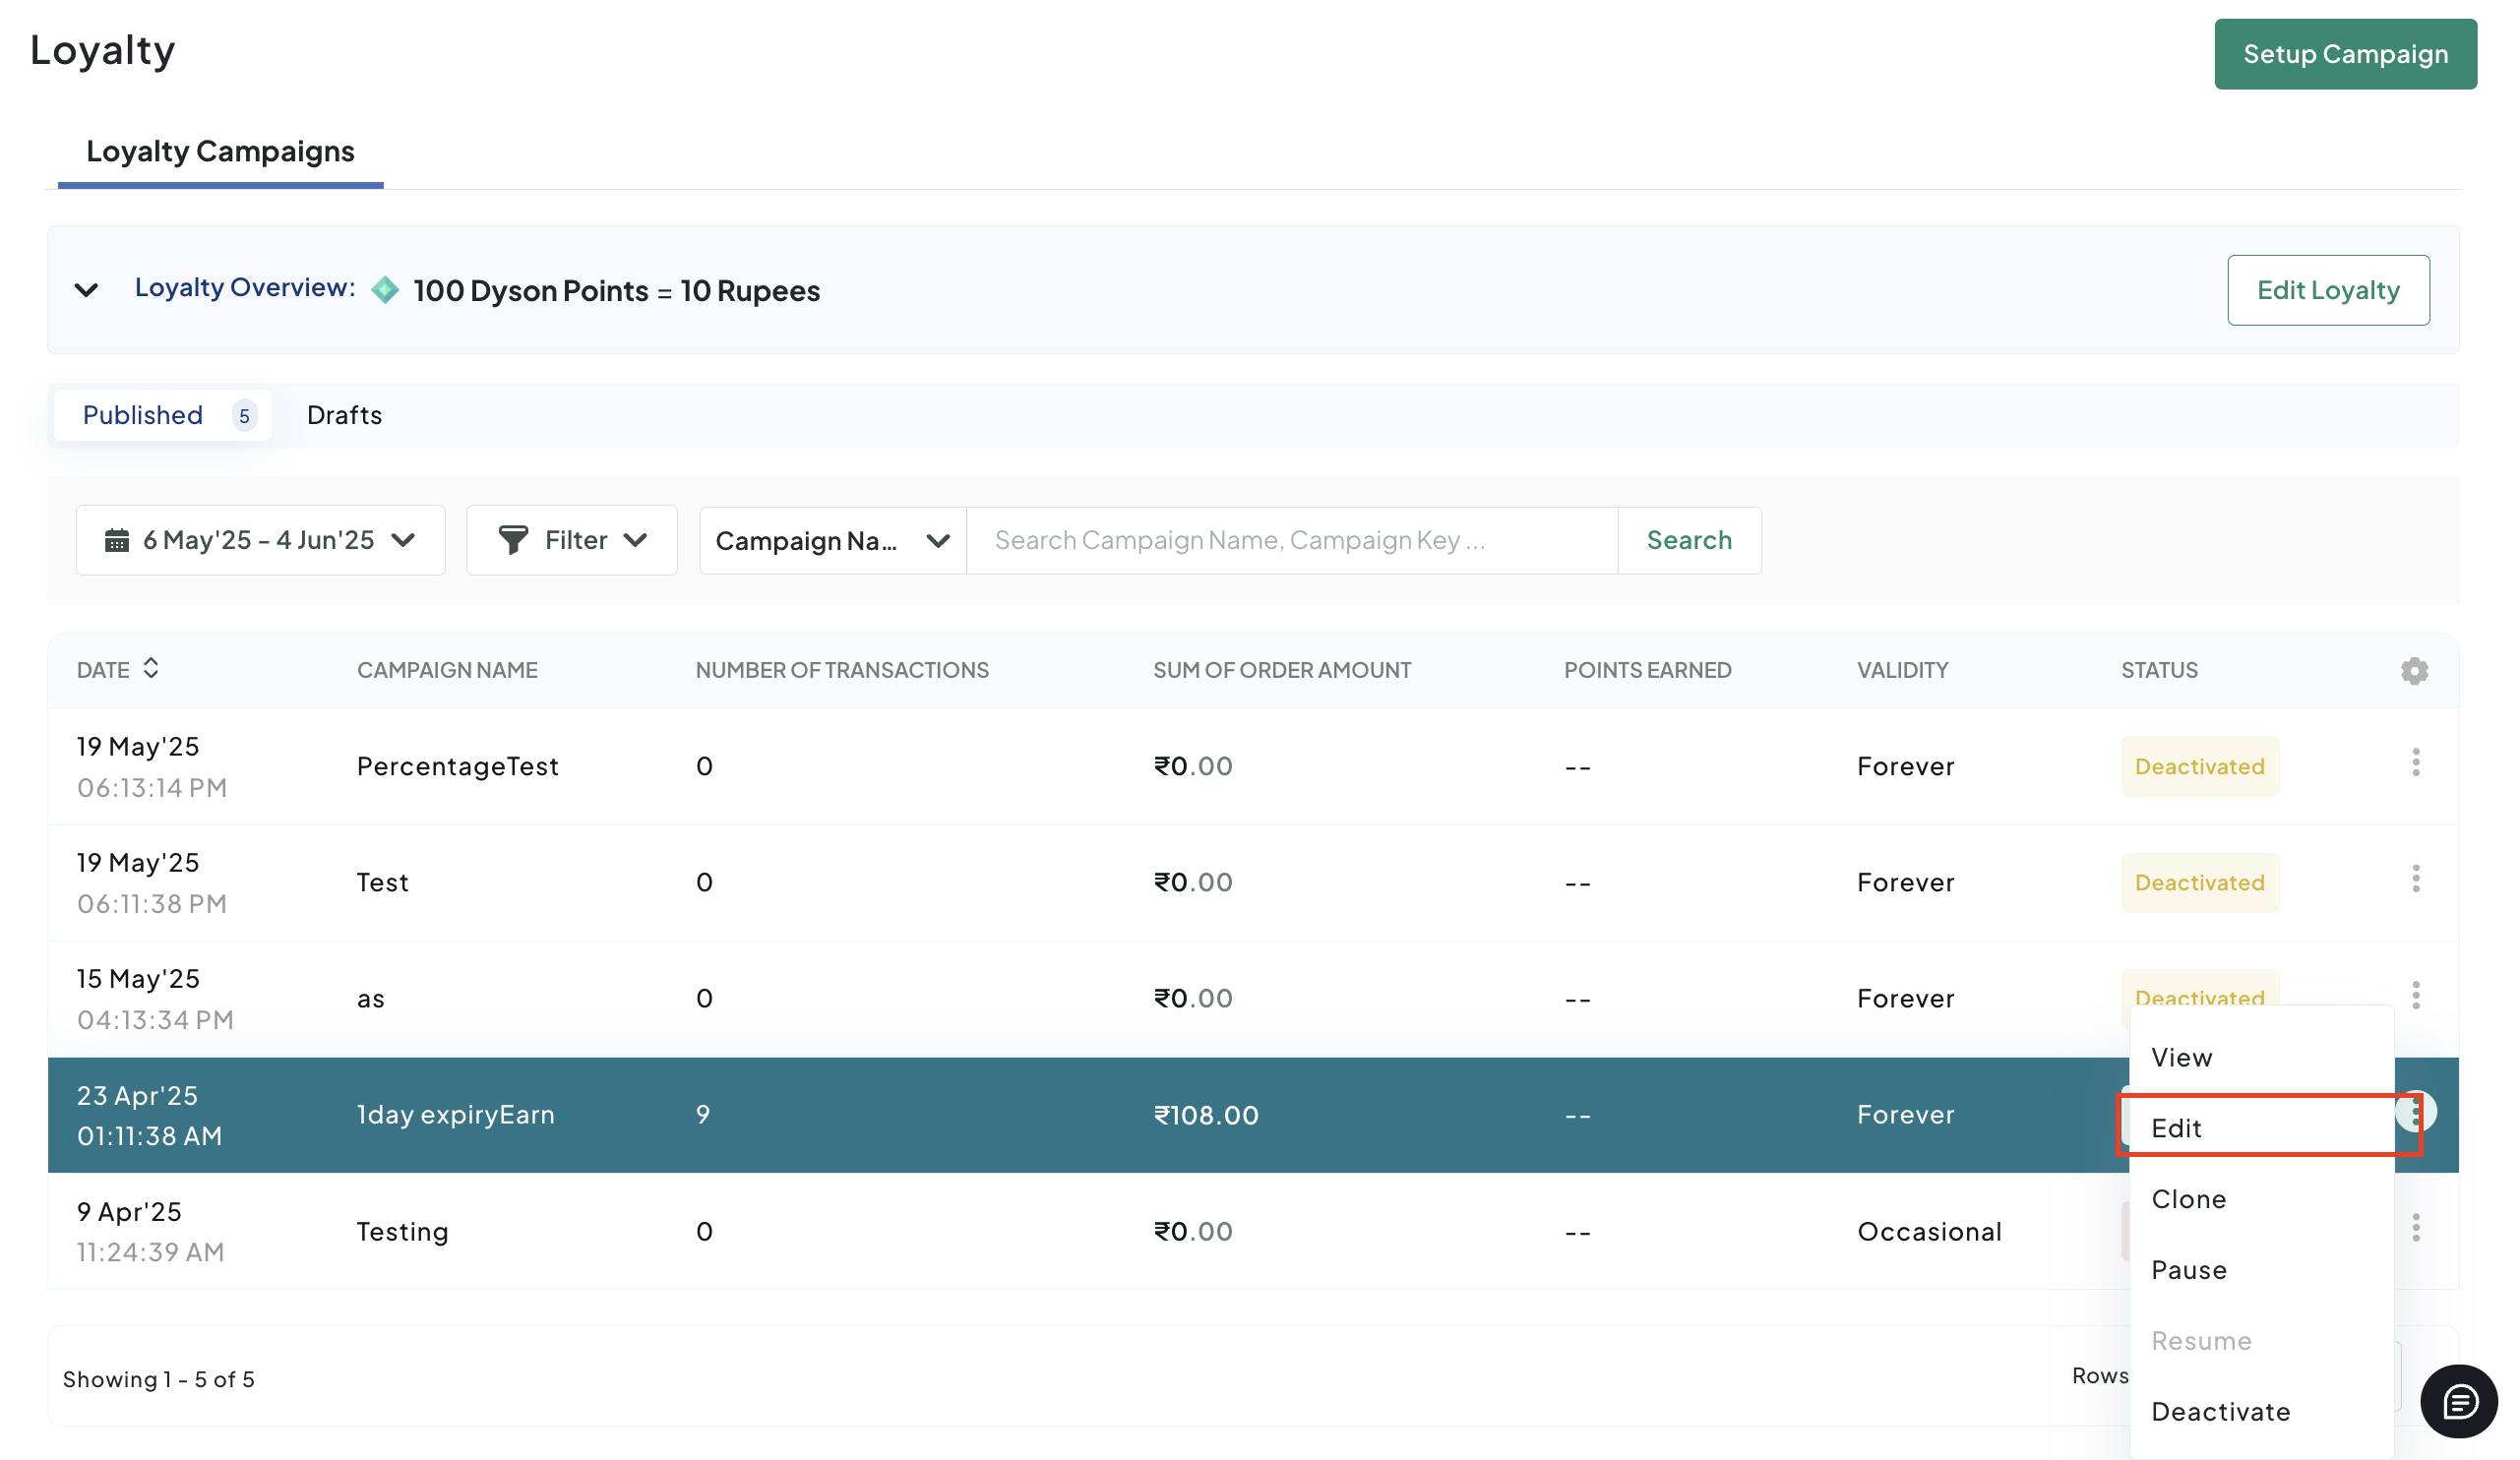
- Navigate to the Loyalty Campaigns page.
- Click the menu next to the campaign and select Edit similar to the following screenshot:
A confirmation message similar to the following screenshot is displayed.
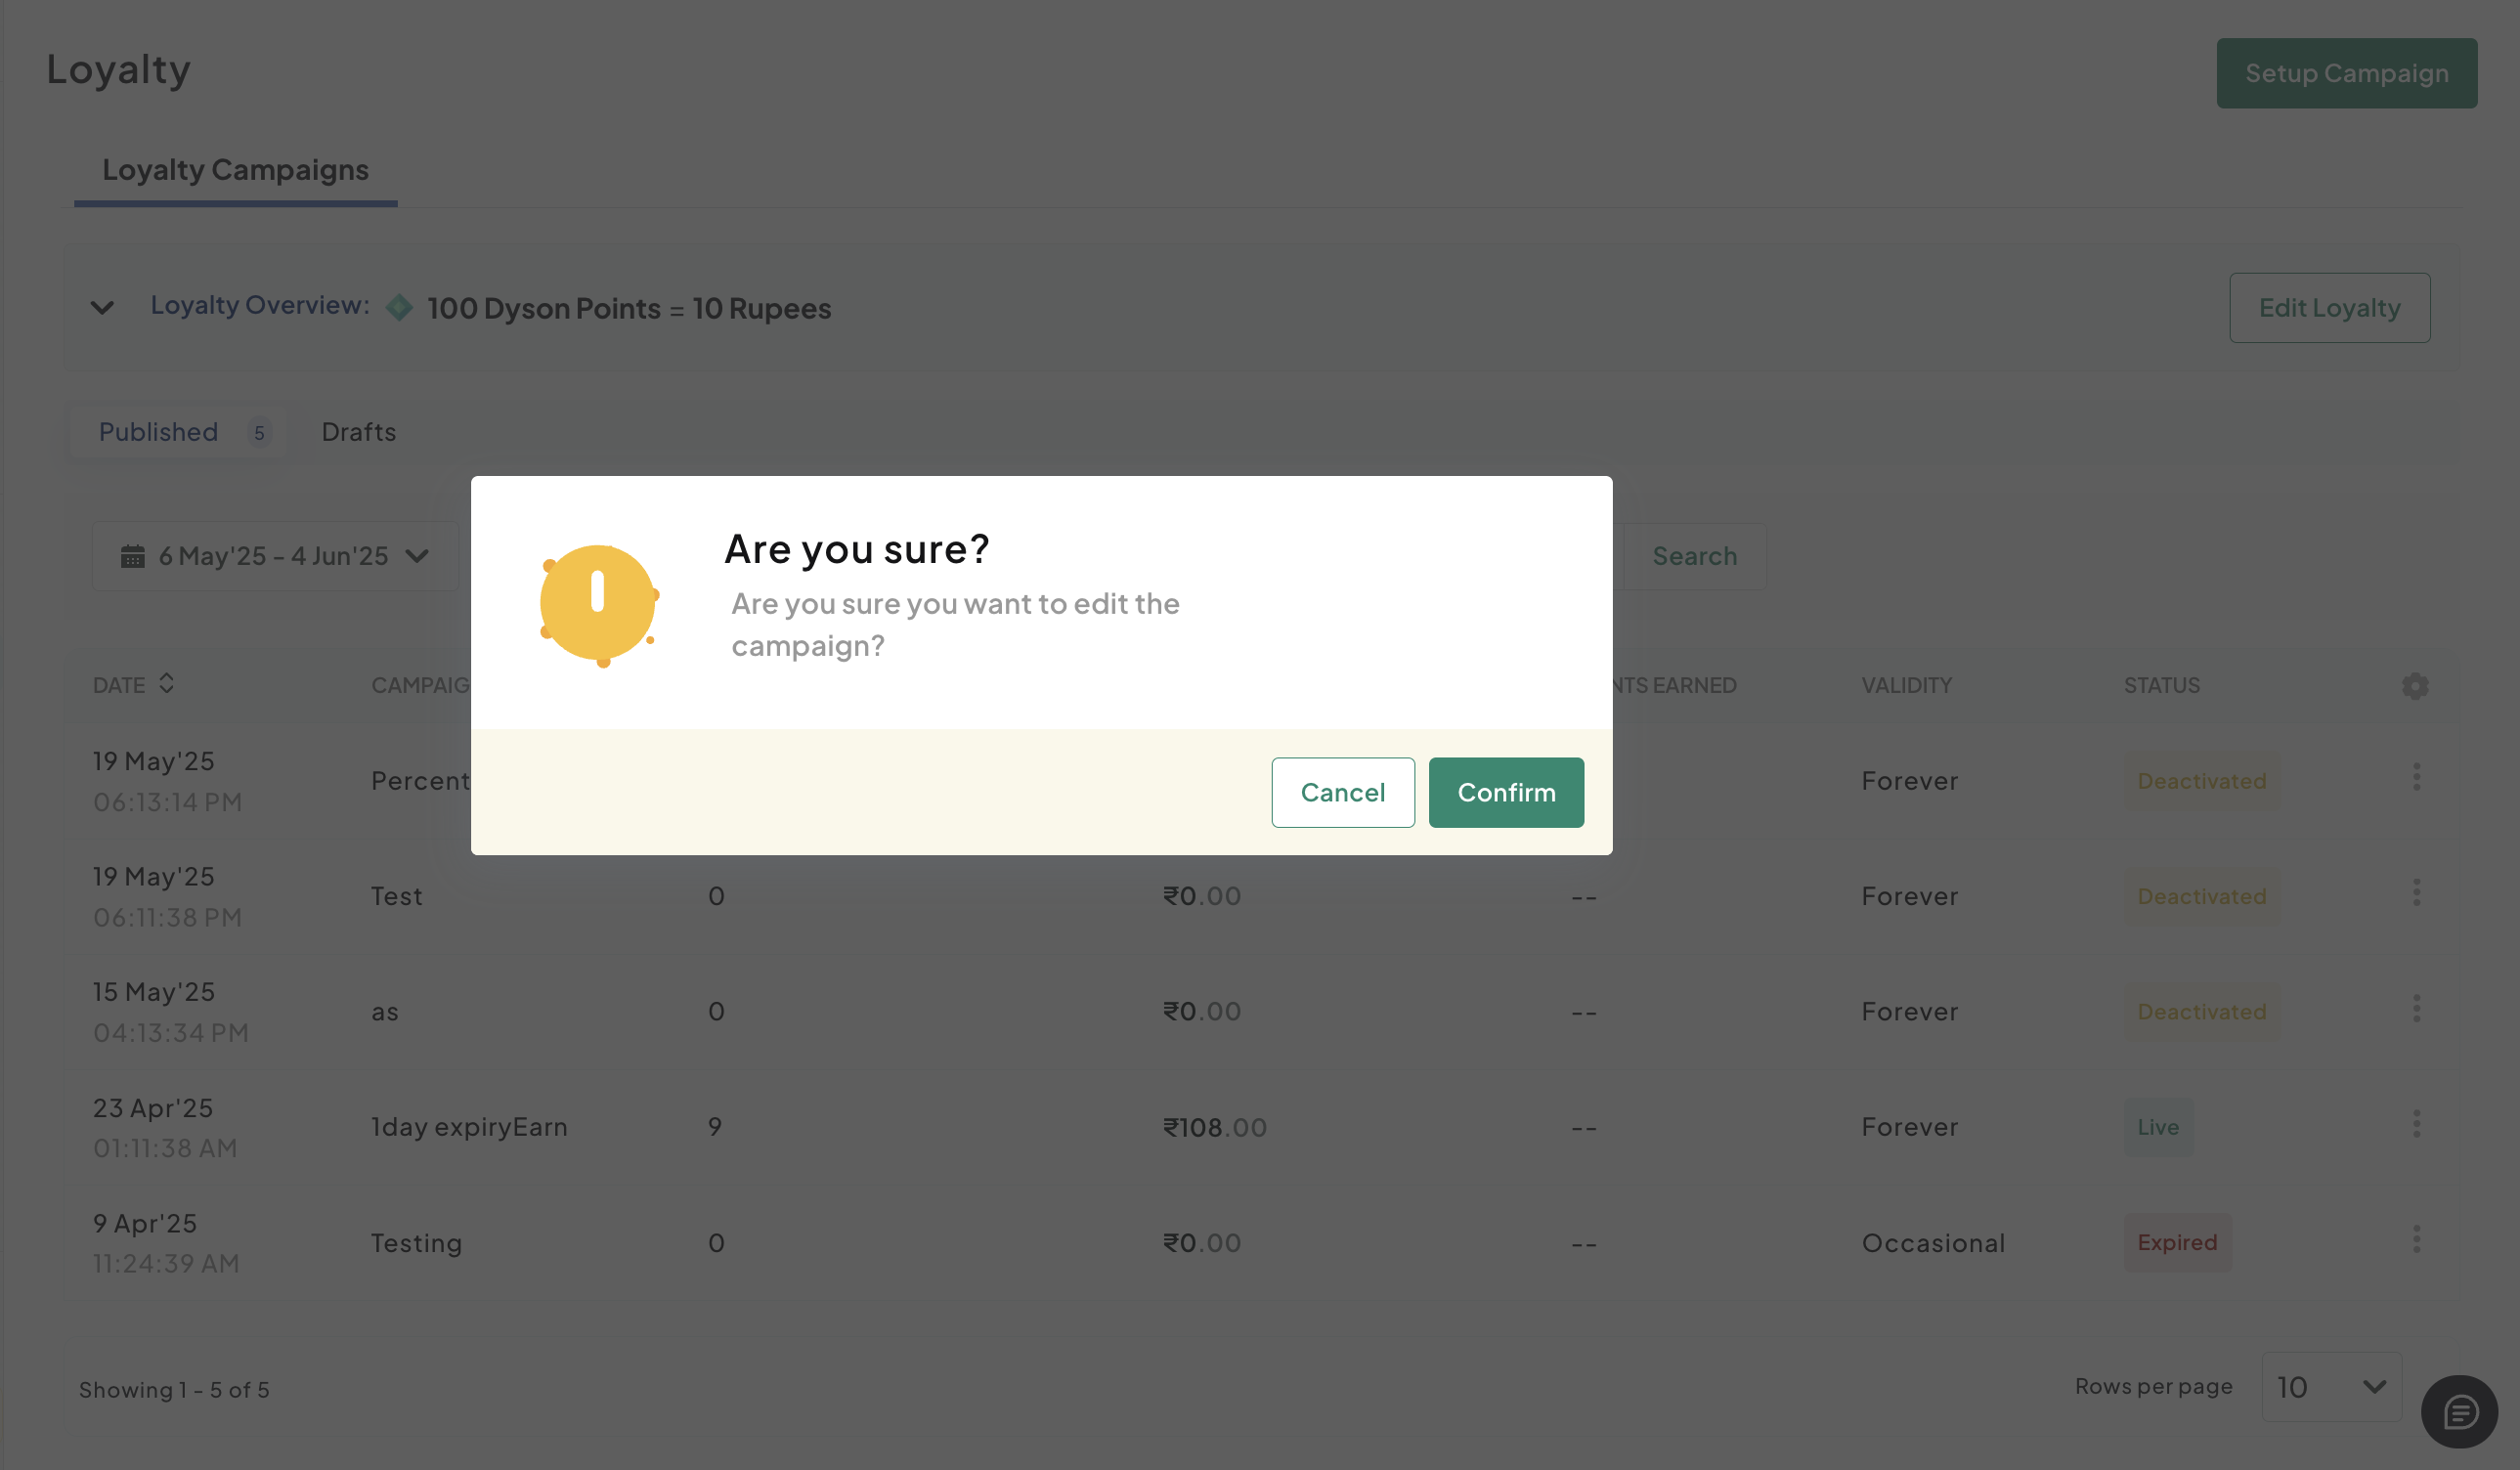
- Click Confirm.
- Enter the basic campaign details as described in the following table:
| Field | Description |
|---|---|
| Campaign Name | Enter a name for your campaign and this name will appear during checkout. |
| Campaign Details | Enter any specific details or terms and conditions. This will also be visible during checkout. |
| Campaign Validity | Select either Valid Forever or Occasional Validity to set how long the campaign will remain active. |
- Click Save & Next.
The Payment options page is displayed.
- Select the relevant payment modes to configure offer details that is explained in the corresponding tabs and then click Save & Next after you have selected payment options.
- Configure the campaign settings as described in the following table:
| Field | Description |
|---|---|
| Earning Rule Type | Select Flat or Percentage to define how points are earned per transaction. |
| Fixed Points Per Transaction | Enter the number of points awarded for each transaction if the "Flat" earning type is selected. |
| Min. Transaction Amount (Optional) | Enter the minimum transaction amount required to earn points. |
| Max. Transaction Amount (Optional) | Enter the maximum transaction amount for earning eligible points. |
| Set Point Expiry (Optional) | Enter the duration in days for point expiry, or leave blank to use the default expiry setting from loyalty configuration. |
- Click Show Advanced Options at bottom and configure the following advance options (if required):
| Field | Description |
|---|---|
| Budget Amount per User (optional) | Enter the points limit you want to set per user for the campaign. |
| Apply Campaign on Certain Products SKU | Select this check box if the campaign should apply only to specific product SKUs, enabling targeted promotions. |
| Allow Campaign on Specific Days | Select this check box to restrict the campaign to operate on particular days, enabling scheduling flexibility. |
| Set Overall Budget for the Campaign | Select this check box to set a total points budget for the campaign, capping the total point distribution. |
| Reset User Limits | Select how often to reset user limits from the drop-down list, with the following options:
|
- Click Save & Publish.
Updated 17 days ago