Create a Pre-Discounted Offer
Pre-discounted offers are applied at your (merchant) end and the transaction amount passed is the discounted transaction amount. PayU is primarily used for doing certain checks and validations rather than applying the discount itself. Pre-discounted offers help you with the following:
- Better user experience on the PayU Payment page (PayU Hosted Checkout) as the offer is already applied at your side, PayU will not be showing the list of offers on the PayU Payment page.
- Reconciliation and Settlements (offer engine back calculates original transaction amount, discount amount, and the net debit amount which can be used on reconciliation & settlements).
- The Don’t allow transaction, if offer is not applicable flag is enabled by default.
This procedure describes how to create a Prebuilt offer on PayU Dashboard and it is similar to creating a Discount offer.
Note: In Merchant Hosted Checkout integration, hide all other offers if Pre-Discounted offer is used.
Steps to Create a No-Cost EMI Offer
- Add the basic details
- Configure payment modes
- Include the Offer rules
- Configure Offer Subvention Details
- Review of the Offer
Step 1: Add the basic details
-
Navigate to .Offers Dashboard.
-
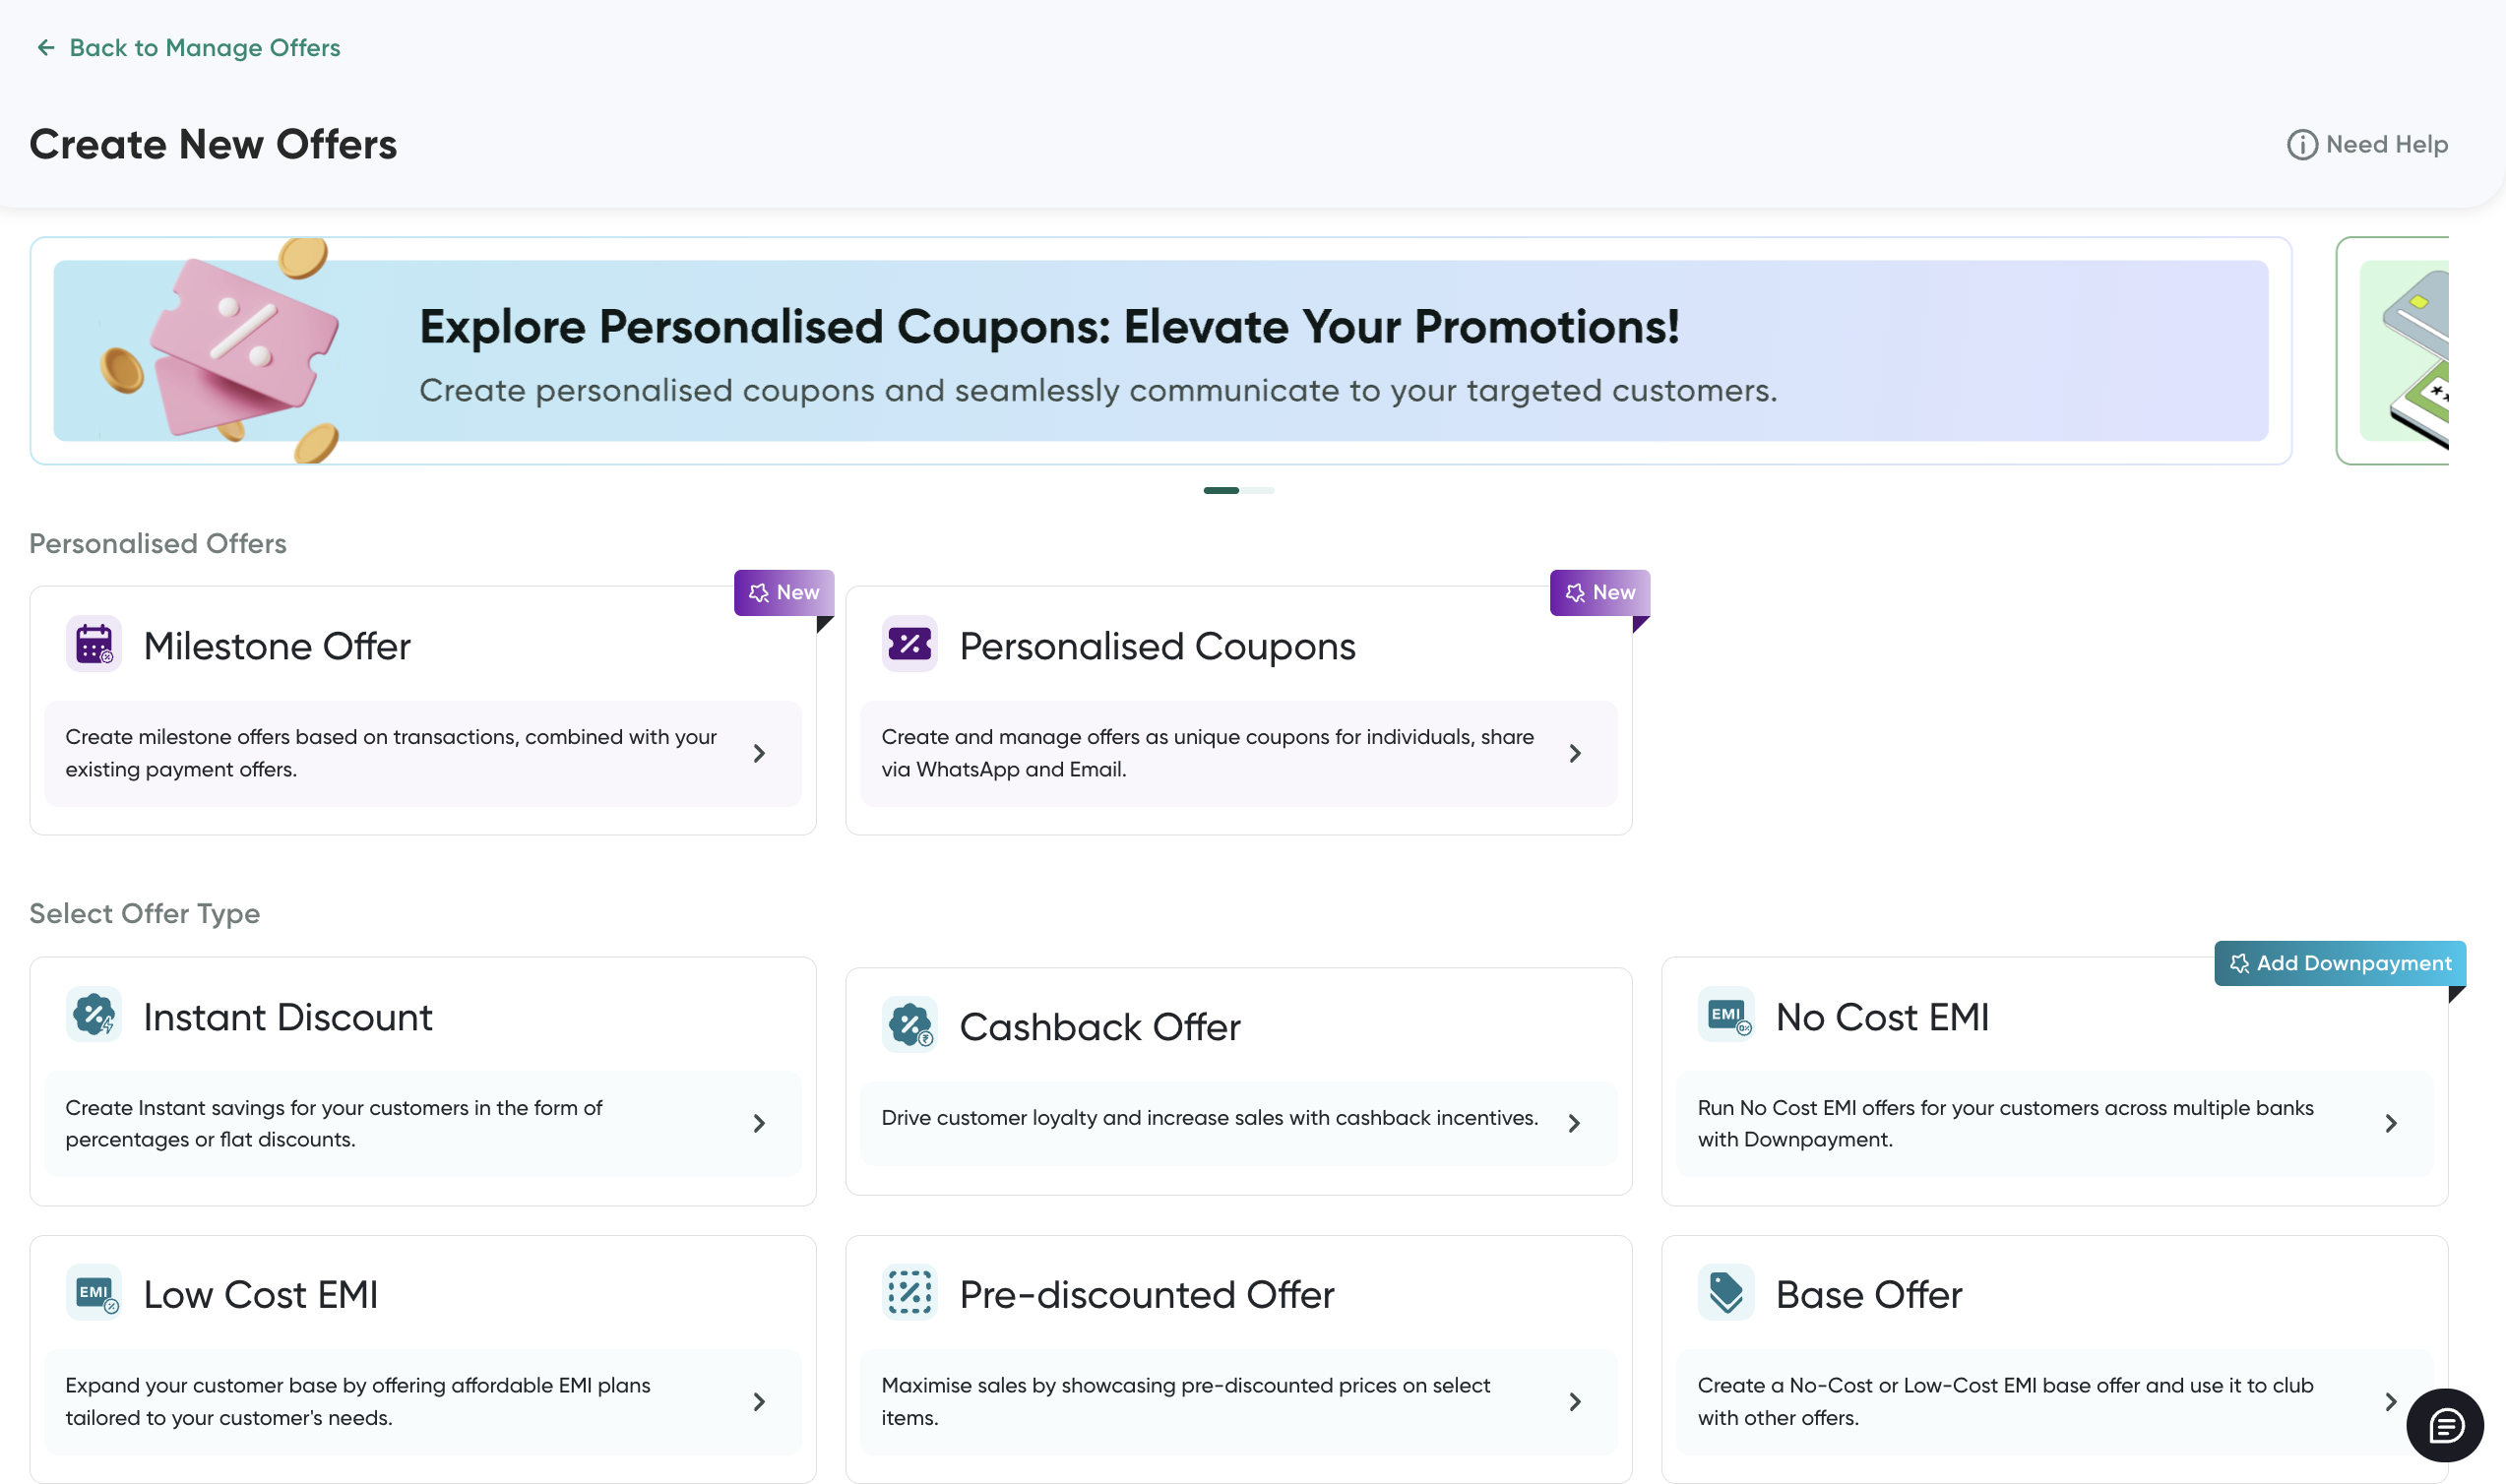
Click Create an Offer at the top-right corner.
The Create New Offer page is displayed.
-
Select the discount type as Pre-Discounted Offer.
The Choose an Offer Type to get started.
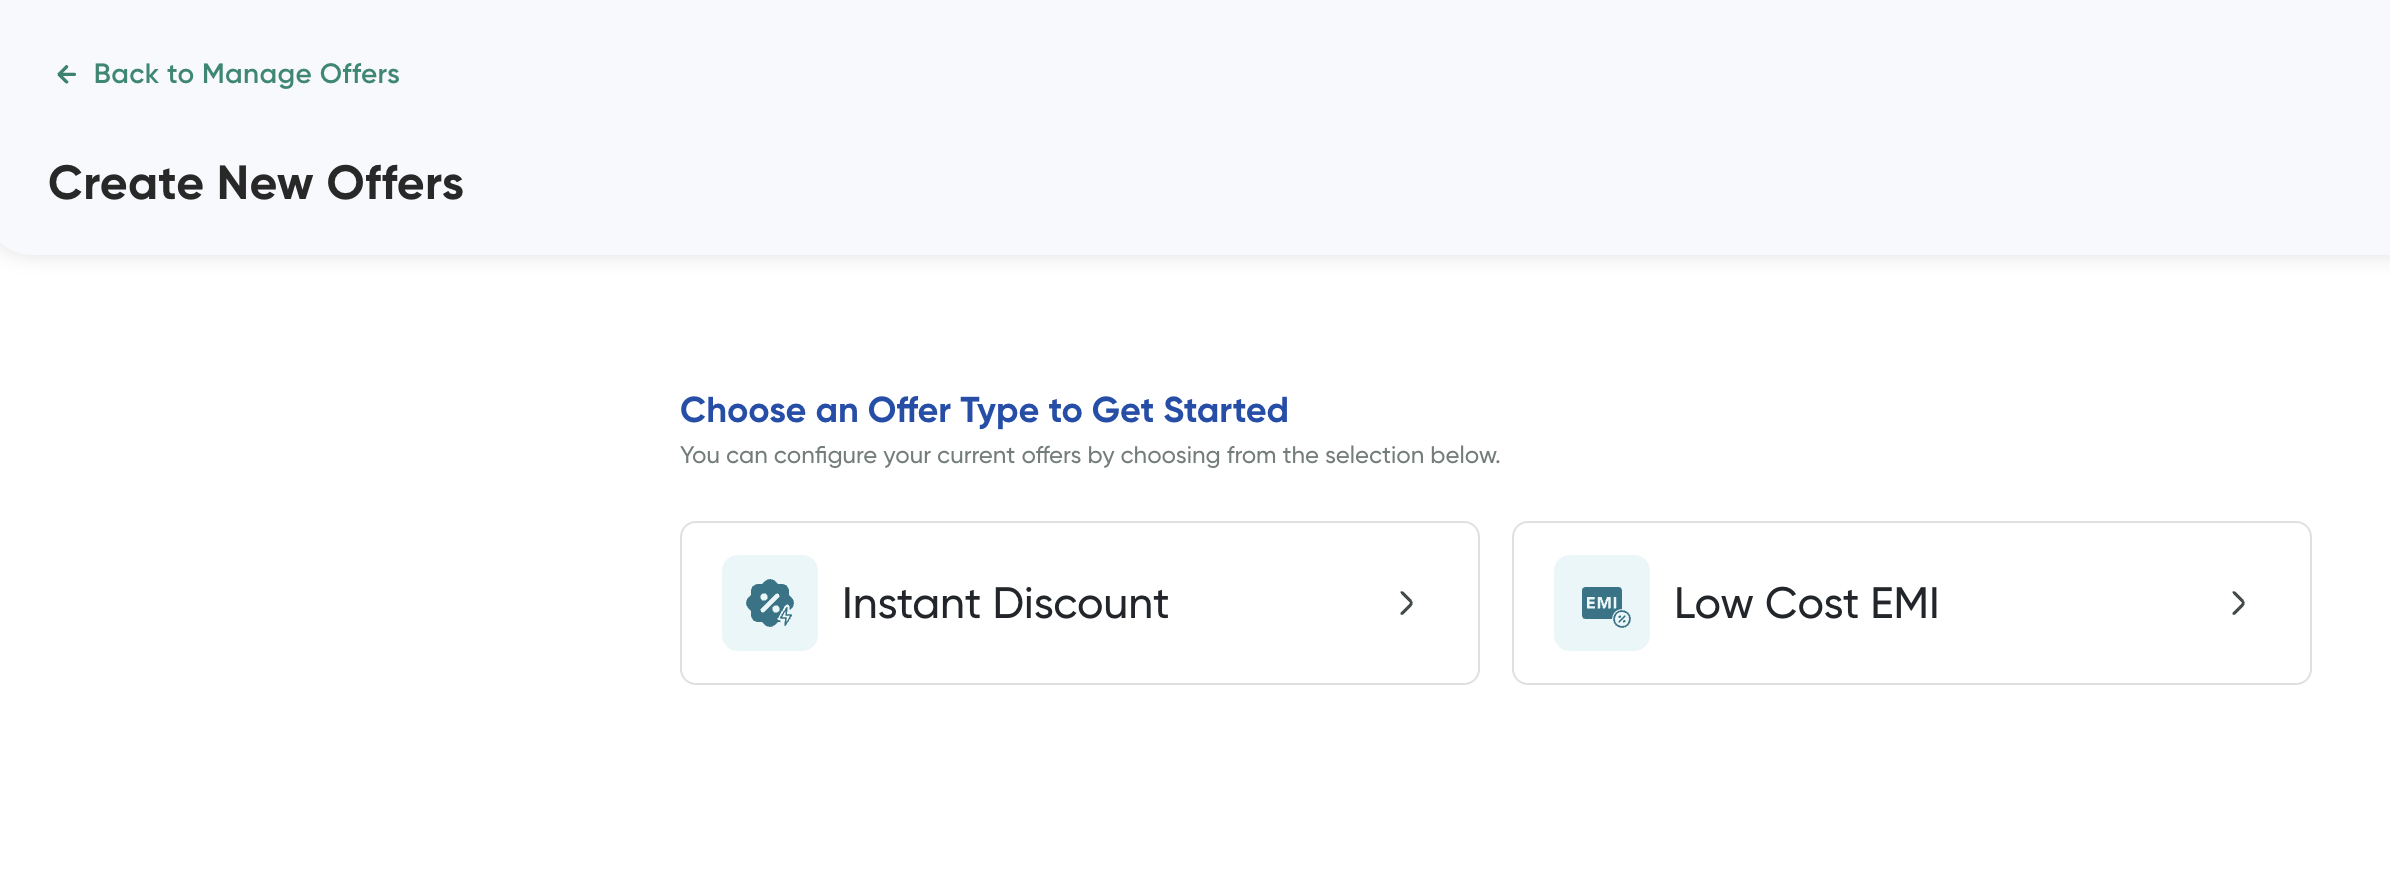
- Select any of the following offer sub-types:
- Instant Discount: The instant discount is applied and discounted amount is displayed on the PayU Payment page and other offers are not shown.
- Low-Cost EMI: The low-cost EMI is applied and the EMI amount is displayed on the PayU Payment page and other offers are not shown.
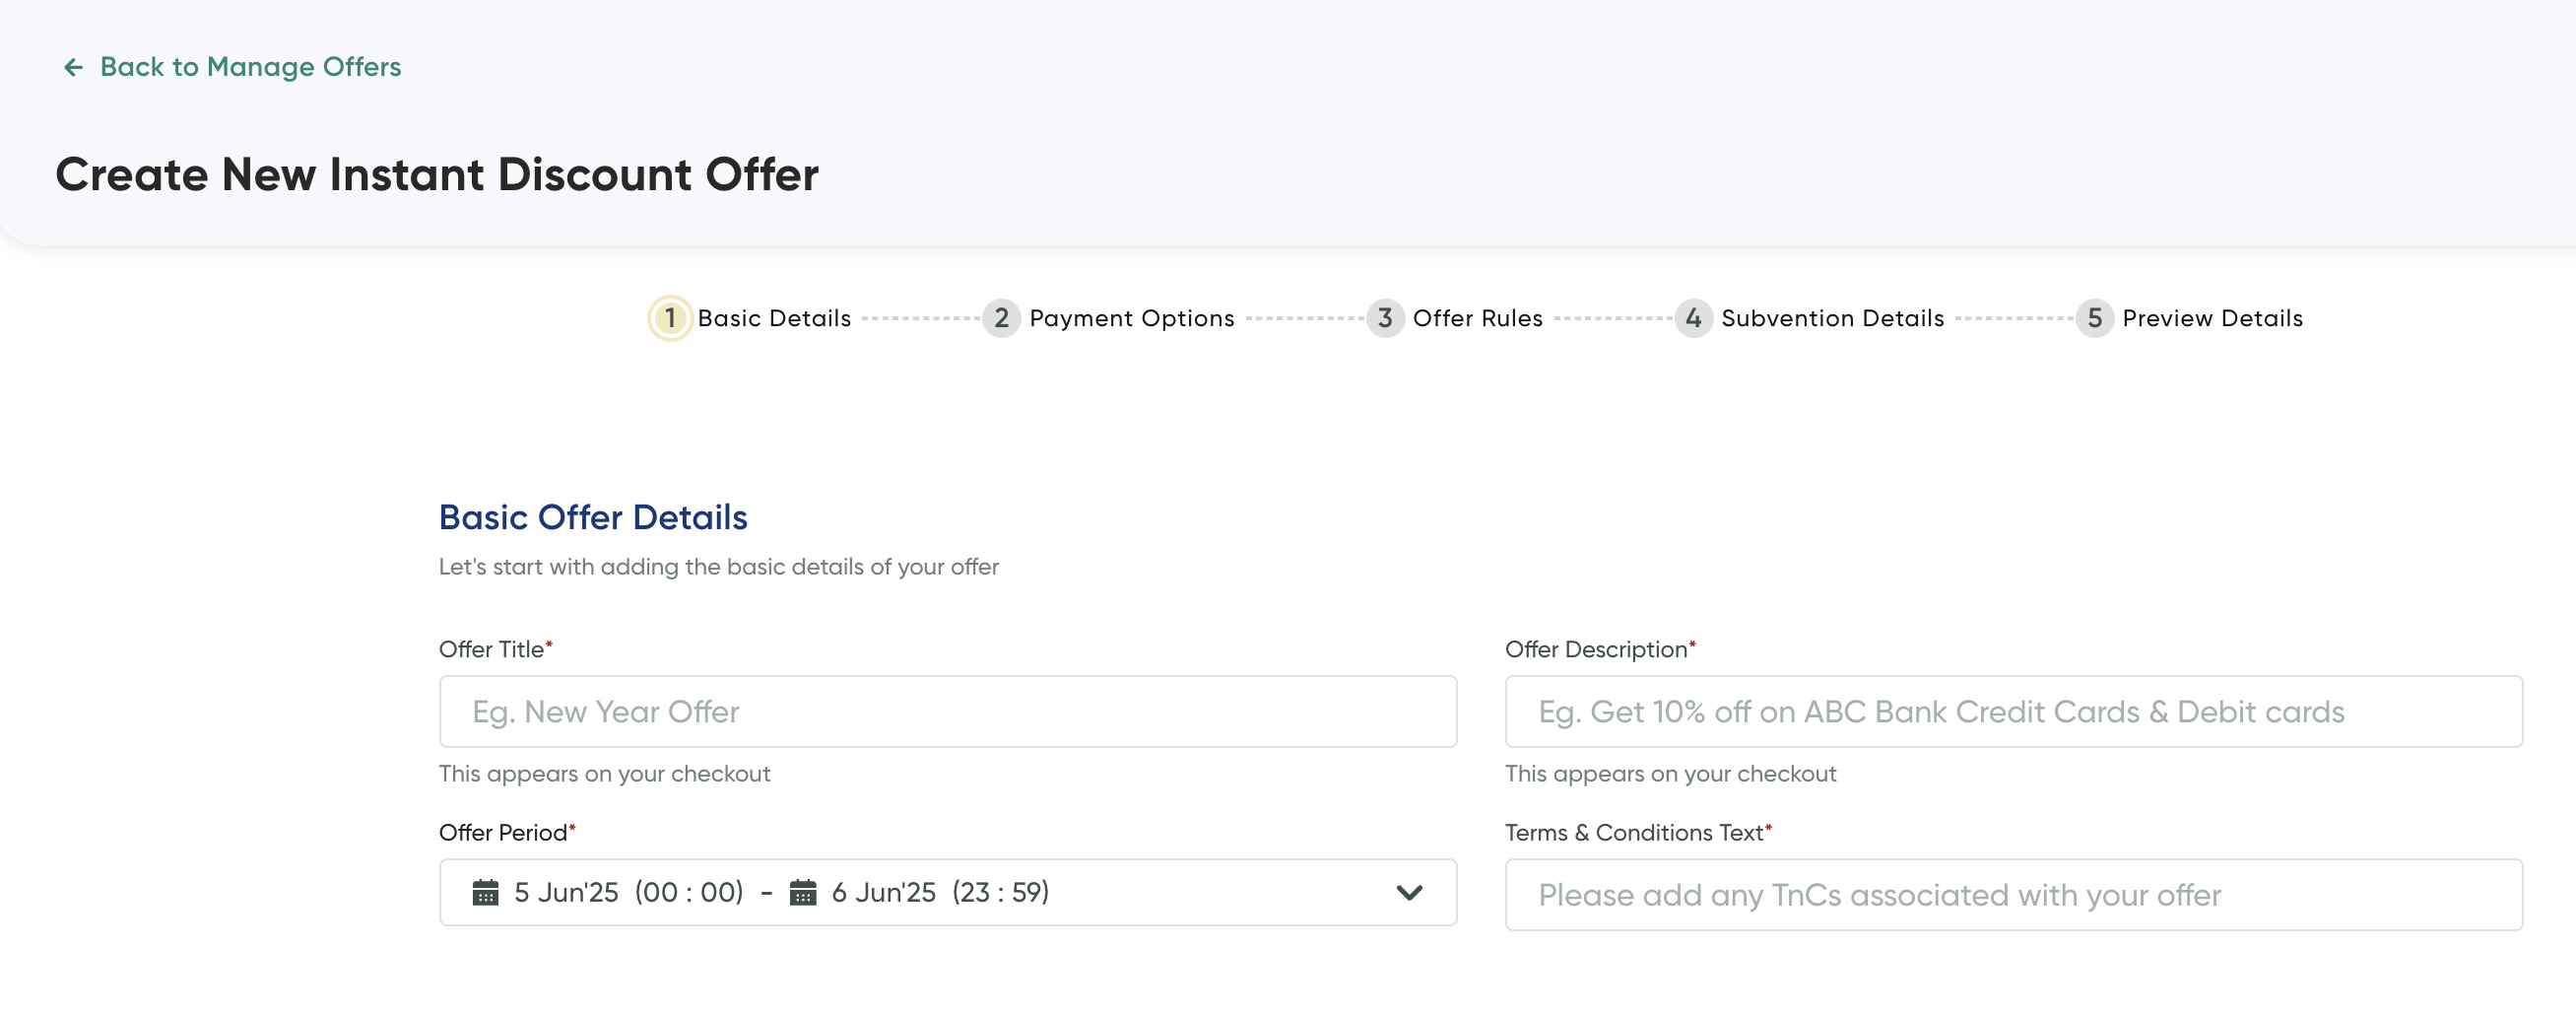
The Basic Offer Details page is displayed.
-
Add the basic details. For more information, refer to Create an Instant Discount or Cashback Offer.
-
After you complete the above details and click Next.
The Payment Options page is displayed.
Note: When you are creating an offer, you can choose to save the incomplete offer details in the Draft state using the Save as Draft & Exit button at the top-right corner and publish it later.
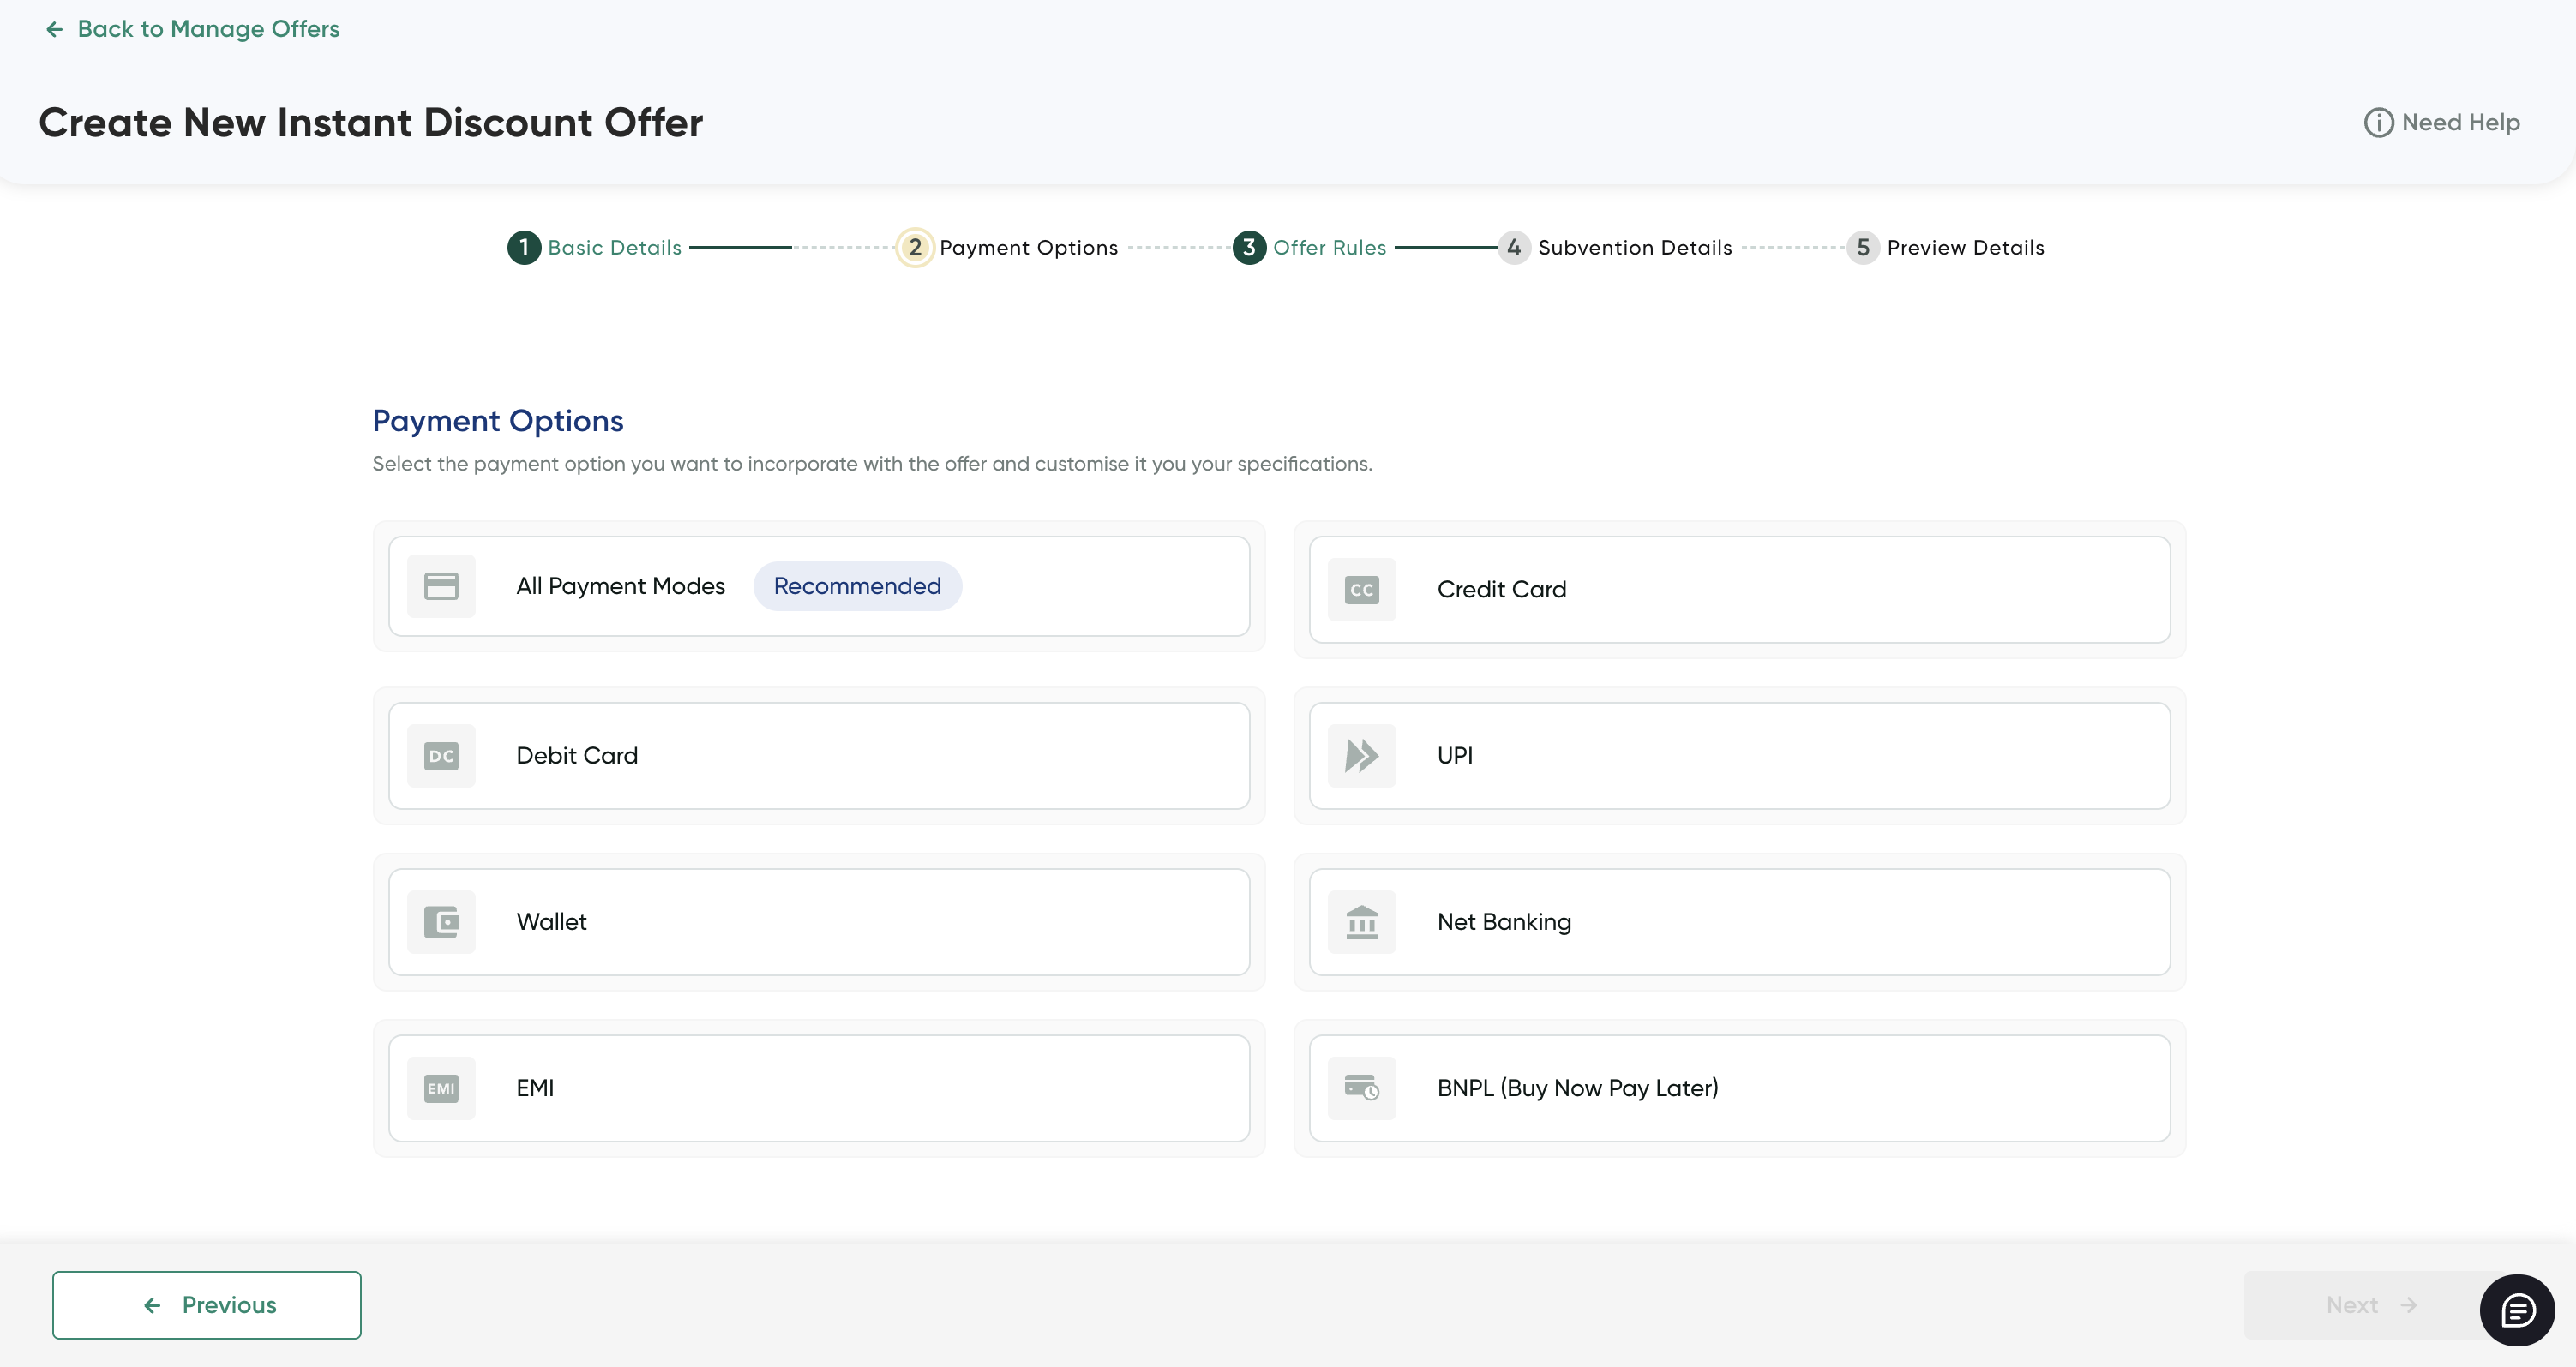
Step 2: Configure payment modes
- Configure the payment modes.
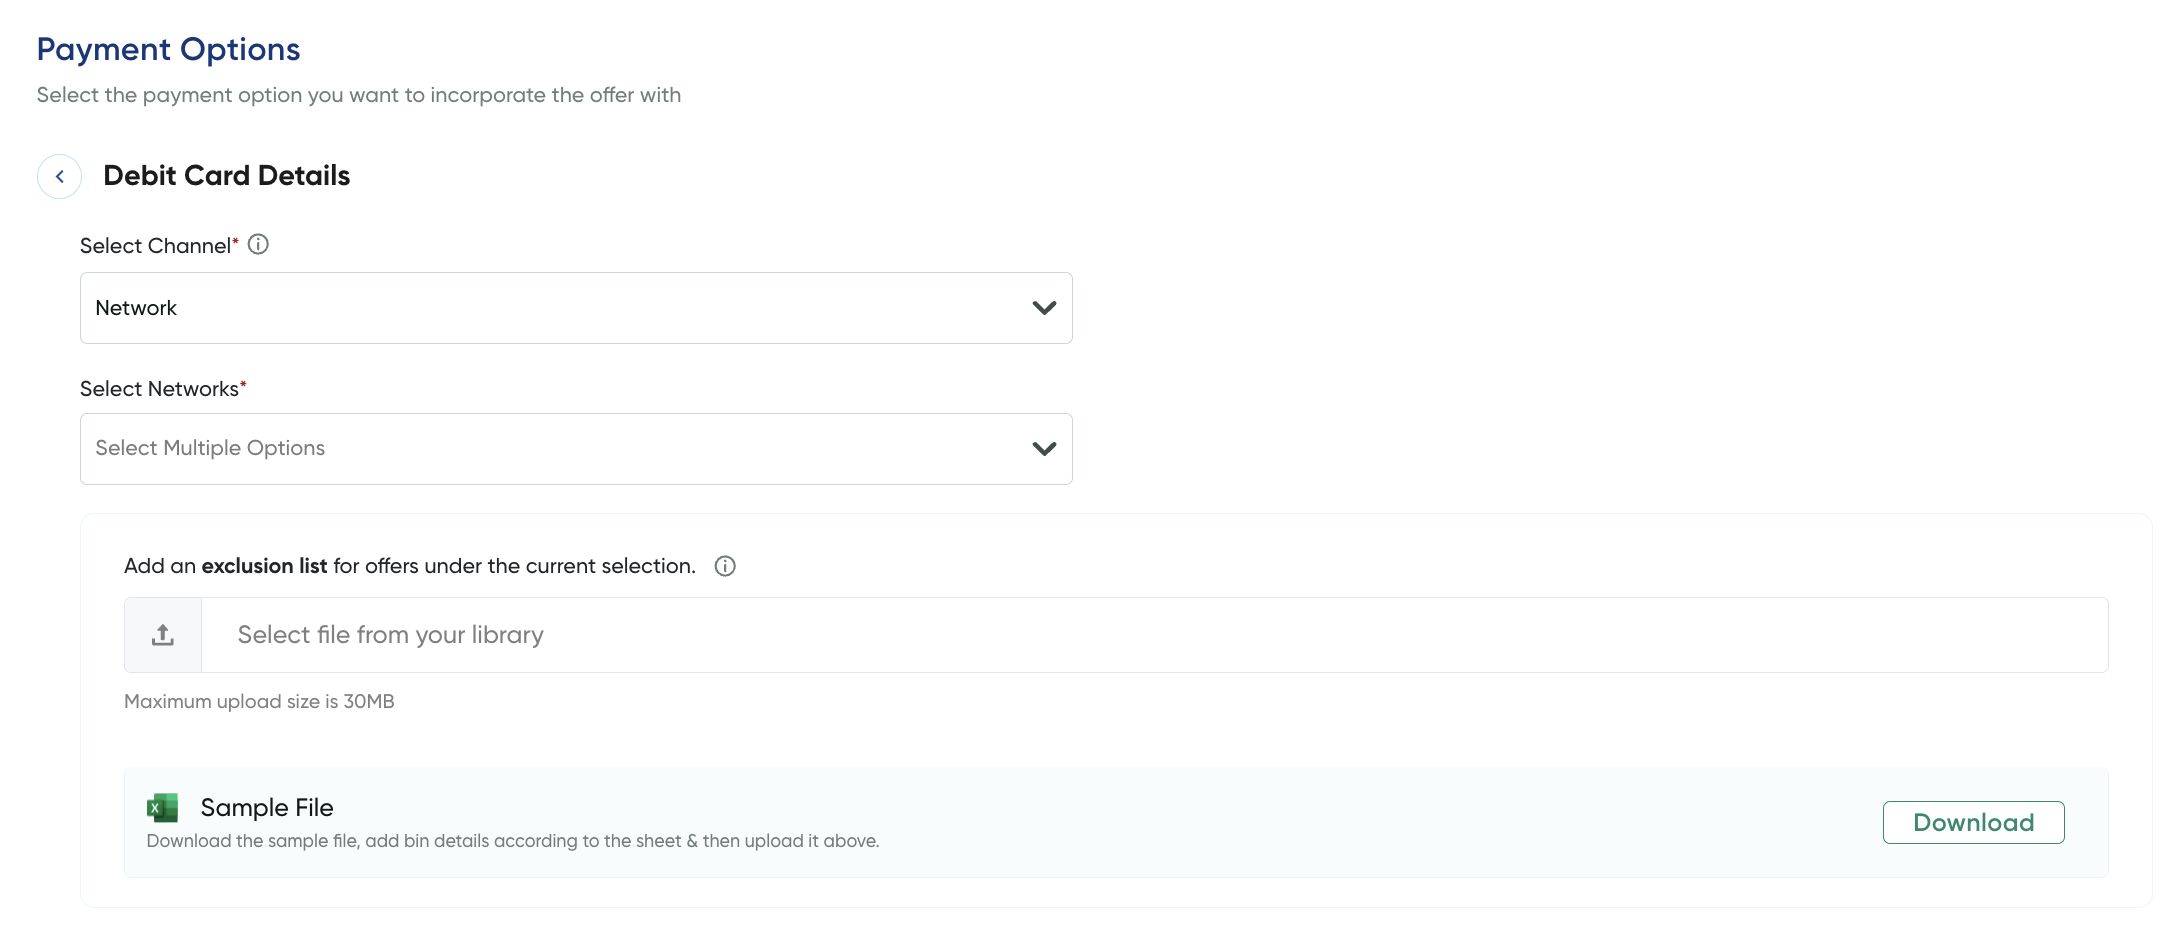
Debit Cards
- Click the Edit button on the Debit Cards tile.
The Debit Card Details page is displayed.
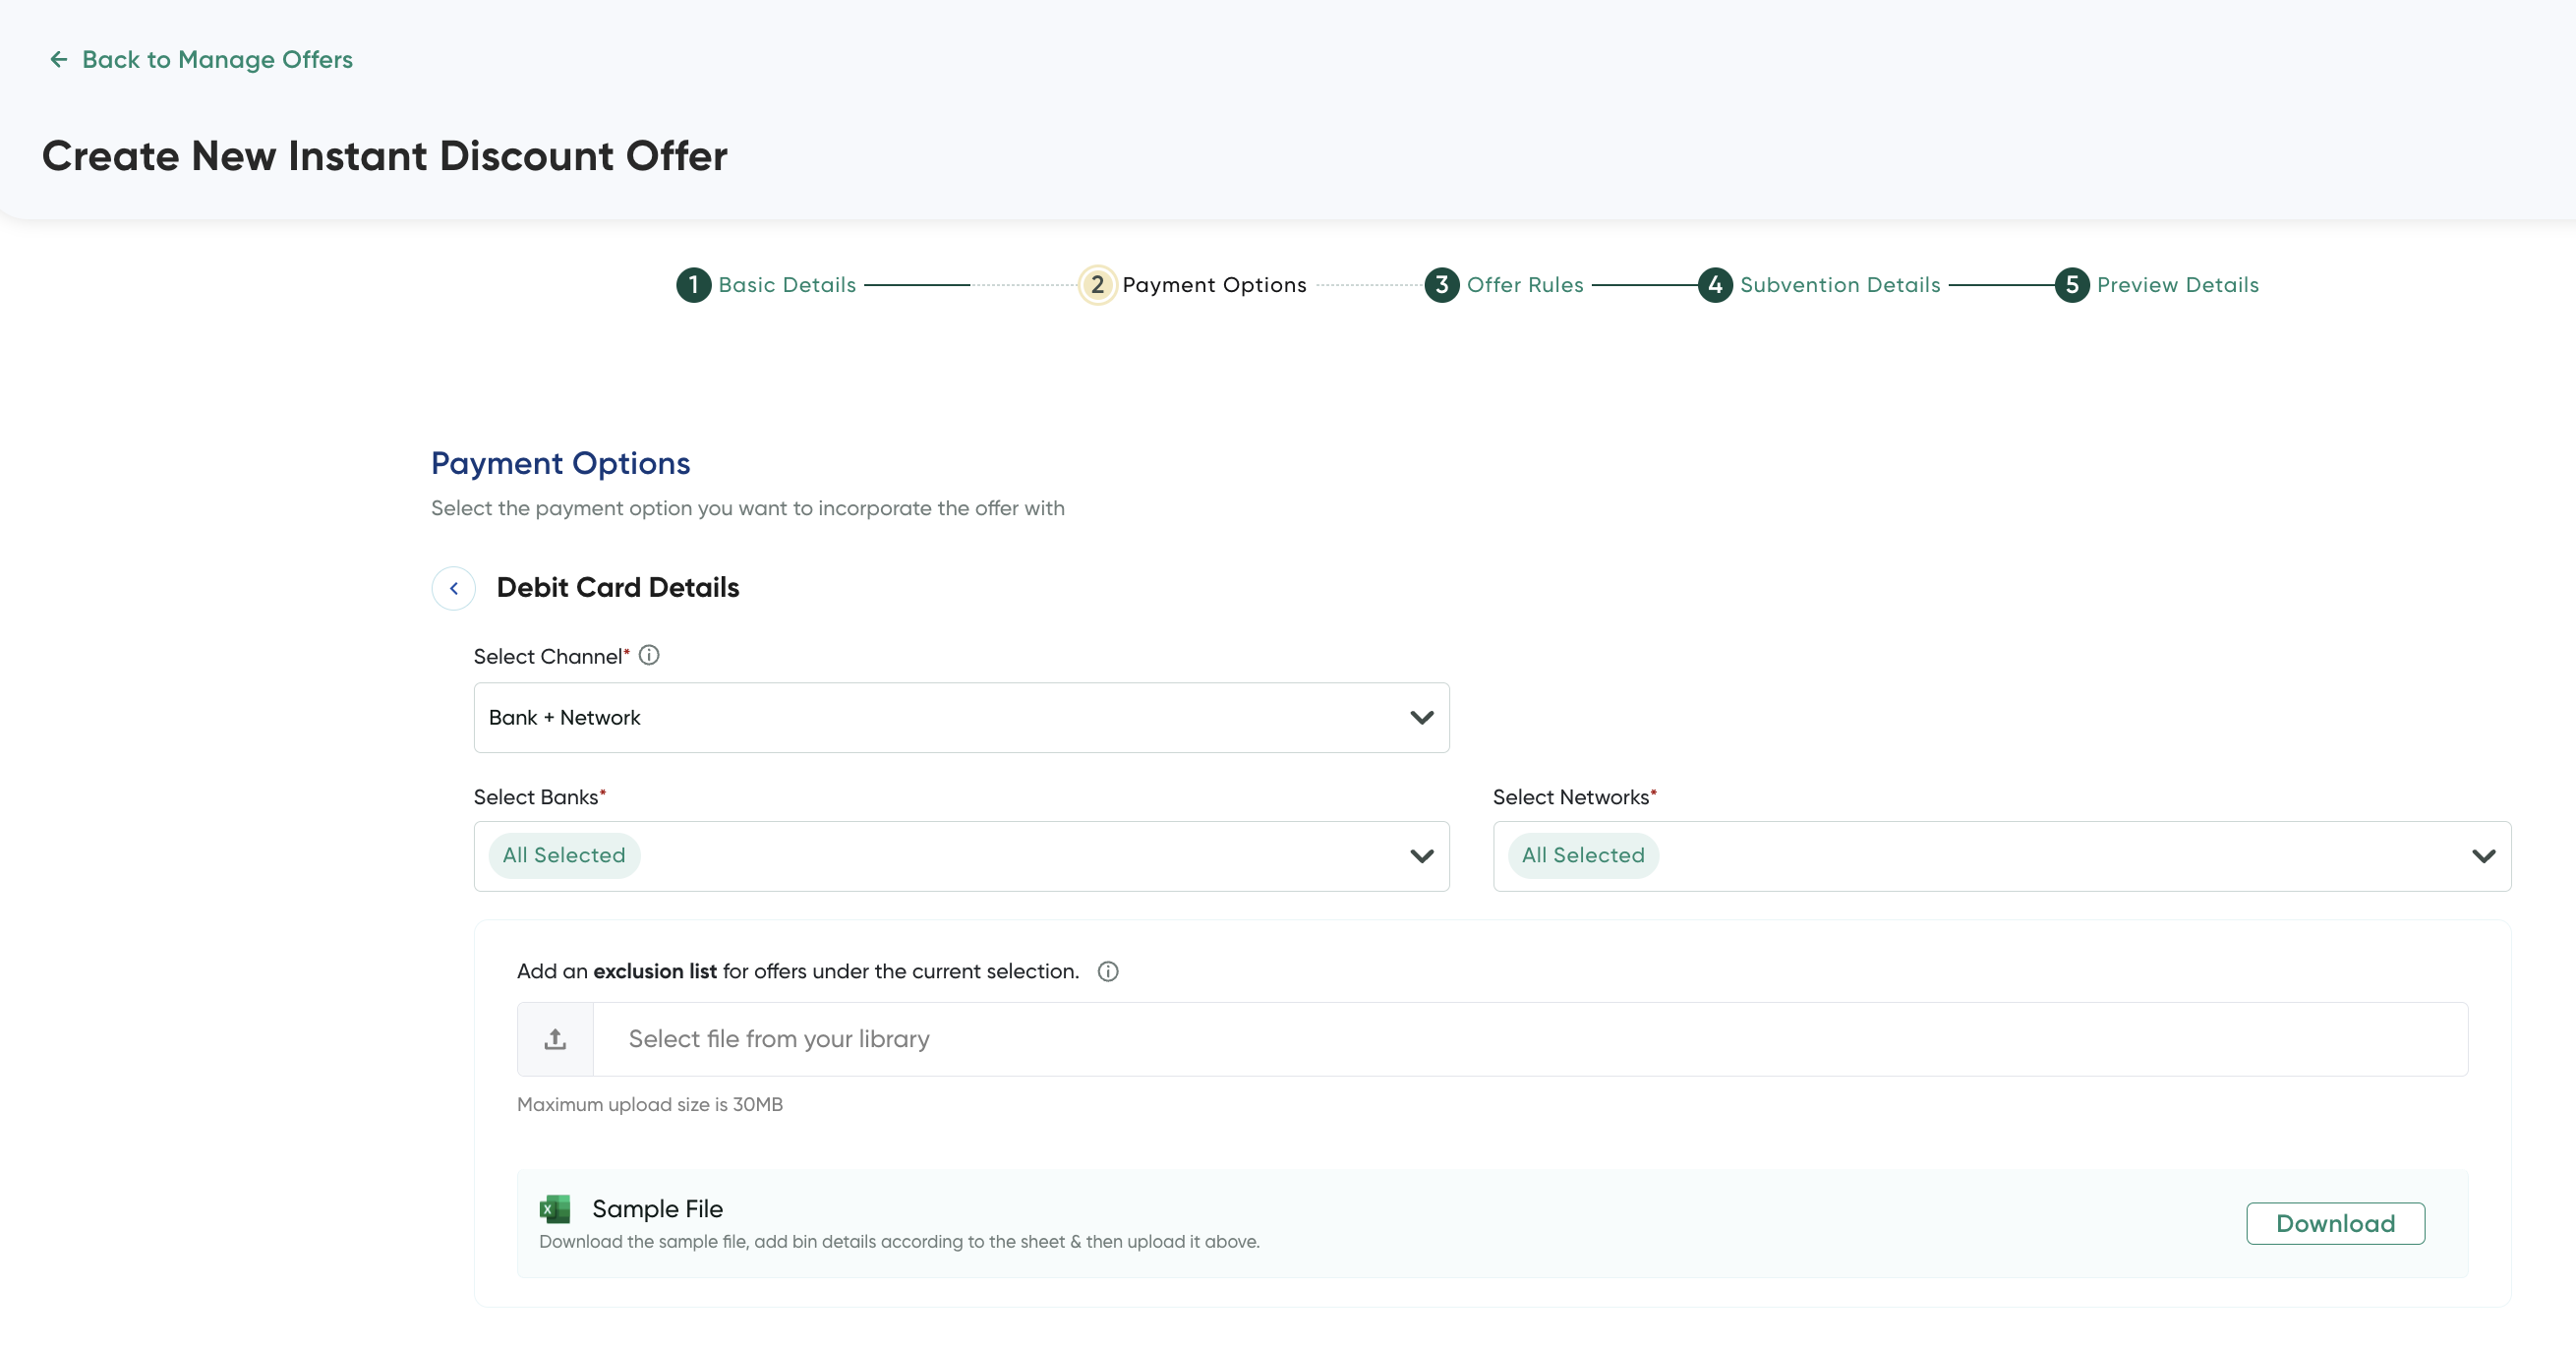
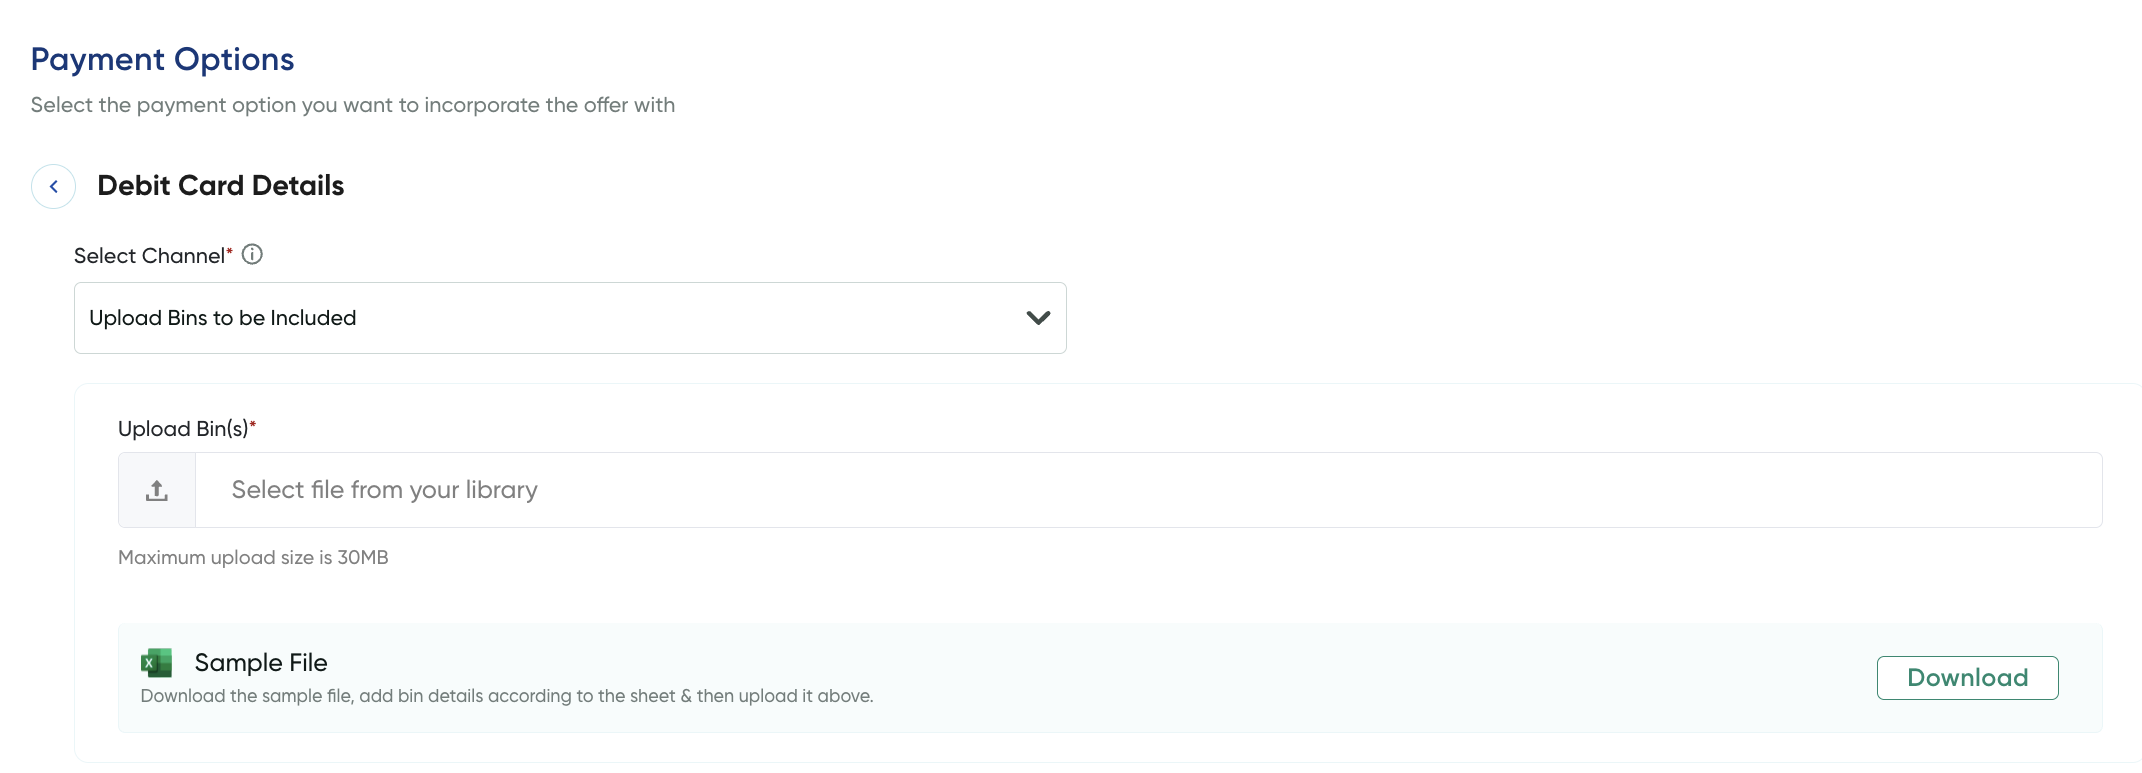
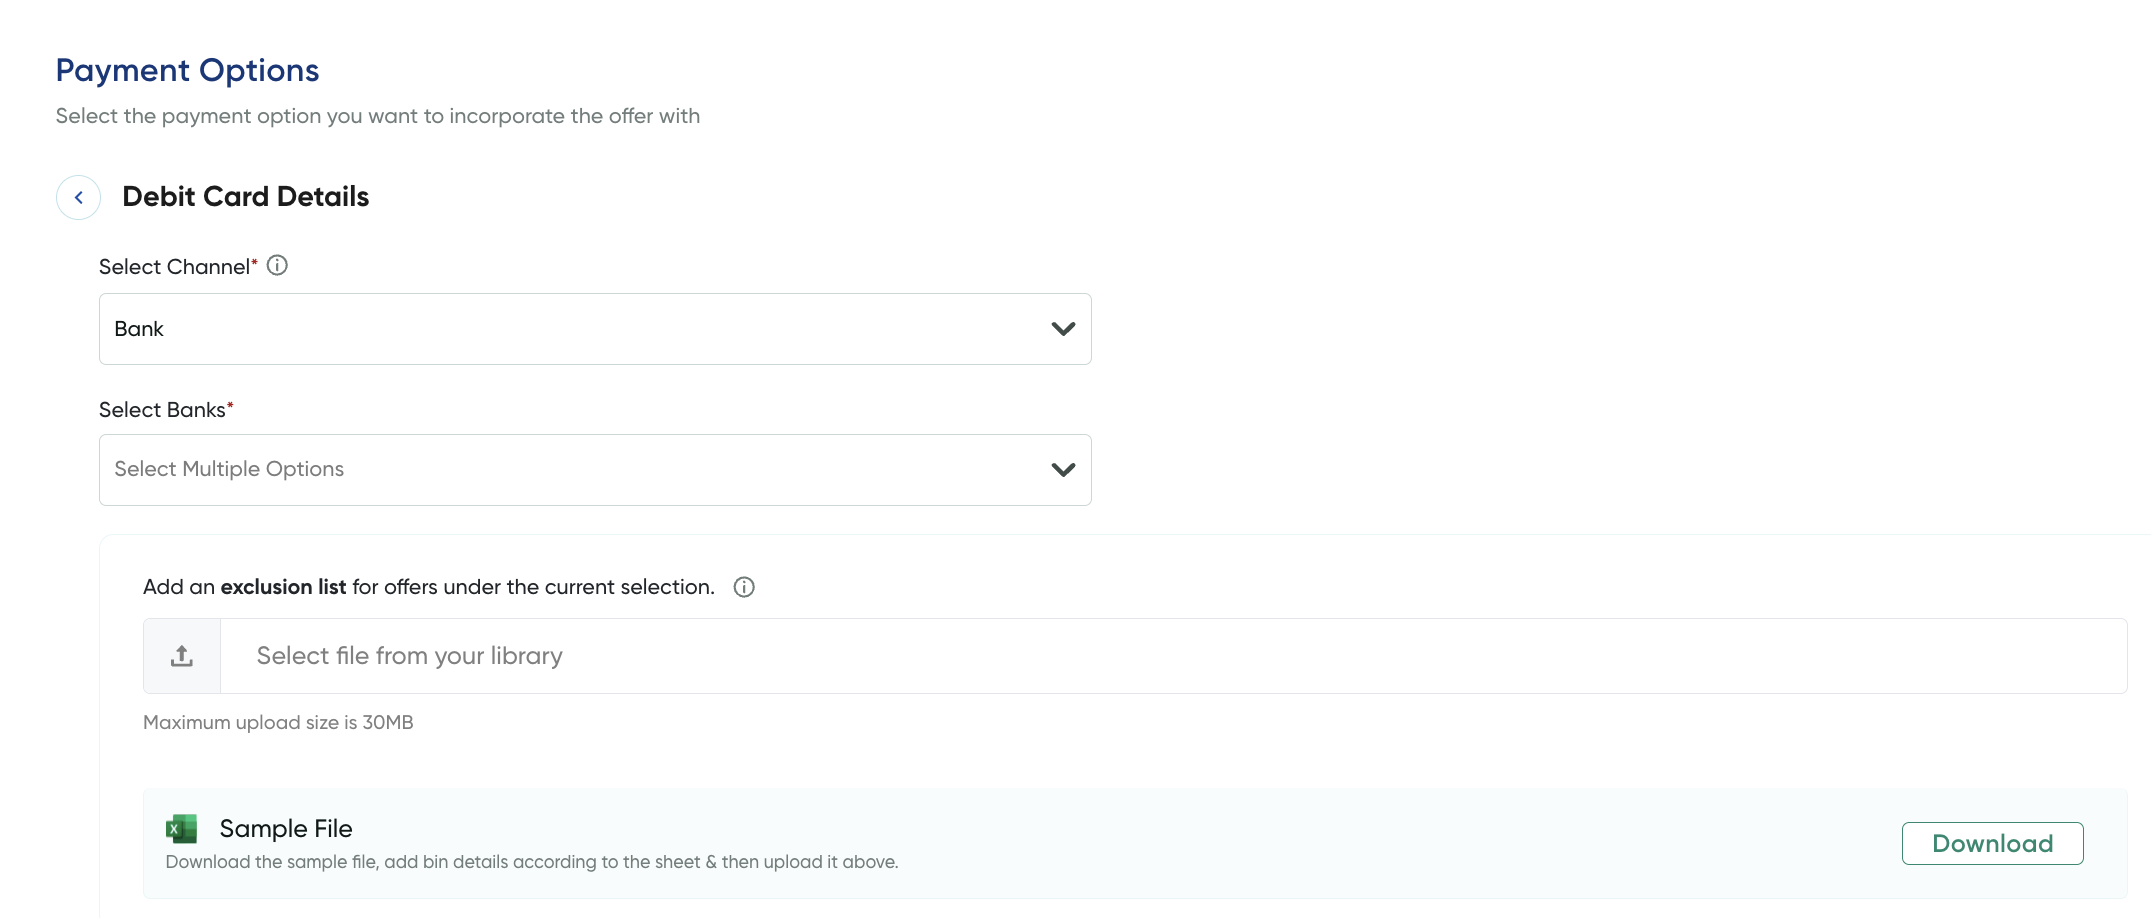
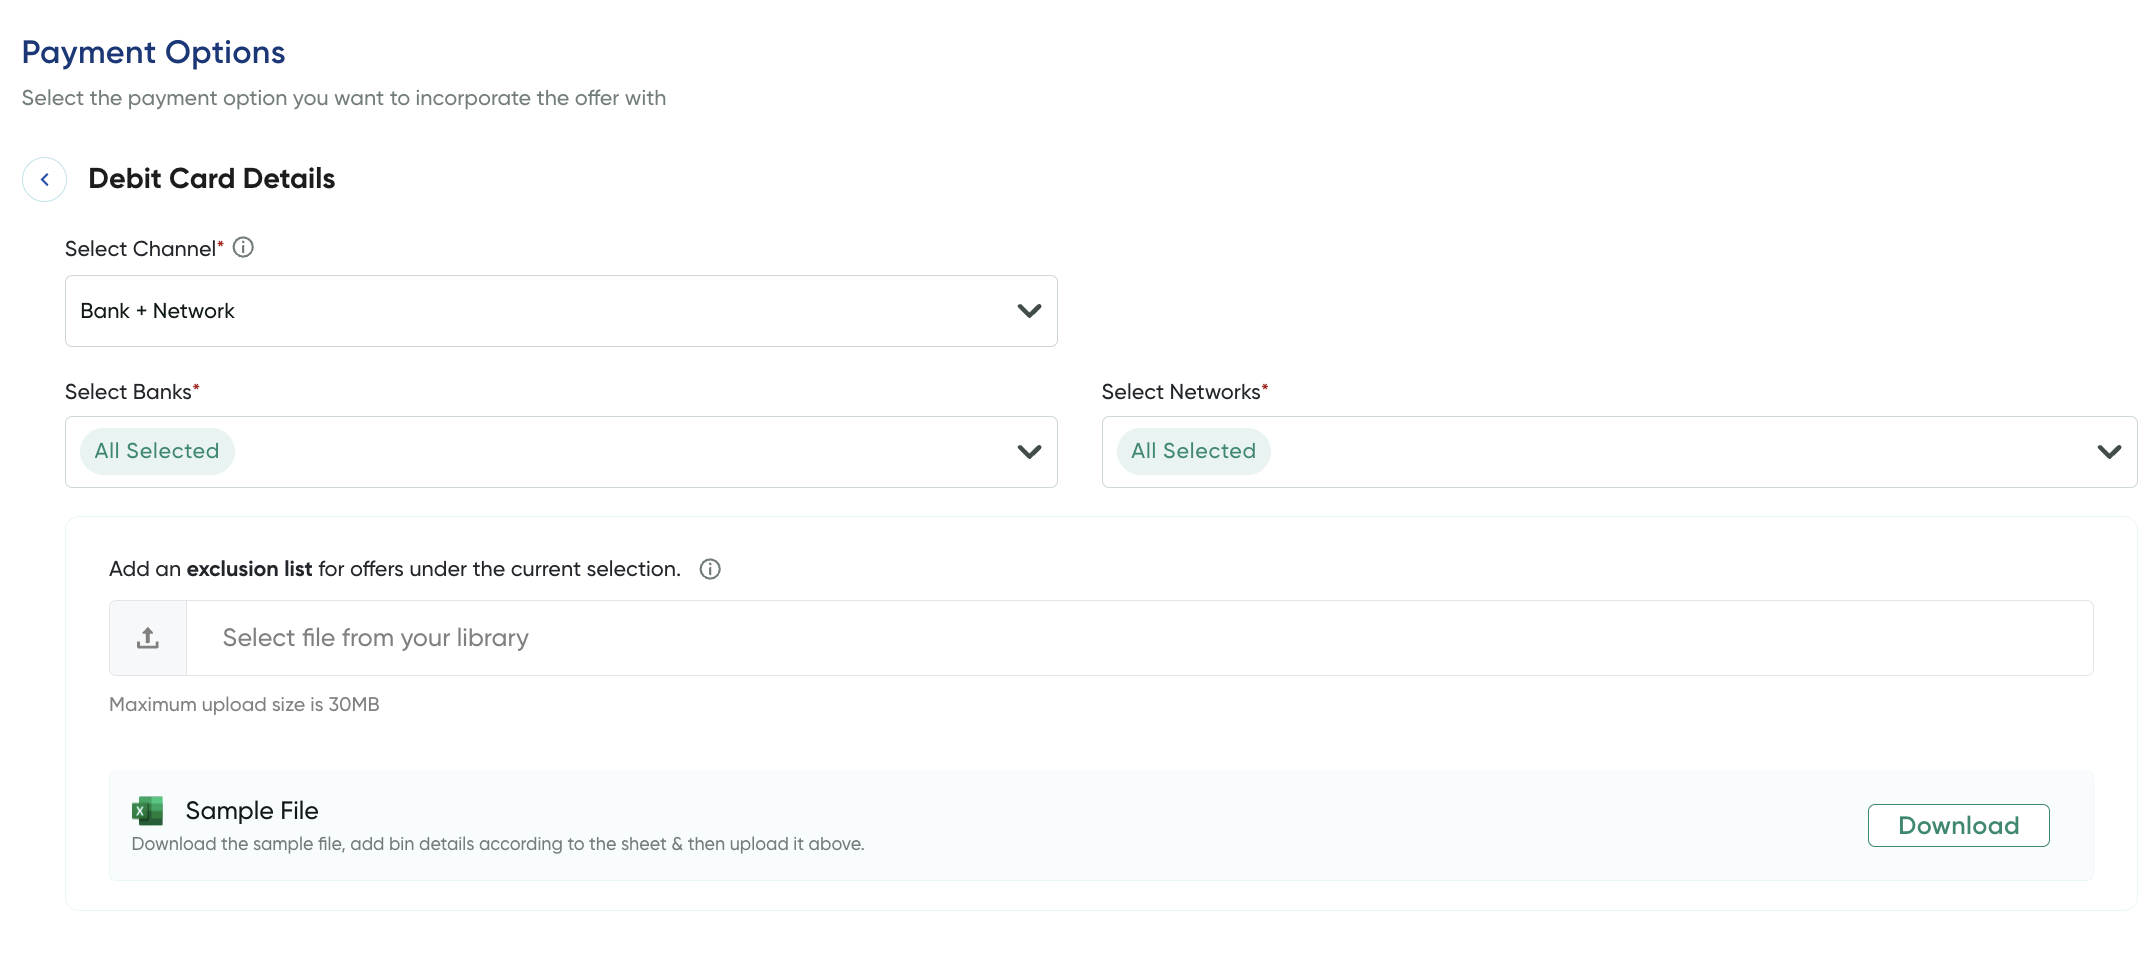
- Perform any of the following based on the method you want to select the bank and network:
| Channel | Description |
|---|---|
| Upload Bins to be included |
|
| Bank | Select the banks for which the offer is applicable from Select Banks drop-down list. Note: You can include exclusion list for offers. For the sample exclusion list file, click Download . |
| Bank + Network | - Select the banks for which the offer is applicable from Select Banks drop-down list.
|
| Network | Search and select a network from the Select Networks drop-down list.
Note: You can include exclusion list for offers. For the sample exclusion list file, click Download . |
- Click the Back button to go back to the payment options list.
Credit Cards
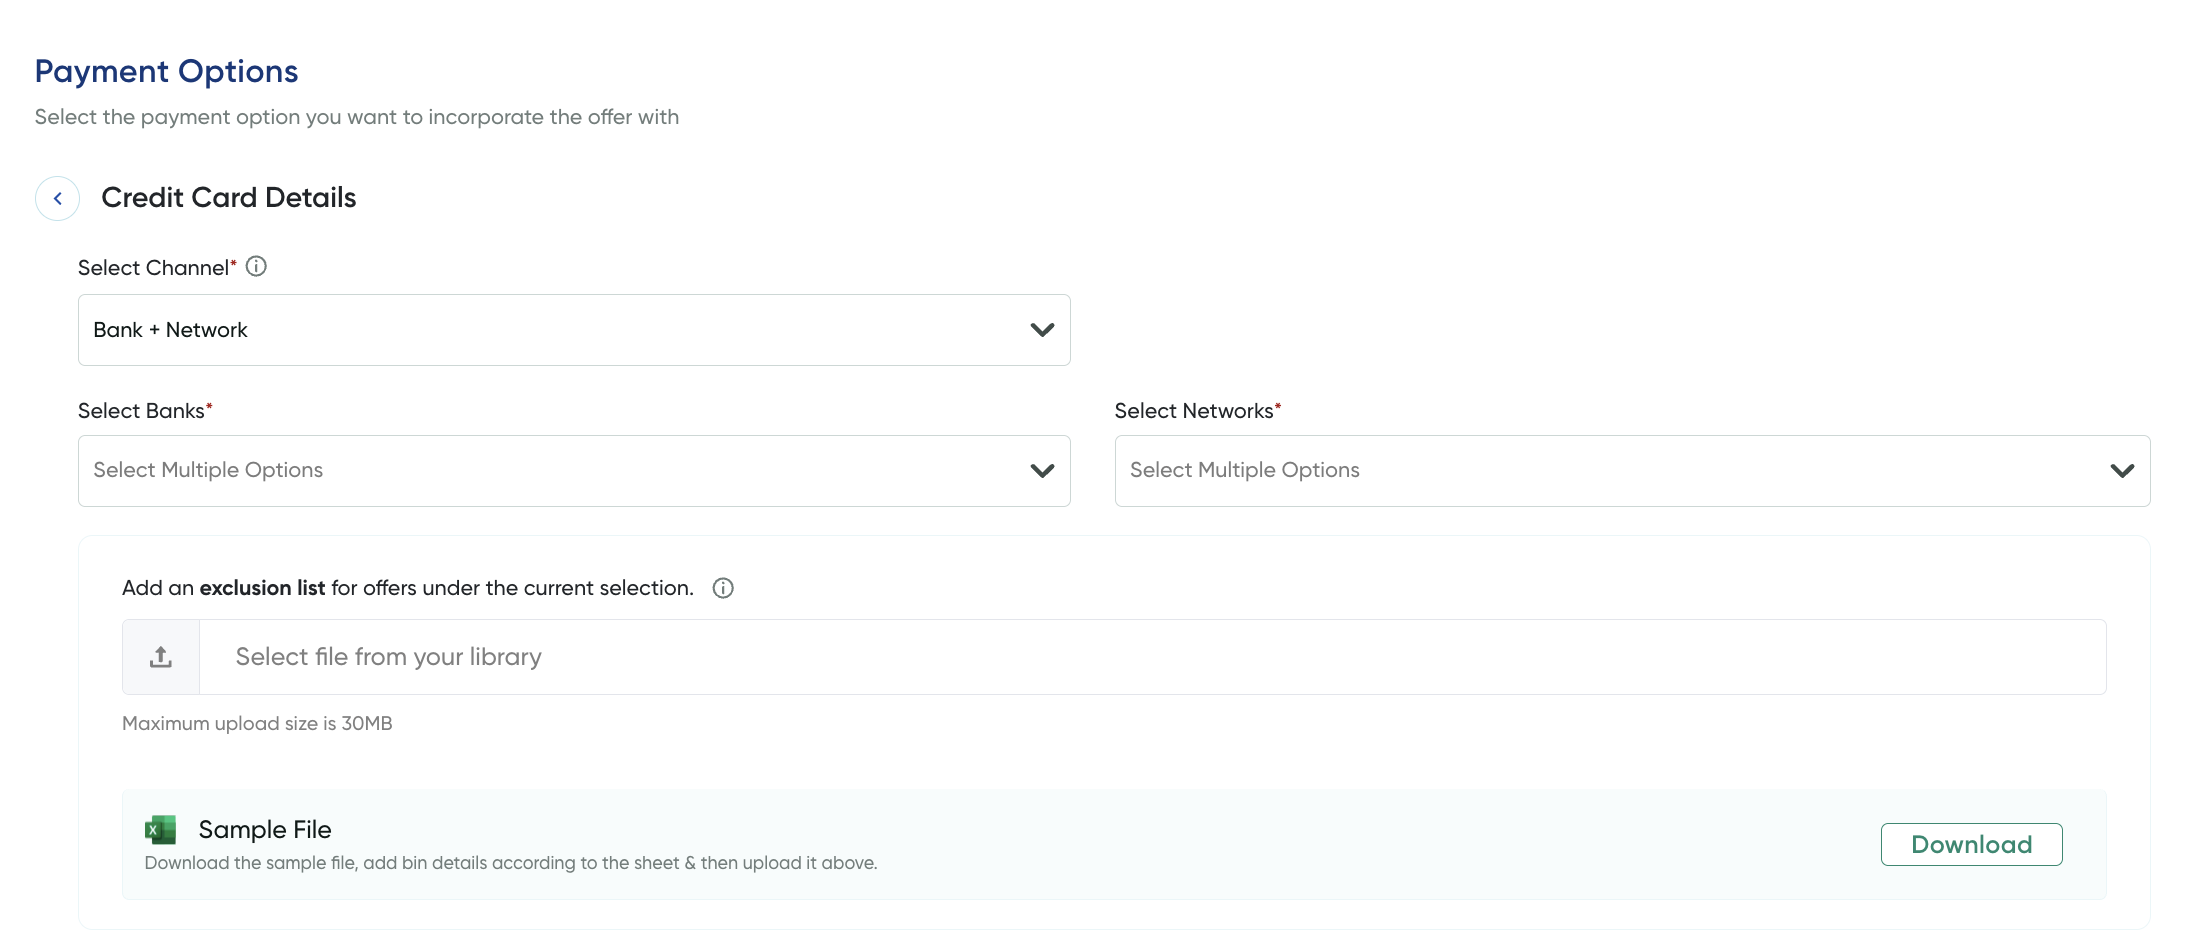
- Click the Edit button on the Credit Cards.
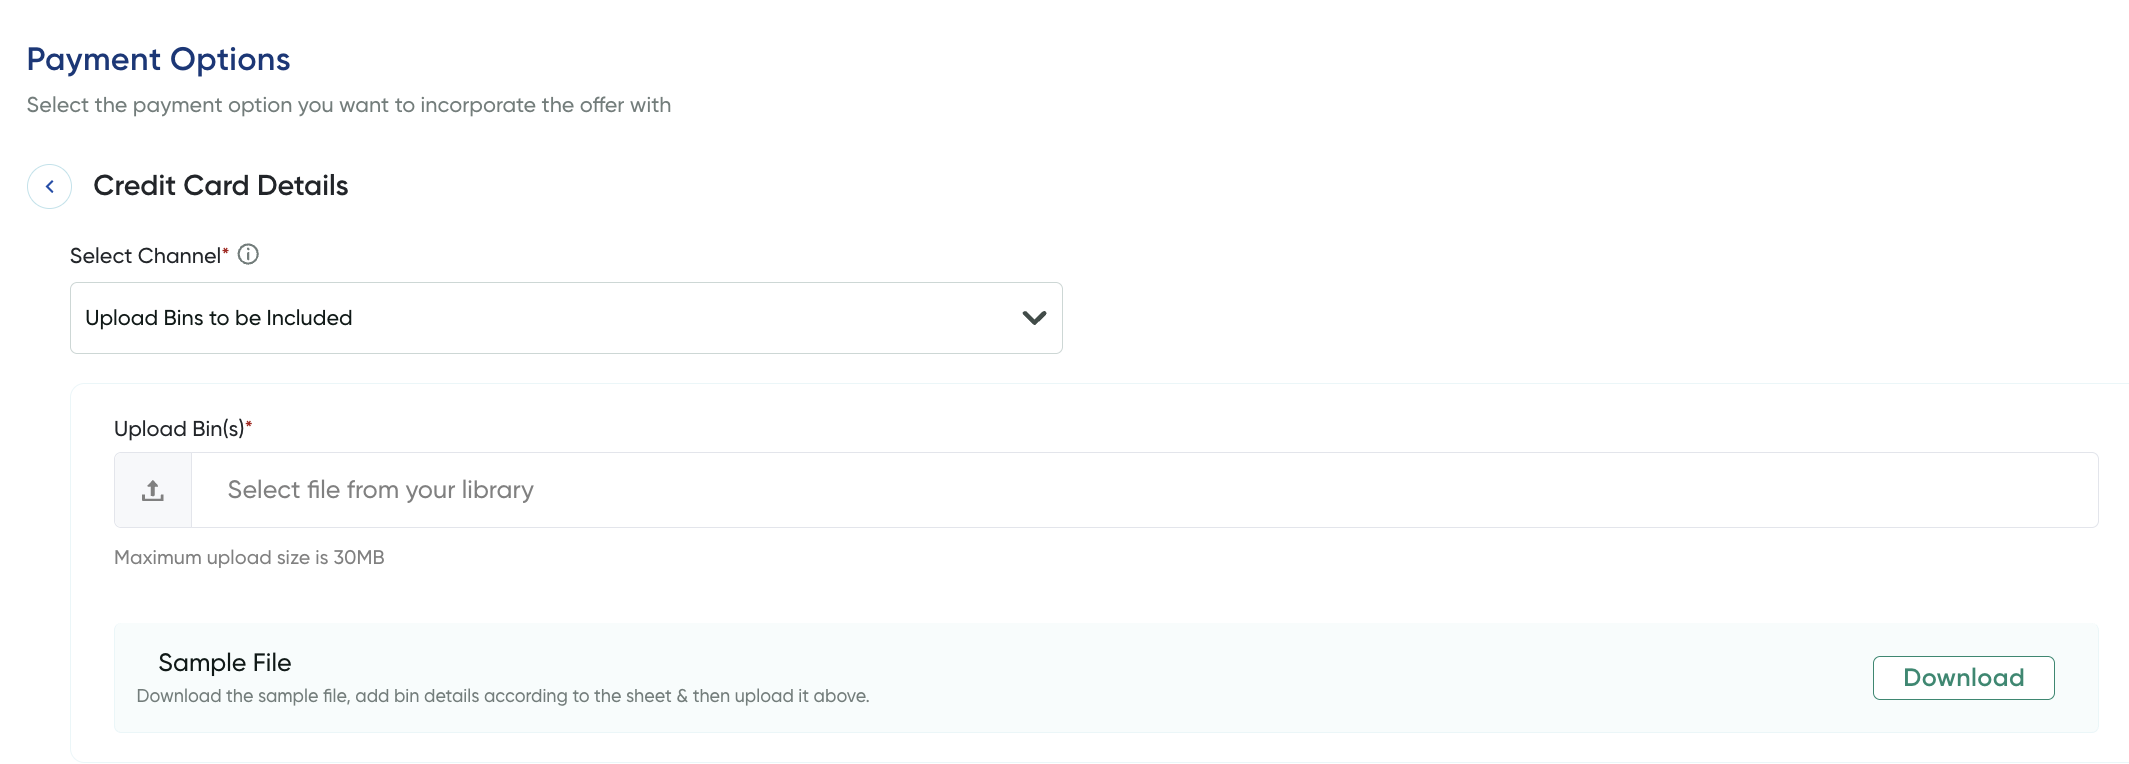
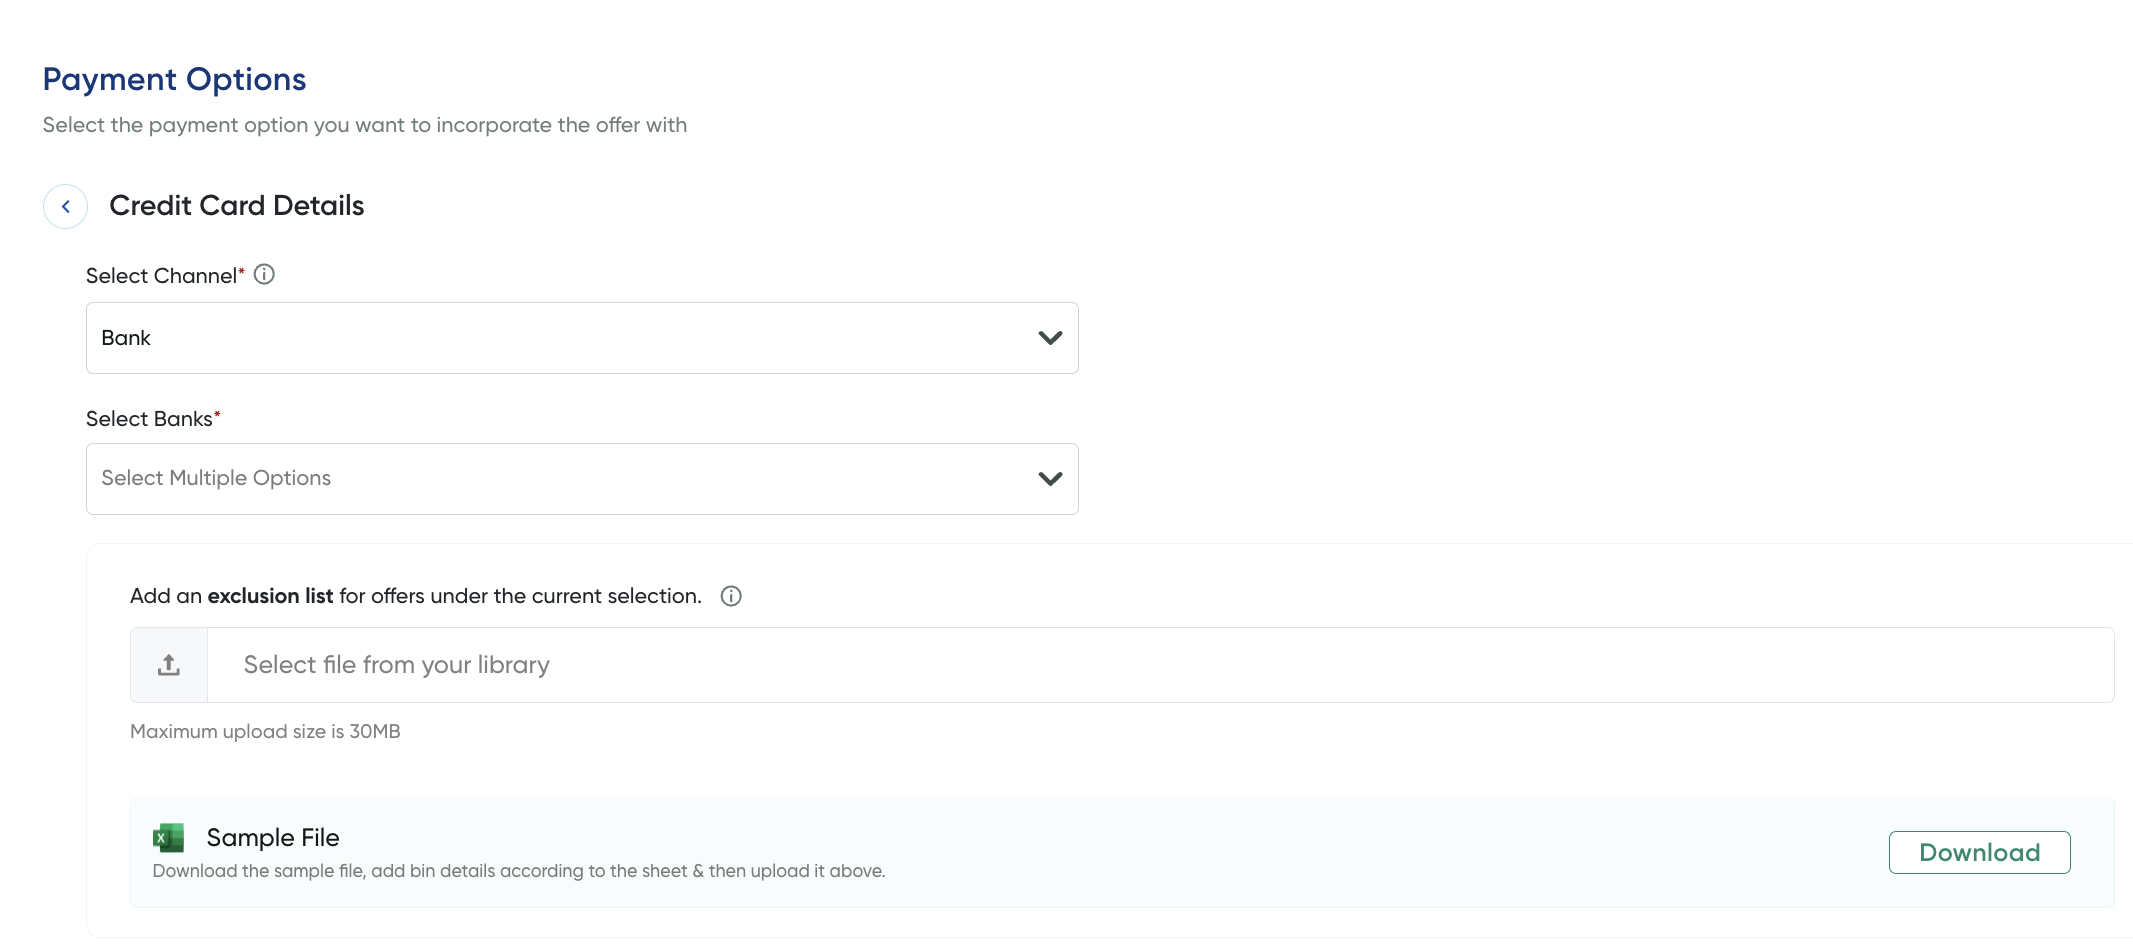
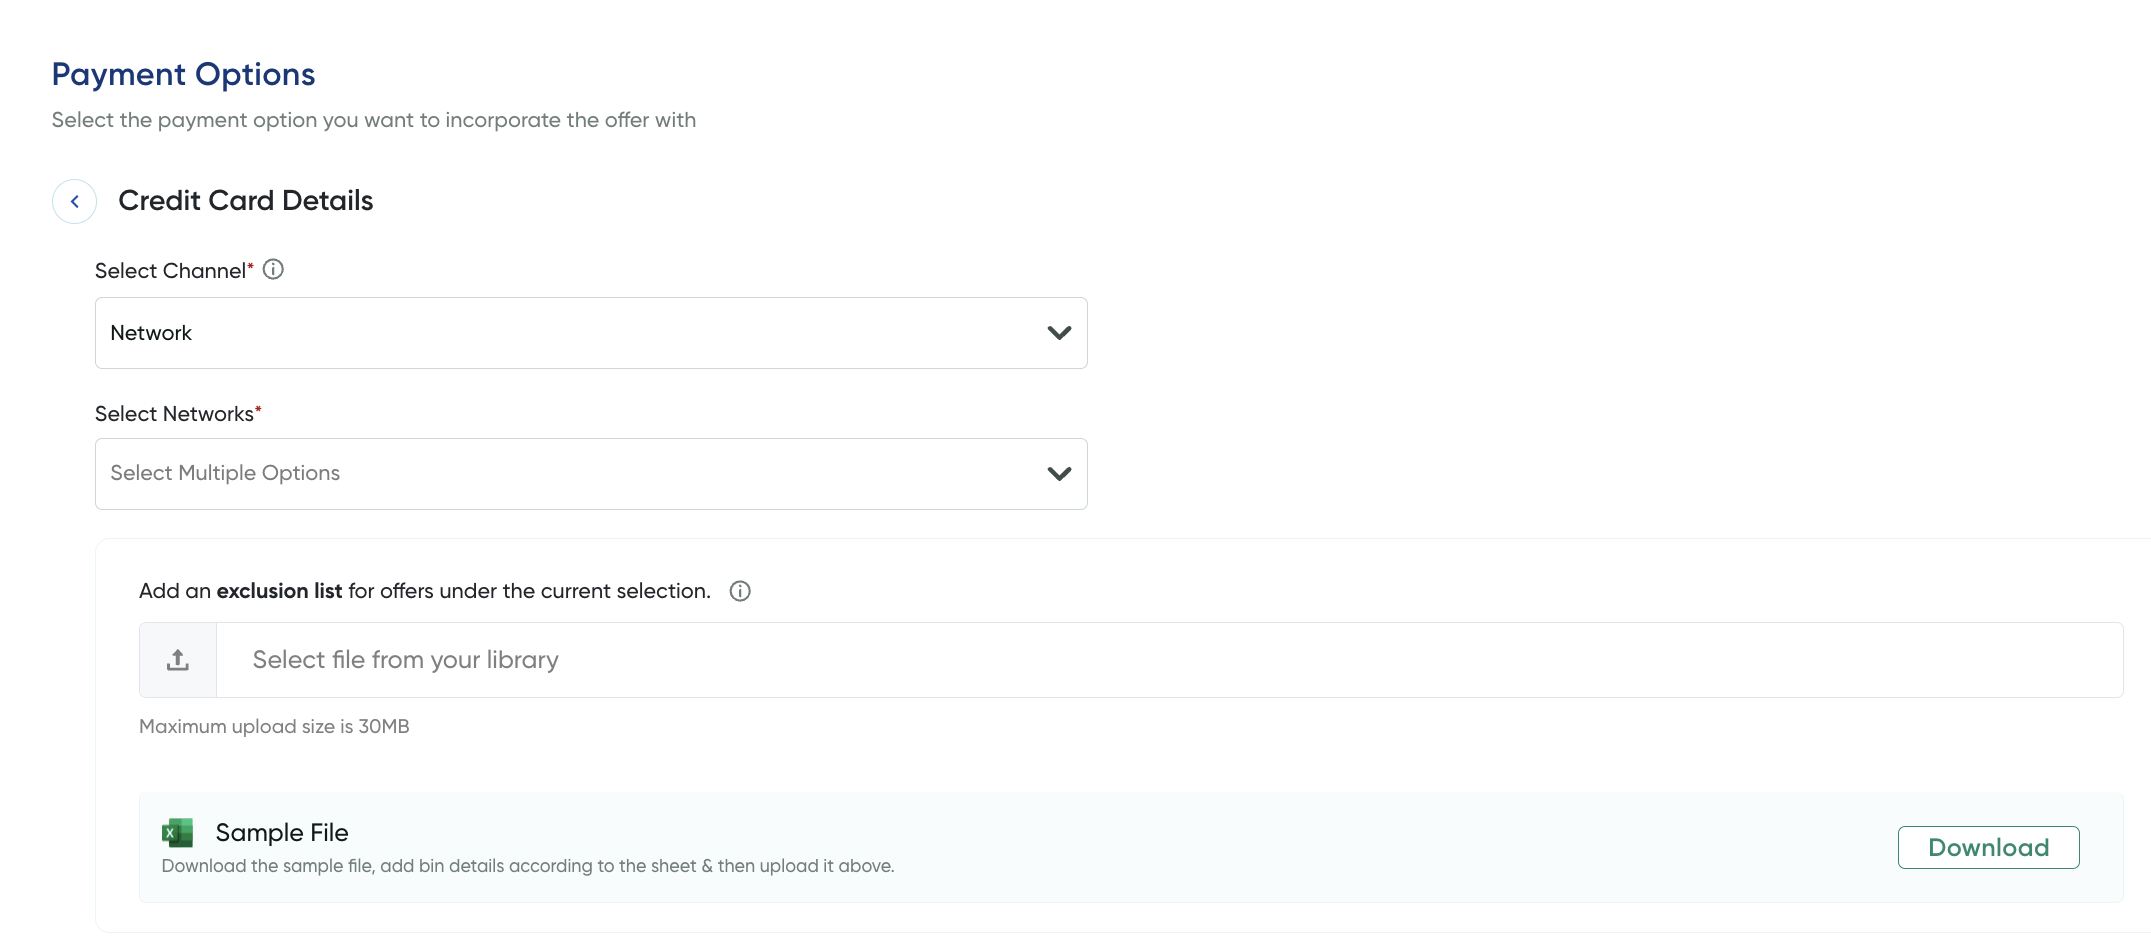
The Credit Card Details page is displayed.
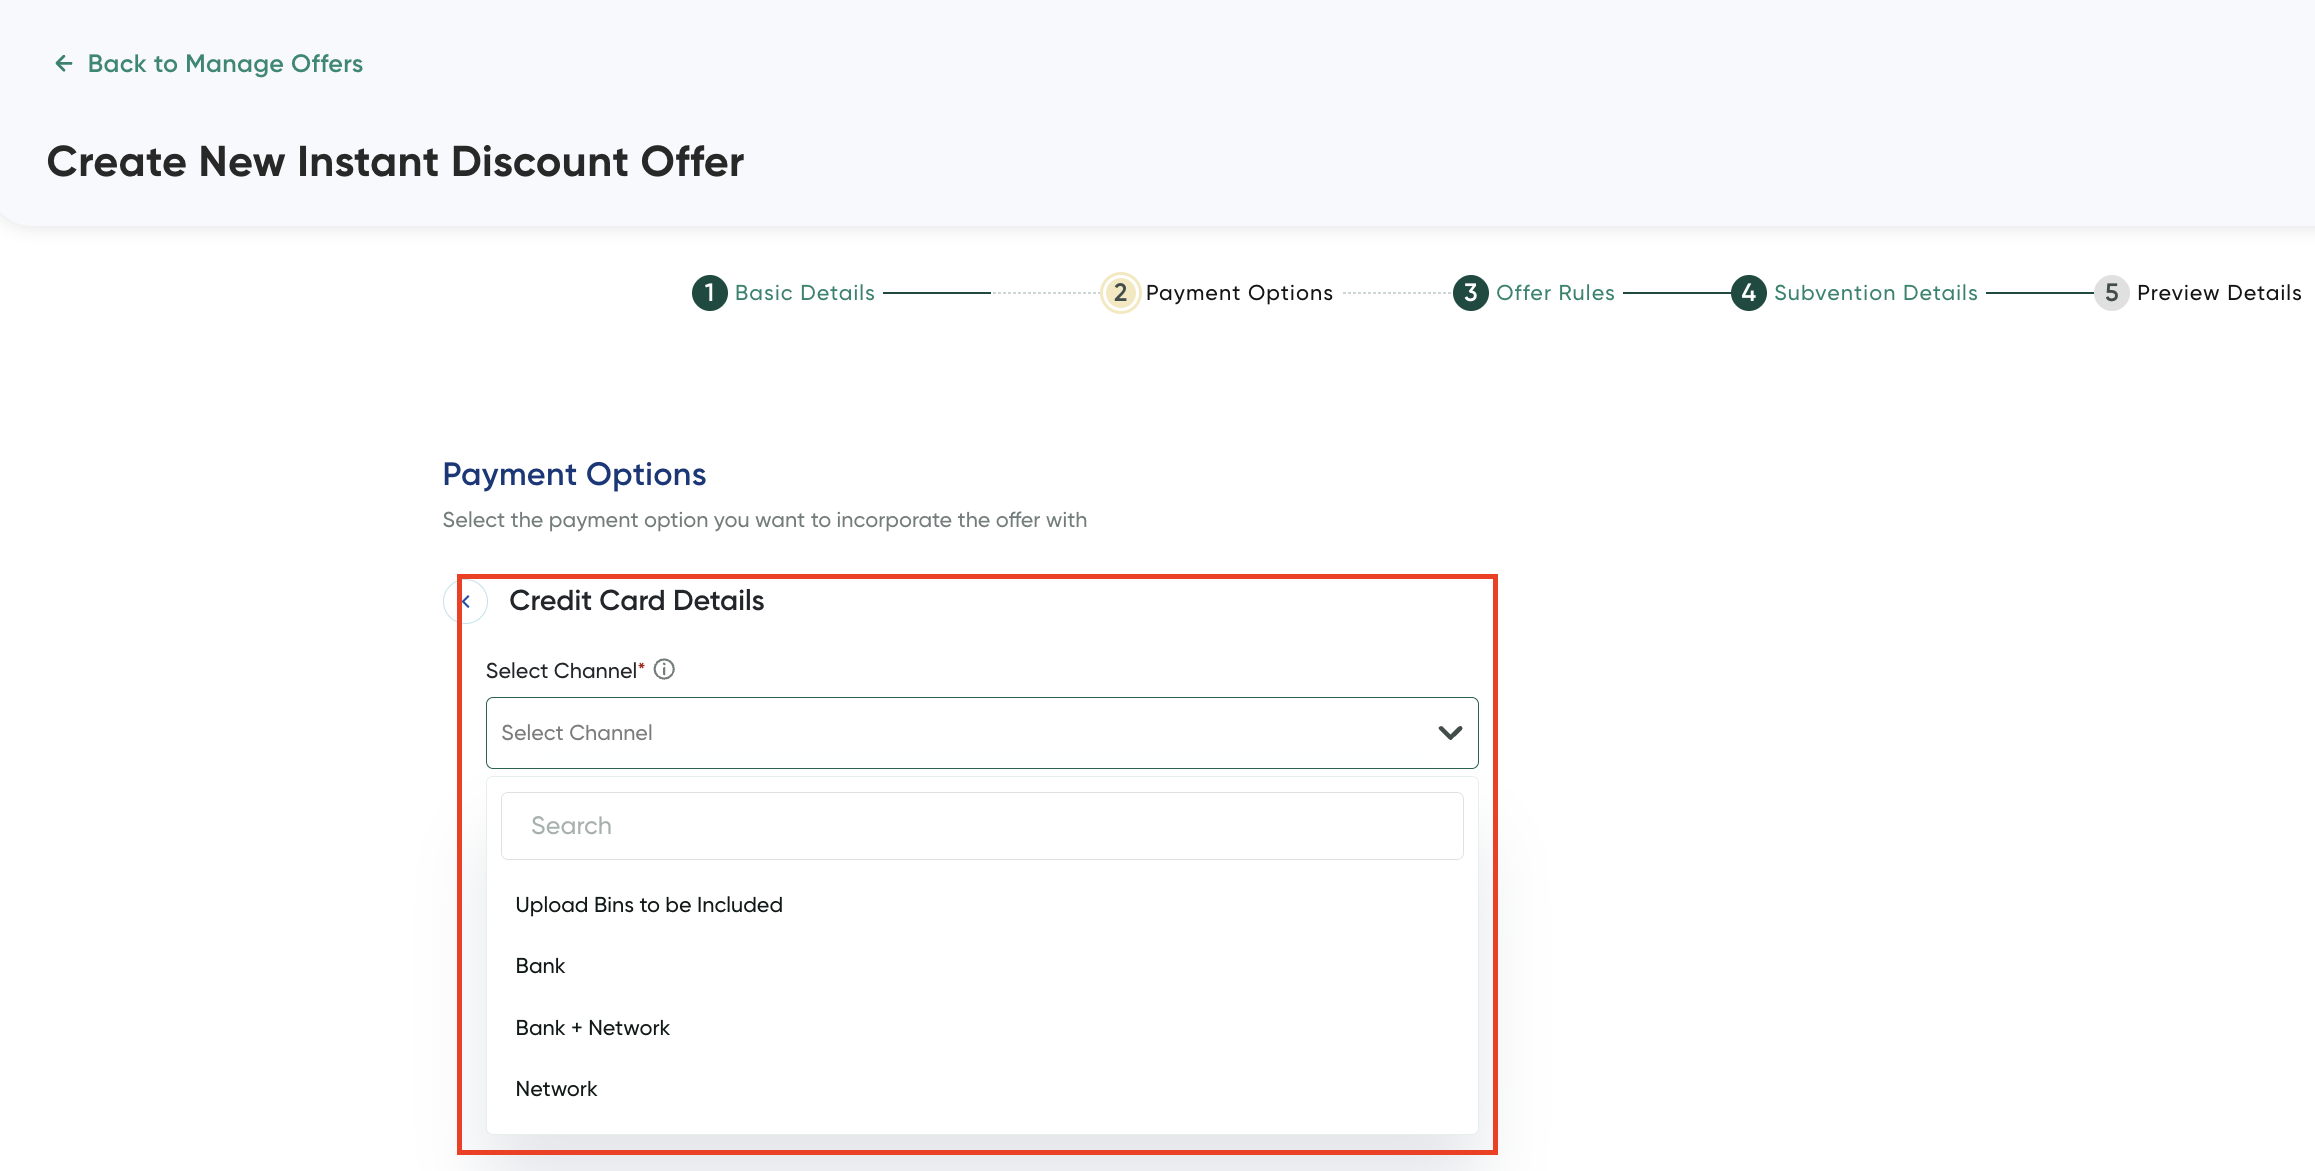
- Perform any of the following based on the method you want to select the bank and network:
| Channel | Description |
|---|---|
| Upload Bins to be included |
|
| Bank | Select the banks for which the offer is applicable from Select Banks drop-down list. Note: You can include exclusion list for offers. For the sample exclusion list file, click Download . |
| Bank + Network | - Select the banks for which the offer is applicable from Select Banks drop-down list.
|
| Network | Search and select a network from the Select Networks drop-down list.
Note: You can include exclusion list for offers. For the sample exclusion list file, click Download . |
- Click the Back button to go back to the Payment Options page.
UPI
-
Click the Edit button on the UPIs tile.
The UPI Details page is displayed.

- Select the check boxes for the UPIs you wish to enable the offer from the **Select UPI Channel **drop-down list.
- Click the Back button to go back to the payment options list.
Wallets
-
Click the Edit button on the the Wallets option.
The Select Wallets page is displayed.
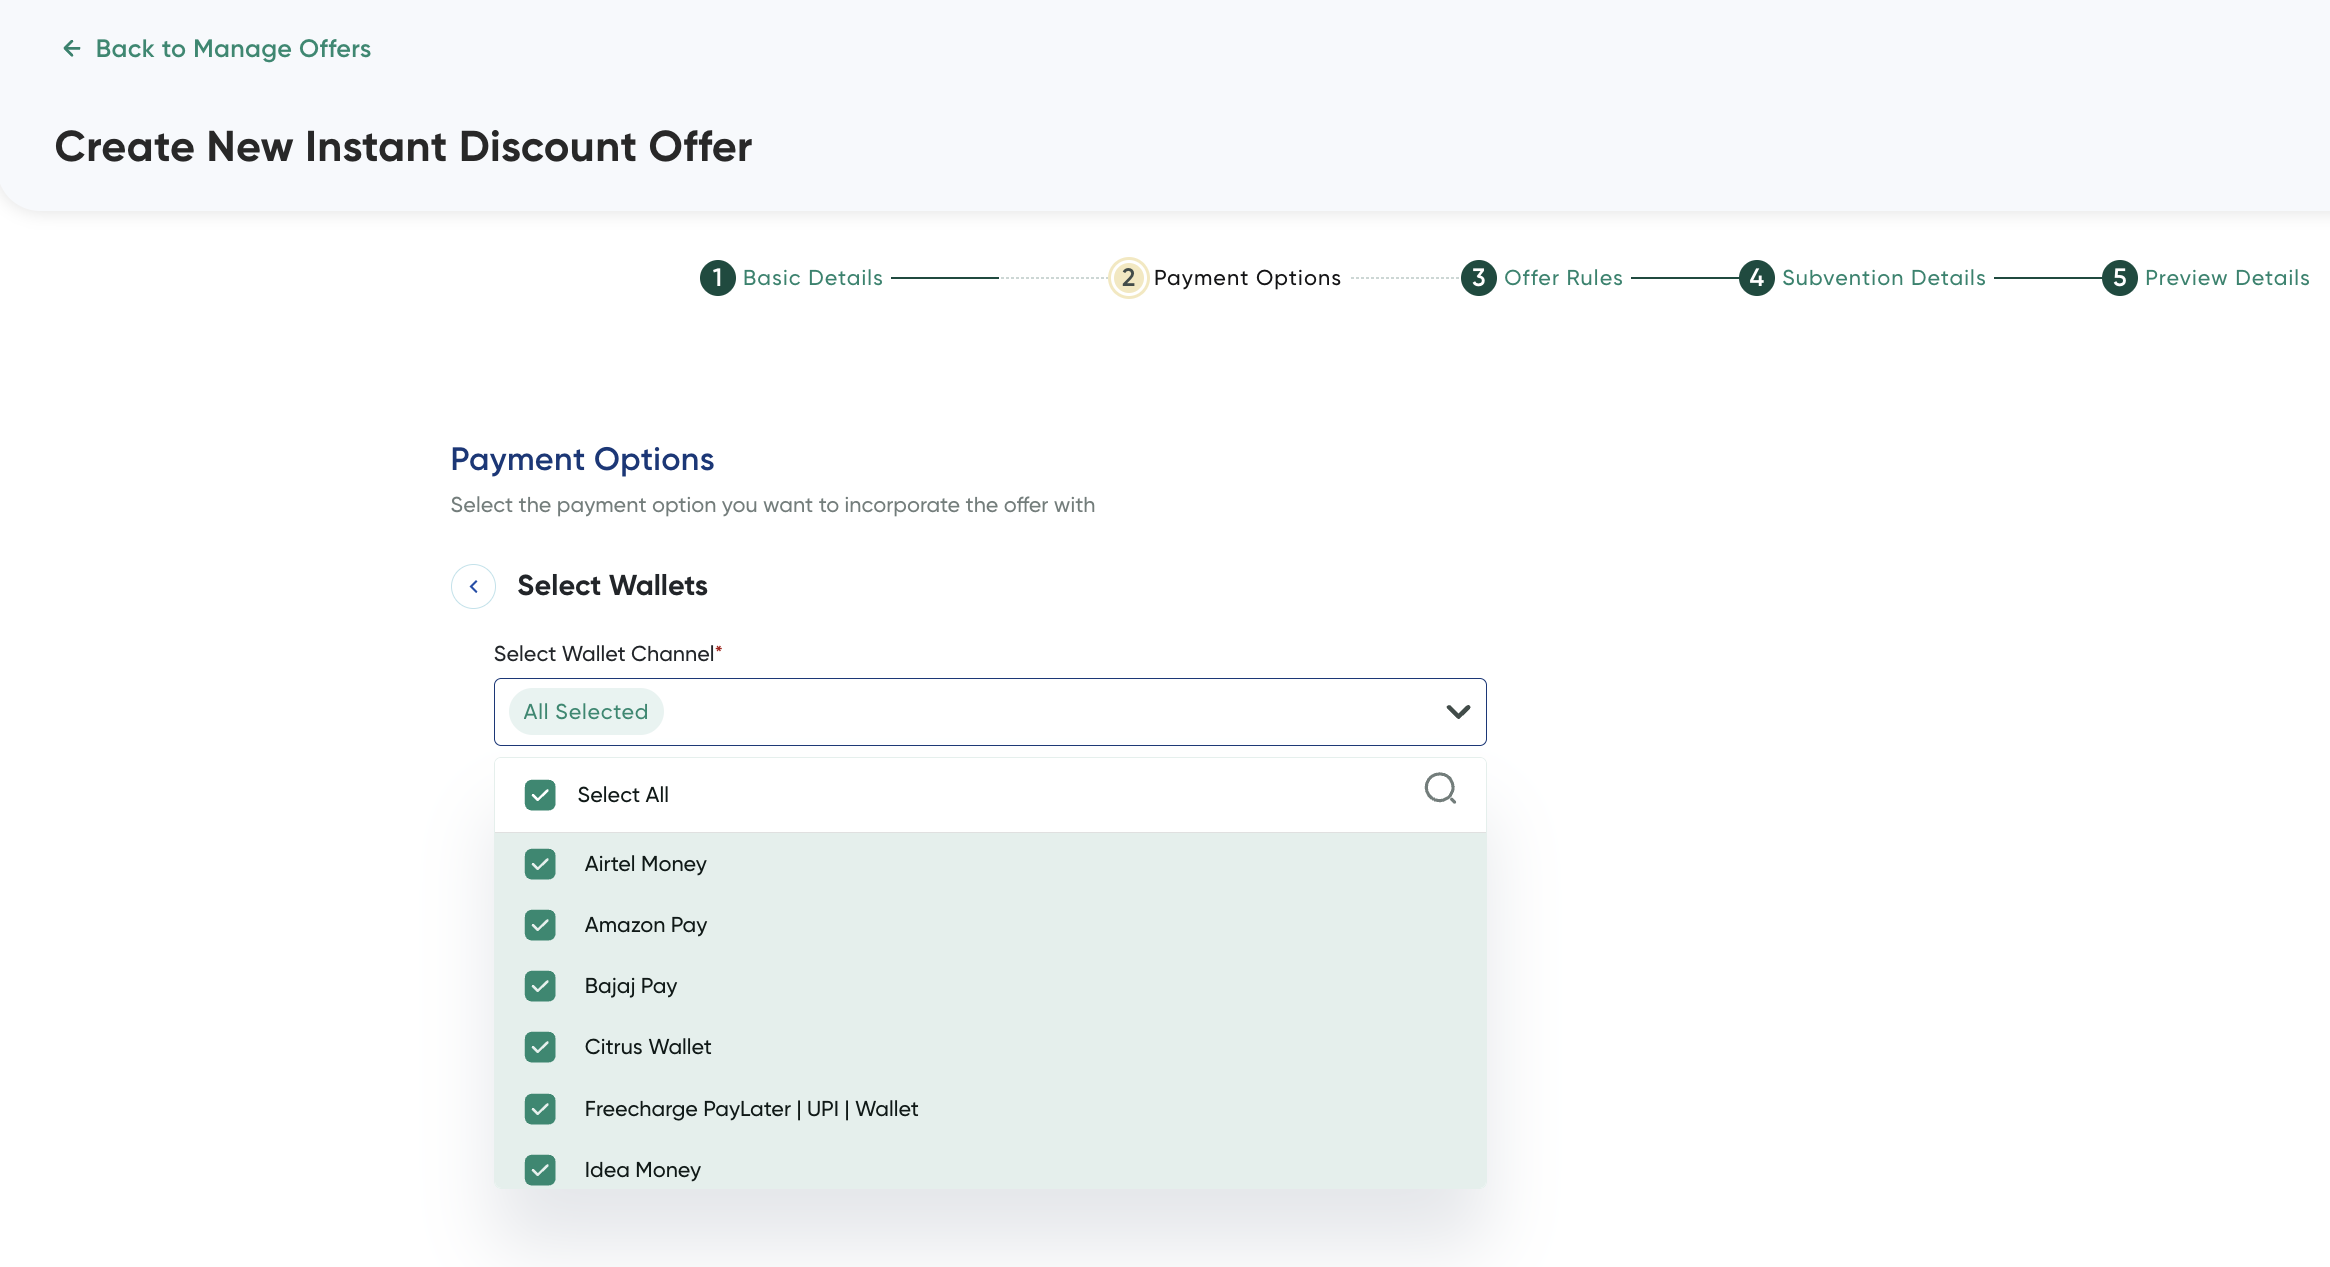
- Select the check boxes for the wallets you wish to enable the offer.
- Click the Back button to return to the Payment Options page.
EMI
-
Click the Edit button on the the EMI option.
The EMI Offer page is displayed.
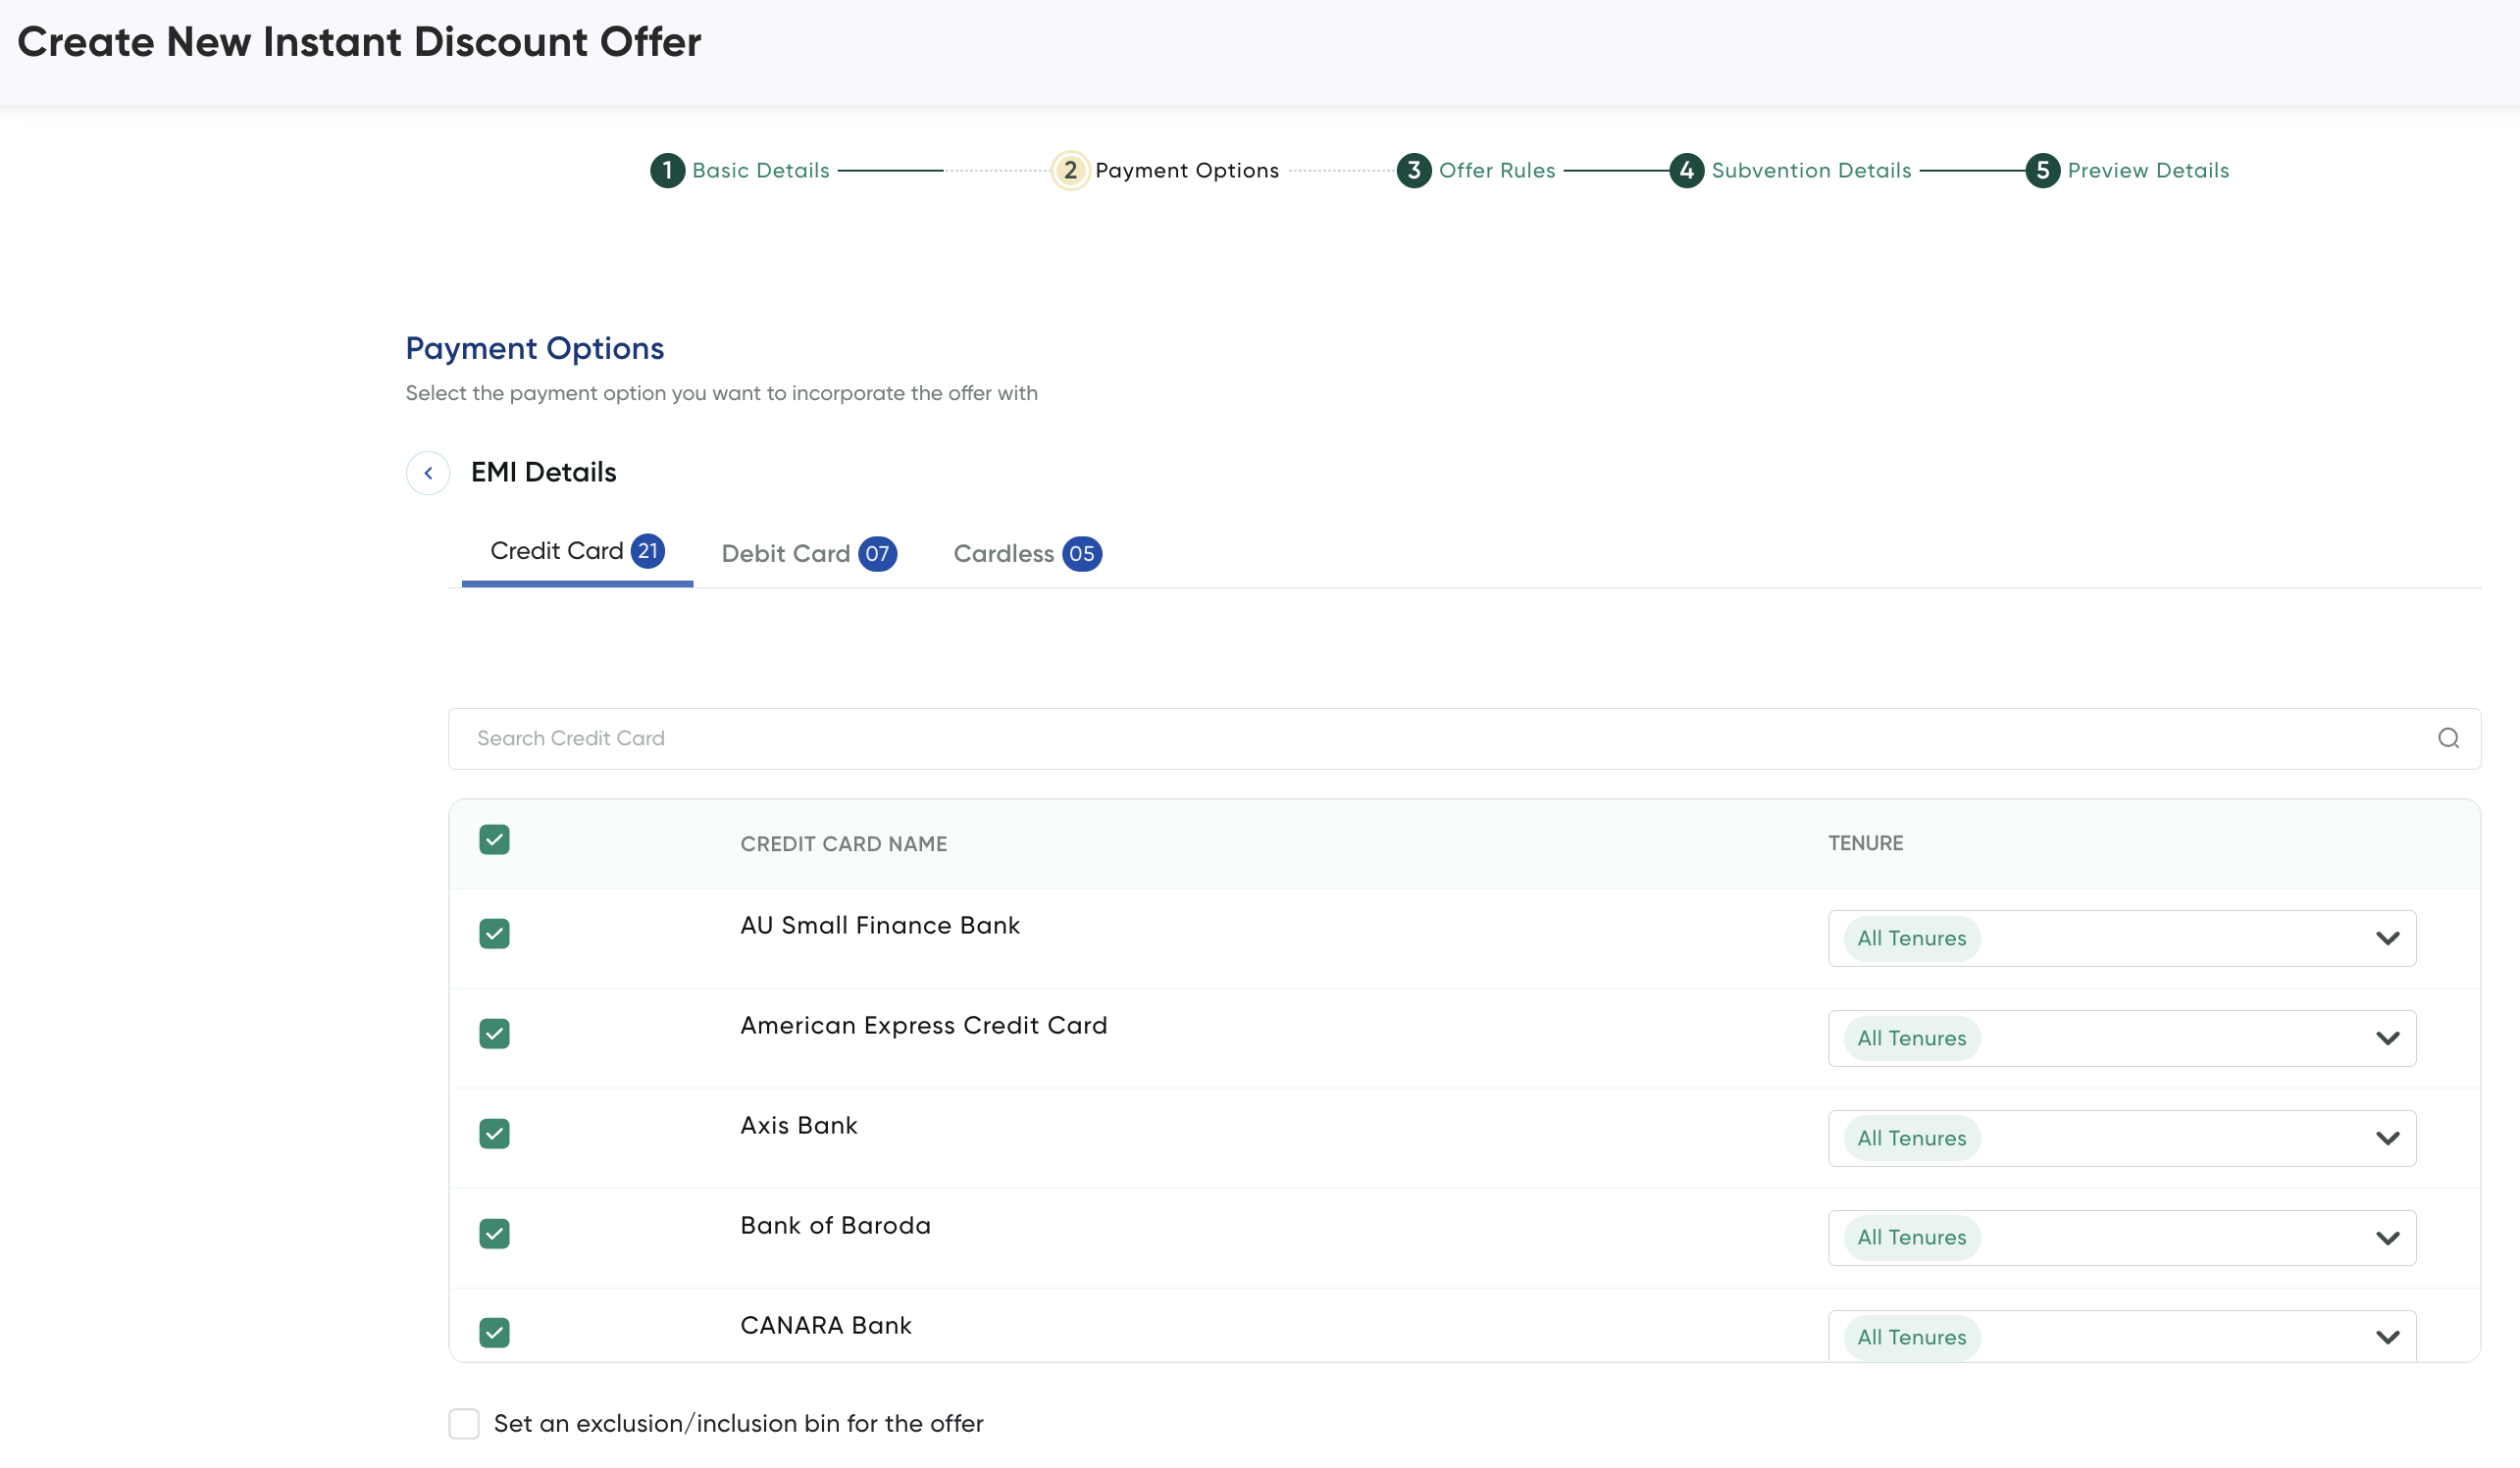
- For each of the following sub tabs, select the desired item on first column and Tenures column on which you wish to enable the offer. You can select all tenures of a specific bank and choose specific tenures for each bank.
- Credit Card
- Debit Card
- Cardless
- Select the Set an exclusion/inclusion bin for the offer check box to include/exclude the offer on a select list of BINs on the banks that were selected in Step 2 using the following steps in each Exclusion Bin and Inclusion Bin sub tabs:
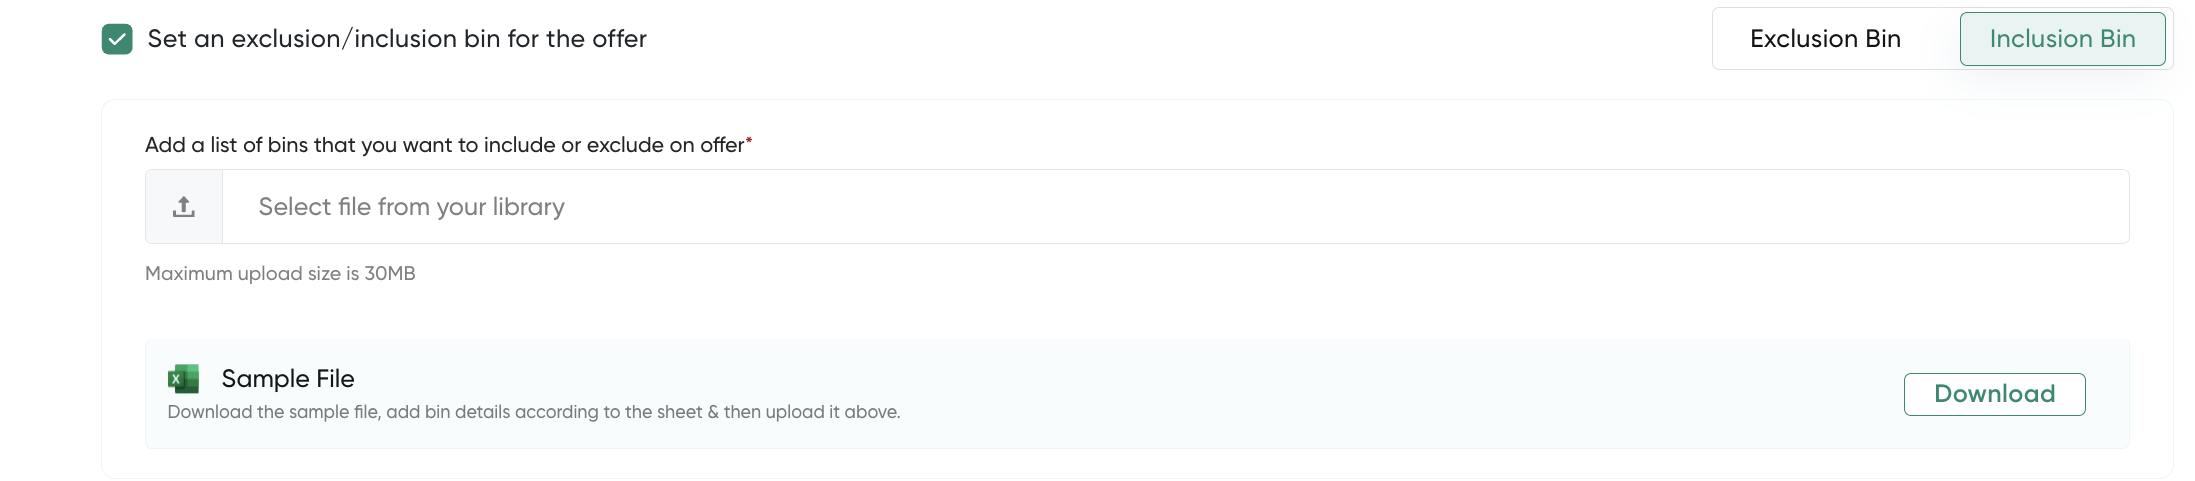
- Click Download Sample File if you are not having the sample file or CSV file template. The CSV file contains some sample BIN numbers (first 6 digits of Debit Card or Credit Cards), which you need to update according to your requirements.
- Update the CSV or text file to include the BIN details. For updating the CSV file, you can use Microsoft Excel or any other Spreadsheet tool.
- Click the browse button in the Add a list of bins that you want to include or exclude on offer to upload the updated CSV file.
- Click the Back button to go to Payment Options page.
BNPL
Select the BNPL option on the Setup Payment options of your offer page.
The Select BNPL Options page is displayed.
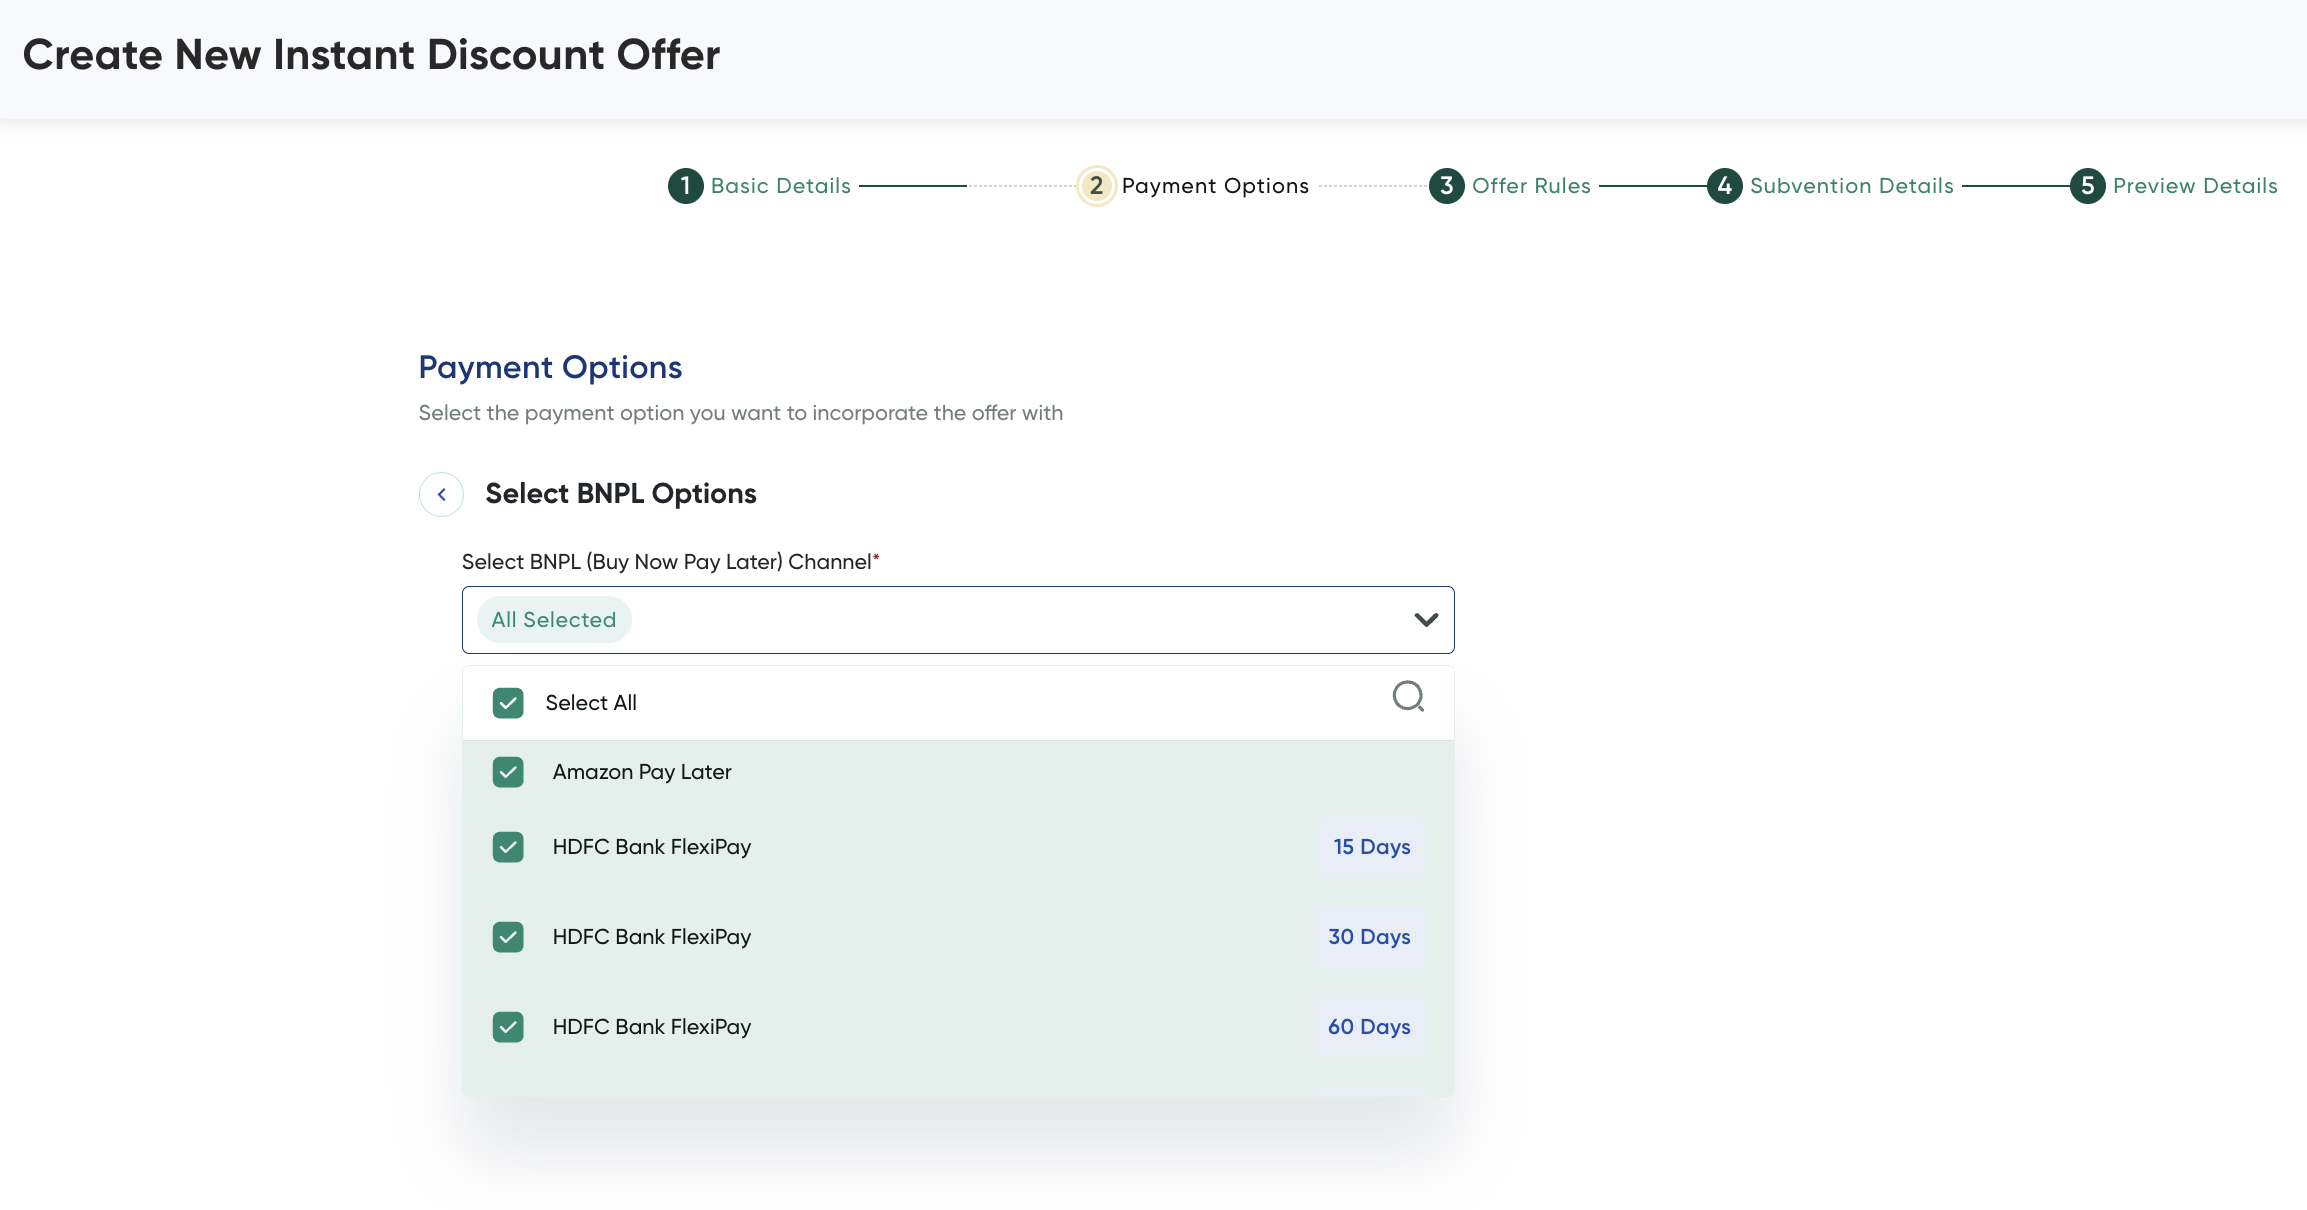
- Click Next.
The Offer Rules page is displayed.
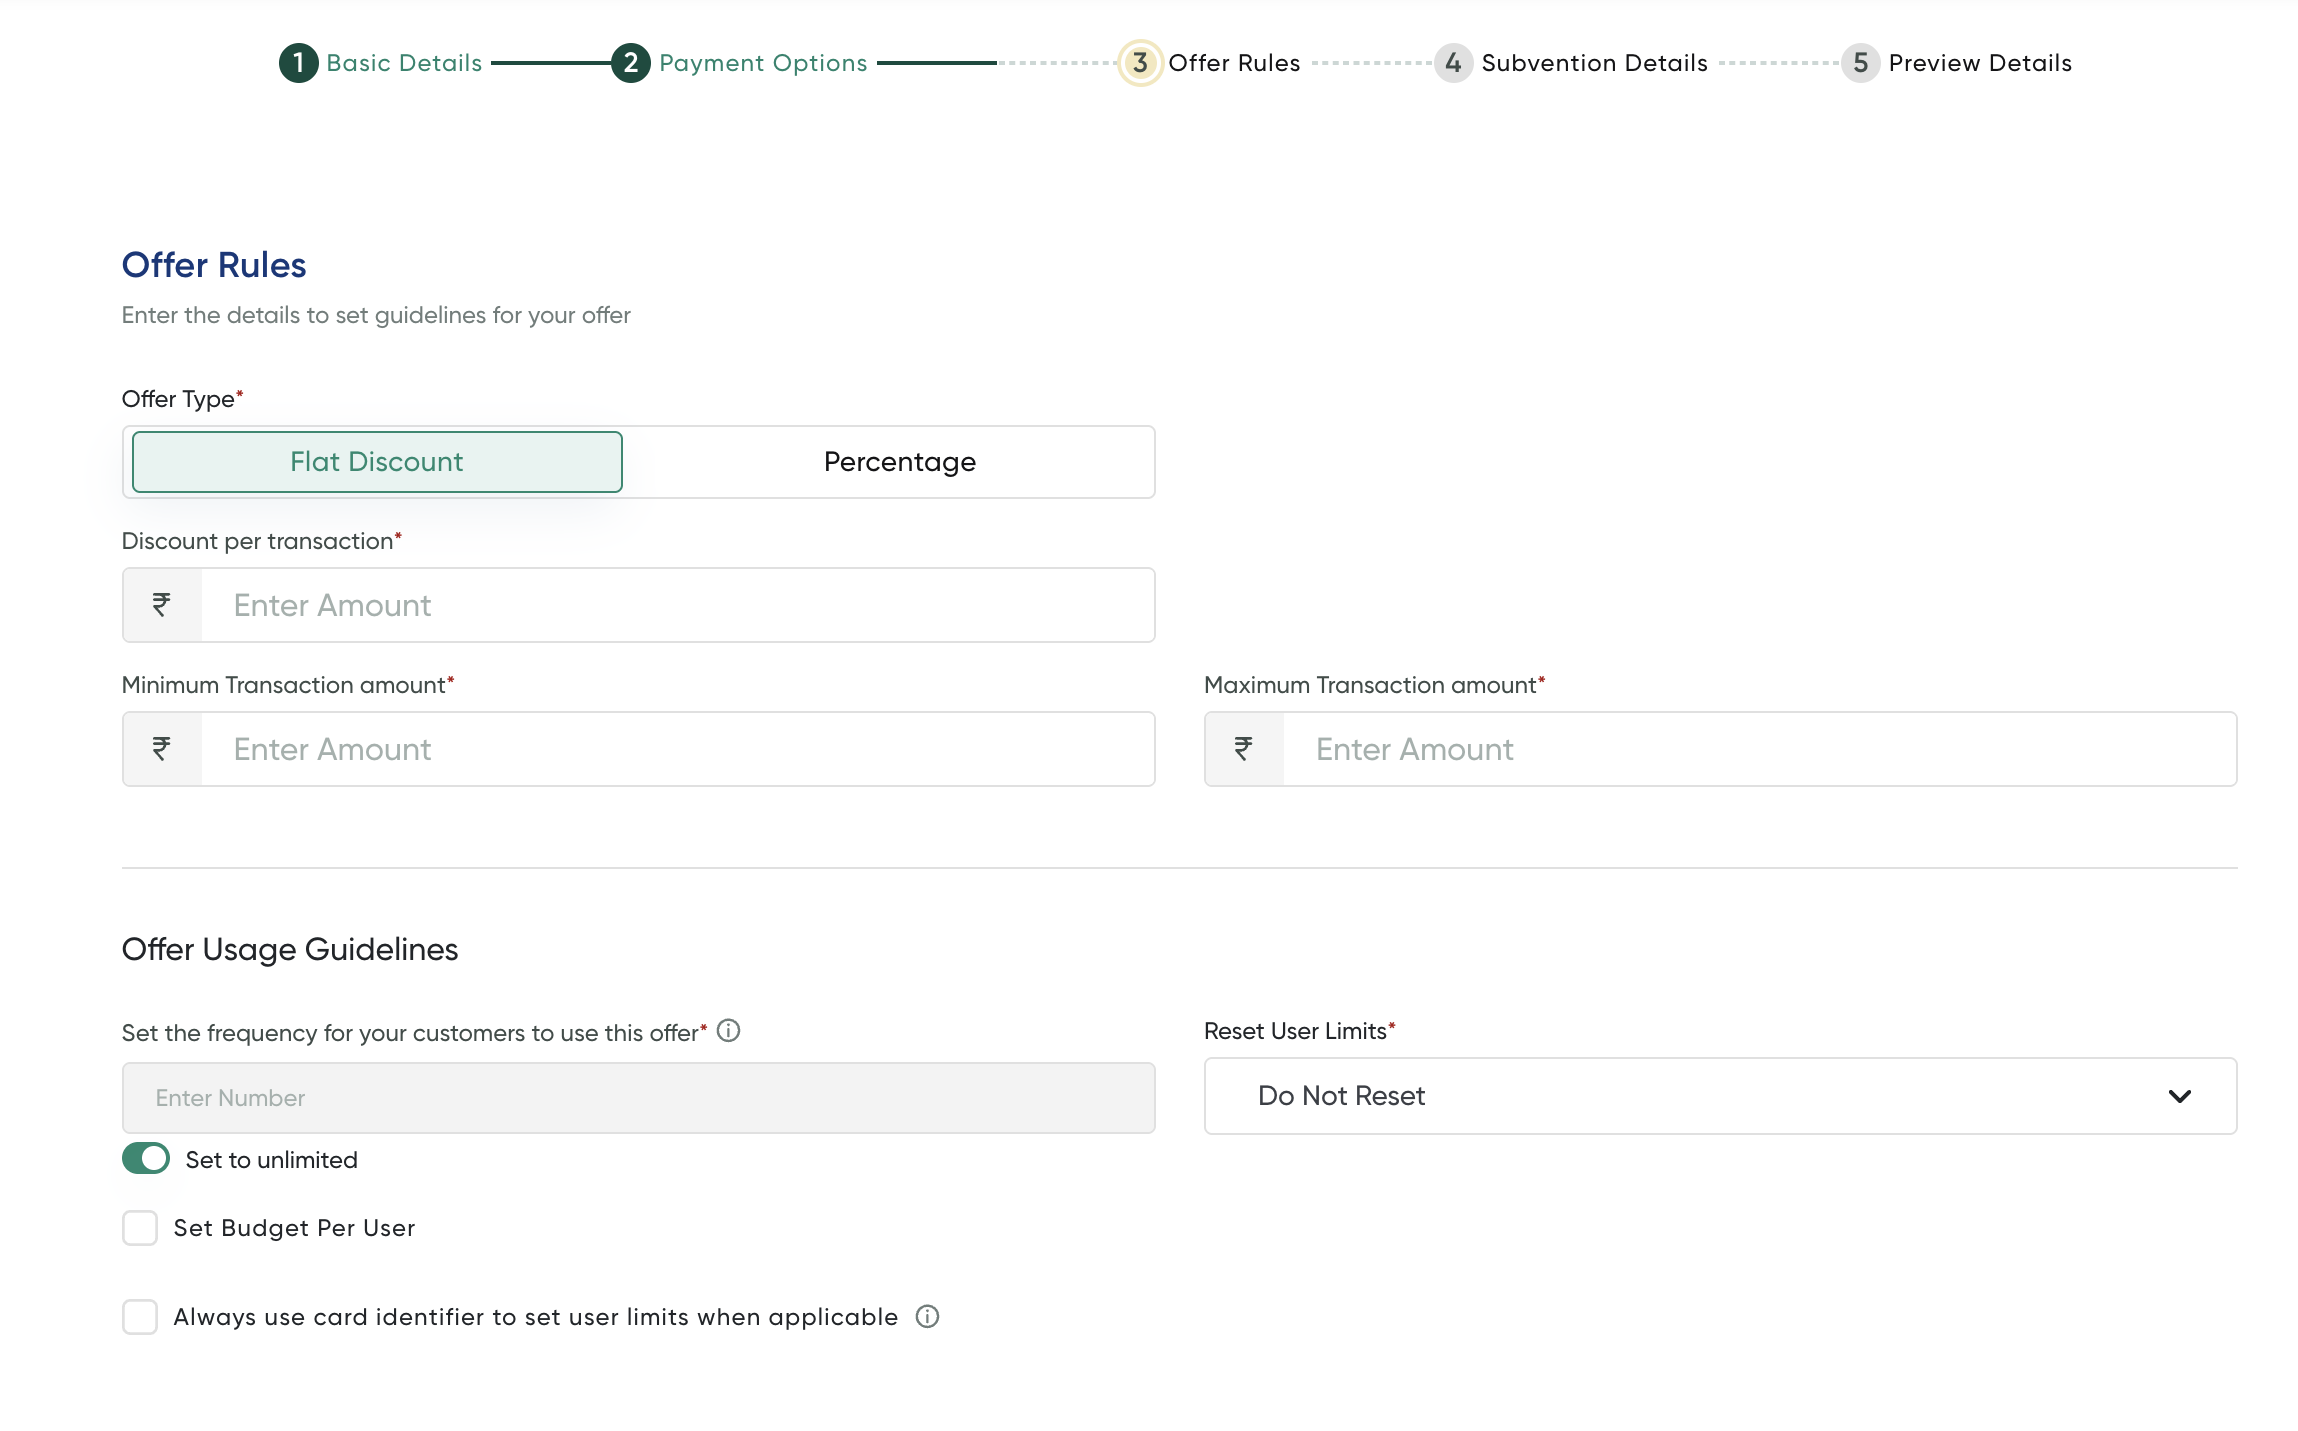
Step 3: Include the Offer rules
-
Enter the offer rules and limitations on the Set Offer Rules page. For more information, refer to Create an Instant Discount or Cashback Offer.
-
After you complete the above details and click Next.
The Subvention Details page is displayed.
Step 4: Configure Offer Subvention Details
- Enter the subvention details in the Subvention Details page. For more information, refer to Create an Instant Discount or Cashback Offer.
- After you complete the above details and click Next.
The Preview Details page is displayed.
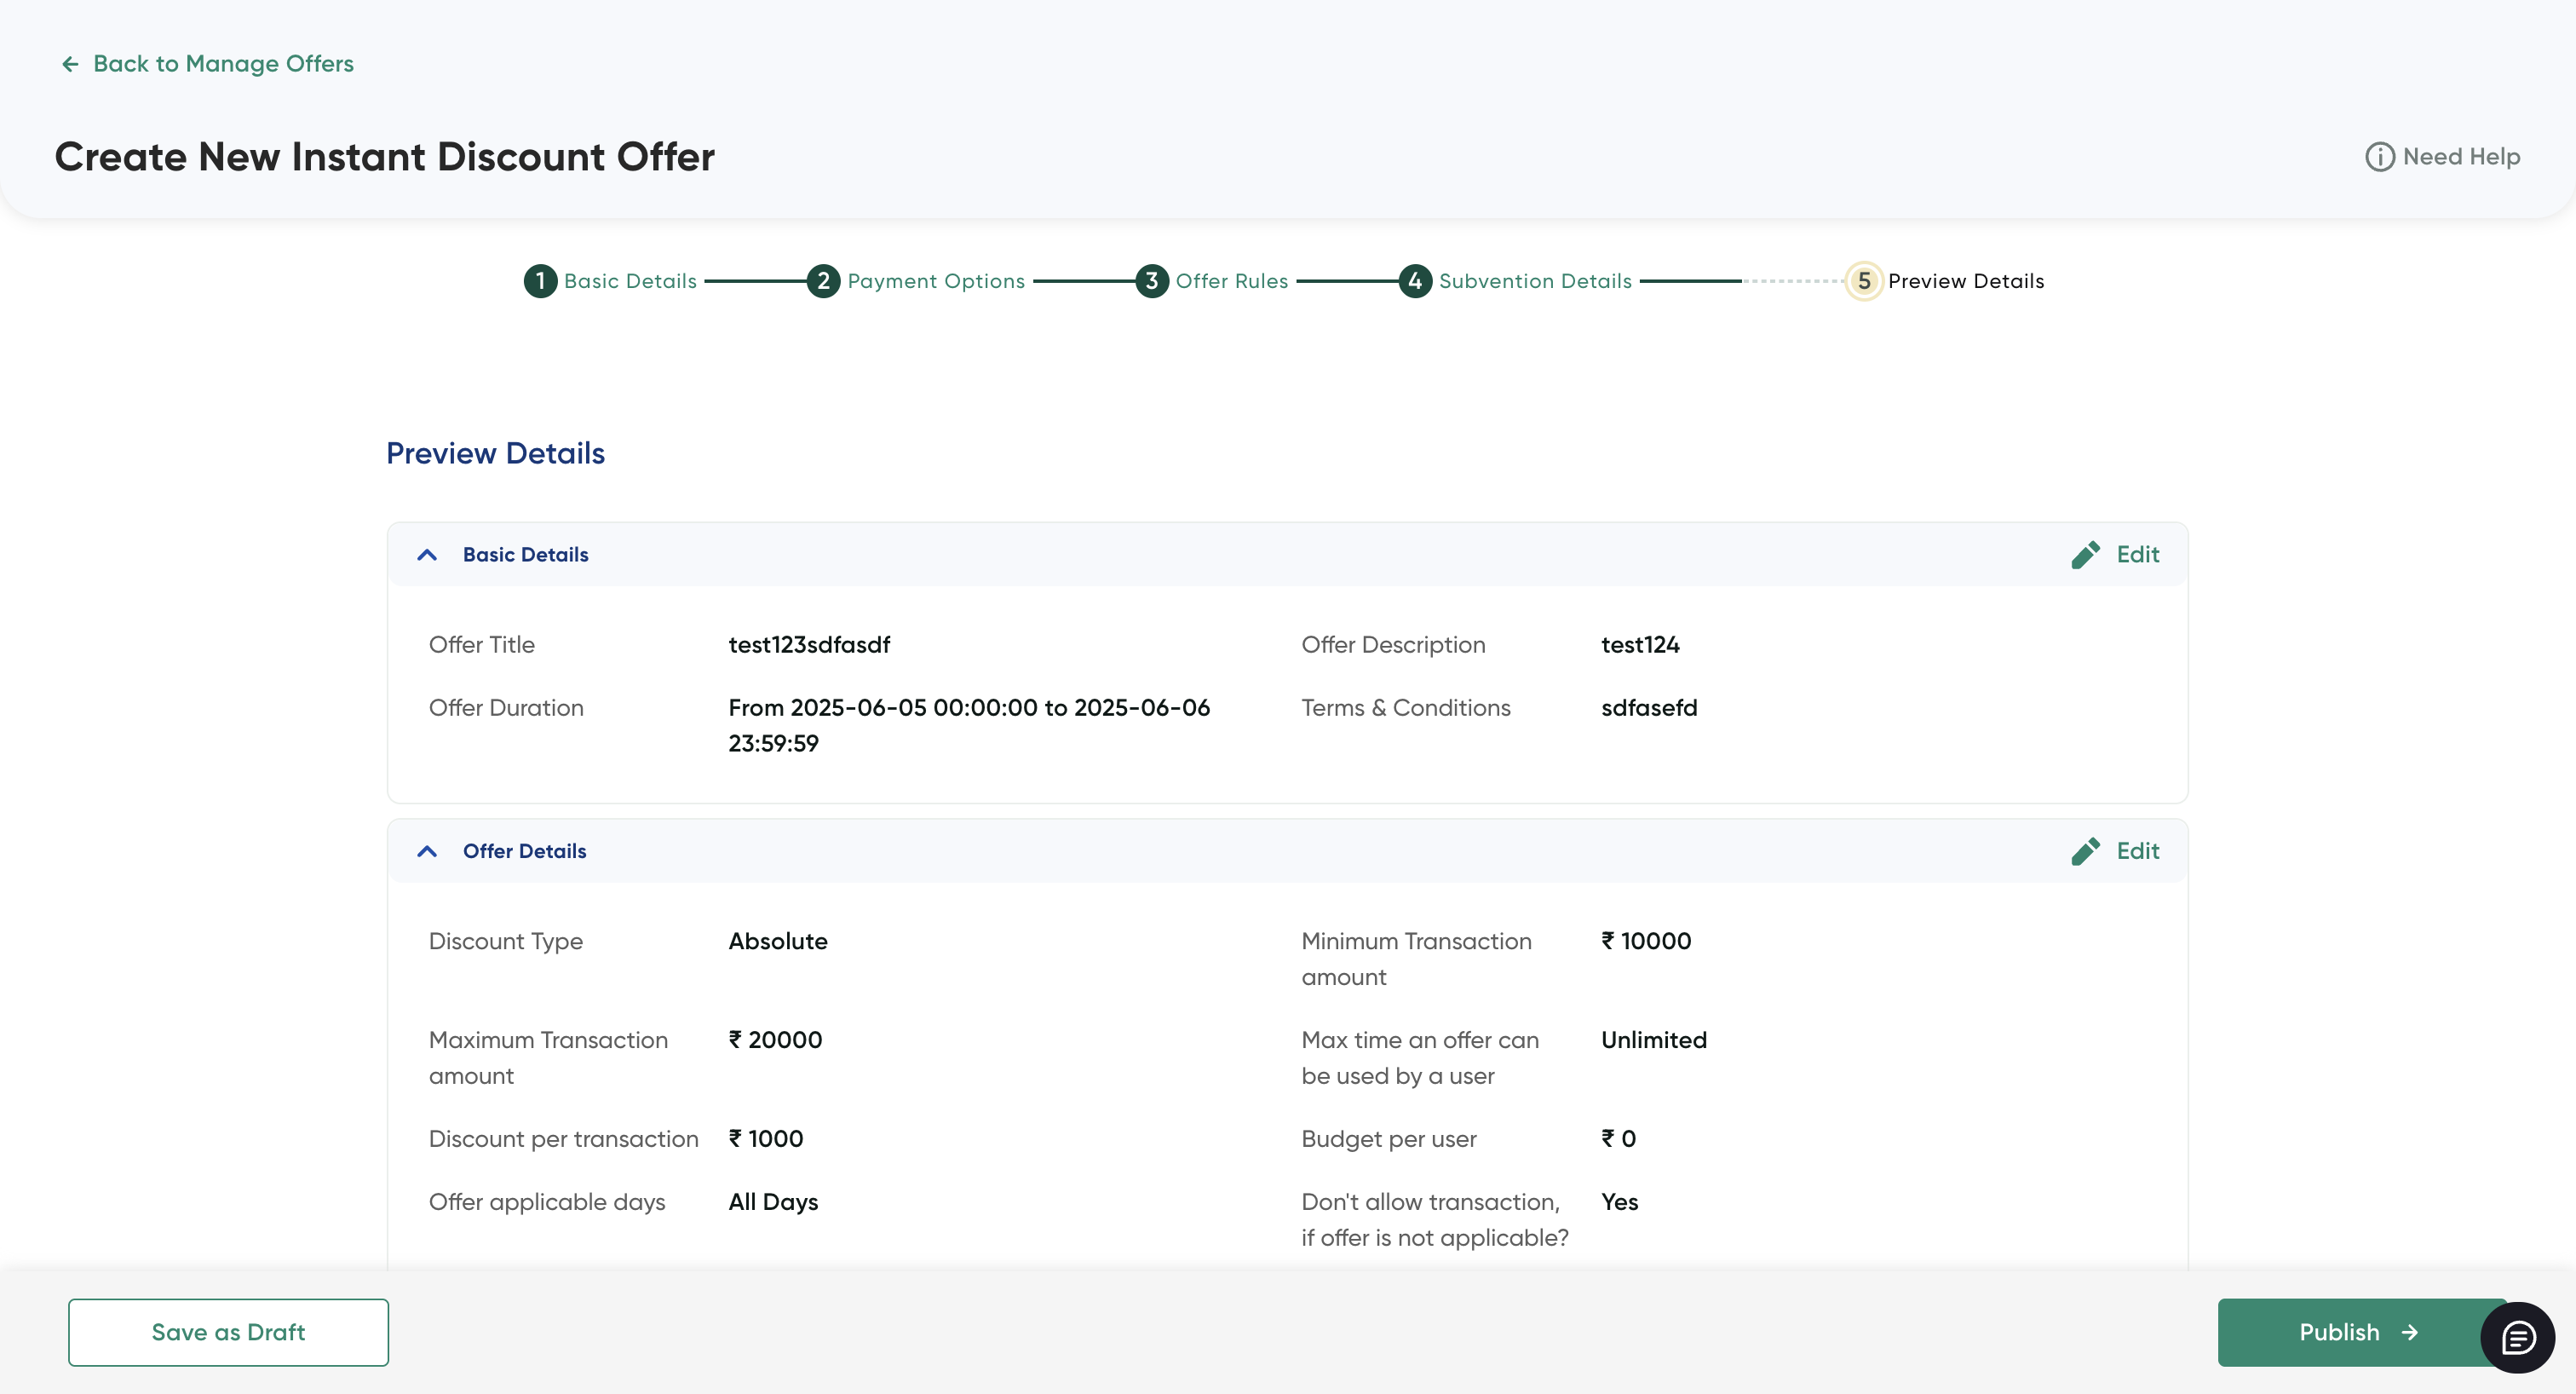
Step 5: Review of the Offer
The Preview Details page summarizes the details you provided in Step 2 to Step 4.
- Review all the configurations added before you make the offer available to your customers.
- Click the Edit button to return back to the corresponding page and update the configuration.
- Click Publish to make it available to customers.
Updated 5 days ago