Schedule a Report
To schedule certain reports:
-
Navigate to Analytics > Reports
-
Select Generate Report on any of the tile for which you want to schedule report.
-
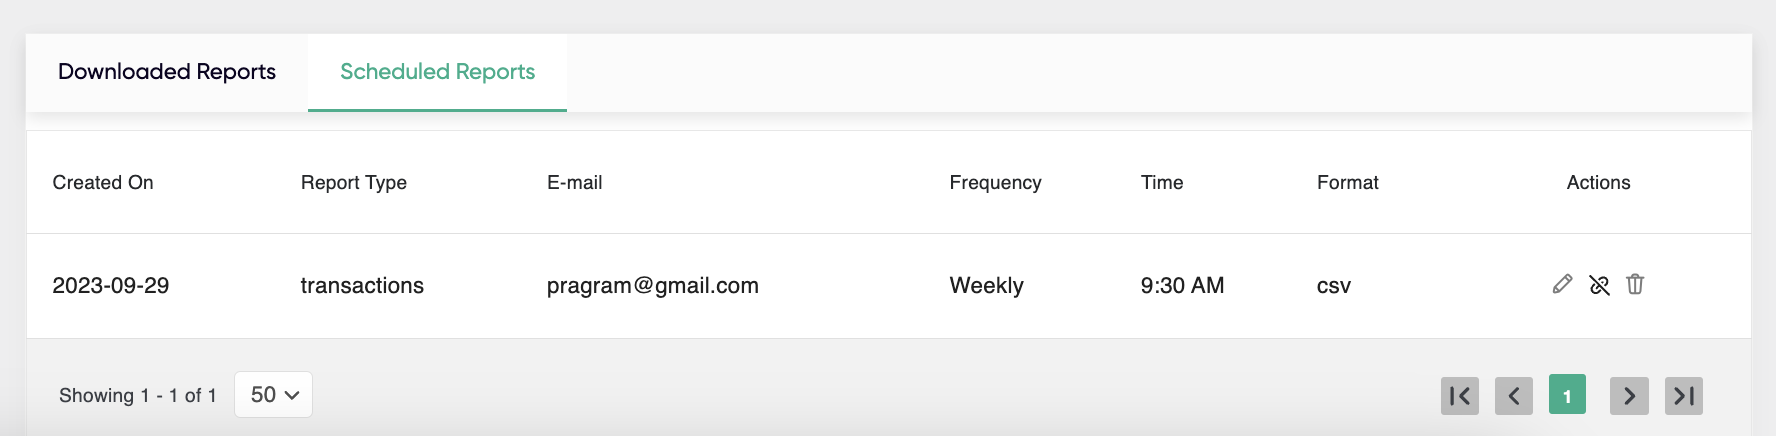
Select the Scheduled Reports tab.
The Scheduled Reports tab is displayed.

-
Select the desired report type from the drop-down list.
-
Click to select the Start and End date from the calendar view.
-
Select the desired frequency Daily, Weekly or Monthly from the drop-down list.
-
Select the preferred time for report generation from the drop-down list.
-
Select the required Source, Payment method, or Transaction Status options given in the Filters field.
-
Select the file format (CSV or XLSX) from the drop-down list
-
Enter the recipient email addresses in the Enter Email field to receive the report.
Note: Use the Add Another Email option to add more mail IDs, but the report can be scheduled only for two email IDs at a time.
- Click Schedule to complete the action.The history of downloaded and scheduled reports is available in this section. You can download them again using the download option using the options under the Actions menu.
Updated about 2 months ago