Install CommercePro Checkout App
To install PayU CommercePro Checkout application in your Shopify store.
- Search for it in Shopify App store.
OR
Navigate to the following URL:
https://apps.shopify.com/payu-commercepro-checkout
- Click Install button to initiate installation process in your store.
Note: If you have not logged on to Shopify, click the Log in to install button and log in with your Shopify Partner Account credentials.
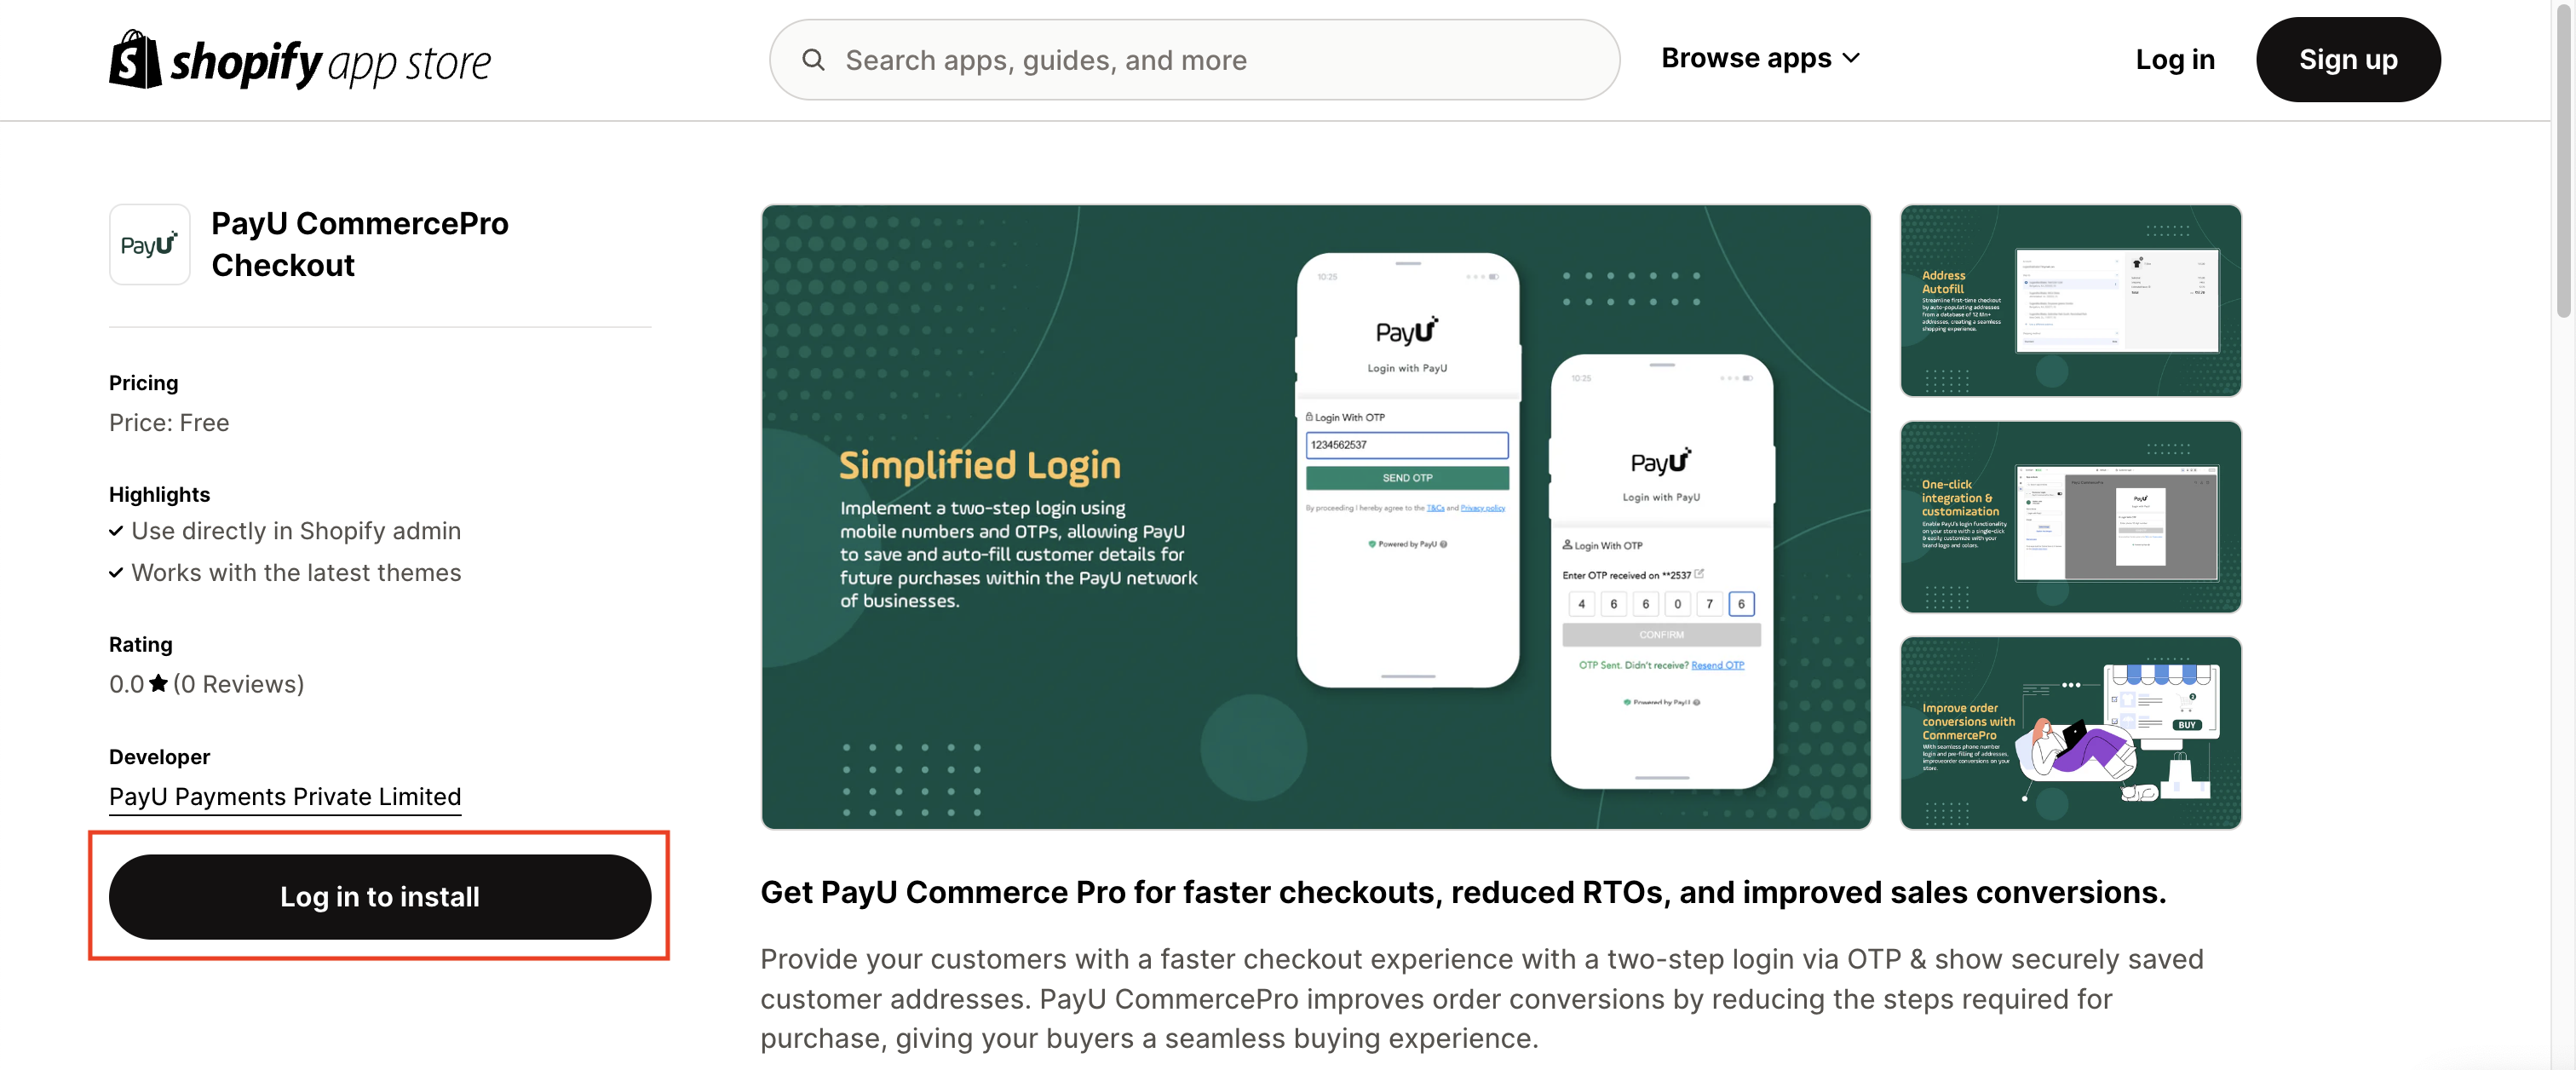
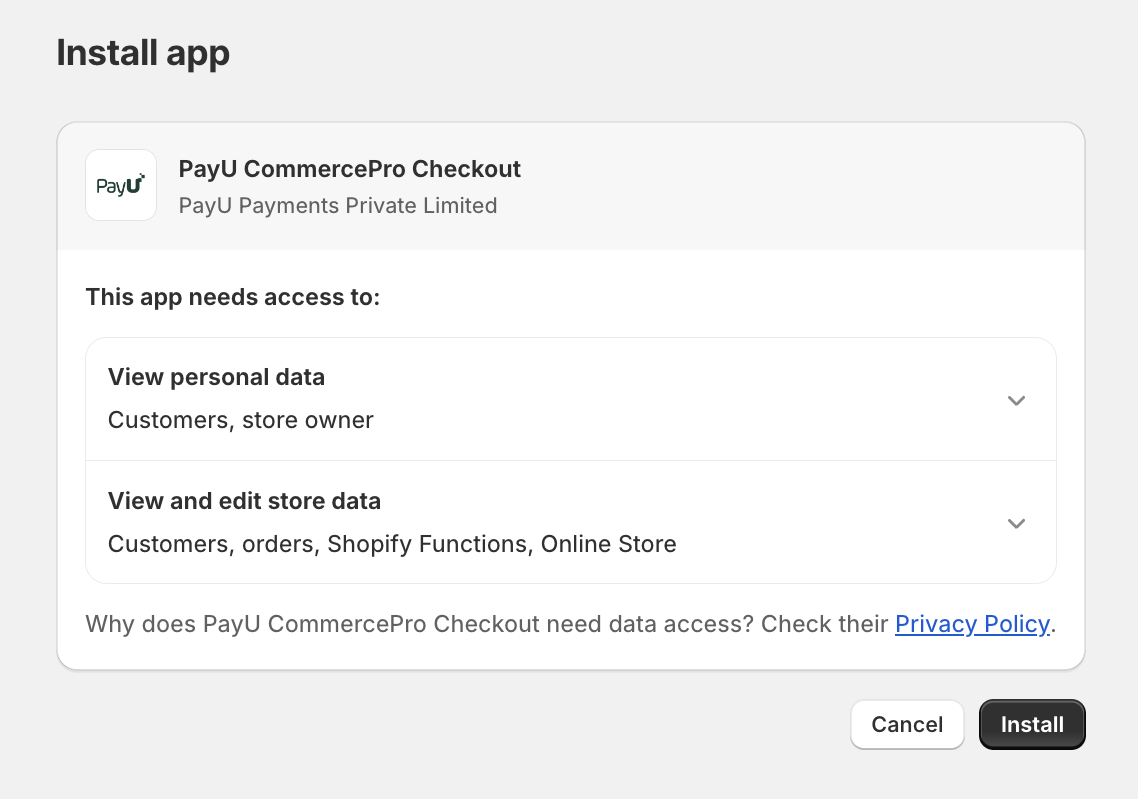
You are redirected to request grant / Install App screen into your Shopify store.
- Click ‘Install to grant permissions and install the PayU CommercePro Checkout app in your store.
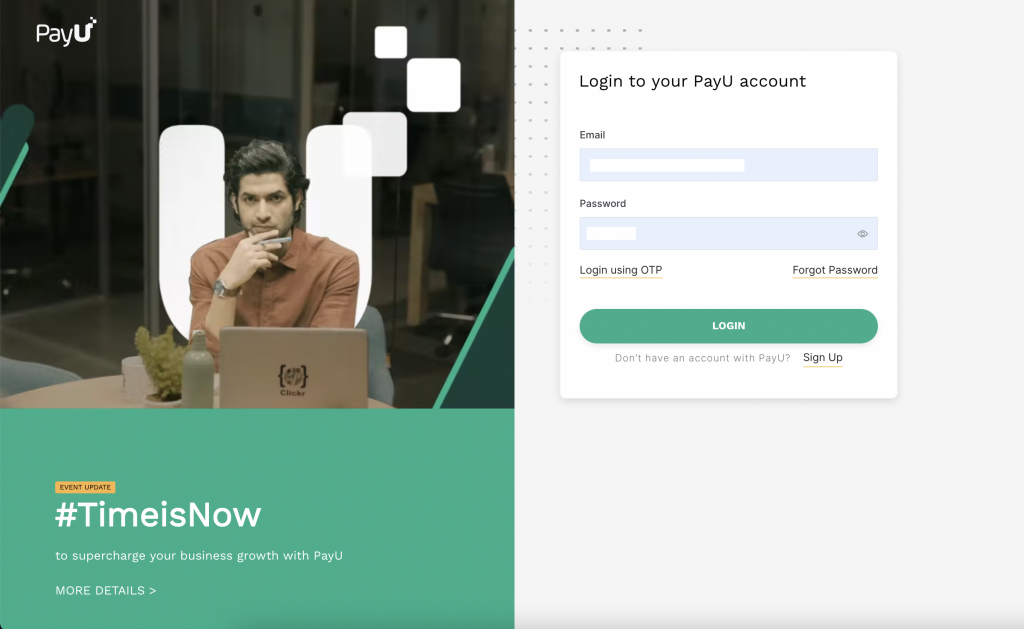
You will be redirected to PayU Account sign in page.
- Log in into your PayU Account using the Email and Password OR Login using OTP option.
This process will connect your PayU account with ‘PayU CommercePro Checkout’ Shopify App.
After successfully login into your PayU Account, it will redirect you to the successfully login confirmation screen, and then it will redirect automatically to Shopify in 5 seconds. The Authorize Your Account page is displayed.
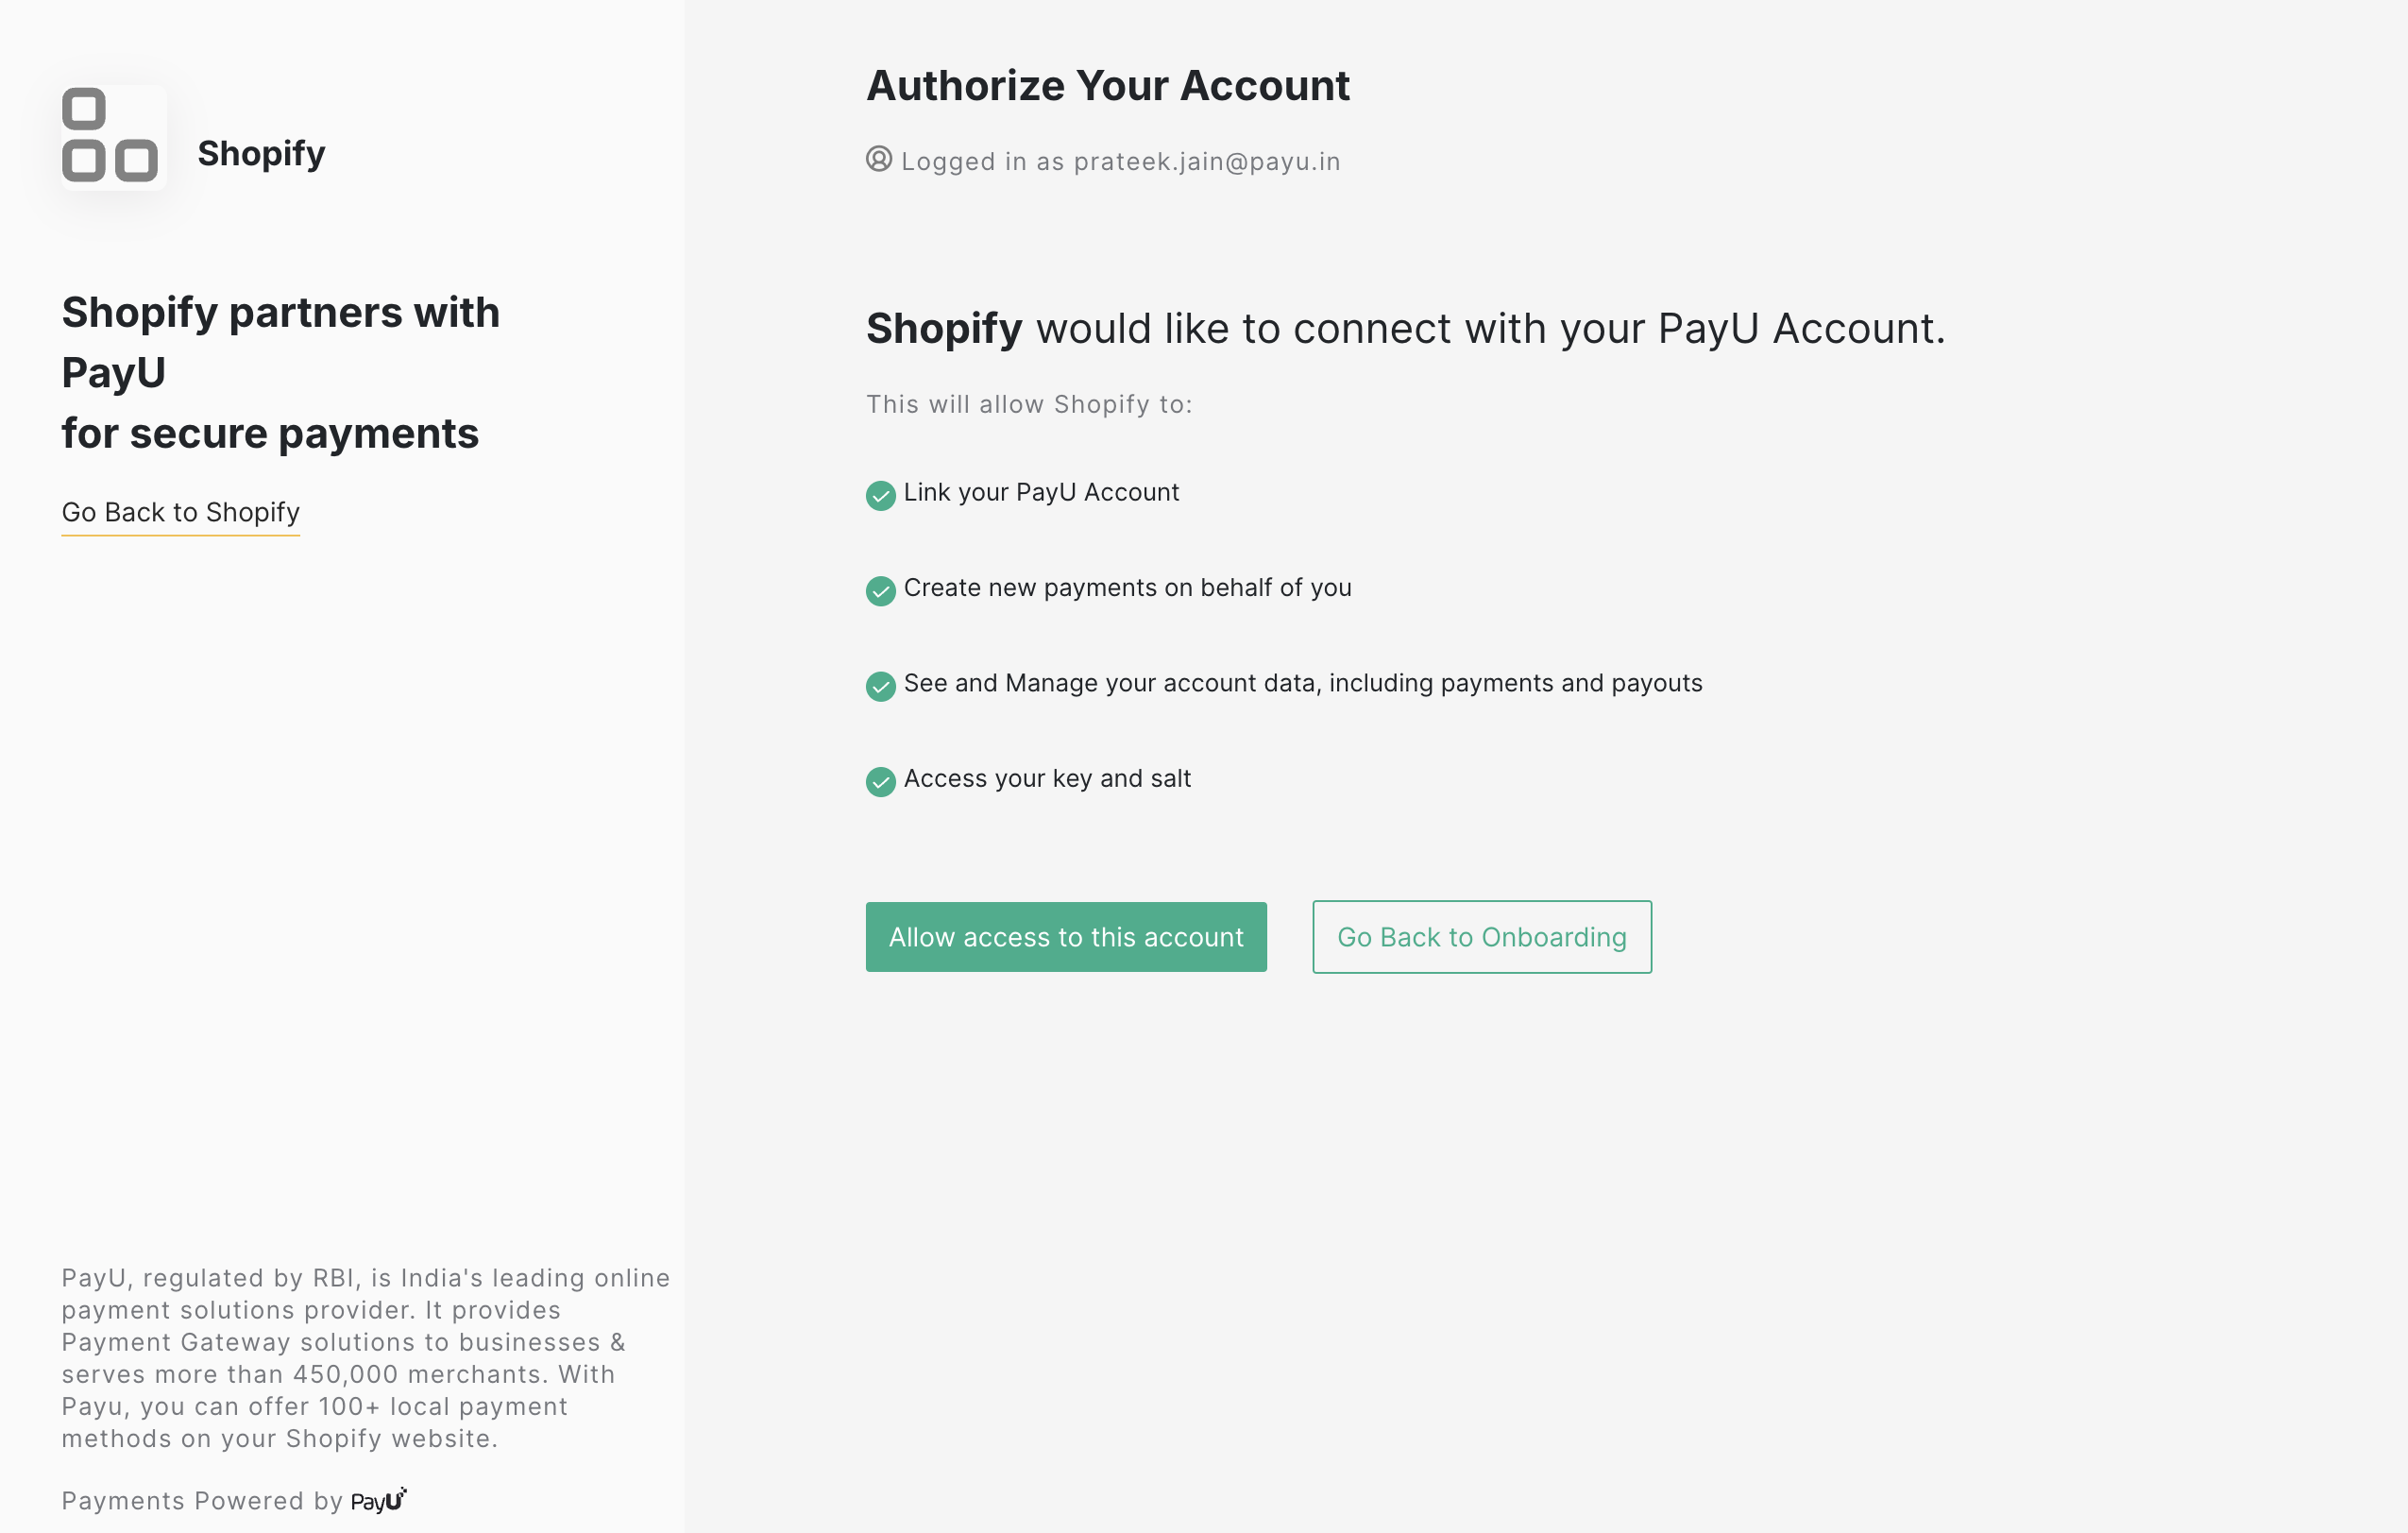
You can go back to Shopify manually by clicking Back to Shopify button.
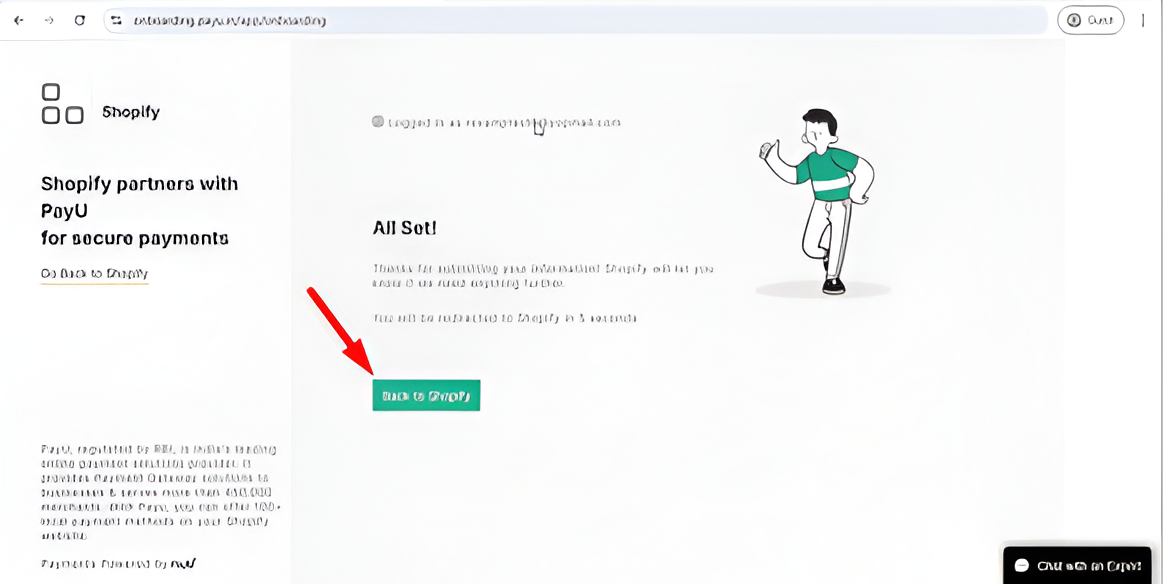
You will be redirect to the PayU CommercePro Checkout Shopify App’s Dashboard.
Set up Login Widget
You can set up the PayU CommercPro App Login Widget using any of the following procedure described in this section:
OR
Set up Login Widget from Dashboard
To set up PayU commerce pro Login widget into your store:
Note:Verify the pre-requisite Shopify settings requirements. For more information, refer to Install CommercePro Checkout App.
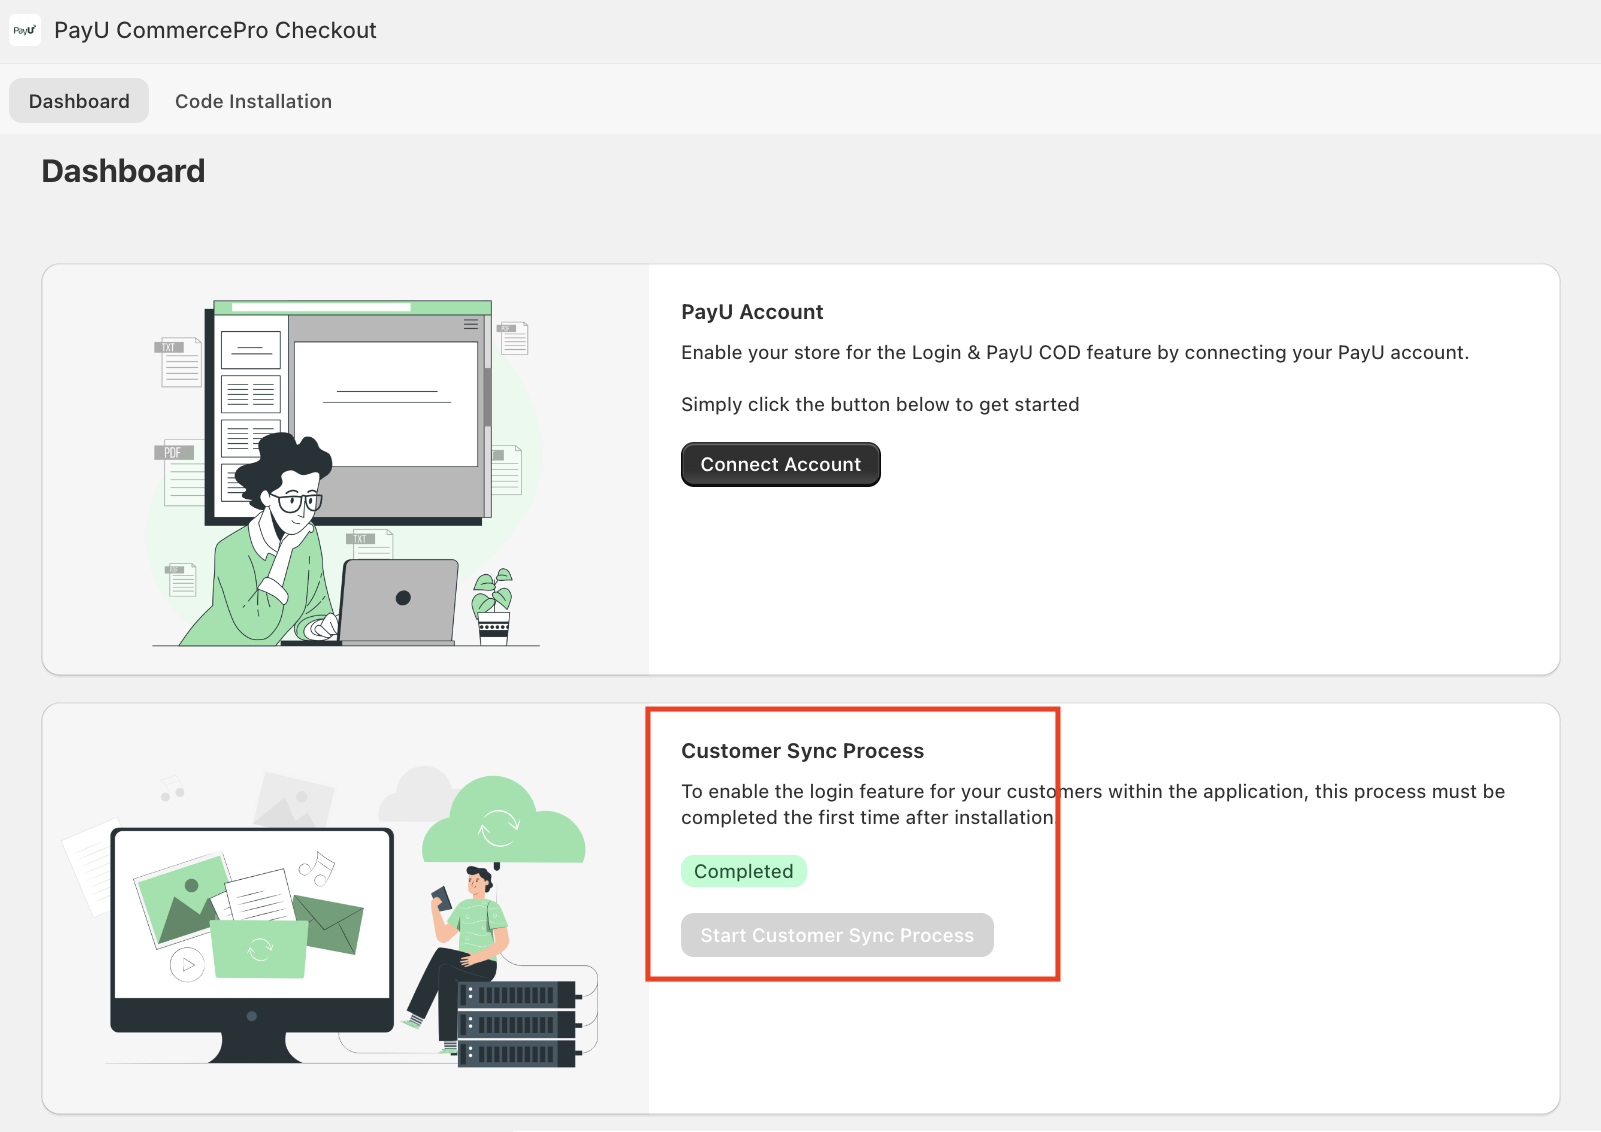
- Verify that Customer Sync Process is completed on the PayU CommercePro Checkout app:
Note: It may take some time for synching and depends on the total customer count on your store.
- Navigate to Store admin > Apps > PayU CommercePro Checkout > Dashboard.
- Check if the Complete status is displayed under Customer Sync Process as in the following screenshot:
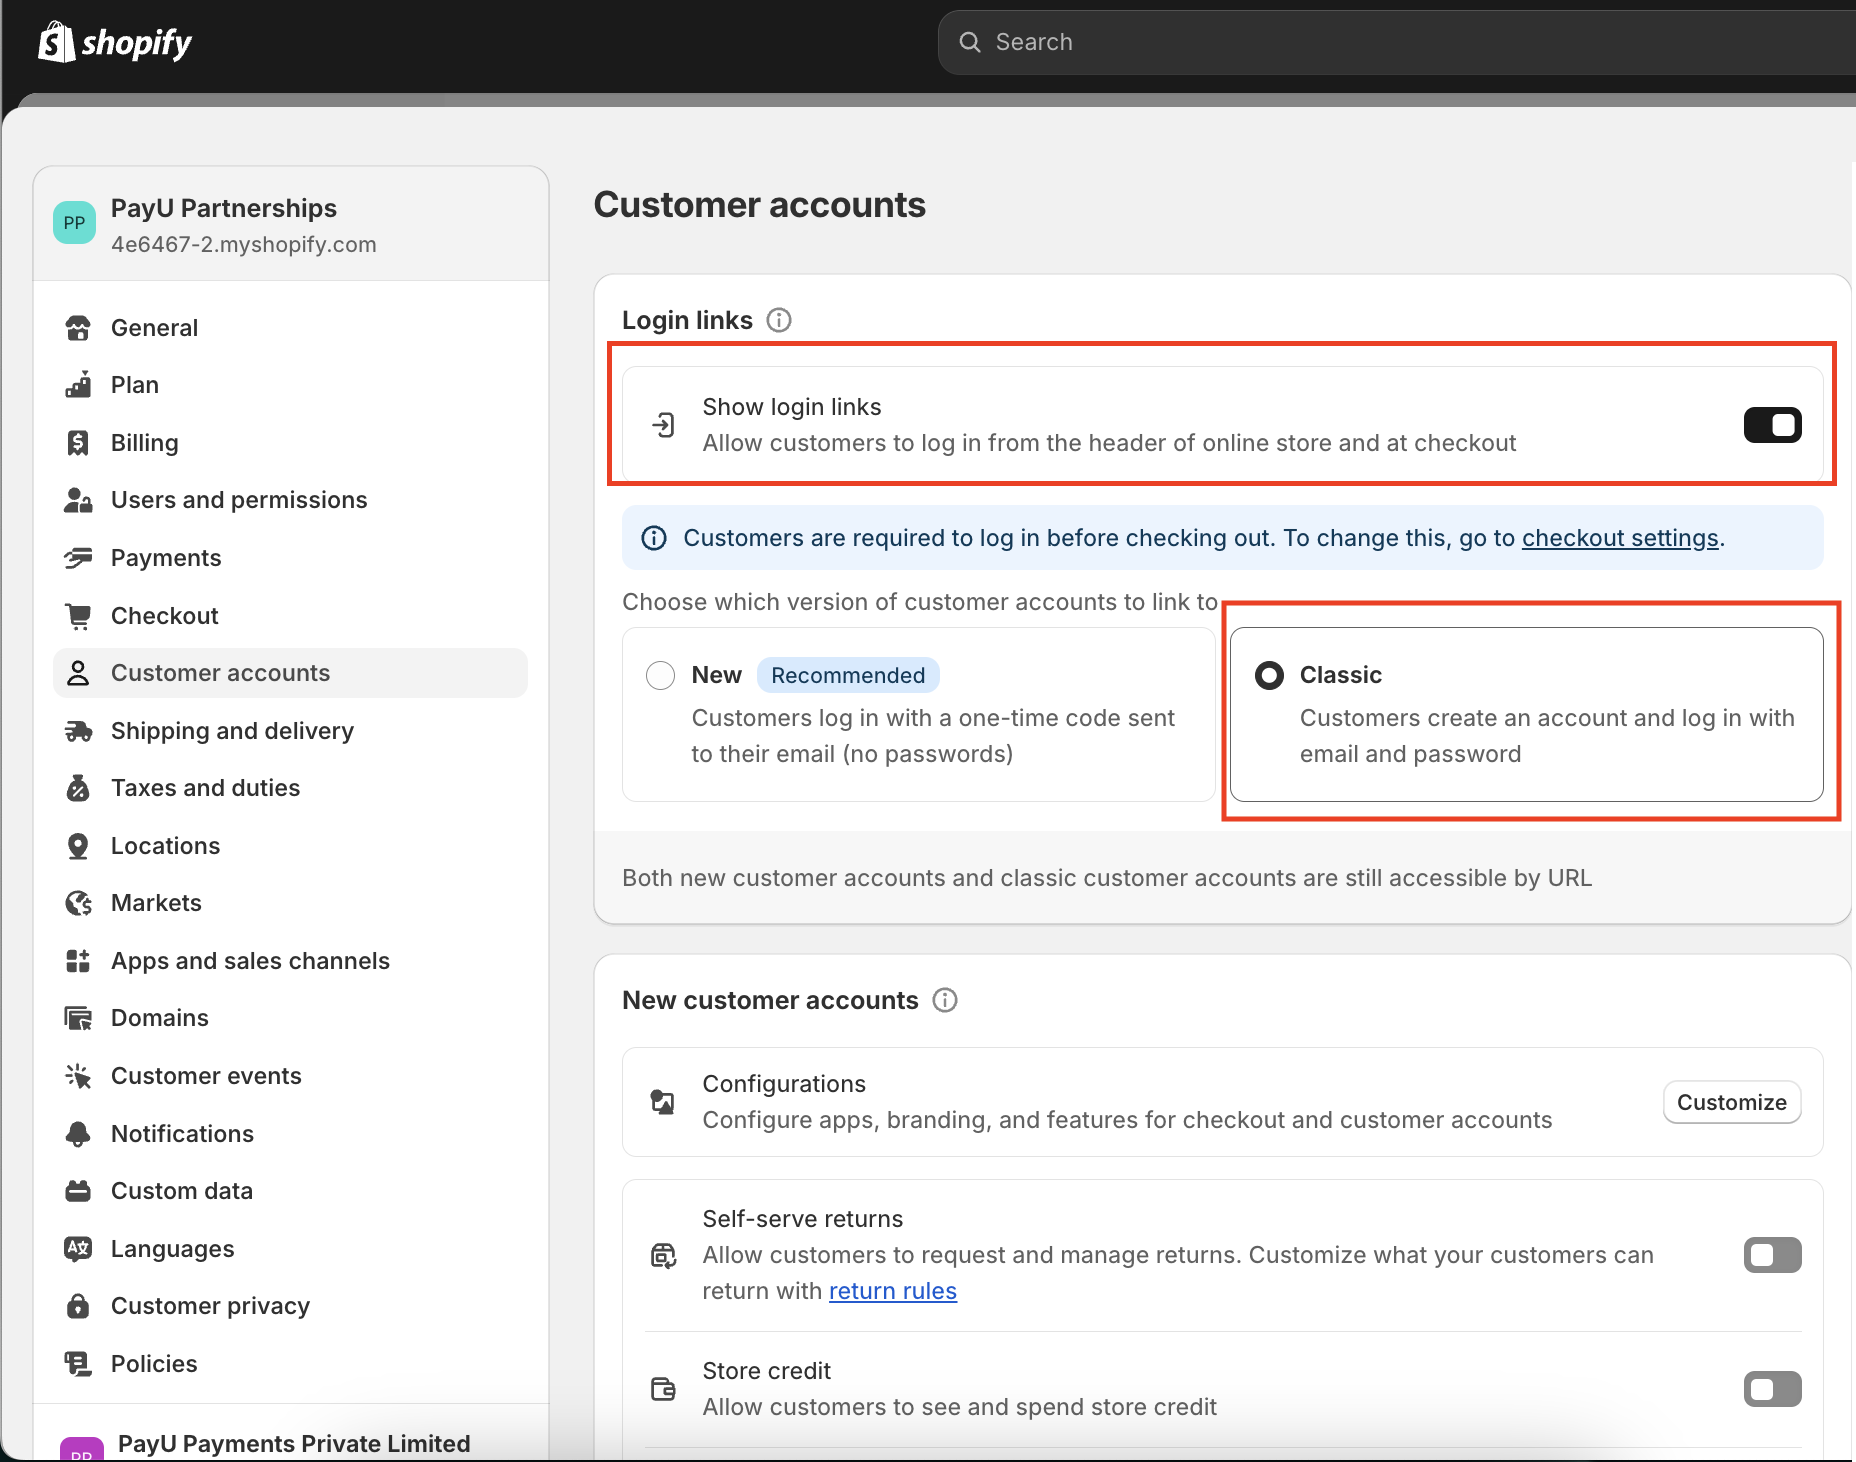
- Verify that show login links is enabled:
- Navigate to Online Store> Settings > Customer accounts.
- Click the Show login linkstoggle button to enable it.
- Ensure that the Classic is selected as in the following screenshot:
- Verify that the following sections are hidden in theme in which you want to enable Login widget:
- Customer login page > Login.
- Customer Register Page > Registration
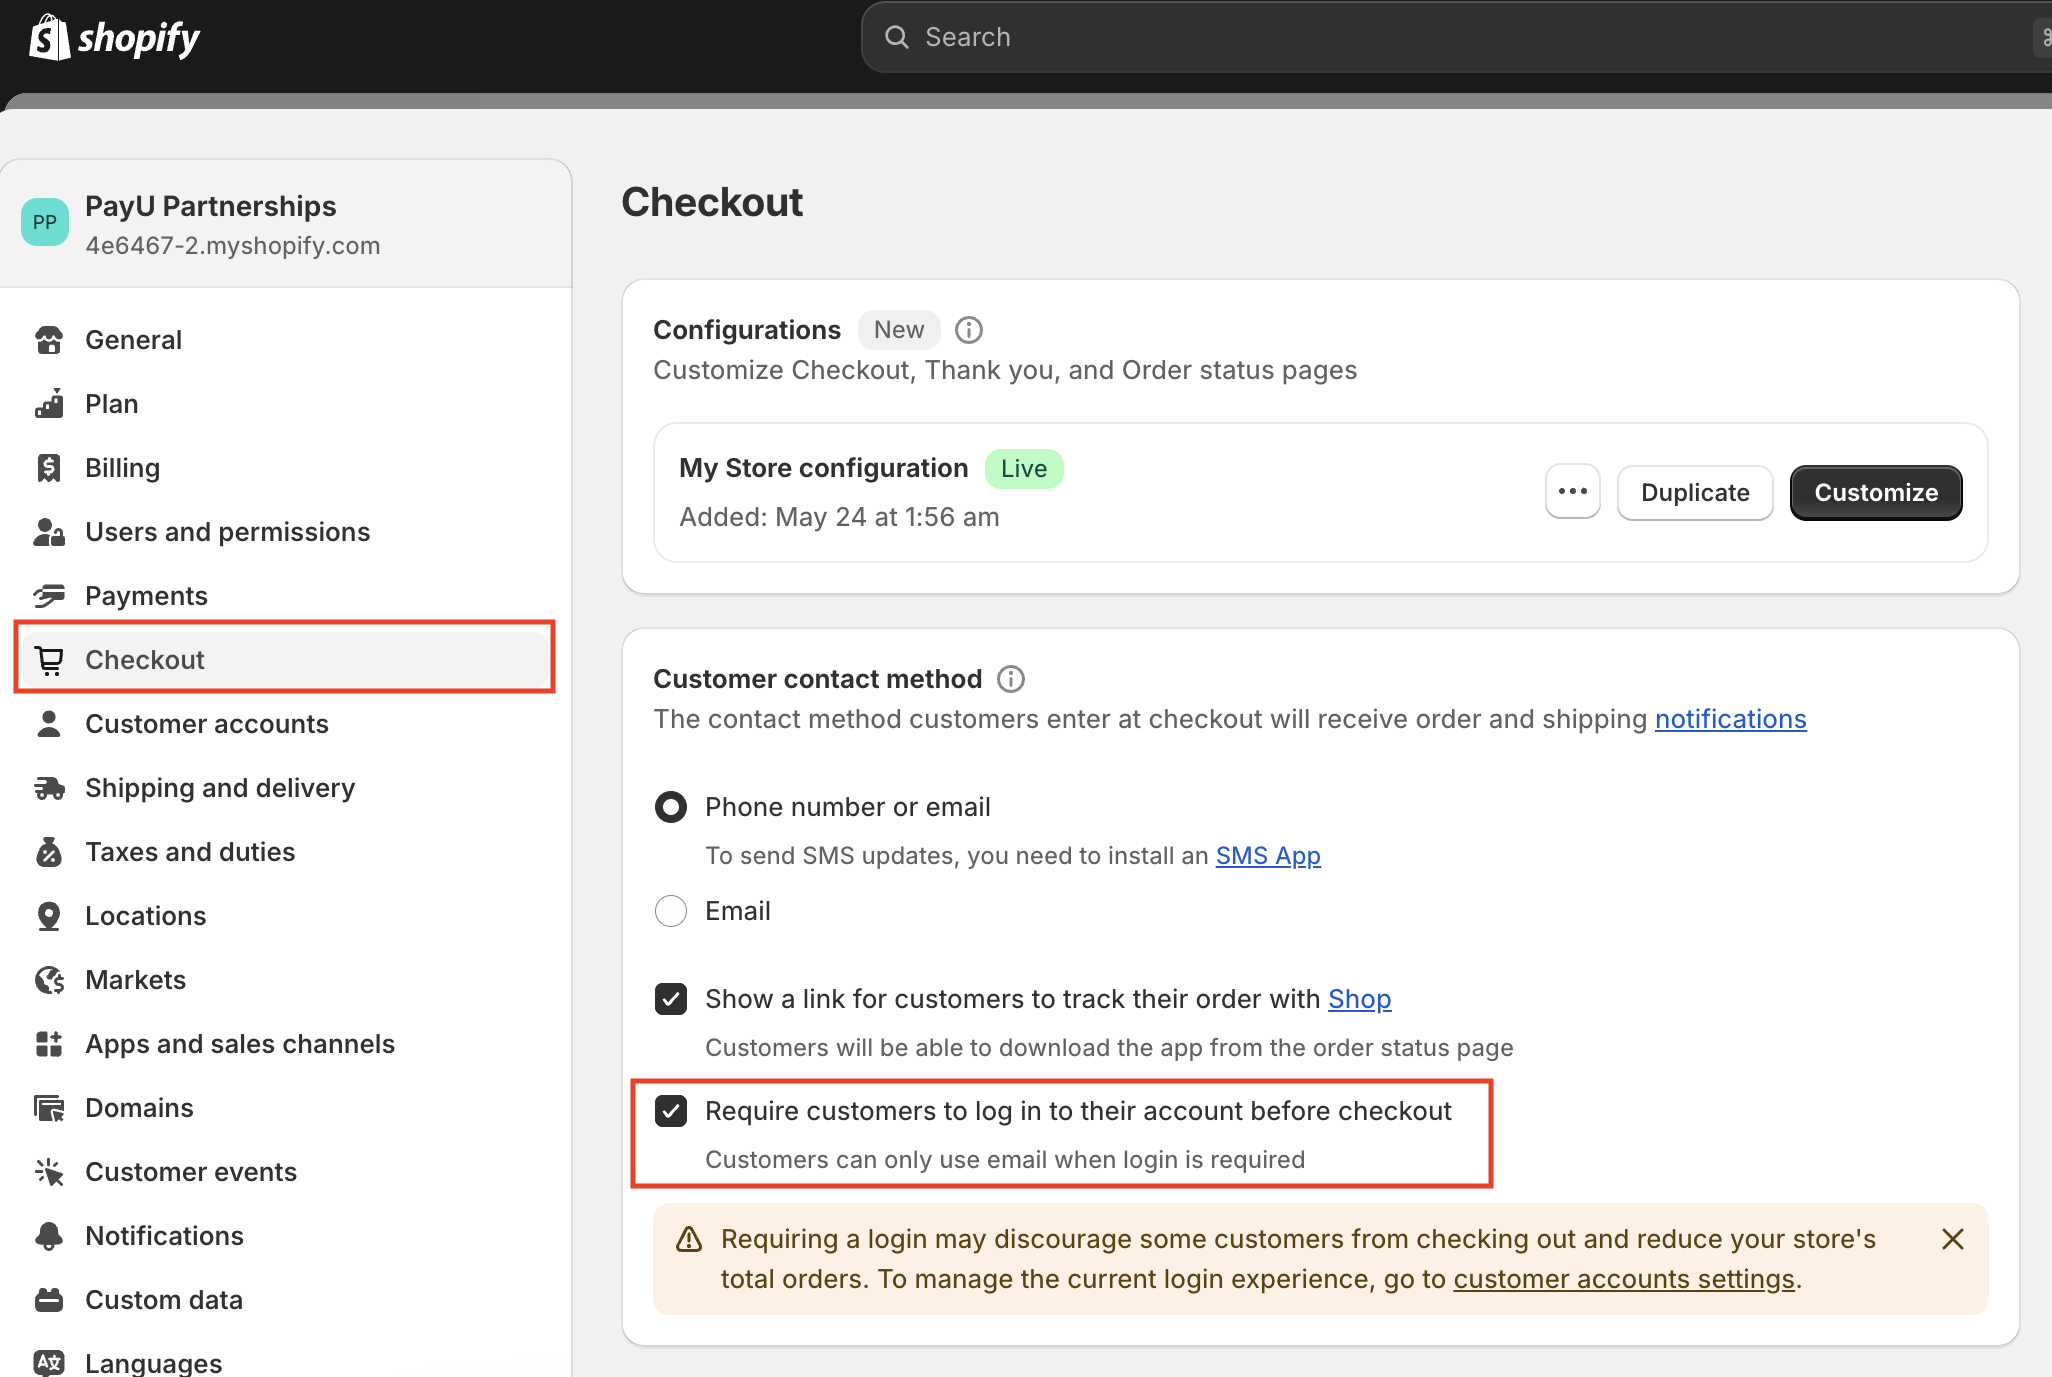
- Verify that guest checkout is disabled:
- Navigate to Settings > Checkout
- Select Require customers to log in to their account before checkout check box.
- Click Save at the bottom-right.
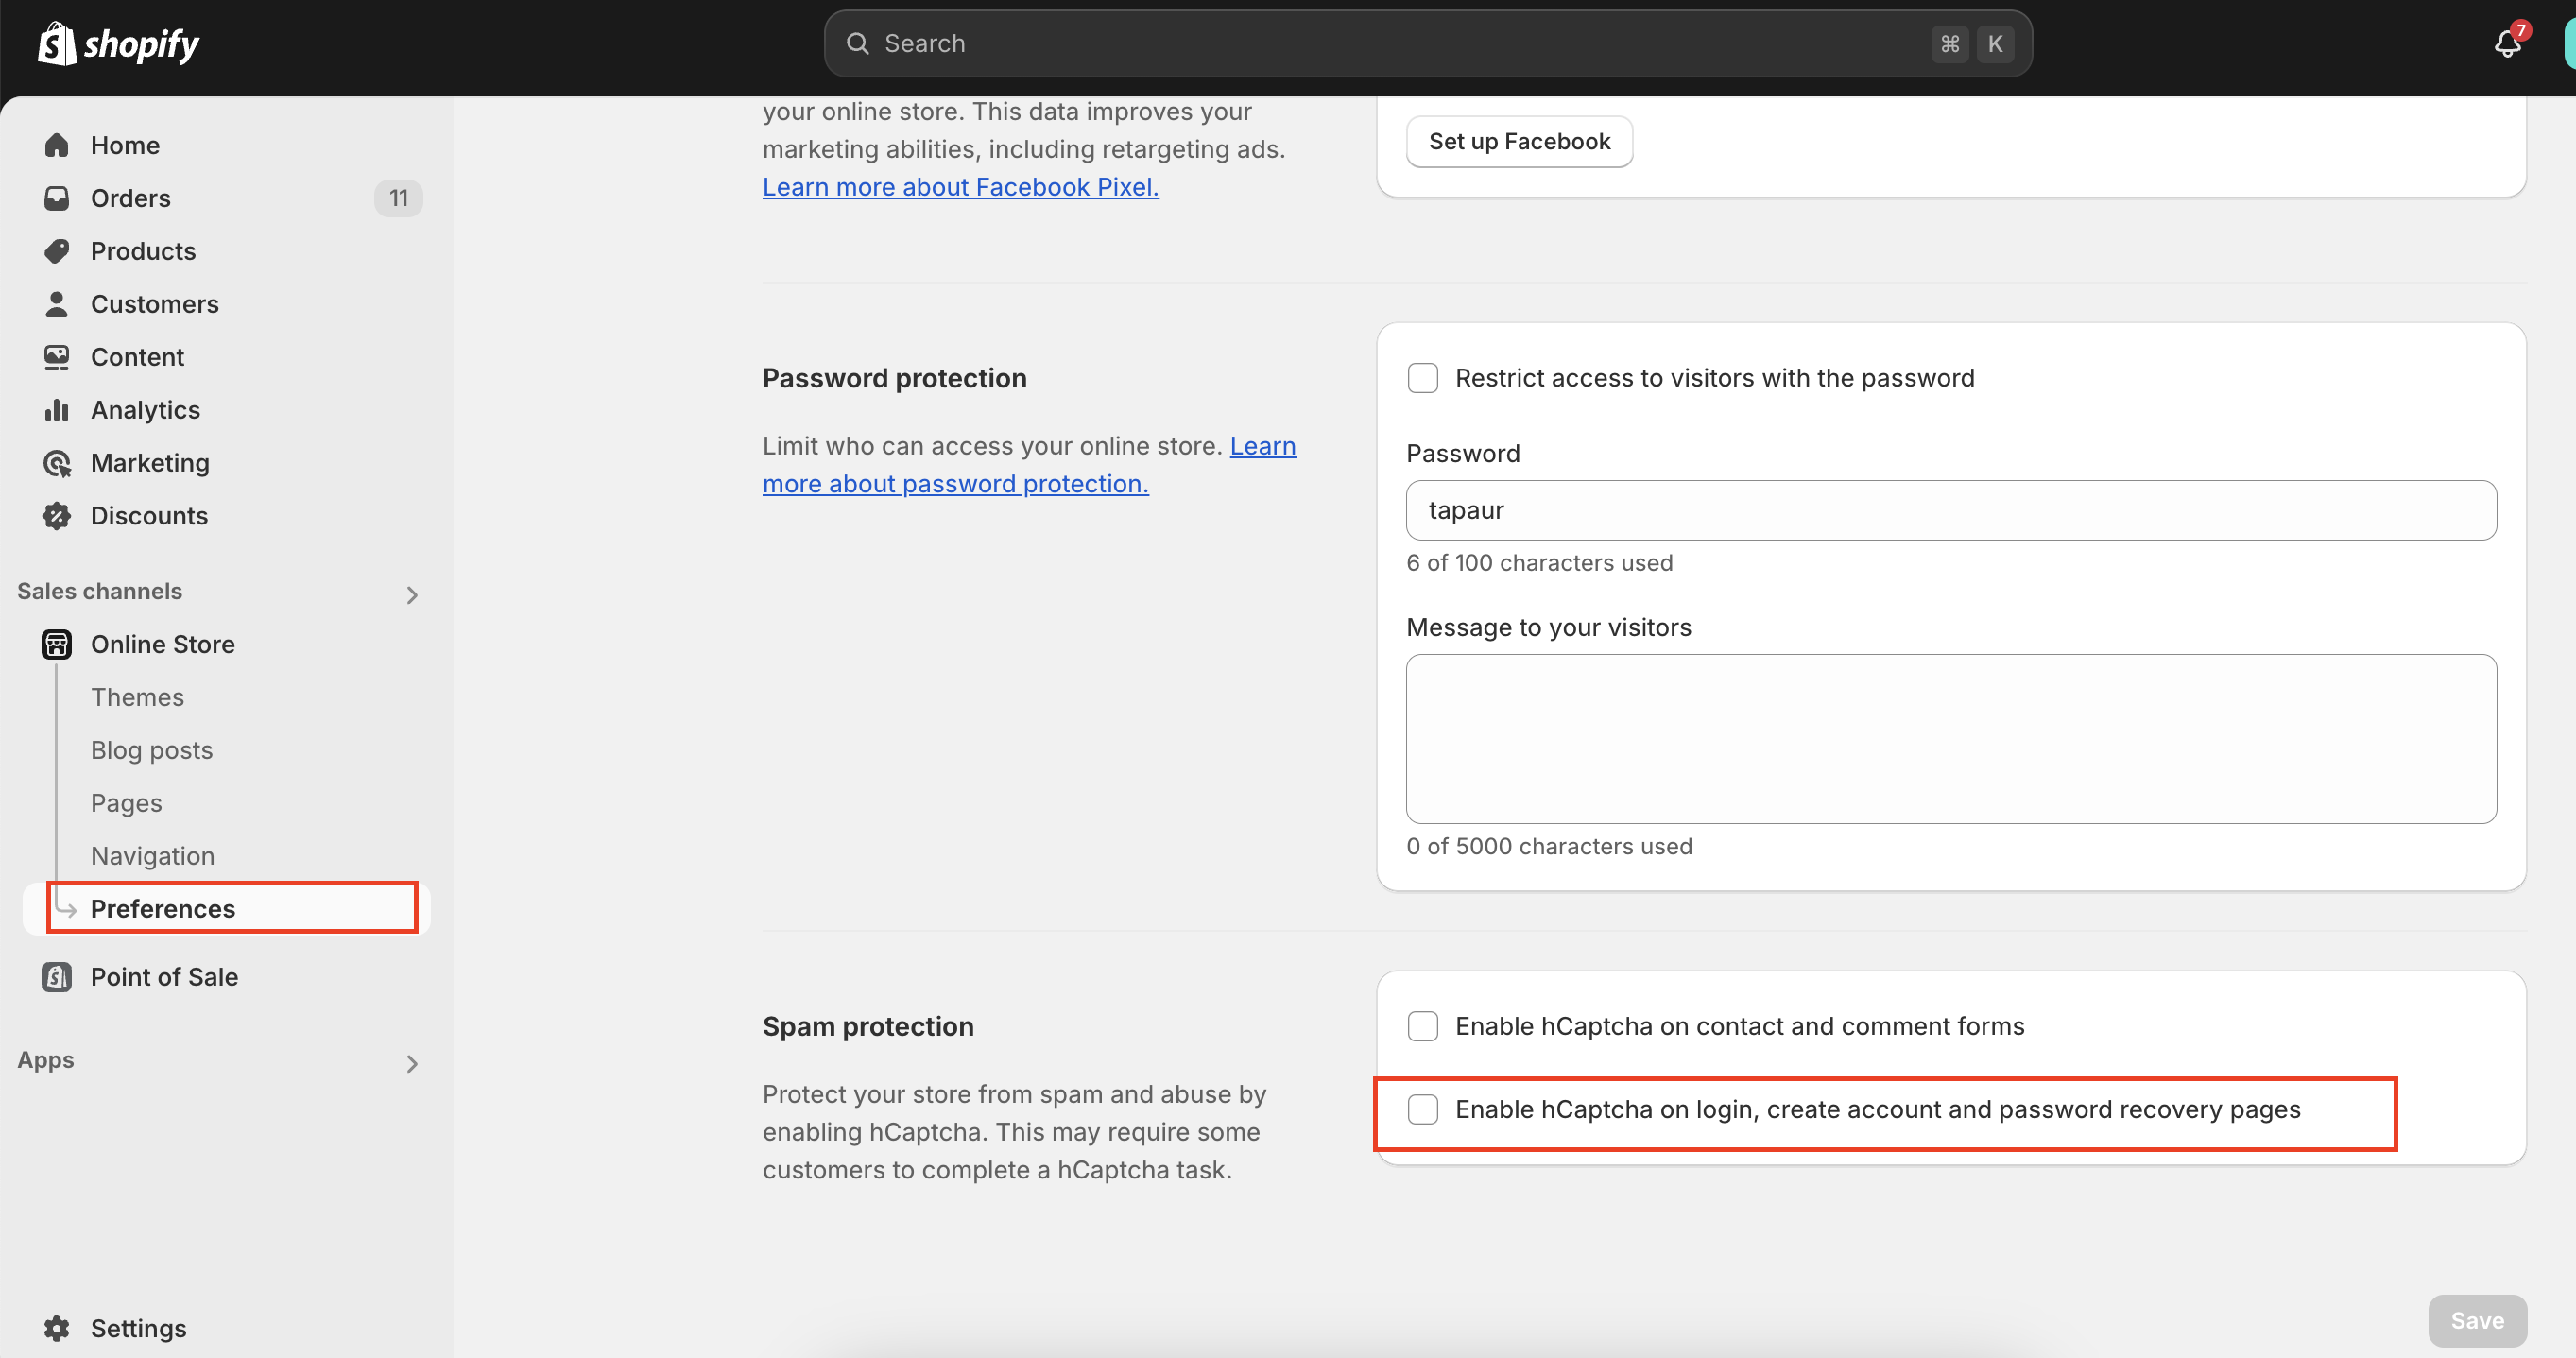
- Verify that captcha on login, create account and password recovery pages is Disabled.
- Navigate to Online Store > Preferences under Sales channels.
- In the Spam protection section, ensure that the Enable nCaptcha to login, create account and password recovery pages check box is not selected.
- Click Save at the bottom-right.
Enable Login Widget from Themes
To enable Customer login widget into storefront:
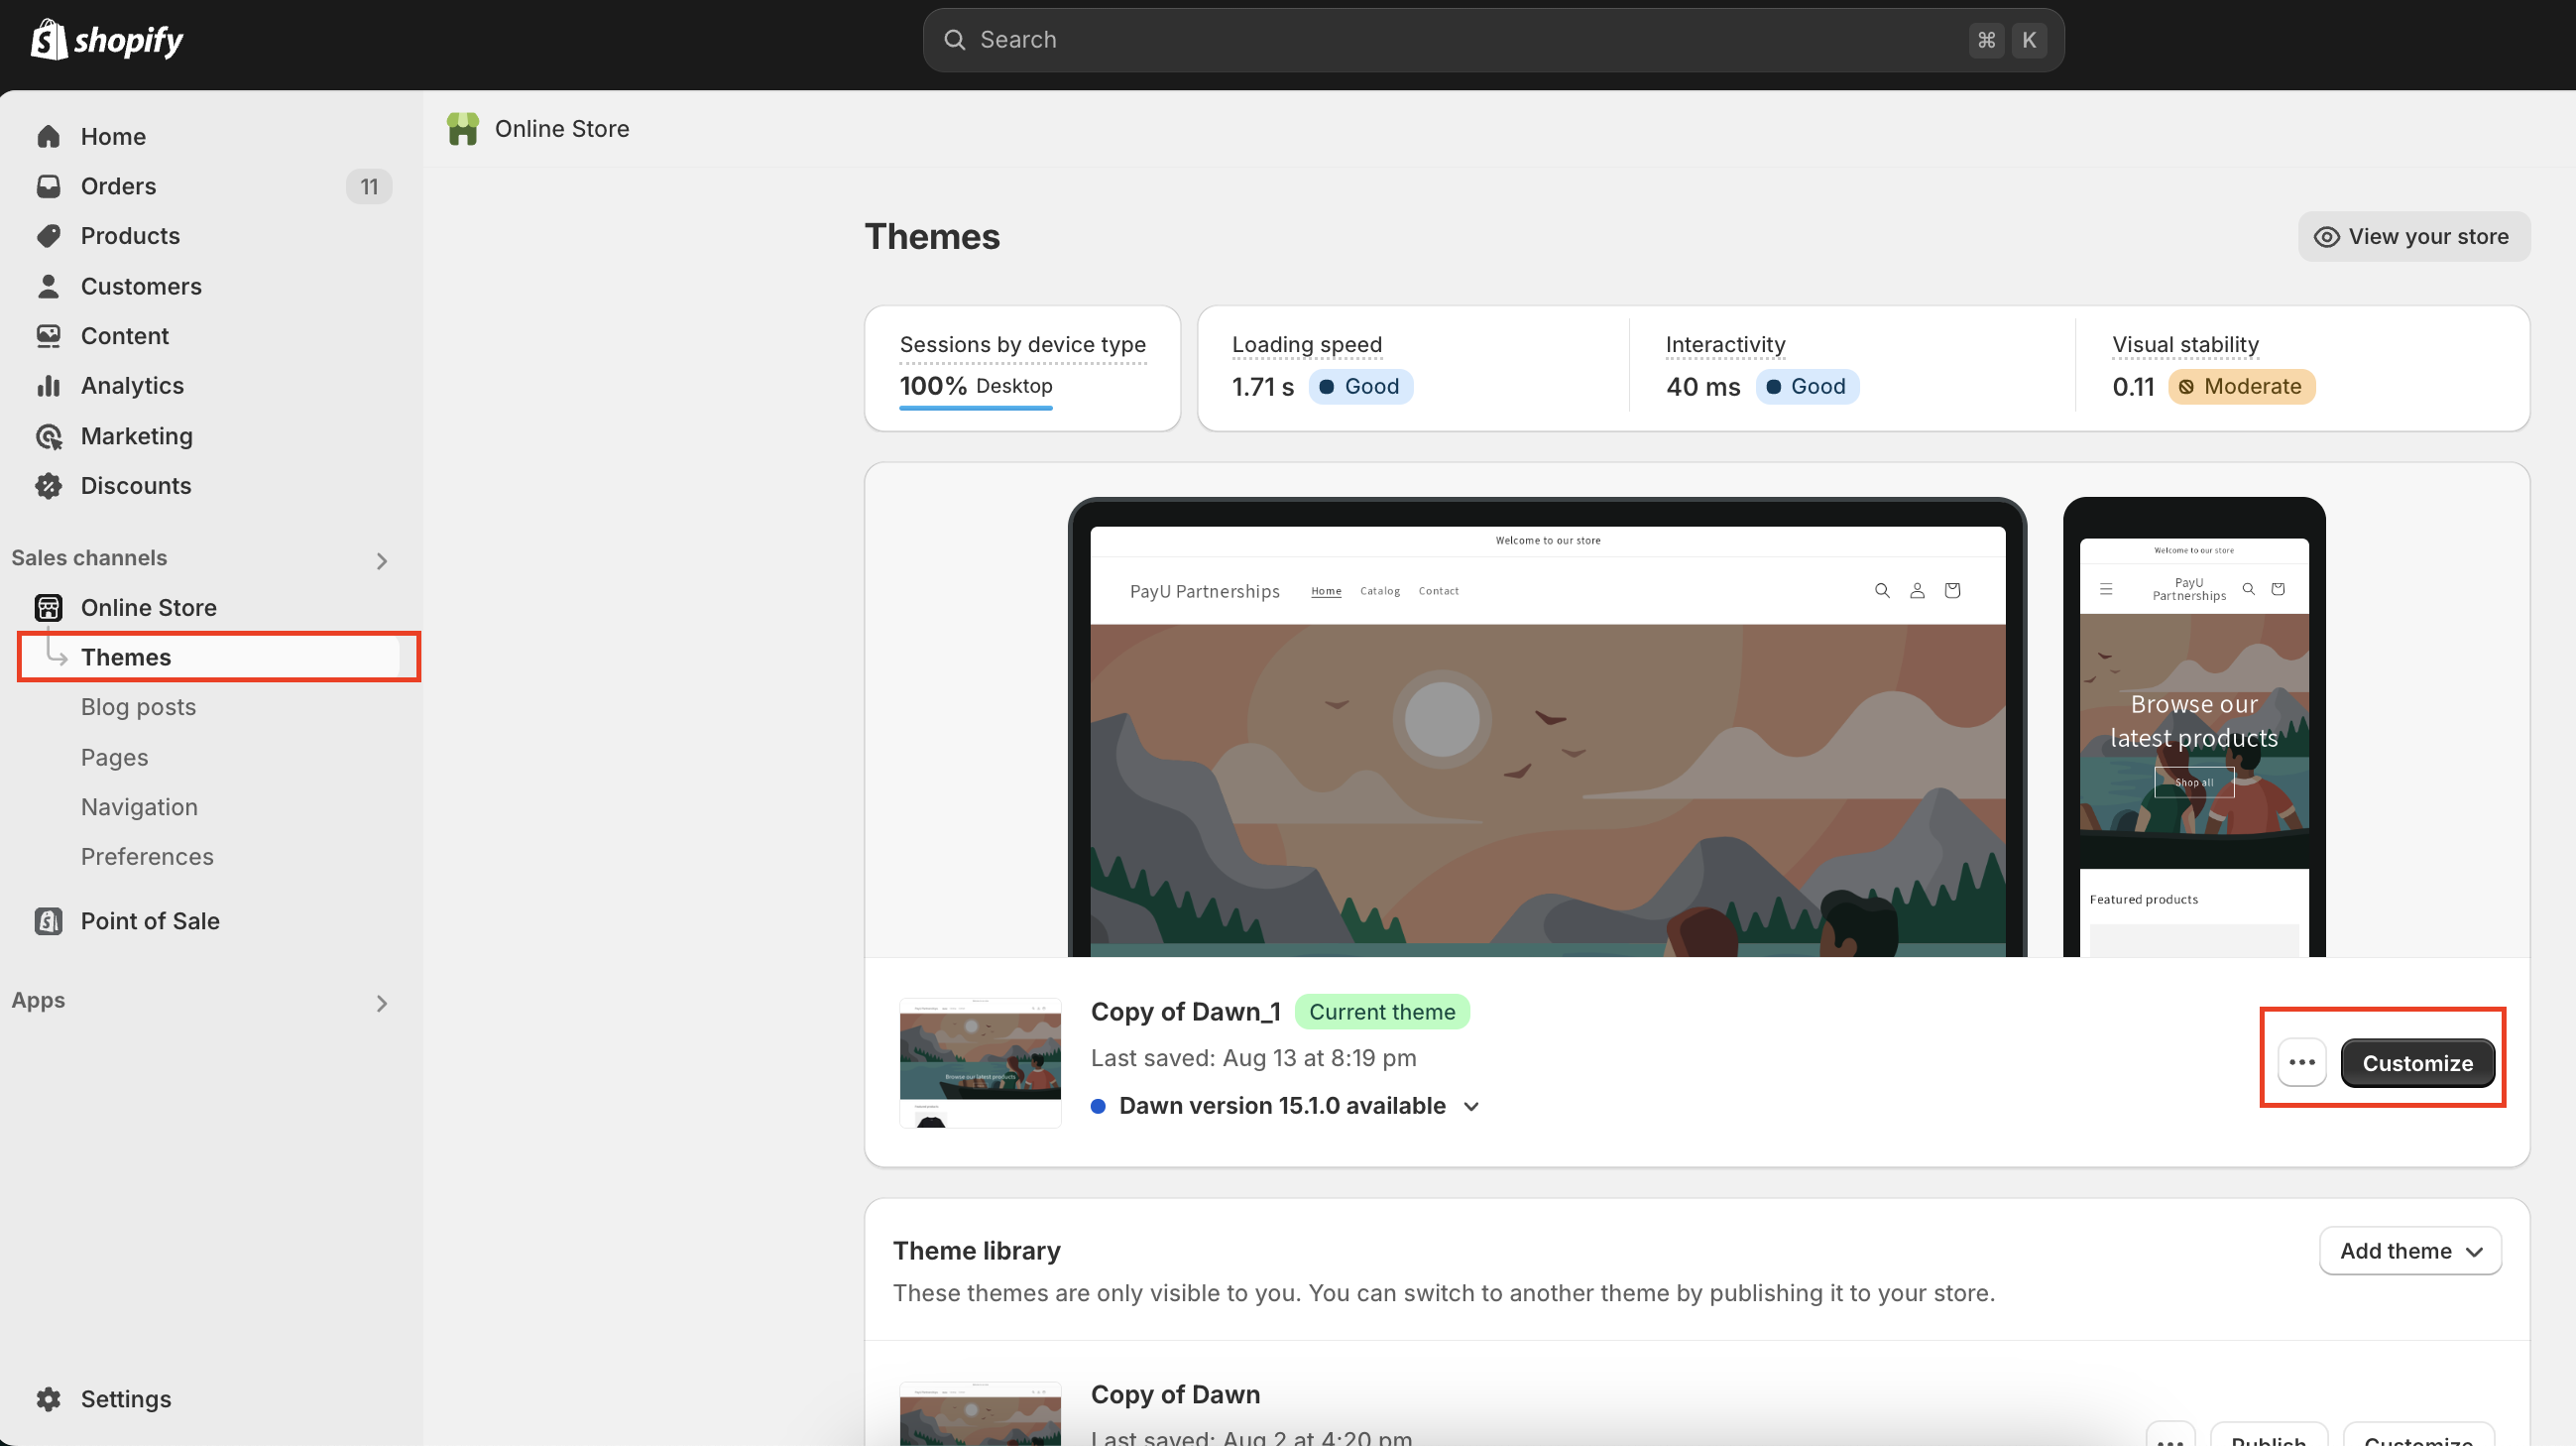
- Navigate to Online store > Themes.
- Click the Customize button in which you want to setup widget.
- Select App embeds on left side navigation bar similar to the following screenshot:
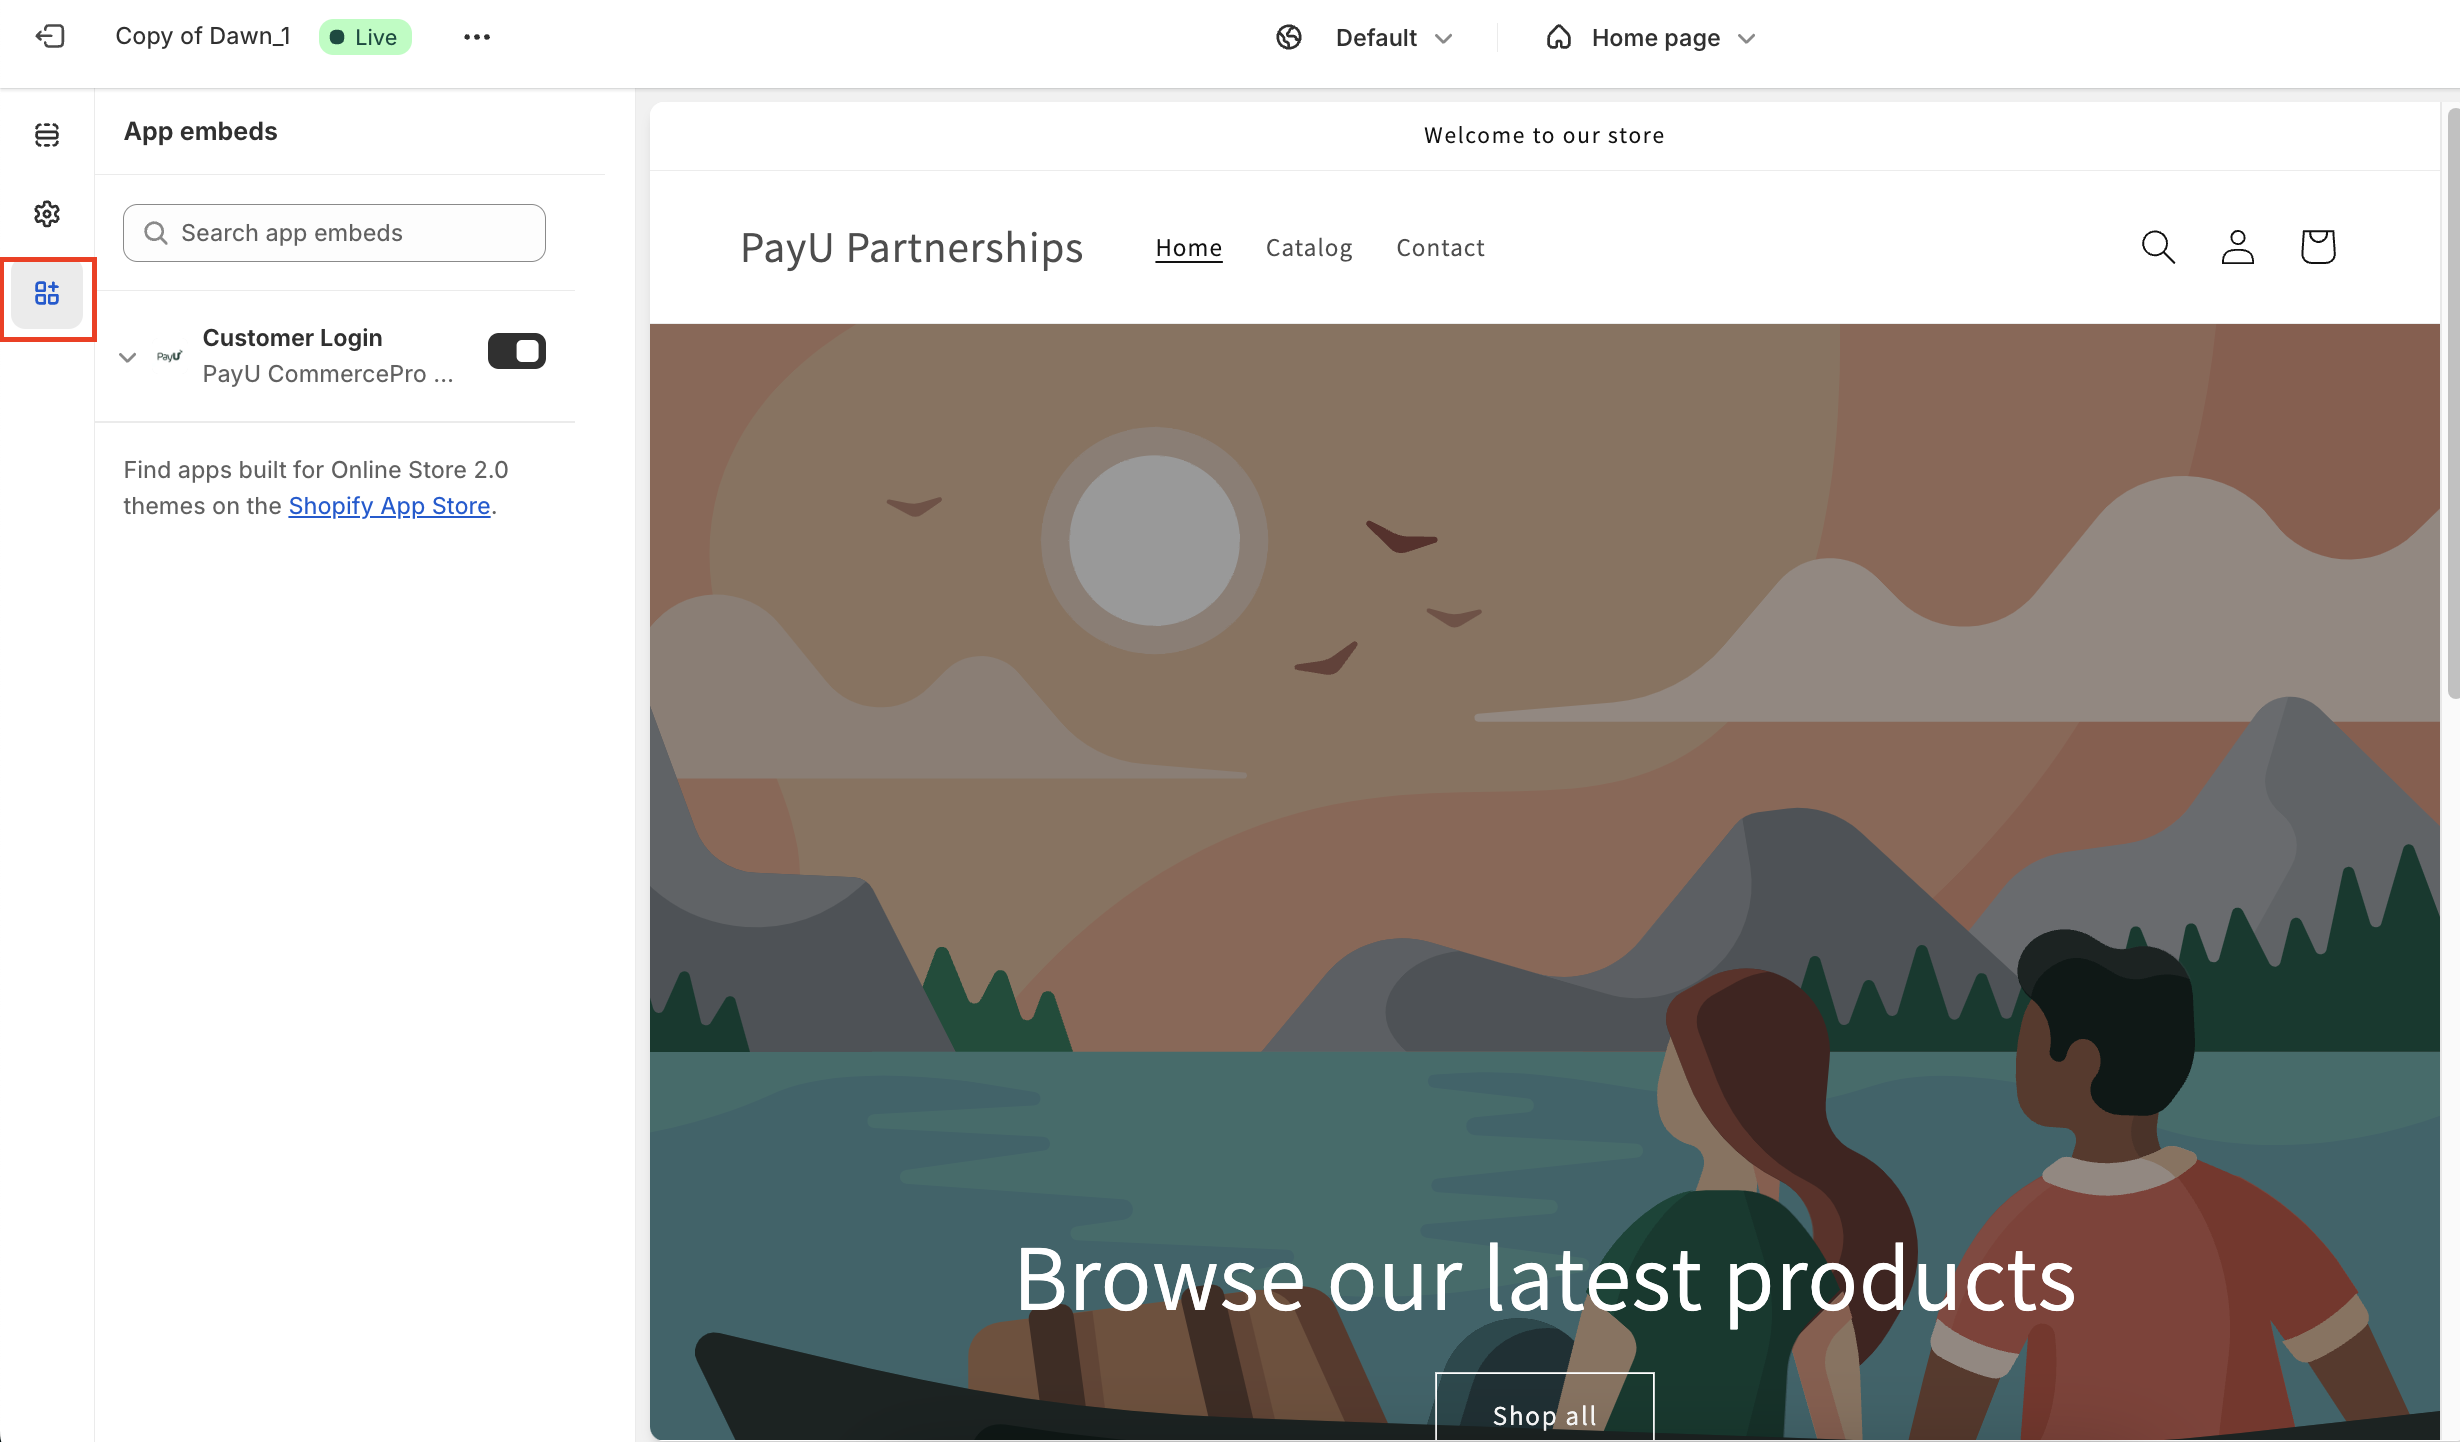
- Search for "Customer Login" using the search bar.
- Look for "Customer login – PayU ..." enable it using the toggle button.
- Click Save located at the top-right corner.
Enable Shopify COD (Optional)
To use Shopify’s default payment options or other PGs in addition to PayU – including Shopify’s default Cash on Delivery – follow this procedure to disable payment customization. After you complete the procedure, the CommercePro app can be used with any payment modes on Shopify’s Checkout:.
To disable payment customization on Shopify:
-
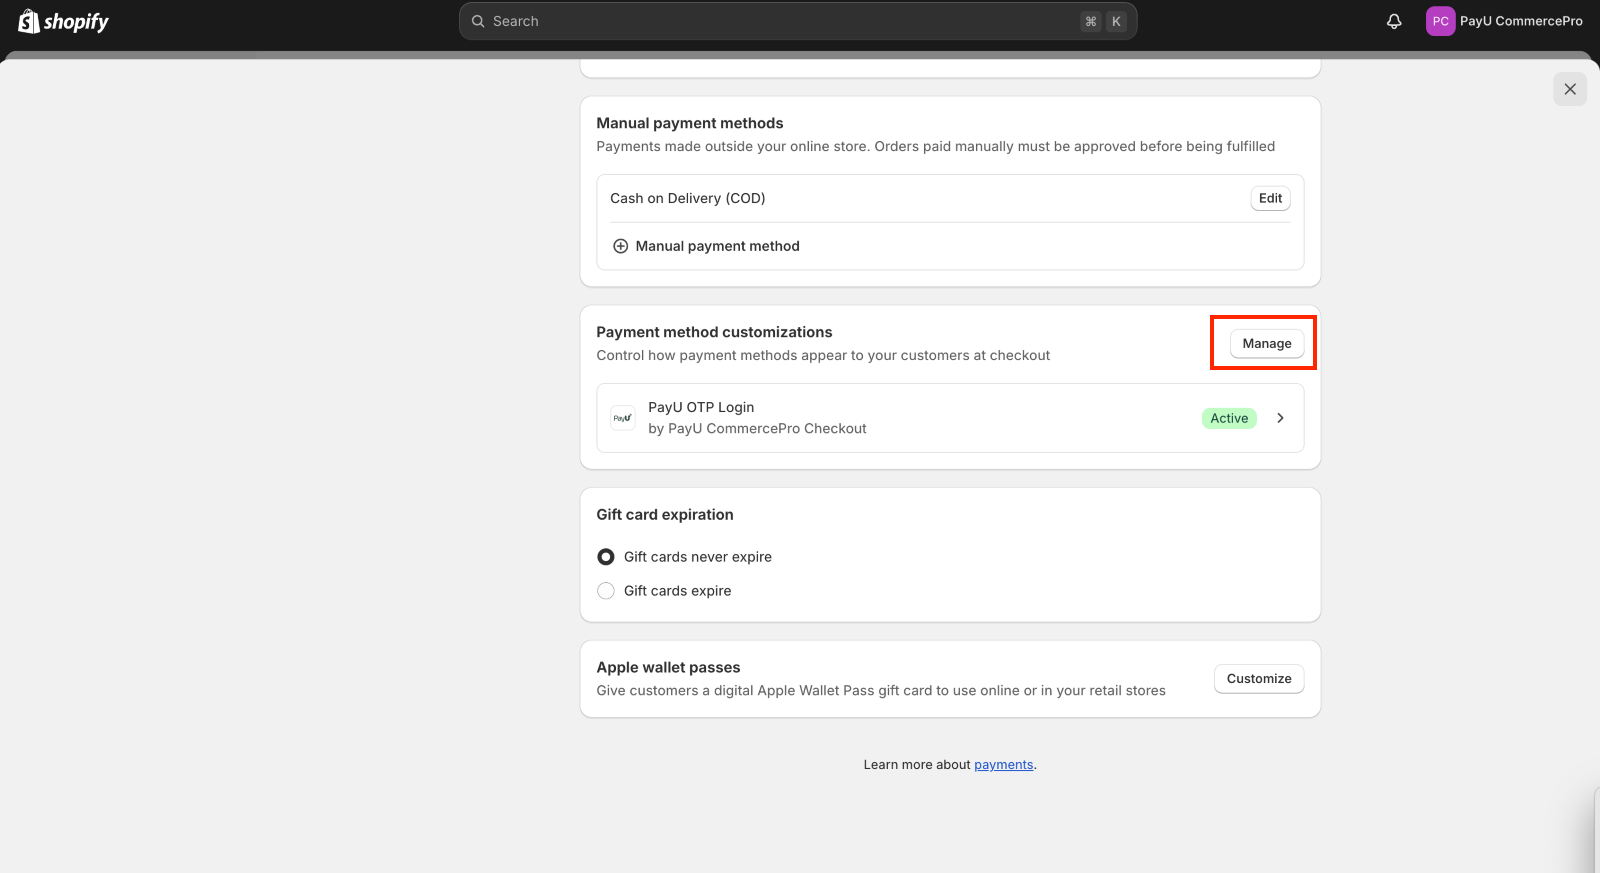
Navigate to Settings > Payments.
-
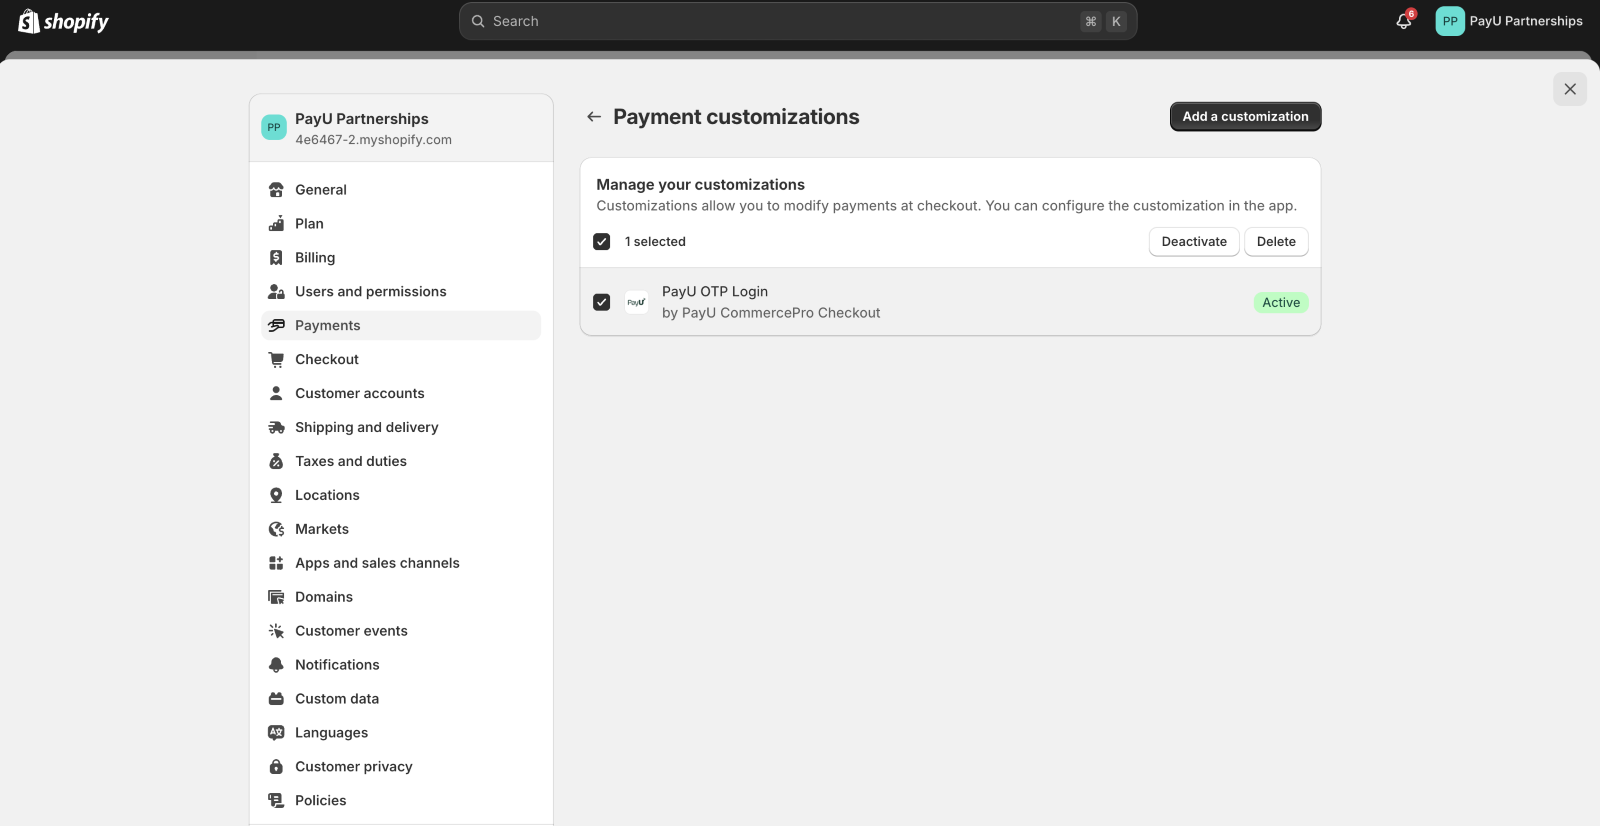
Scroll down to “ Payment method customization section and click on Manage.
-
Select the PayU OTP Login check box and then click Deactivate in the Manage your customizations pane.
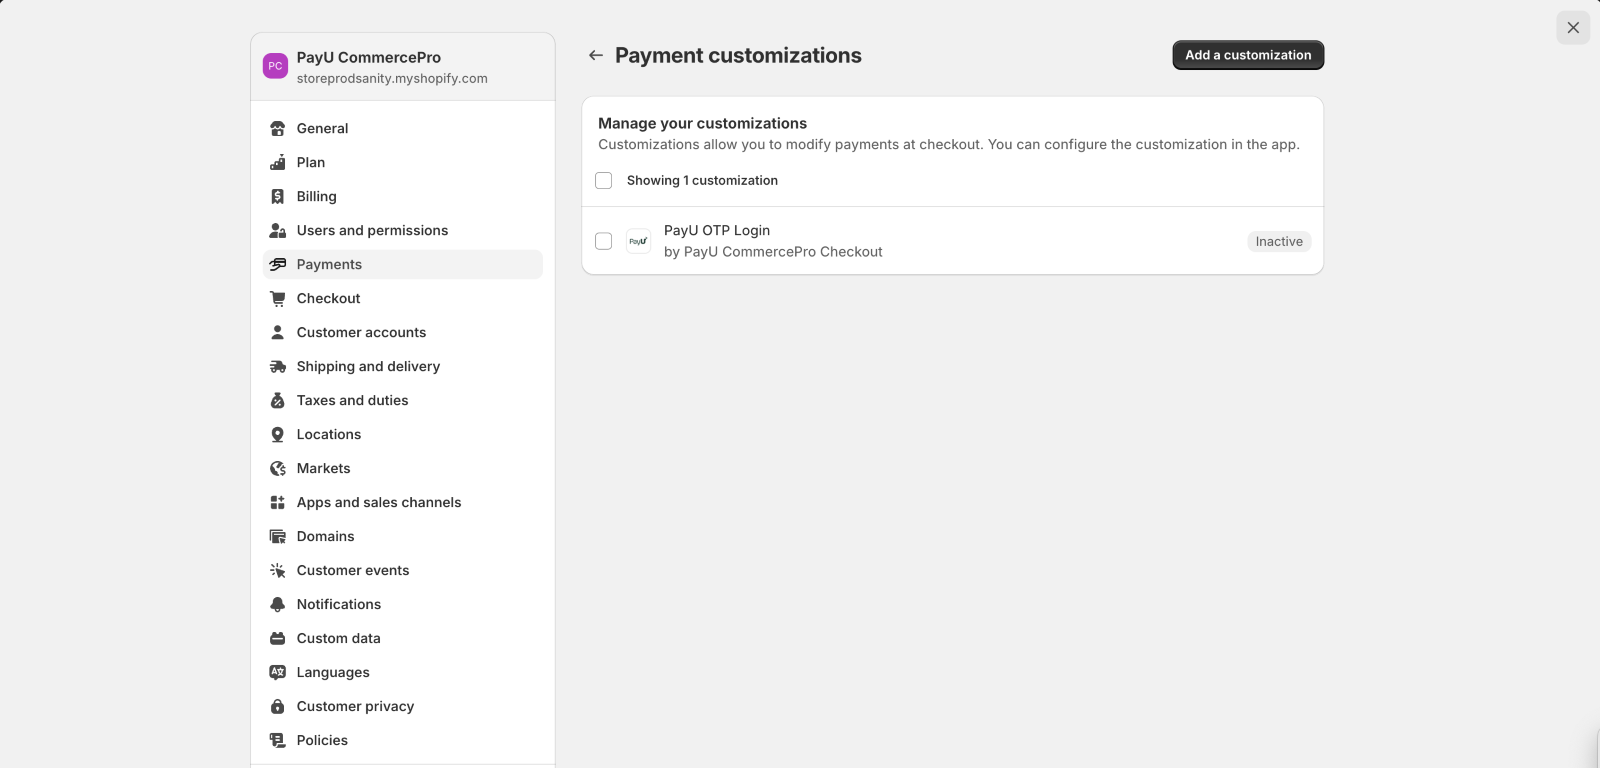
After the PayU OTP Login updated to “Inactive” state, any non-PayU payment mode (including Shopify’s Cash on Delivery option) will be available on the checkout page.
Updated 4 months ago
