Payment Buttons
The Payment Buttons features allows you to create buttons on your website or blogs to collect payments or donations from your customers without writing code or no knowledge of coding.
After you specify the button color according to your website or blog theme, button label and amount to be collected, PayU generates the code that you can embed on your website or blog.

To create a new Payment Button:
- Open the Create New Payment page
- Customize the Payment Button
- Customize your Checkout Page
- Configure Advanced Options
Step 1: Open the Create New Payment page
-
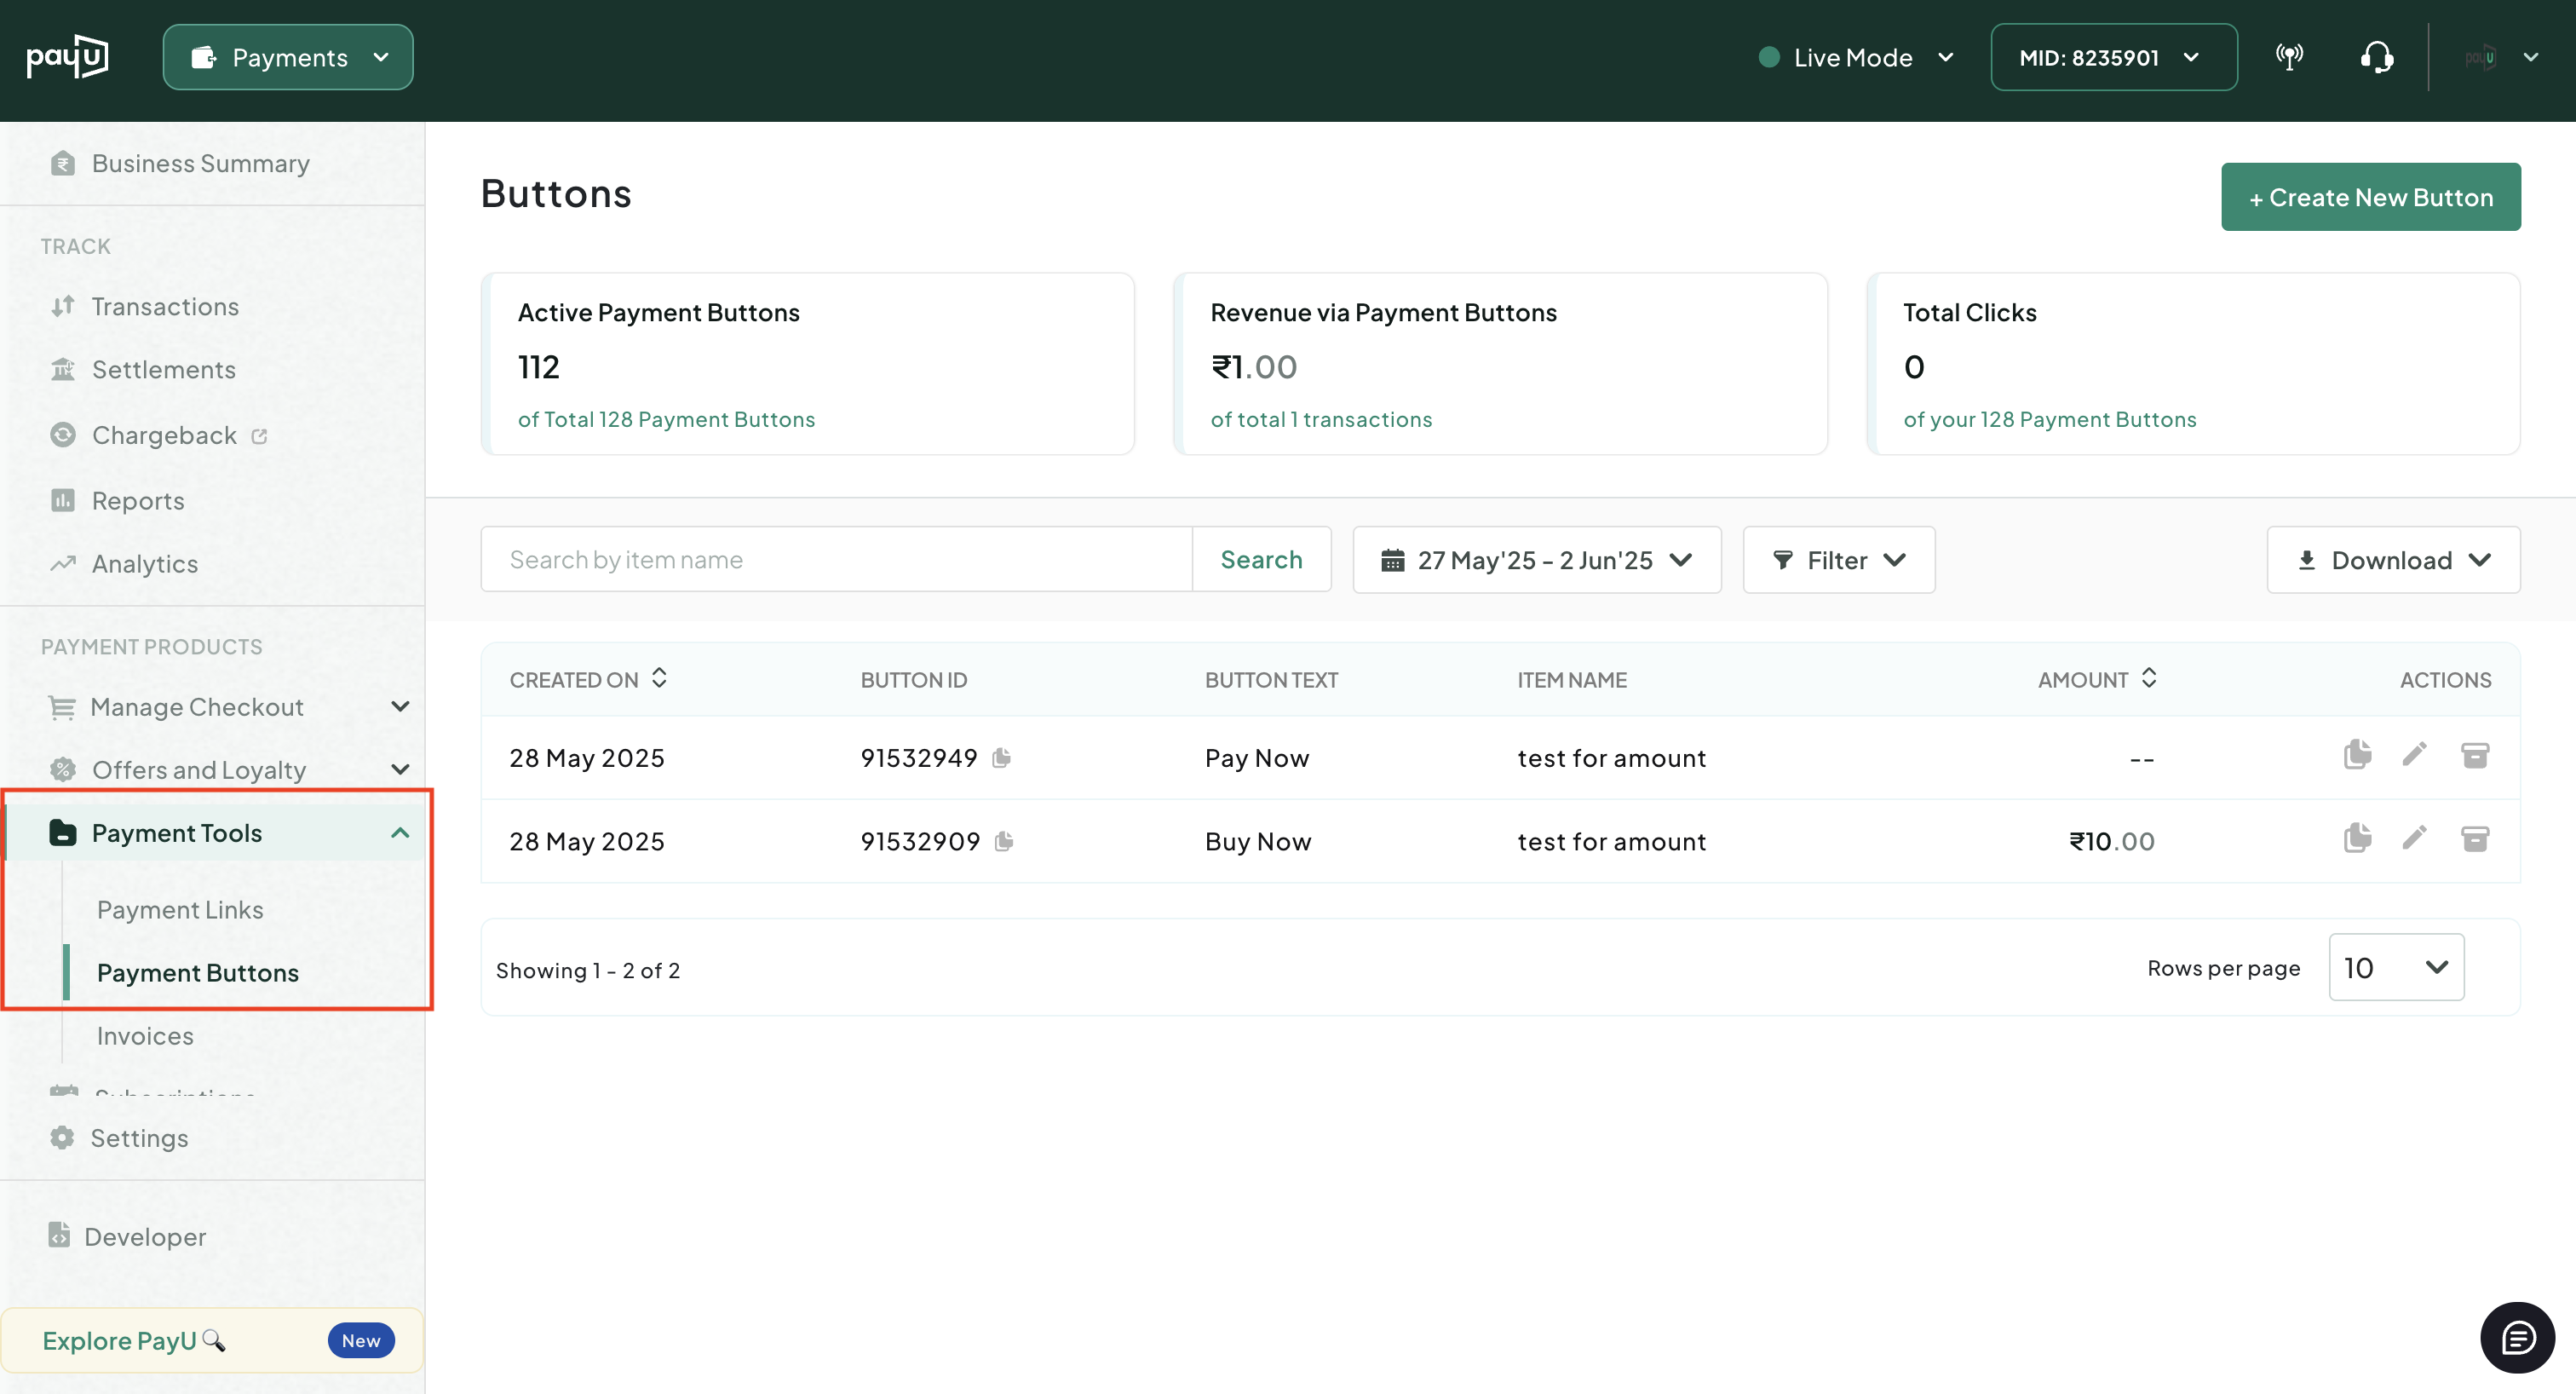
Select Payment Tools > Payment Buttons from the left pane of the Dashboard.
The list of existing buttons are listed on the Buttons page.
-
Click Create New Button at the top-right corner.
The Create New Payment Button page is displayed.
Reference: You can configure webhooks and check the status of transaction. For more information, refer to Webhooks for Payments.
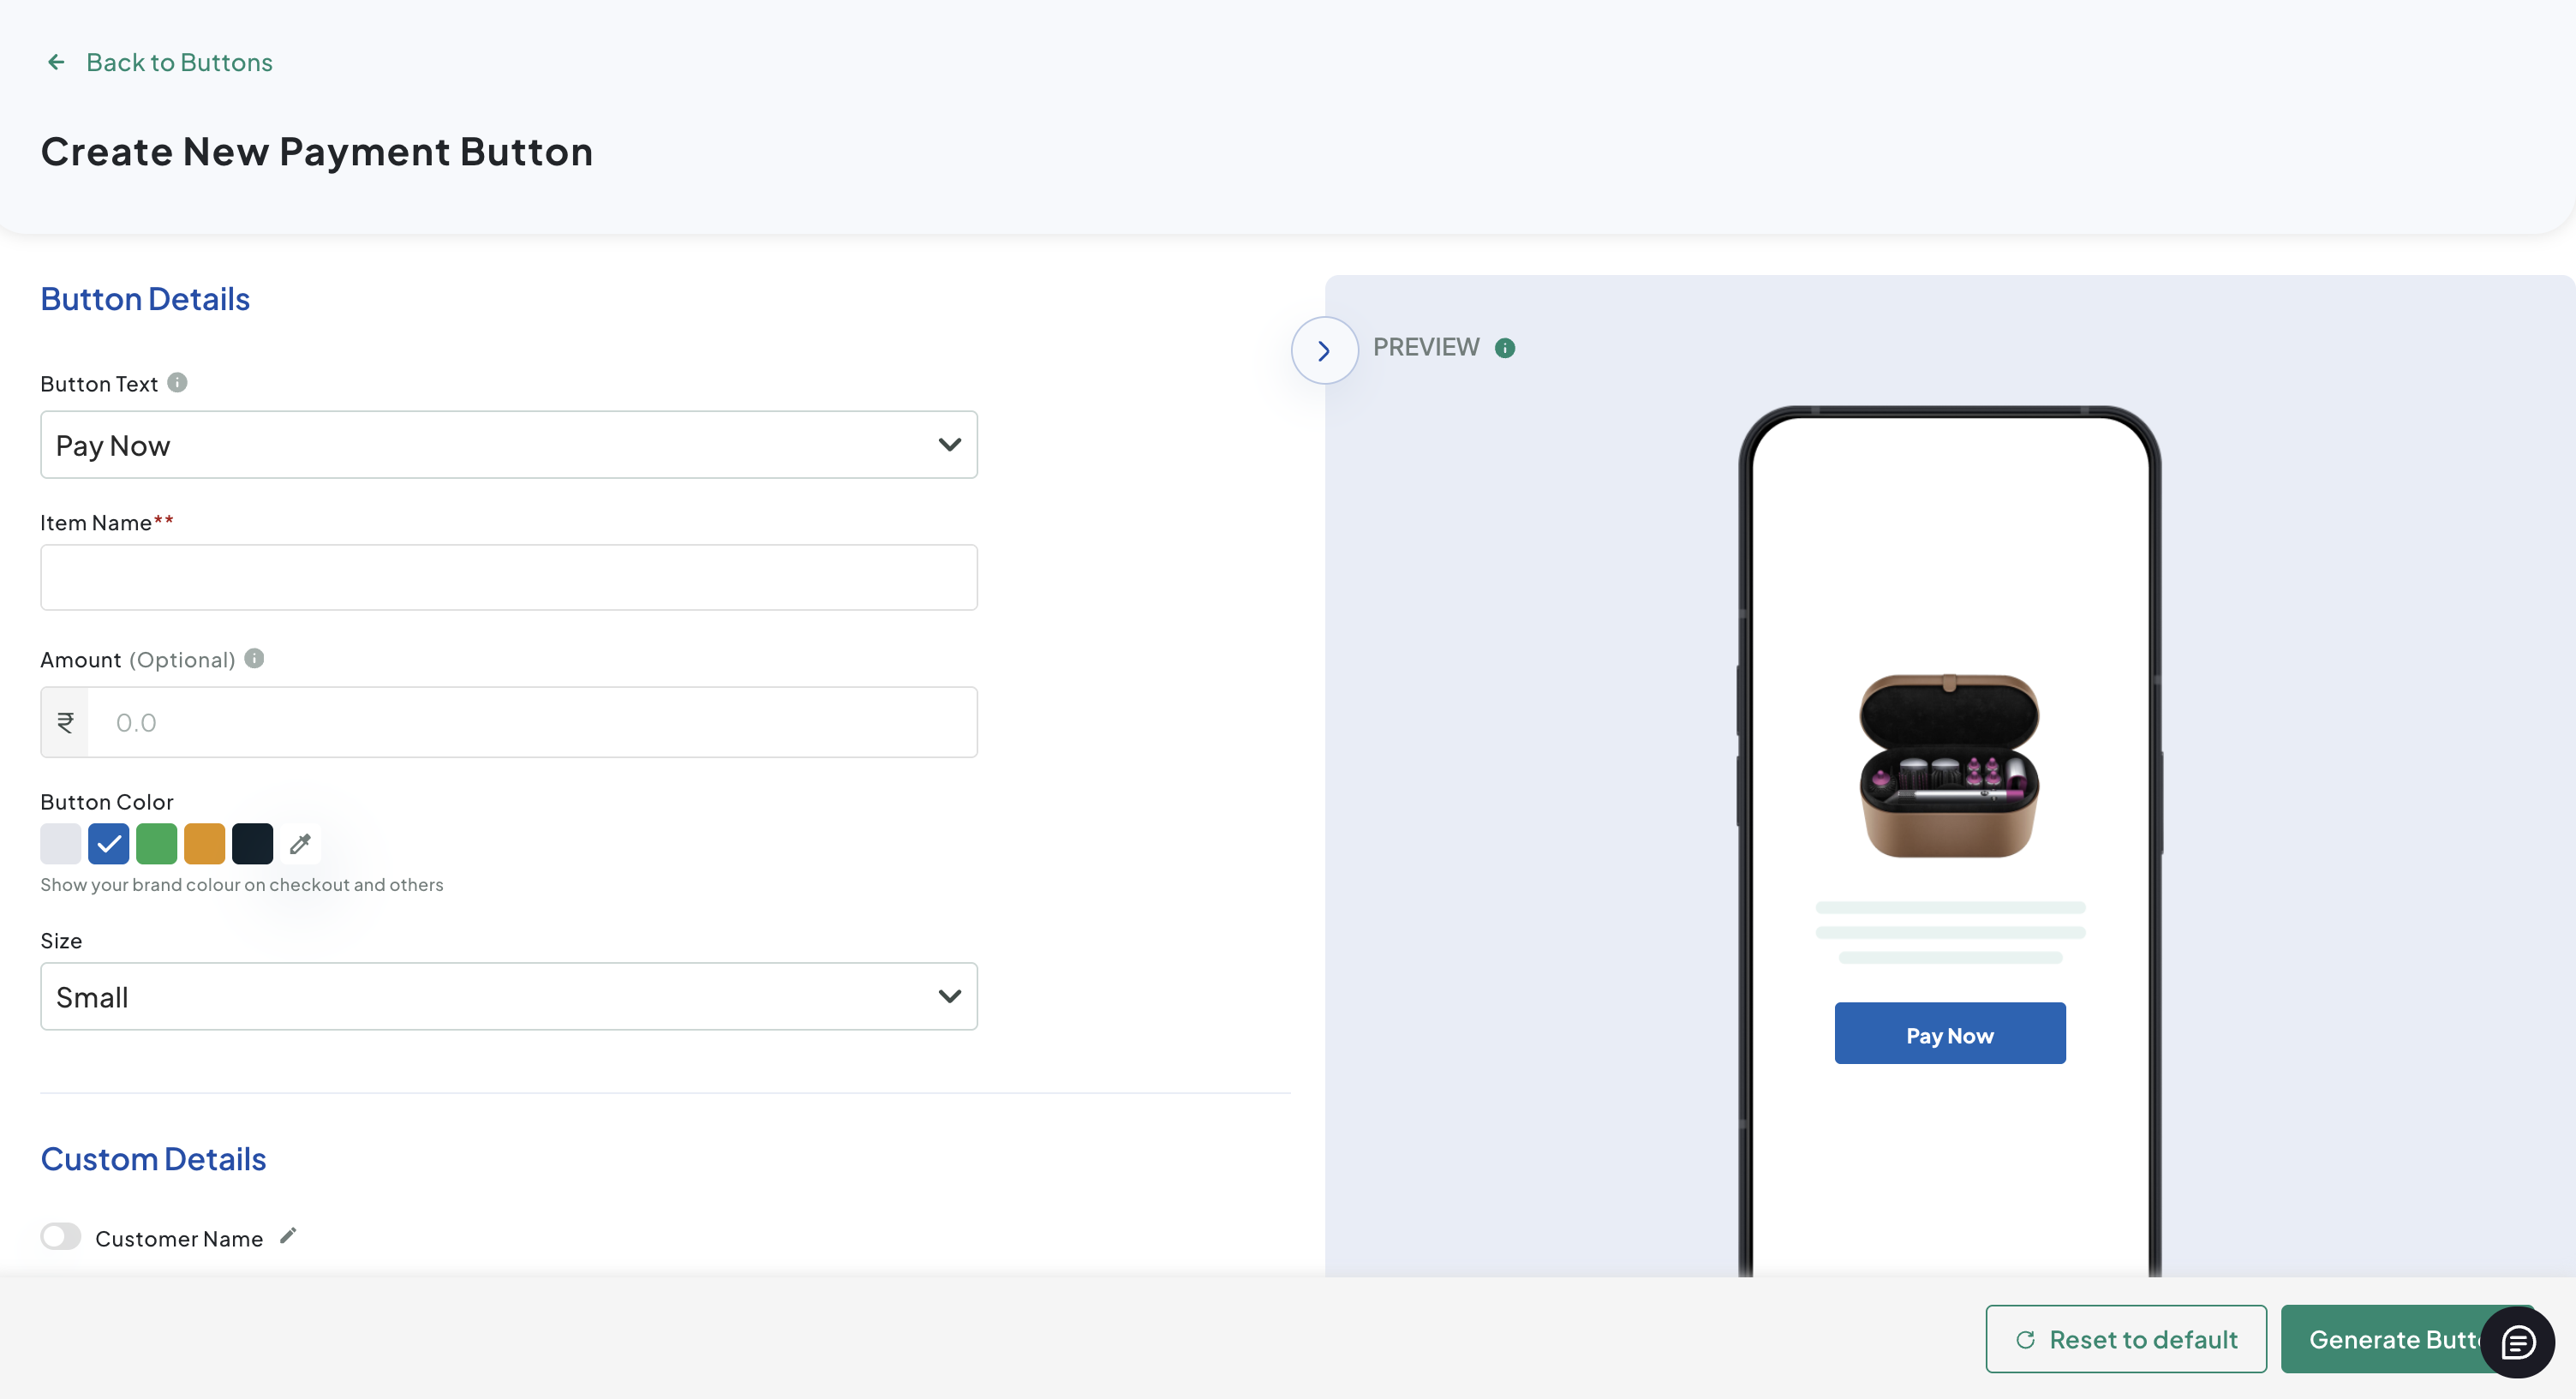
Step 2: Customize the Payment button
To customize the Payment Button:
- Select any of the following button label that must be displayed from the Button Text drop-down list:
- Buy Now
- Pay Now
- Book Now
- Donate Now
- Enter the description in the Item Name field.
- Enter the amount that must be collected in the Amount field.
Note: The Amount field is optional and if you leave the field blank, the customers will be asked to enter the amount on the Checkout page.
- Select the color of the button from the primary colours or use the dropper to select a custom color.
- Select any the following button size that suits your website:
- Small
- Medium
- Large
Step 3: Customize the Checkout page
-
Navigate to the Custom Details tile.
The fields on the Custom Details tile are displayed.
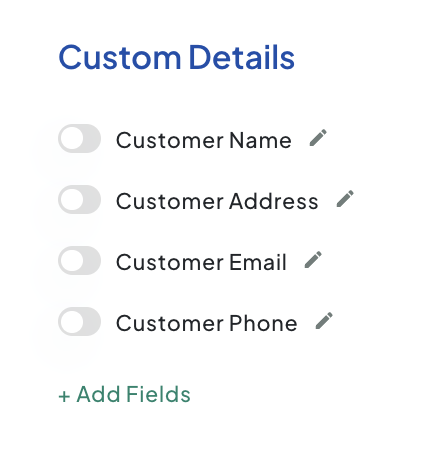
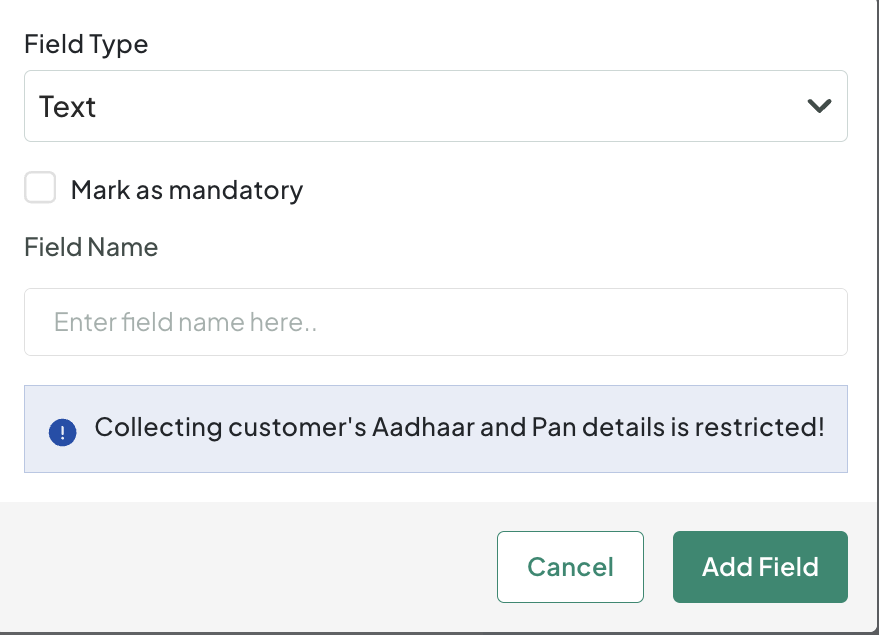
- Click the toggle button to enable each field on the Custom Details tile and then Click the pencil button next to the field to launch the pop-up page similar to the following and then provide the details as described in the following table and click Add Field:
Note: Use the Add Fields option at the bottom to add more fields on your Check Out page if required.
| Field | Description |
|---|---|
| Field Type | Select any of the following field types or controls that you wish to add on your Checkout page:
|
| Field Name | Enter the field label that must be shown on the Check Out page. |
| Mark as mandatory | Select this check box to make the field mandatory so that customer has to provide input. |
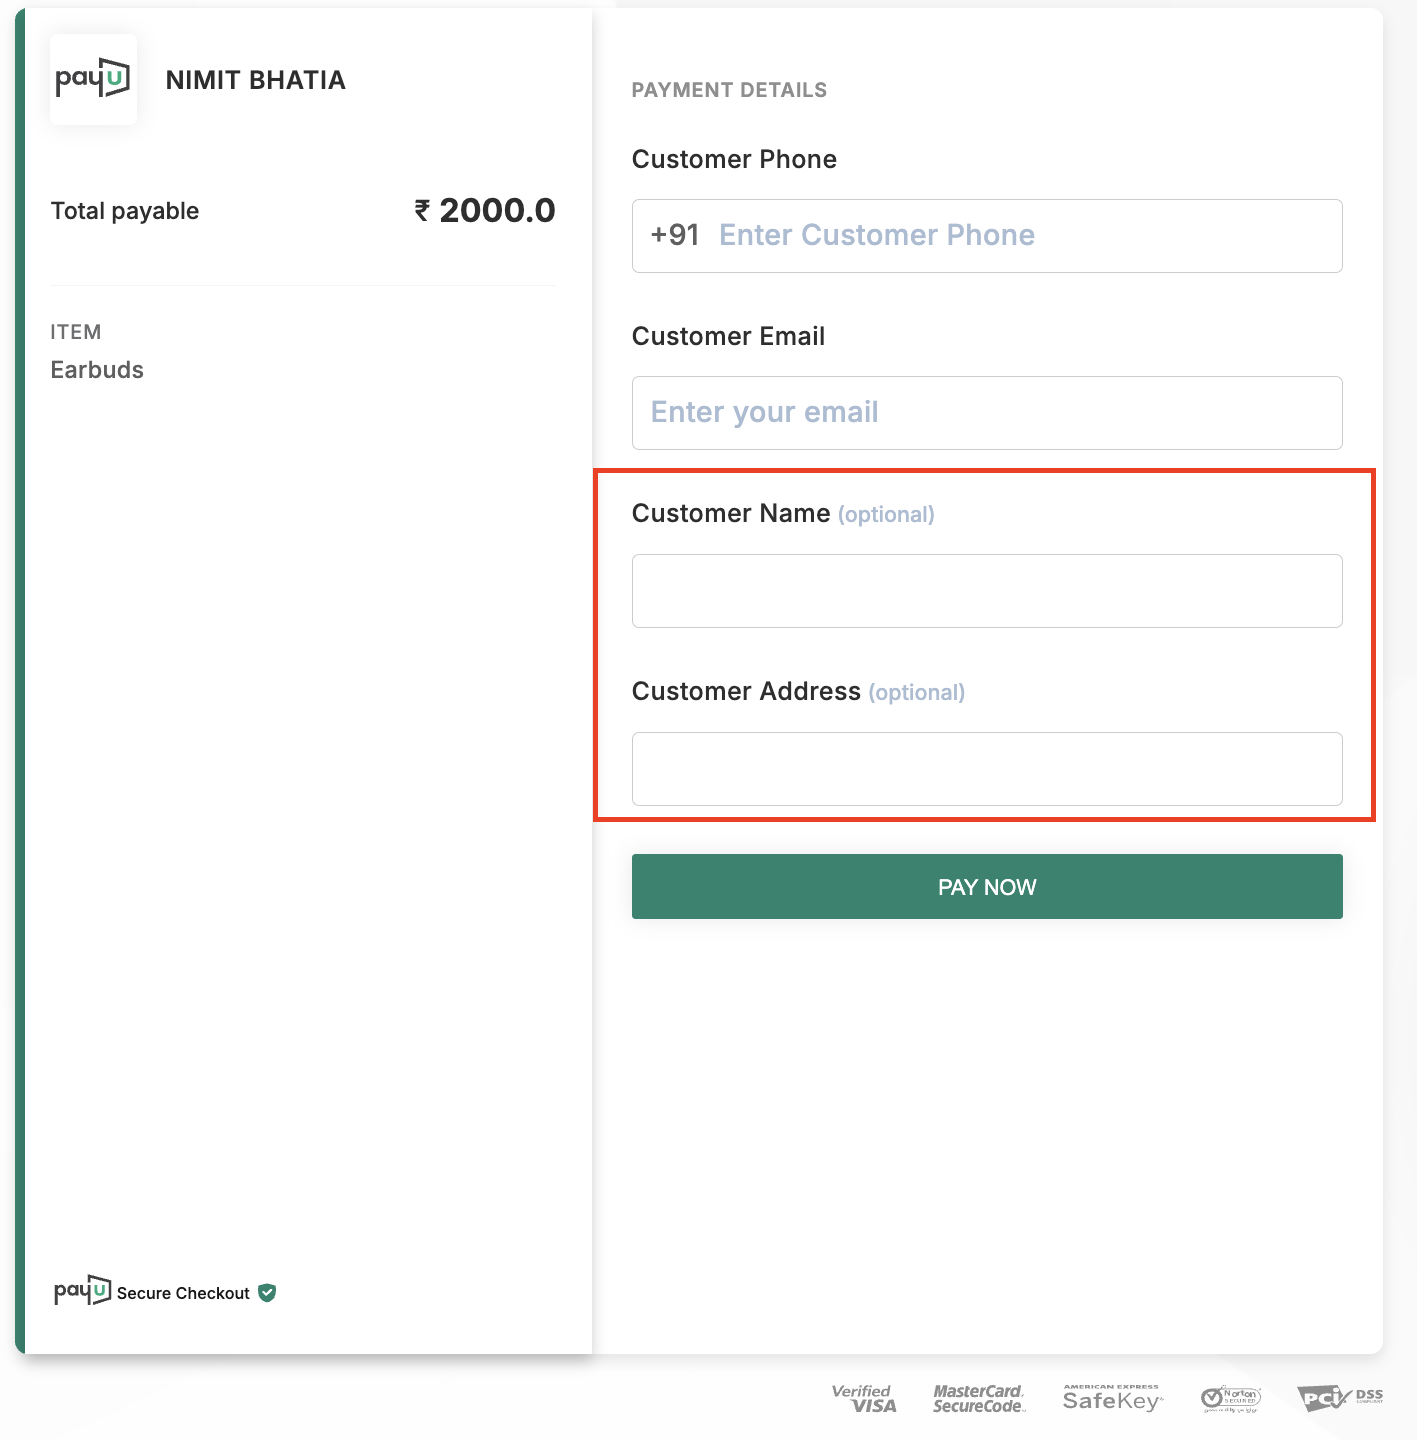
After the fields are enabled, they are displayed on the PayU Checkout page when the customer clicks the payment button similar to the following sample screenshot (Customer Name and Customer Address in this sample screenshot):
Step 4: Configure the advanced options
After the customer completes filling the details on Check Out page, they will enter the additional details as configured in this step and then redirected to after completing the checkout.
To configure the additional fields (to be displayed after payment page):
-
Scroll down to the Custom Details pane.
The fields on the Custom Detailstile are displayed.
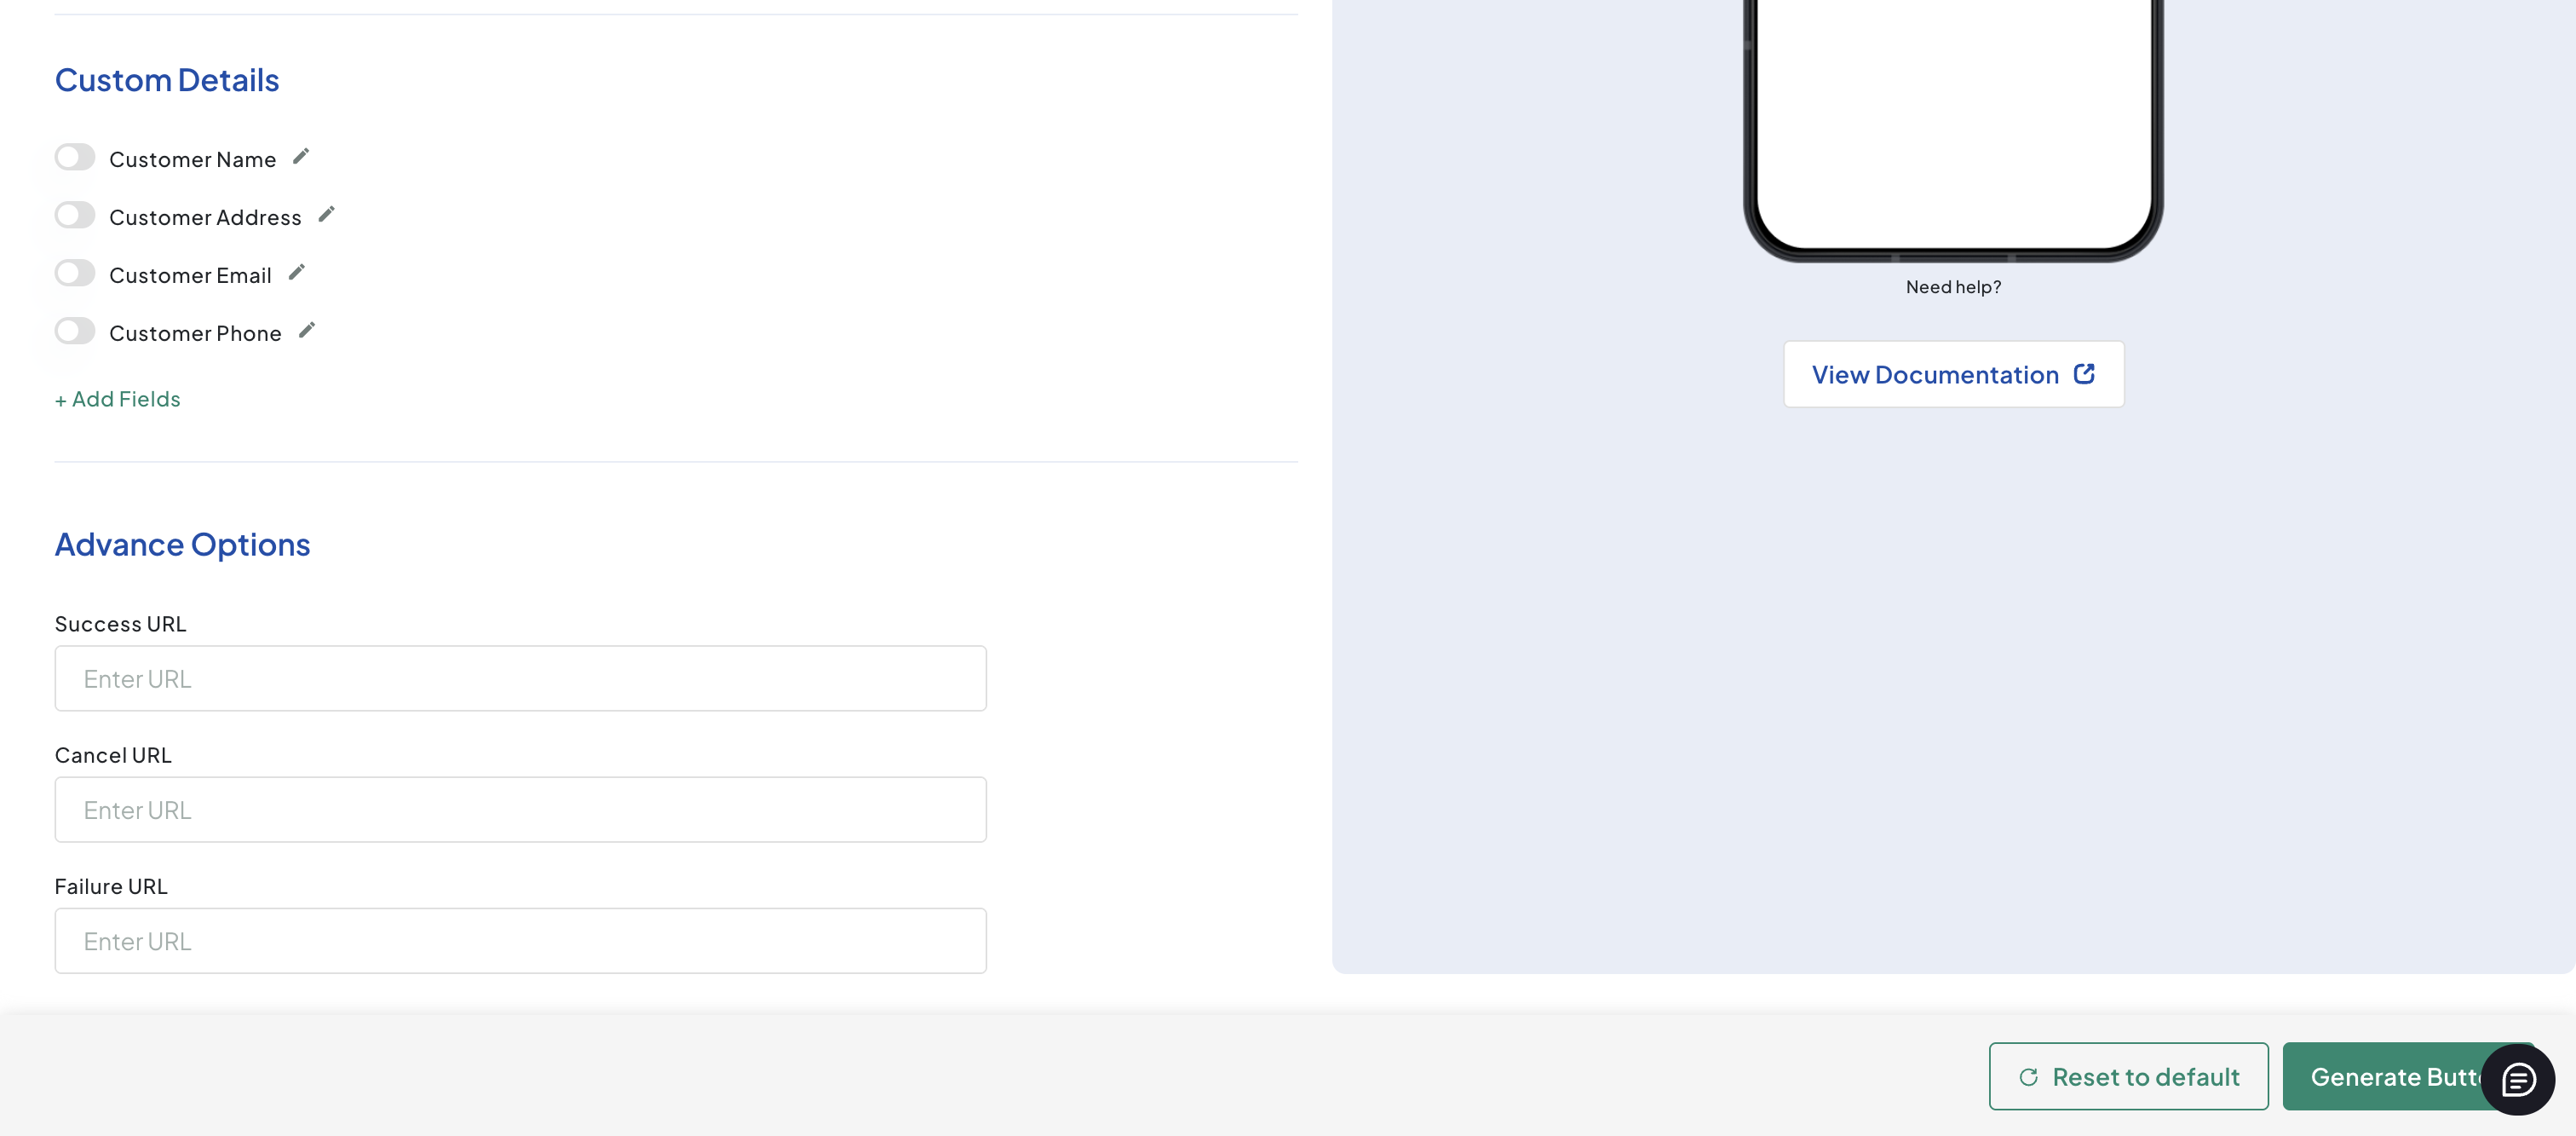
- Click any of the following toggle button so that must those customer details must be collected by customer during checkout:
- Customer Name
- Customer Address
- Customer Email
- Customer Name
- Enter the page URL for the following fields:
- Success URL: URL to which the customer must be redirected if the payment is successful.
- Cancel URL: URL to which the customer must be redirected if the customer cancels or aborts the payment.
- Failure URL : URL to which the customer must be redirected if the payment has failed.
- Click Generate Button.
Filter the Payment buttons
The Filter menu enables you to filter the payment buttons based on date range or payment button type.

Filter by created date range
To filter the payment buttons by date range:
- Click Past 1 Year drop-down menu to view the date filter options.
- Click to select any of the the date range:
- Today
- Yesterday
- Past 7 days
- Past 30 days
- Past 1 year
- Custom Range
Note: For the Custom Range option, select the start date and end date for which the payment buttons must be displayed.
- Click Apply to get the results.
Filter by Payment Button type
To filter the payment buttons based on its type:
- Click Filter drop-down menu to view the filter options.
- Click to select the check box for the desired options from the list.
- Click Apply to get the results.
Export the Payment Buttons history
You can download the payment button records history in CSV or XSLX format.
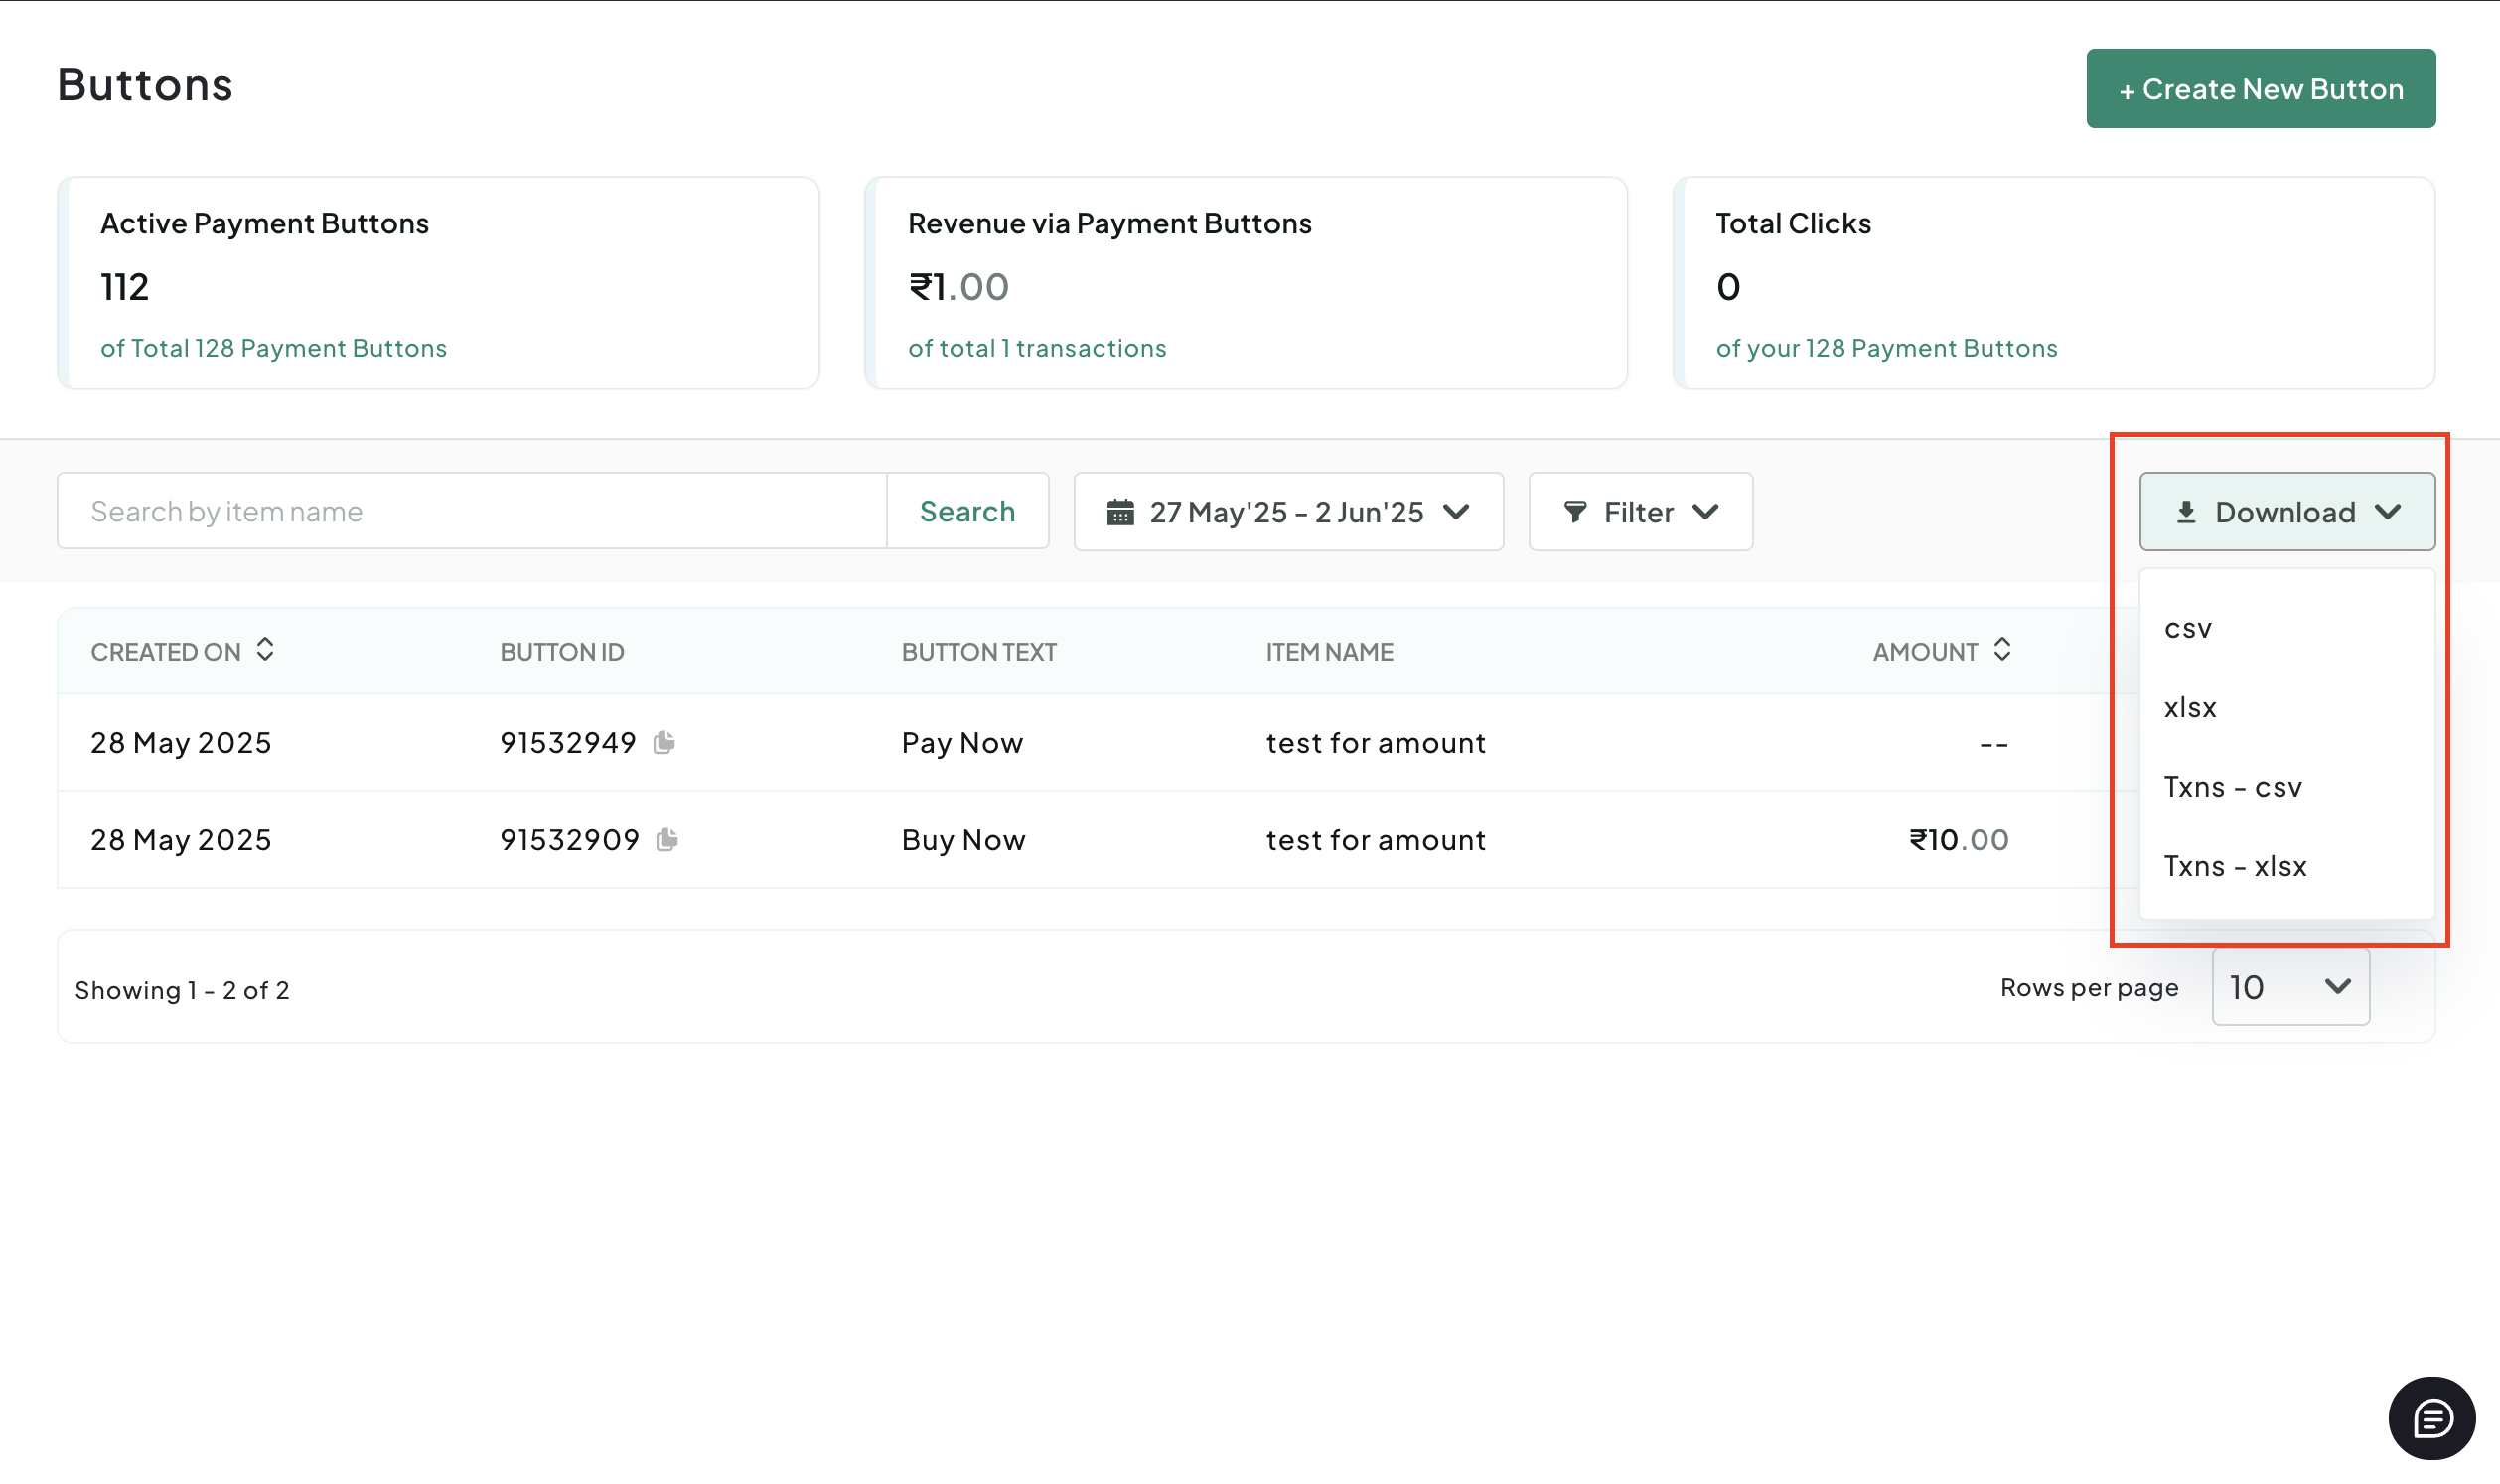
To download the payment button records:
- Click the Download menu to view the options.
- Select the required format (CSV or XLSX) to generate the report.
A pop-up page is displayed with the status of the generated report.

- Perform any of the following steps:
- Click Download Report to complete the action.
- Click Share, enter the recipient email ID, and then click Share.
Note: You can share the report to multiple email IDs by entering the comma-separated entries.
Updated 29 days ago