One-Time Mandate Experience
It allows your customer to make a one-time payment or establish a mandate tailored to their specific needs. It allows merchants to enable their customers with flexible, efficient, and secure payment options. The following are some use cases:
- Scenario 1: Merchants, particularly in the insurance sector, can leverage this feature to collect insurance fees directly from users. This eliminates the typical wait time of T+2 days for the first premium, circumventing the prevalent ecosystem challenges associated with eNACH.
- Scenario 2: It also offers users the flexibility to opt for the AutoDebit feature according to their preferences, ensuring a more personalized financial management experience.
This feature is specifically designed for Insurance providers, providing them with a streamlined and efficient payment collection process.
The One-Time Mandate supports a variety of payment flows, including eNACH, UPI Autopay, and Standing Instructions (SI) on Cards, all accessible through the PayU Checkout page. It works with PayU Hosted Checkout integration, ensuring a smooth and secure transaction experience.
Note:
The One-Time Mandate is supported only with PayU Hosted Checkout integration. For the request and response parameters, refer to One-Time Mandate Consent Transaction using PayU Hosted Checkout.
Currently, the standard transaction flow for one-time transactions, integrated with a PayU Recommendation Engine and SI capabilities.
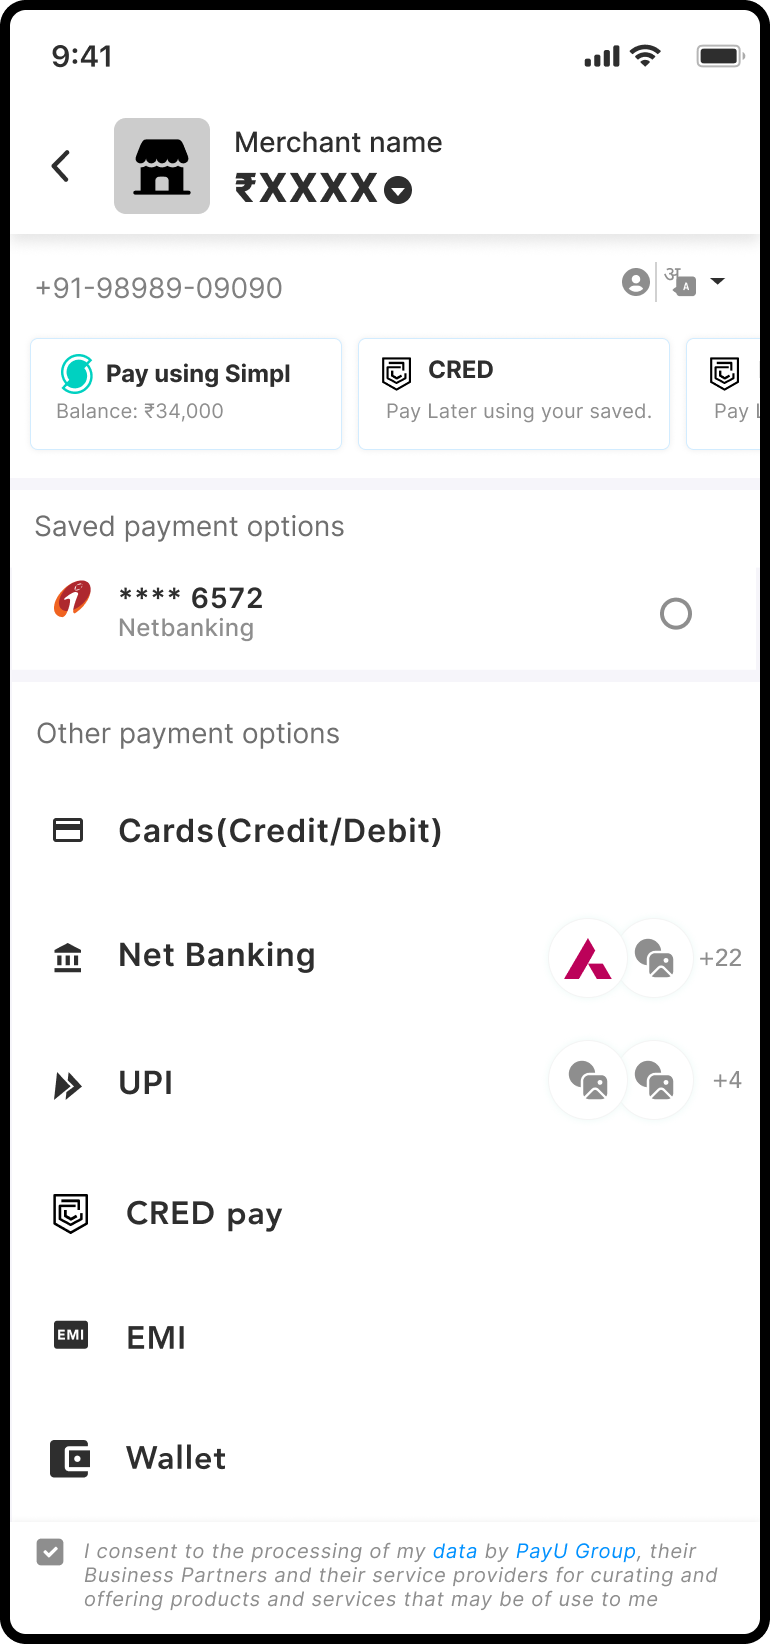
User Journey
Cards
- User will land on our payment checkout page for the transaction where all the checkout-supported payment modes will be visible.
-
User will select the option for Register AutoPay for cards.
-
User will enter the card details.
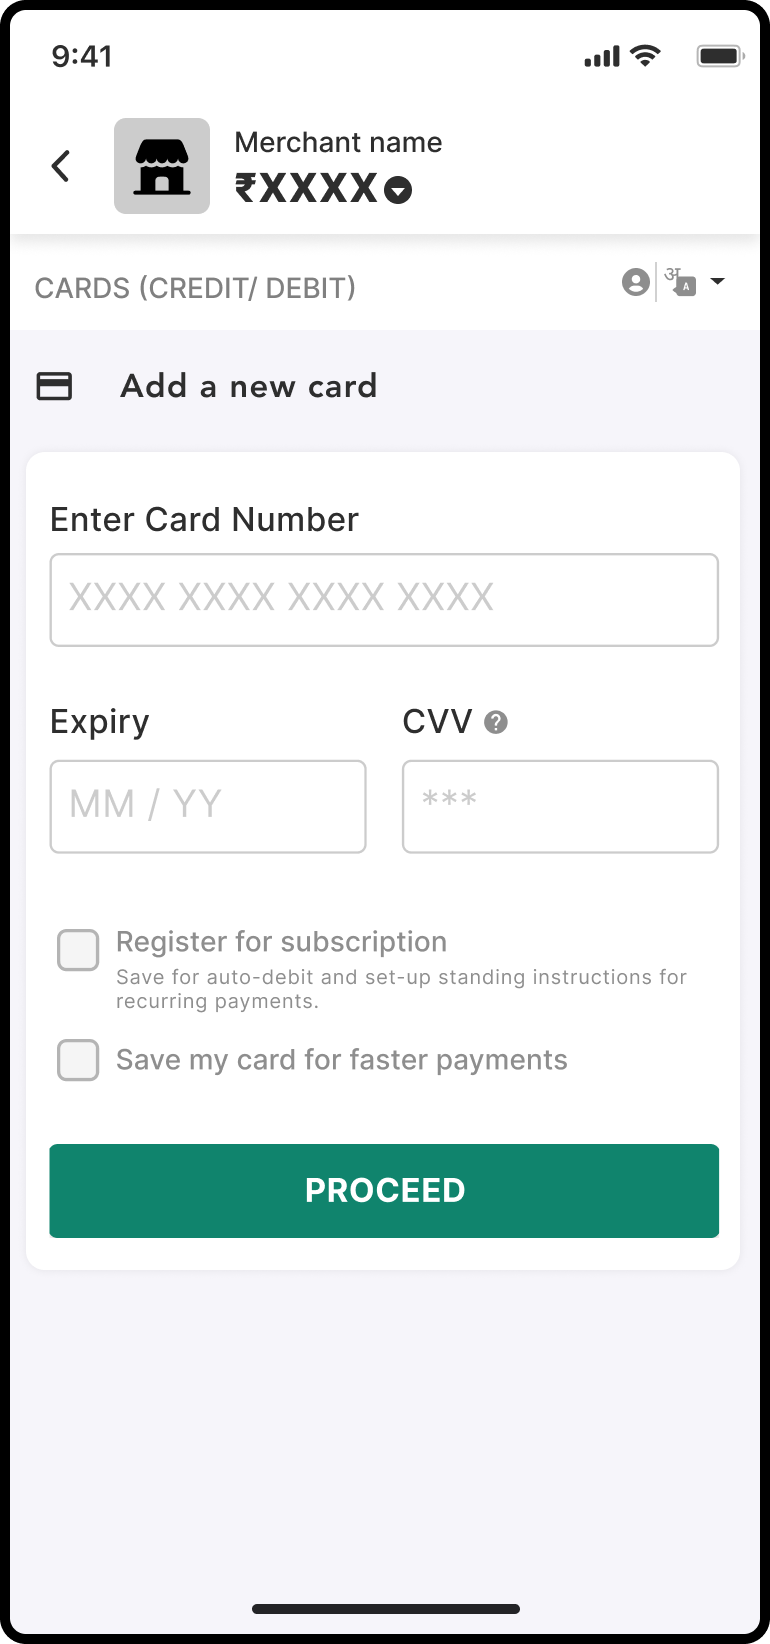
- Based on mandate eligibility user will see an option to opt in for registration.
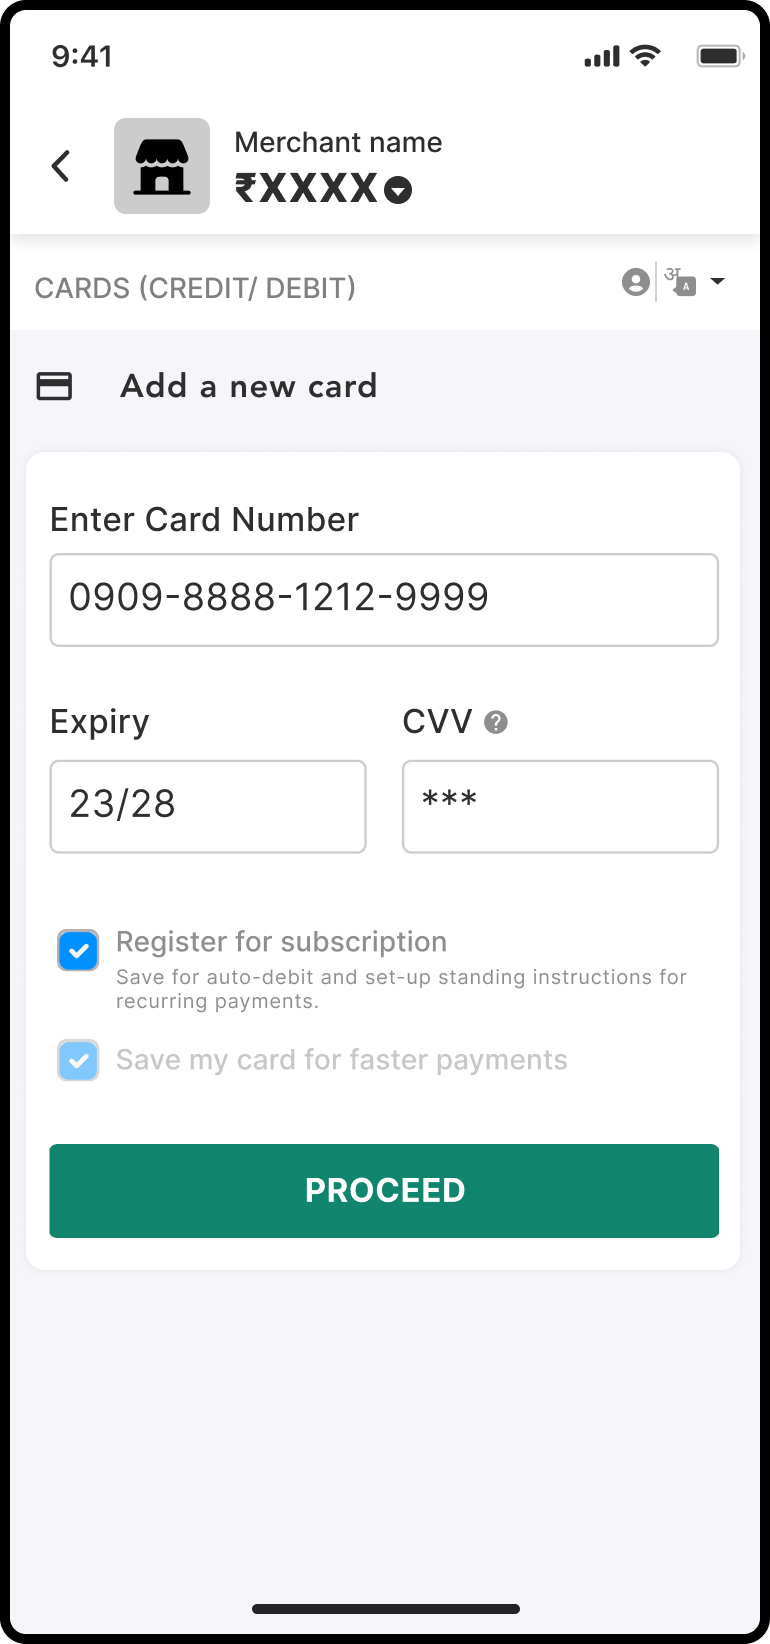
- Based on user action flow for normal transaction or mandate transaction will be executed.
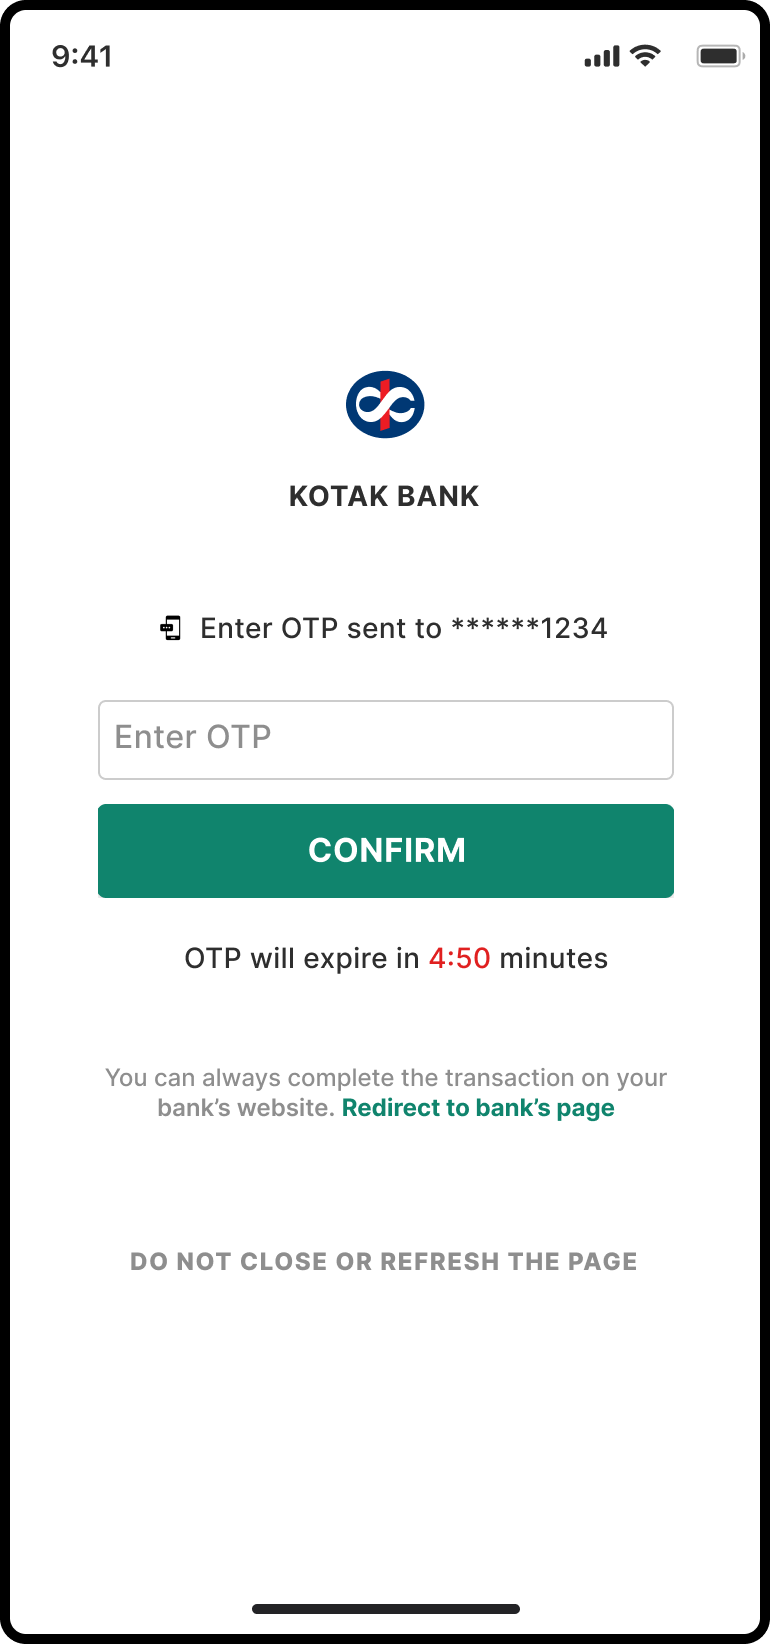
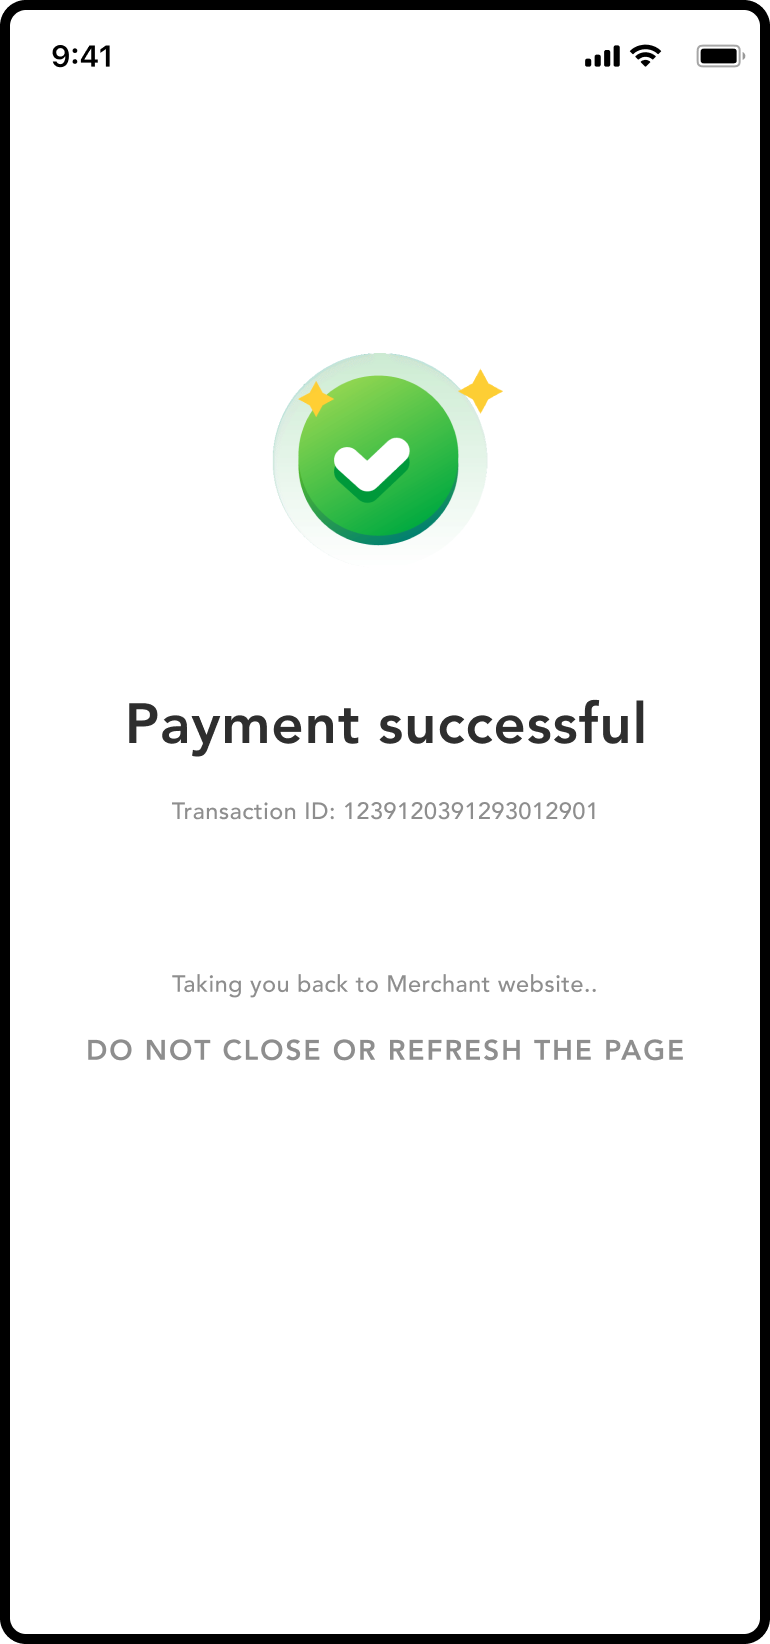
The payment confirmation message is displayed after successful OTP authentication.
Negative scenarios
If the card is not eligible, an error message is displayed below the Enter Card Number field similar to the following screenshot:

UPI Intent
- User will land on our payment checkout page for the transaction where all the checkout-supported payment modes will be visible.
- User will select UPI to proceed with UPI transaction.
- User will enter the VPA or UPI ID.
- User will see an option to opt in for registration.

- Based on user action flow for normal transaction or mandate transaction will be executed.
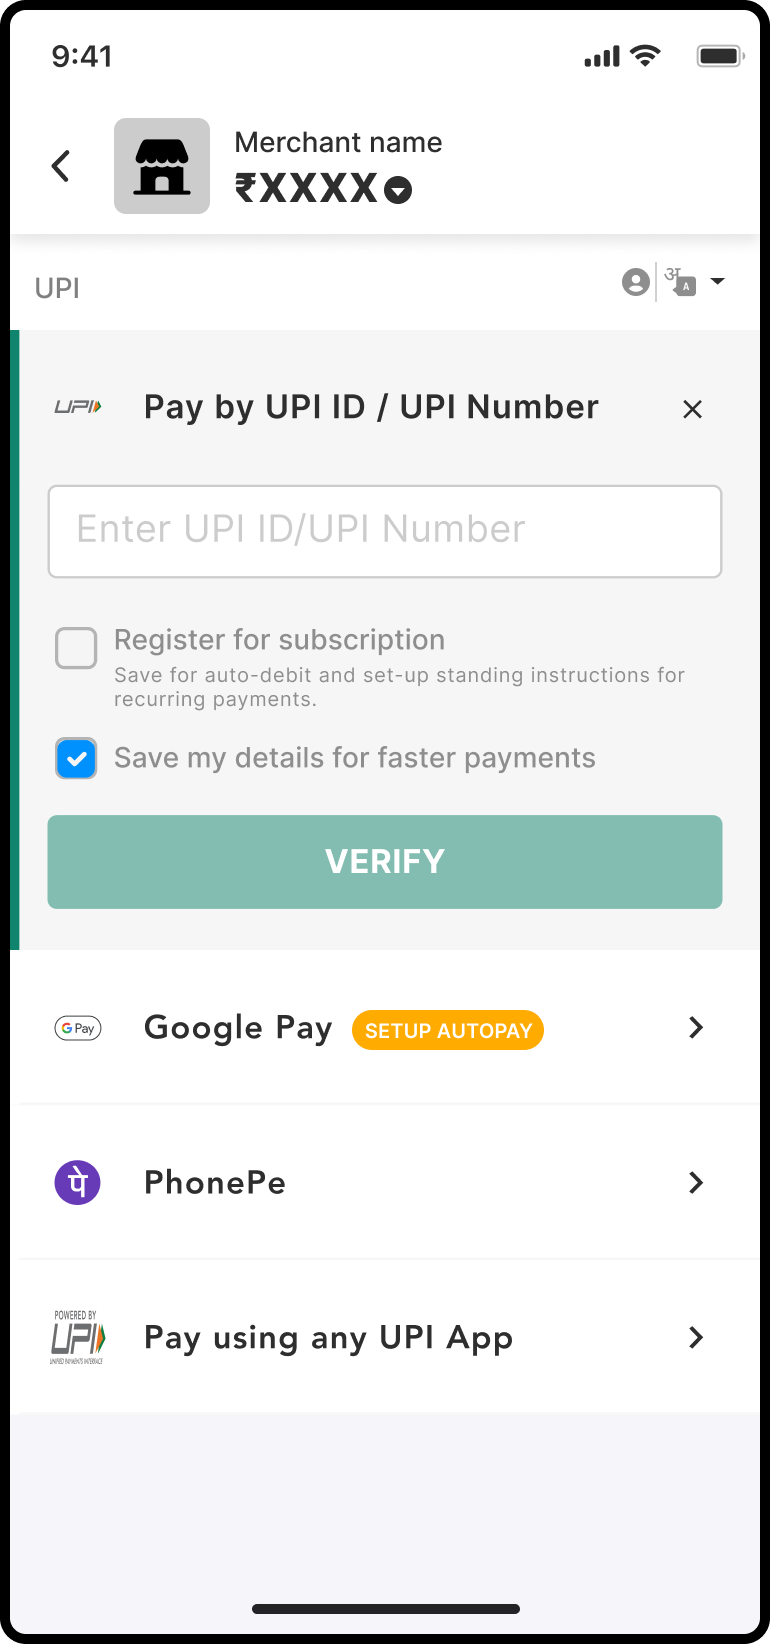
UPI Collect
- User will land on our payment checkout page for the transaction where all the checkout-supported payment modes will be visible.
- User will select UPI to proceed with UPI Collect.
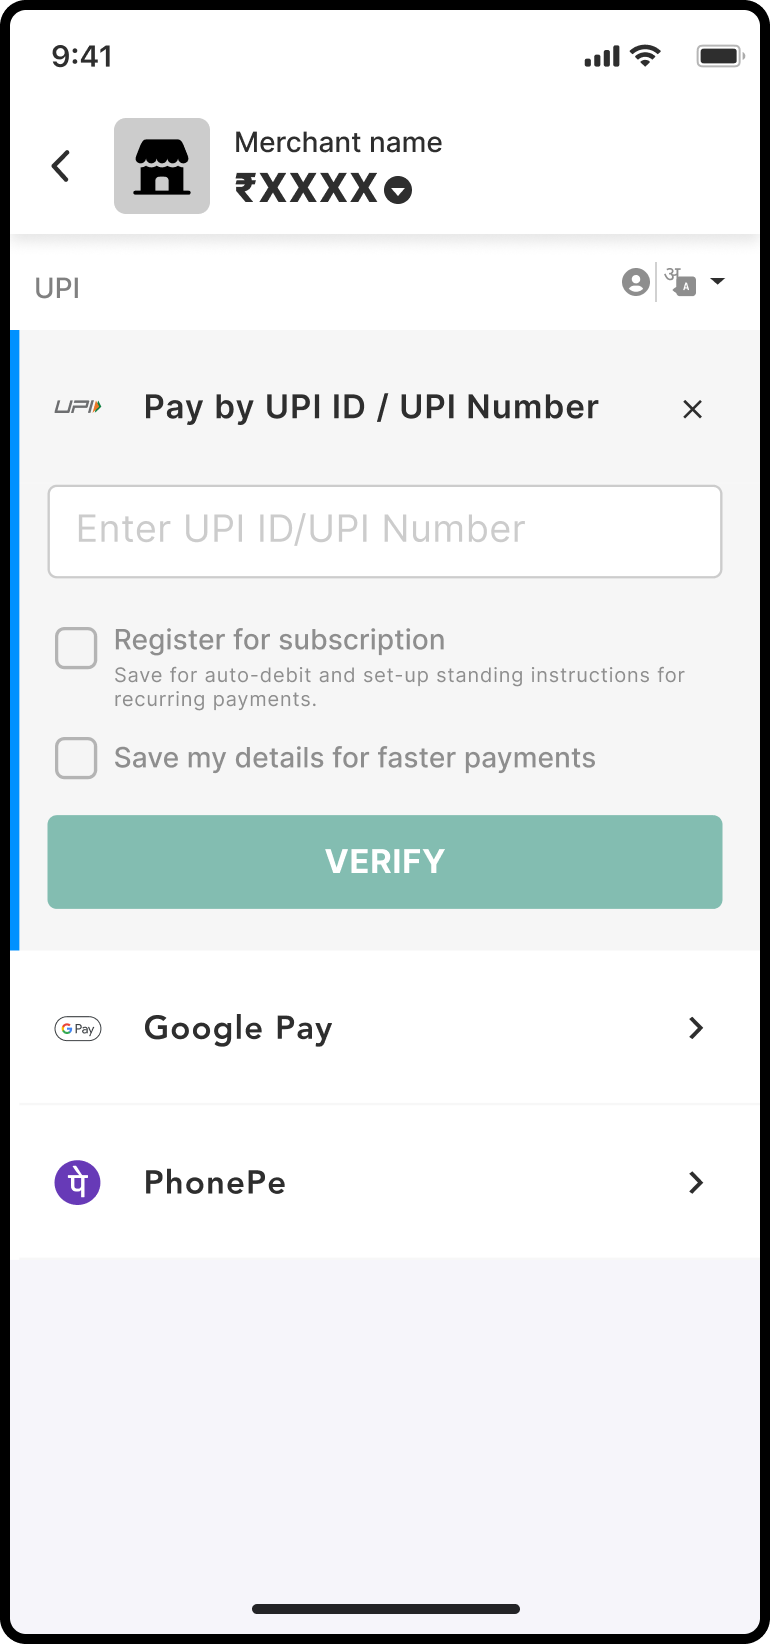
- User will enter the UPI ID or UPI number.
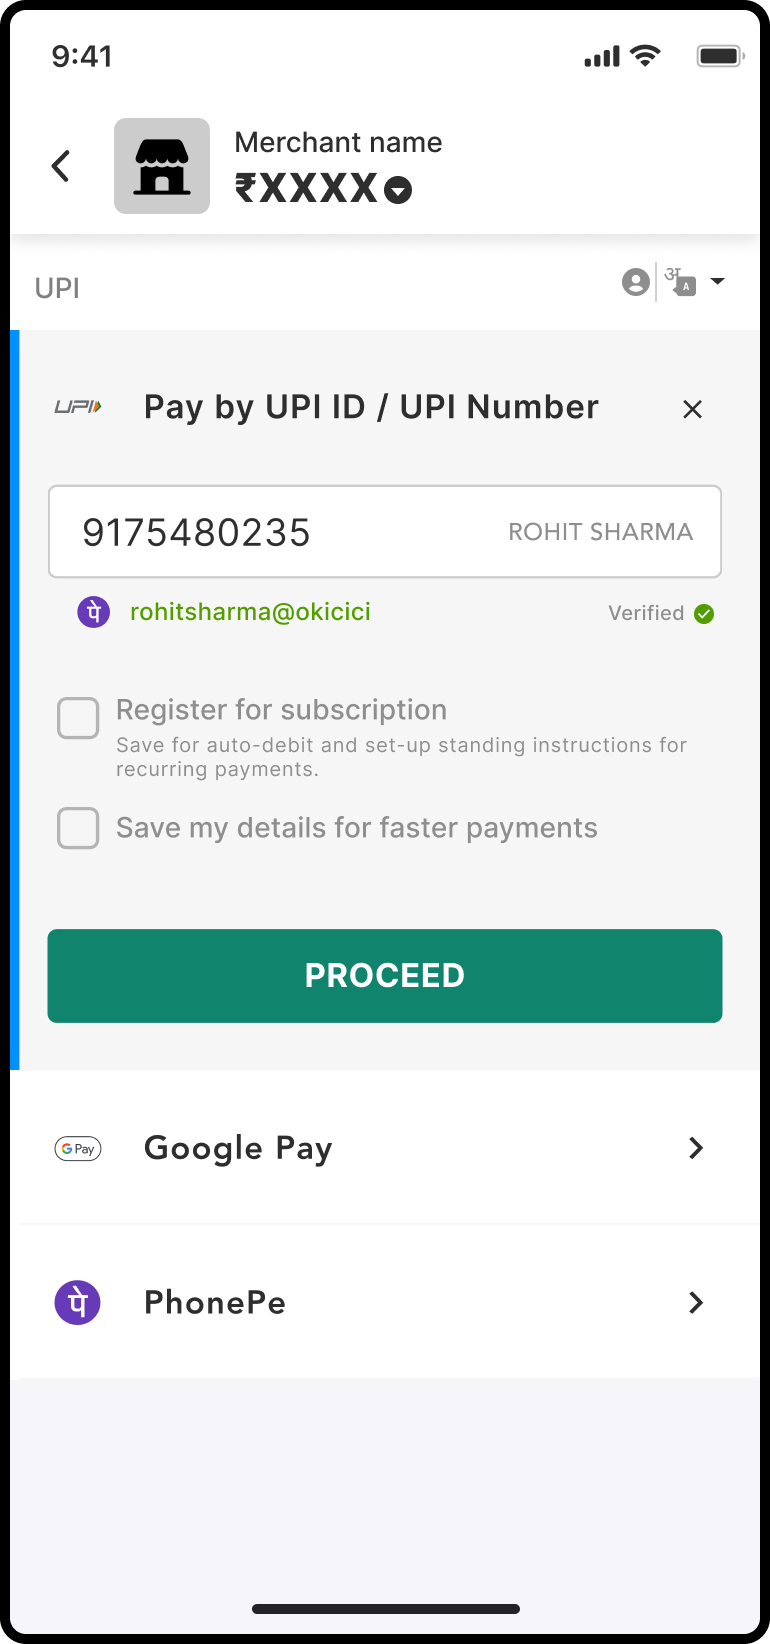
- User will see an option to opt in for registration.
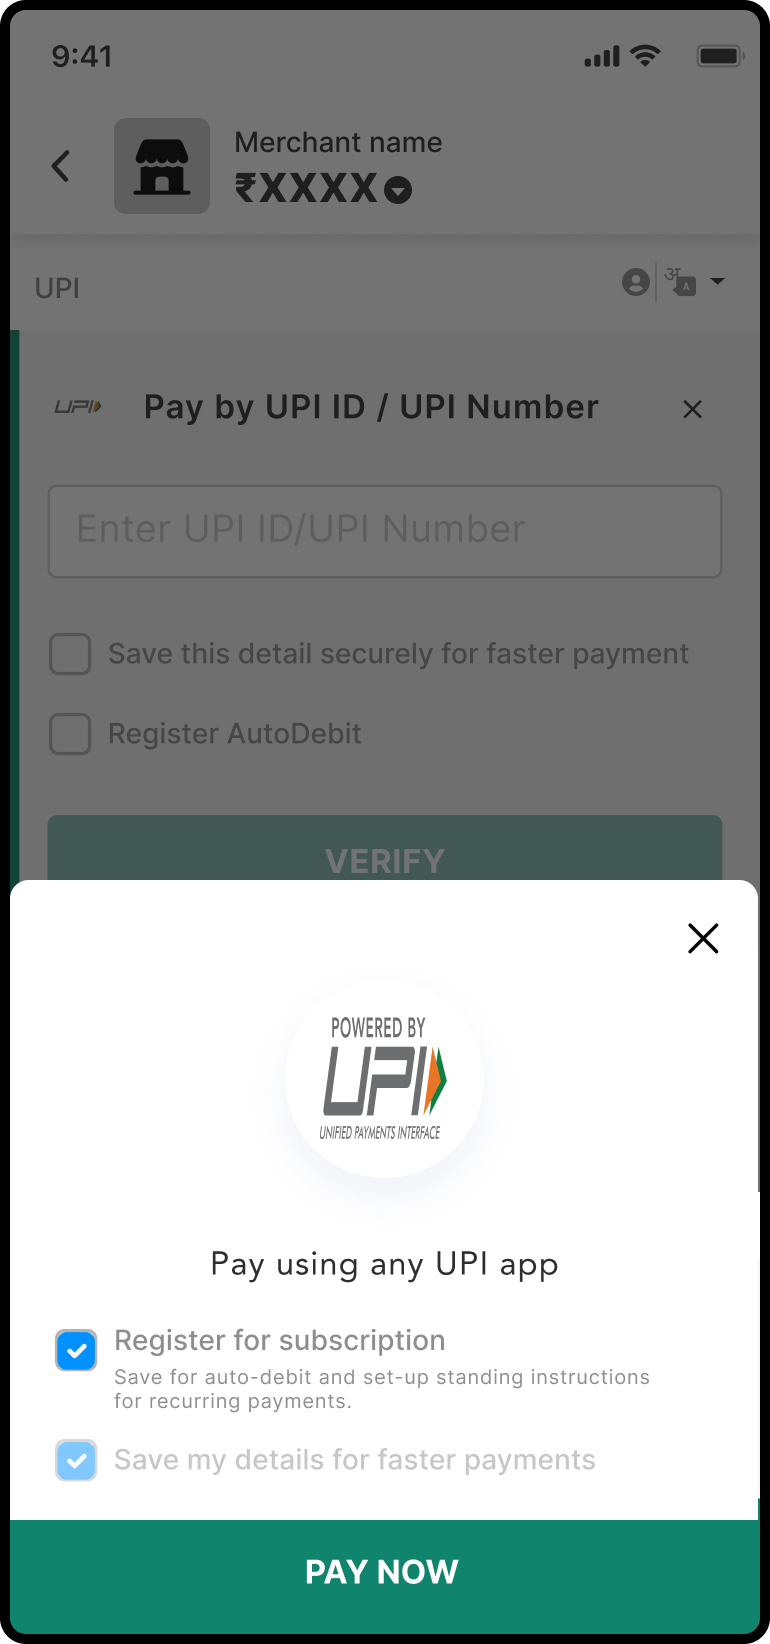
- Based on user action card flow for normal transaction or mandate transaction will be executed.
Net Banking
- User will land on our payment checkout page for the transaction where all the checkout-supported payment modes will be visible.
-
User will select Net Banking from the list of payment options.
-
User will the select the bank account where the Net Banking transaction will be performed.
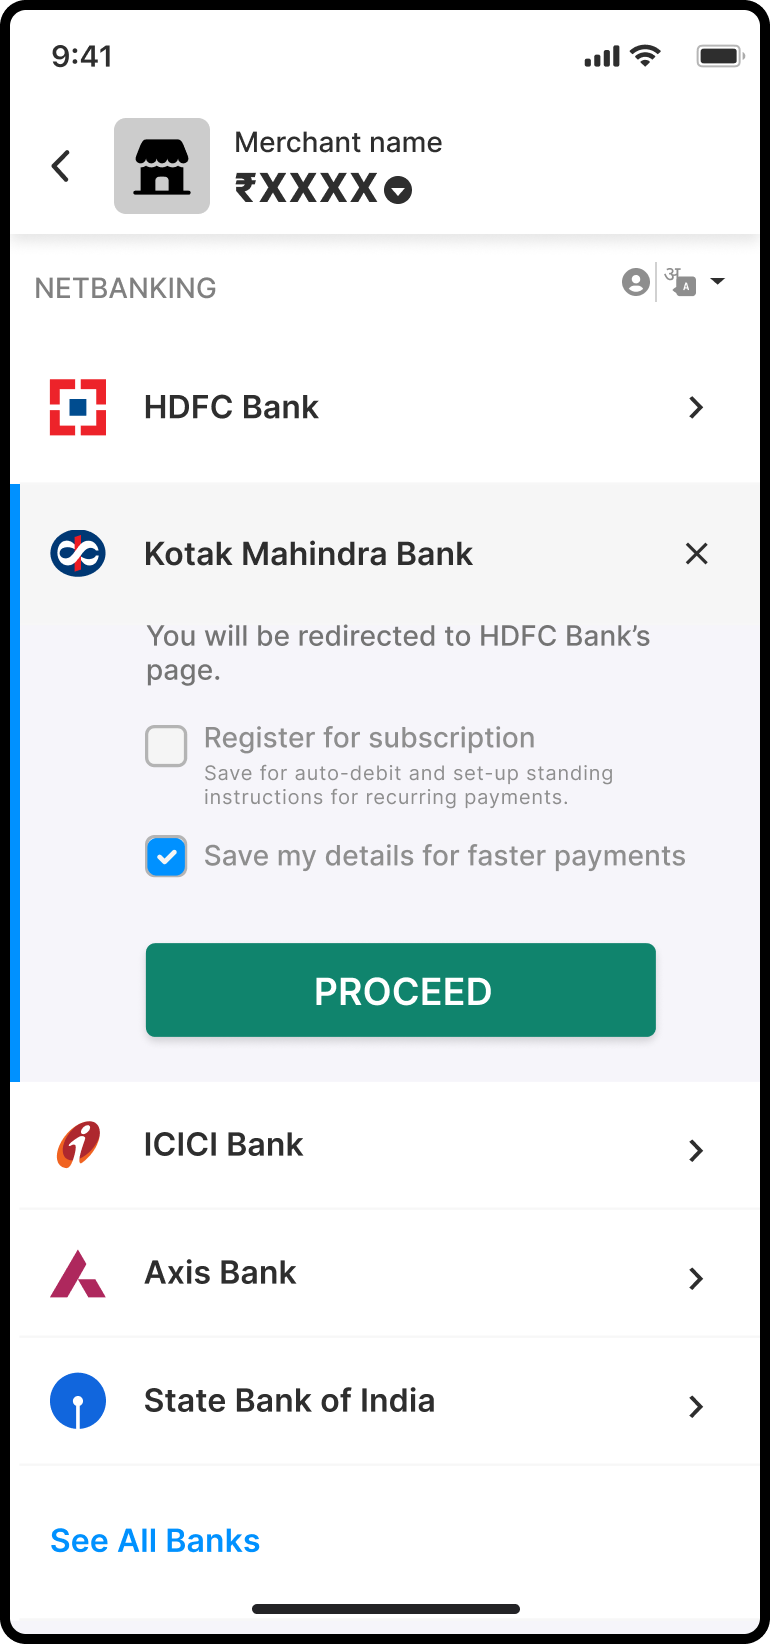
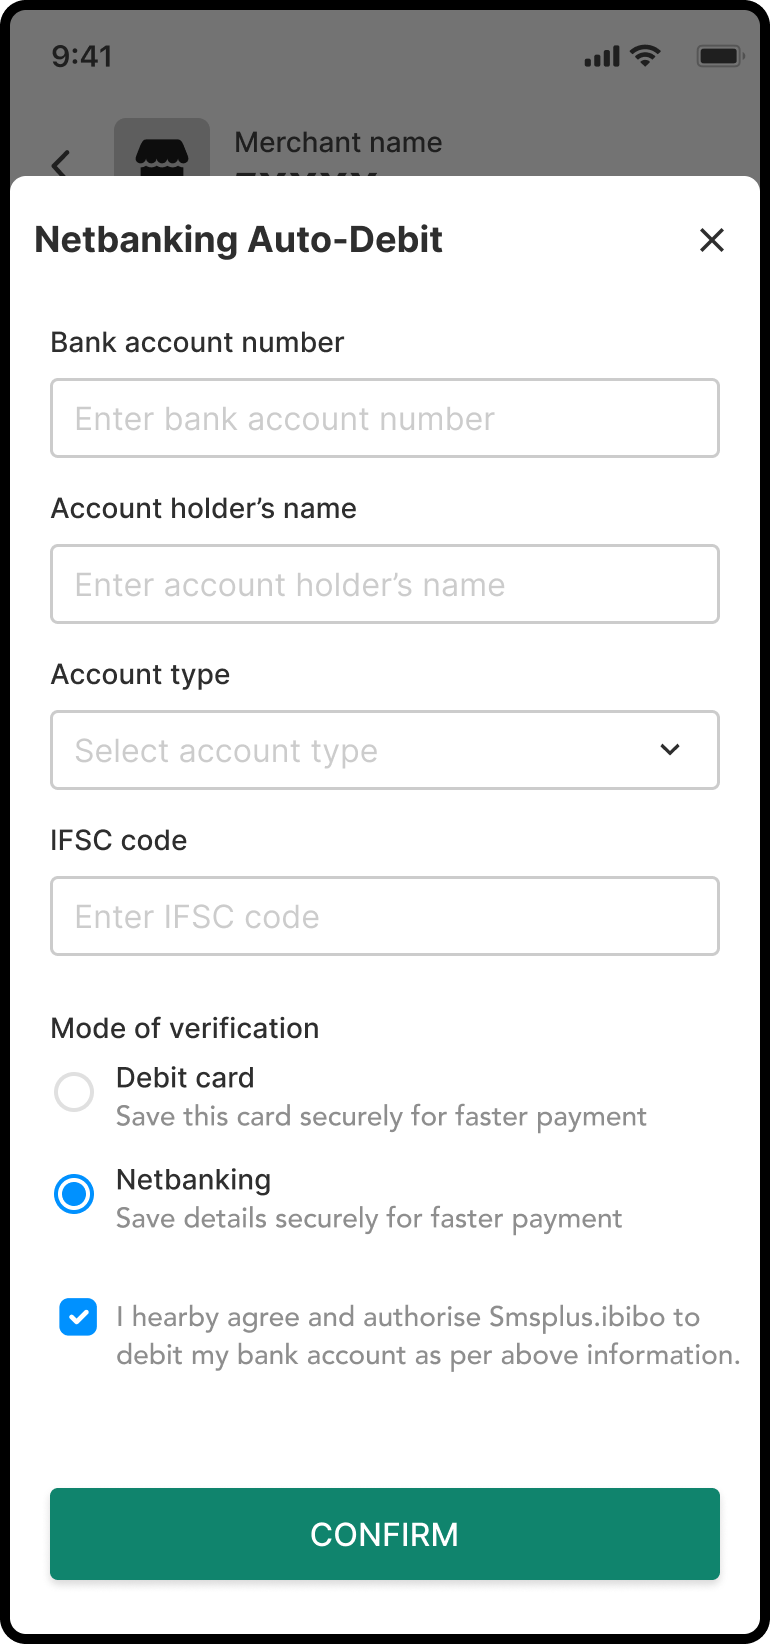
- User will select the checkbox and account details option will become visible to the users.

- User will input the Banking details such as Account number, IFSC code, Name and Account Type on the payment page itself.
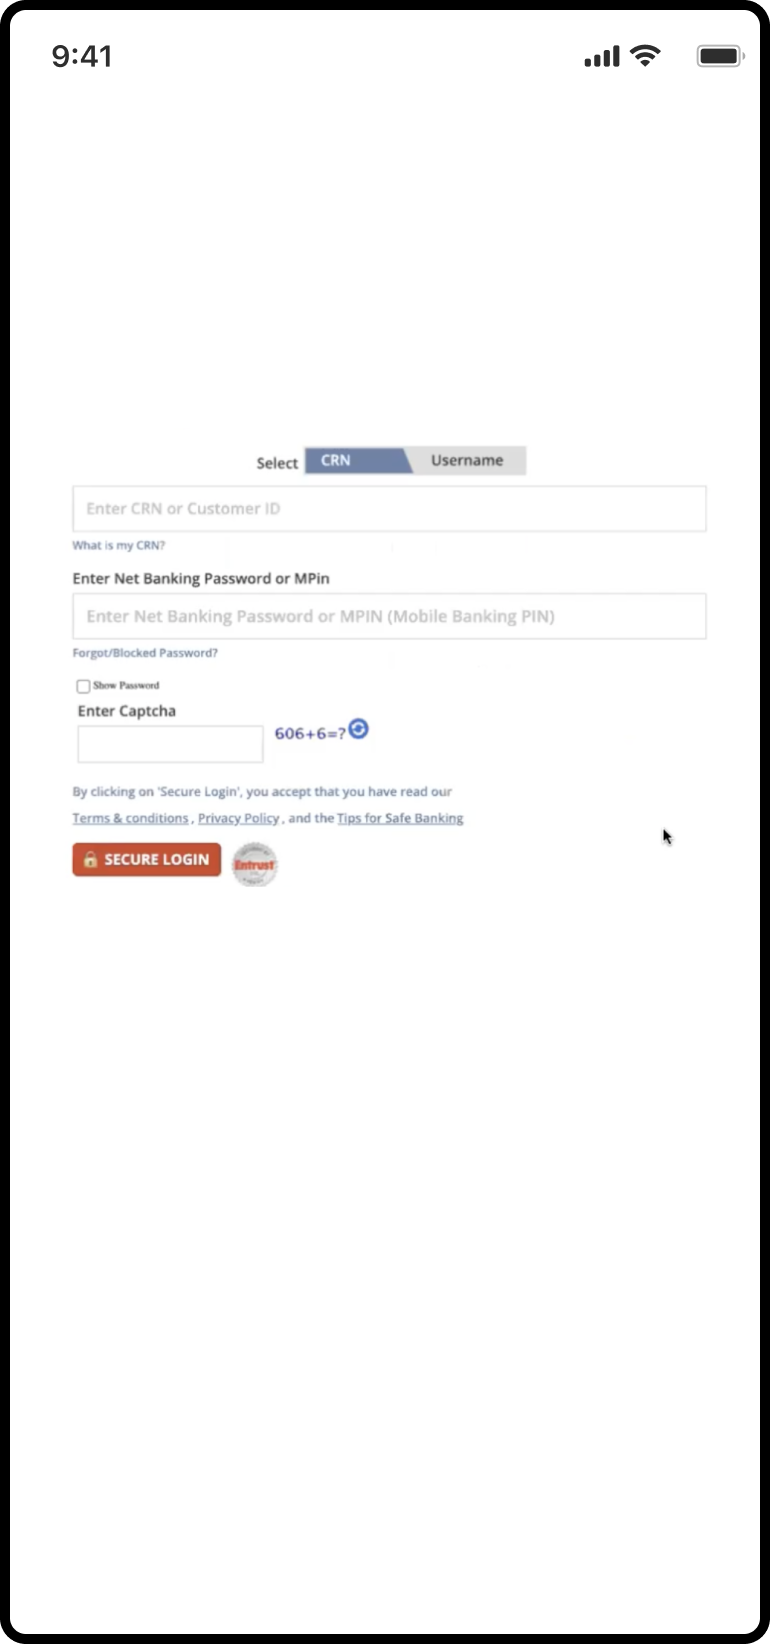
- User will be asked to enter the Net Banking password.
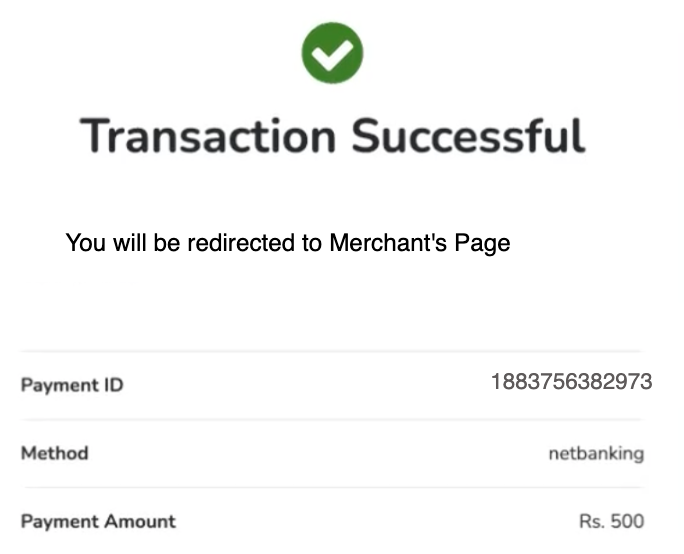
- User will be shown payment successful or declined page for one-time Net Banking transaction based on mandate eligibility:
- Case 1: When user opt’s for Mandate Registration along with one time payment:
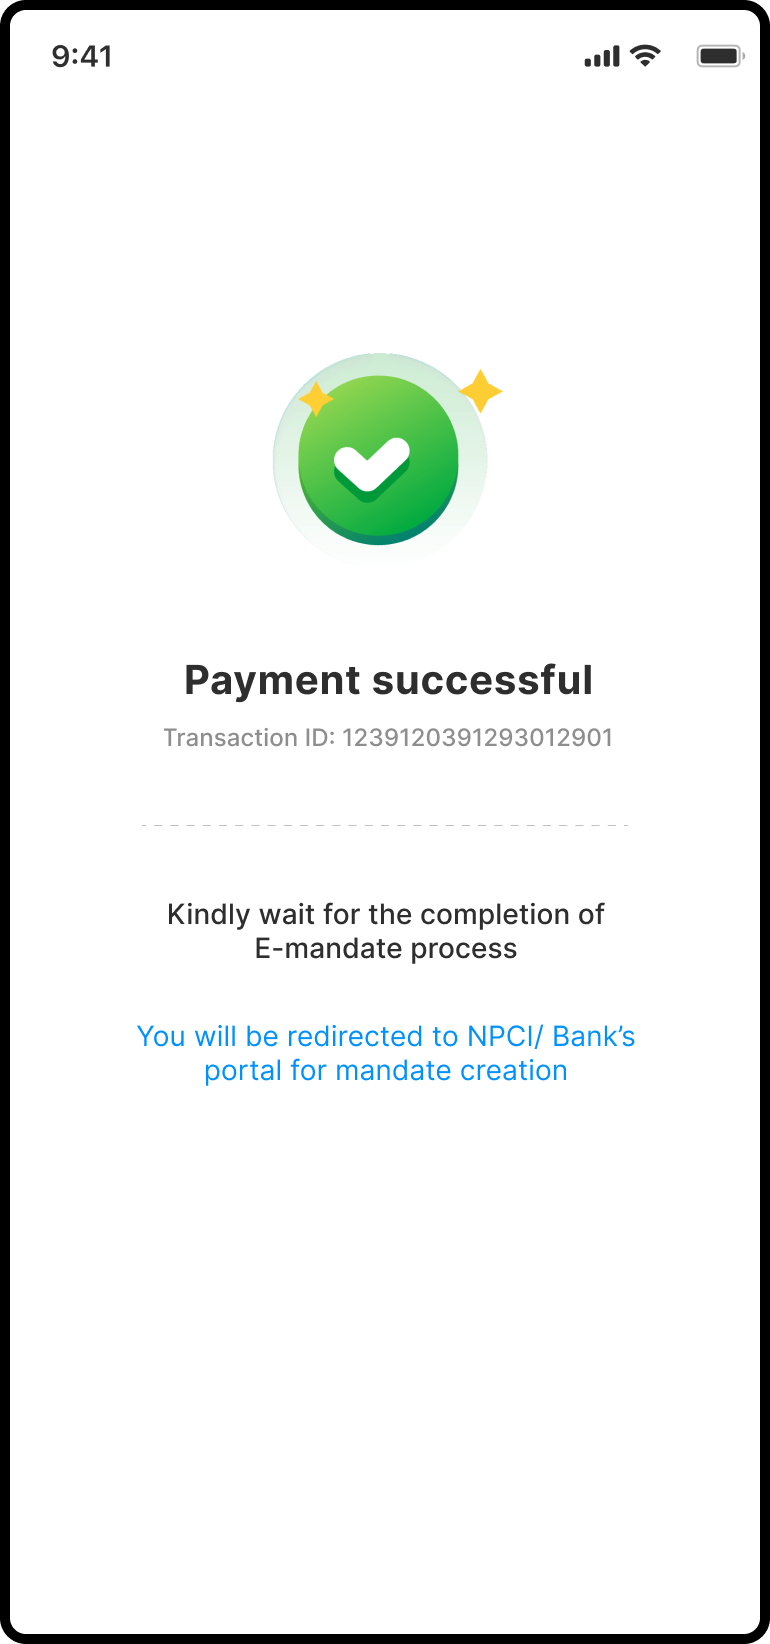
The user redirected to the bank page for eMandate consent.
- Case 2: When user does not opt for Mandate Registration along with one time payment:
- Case 3: When one time payment is declined
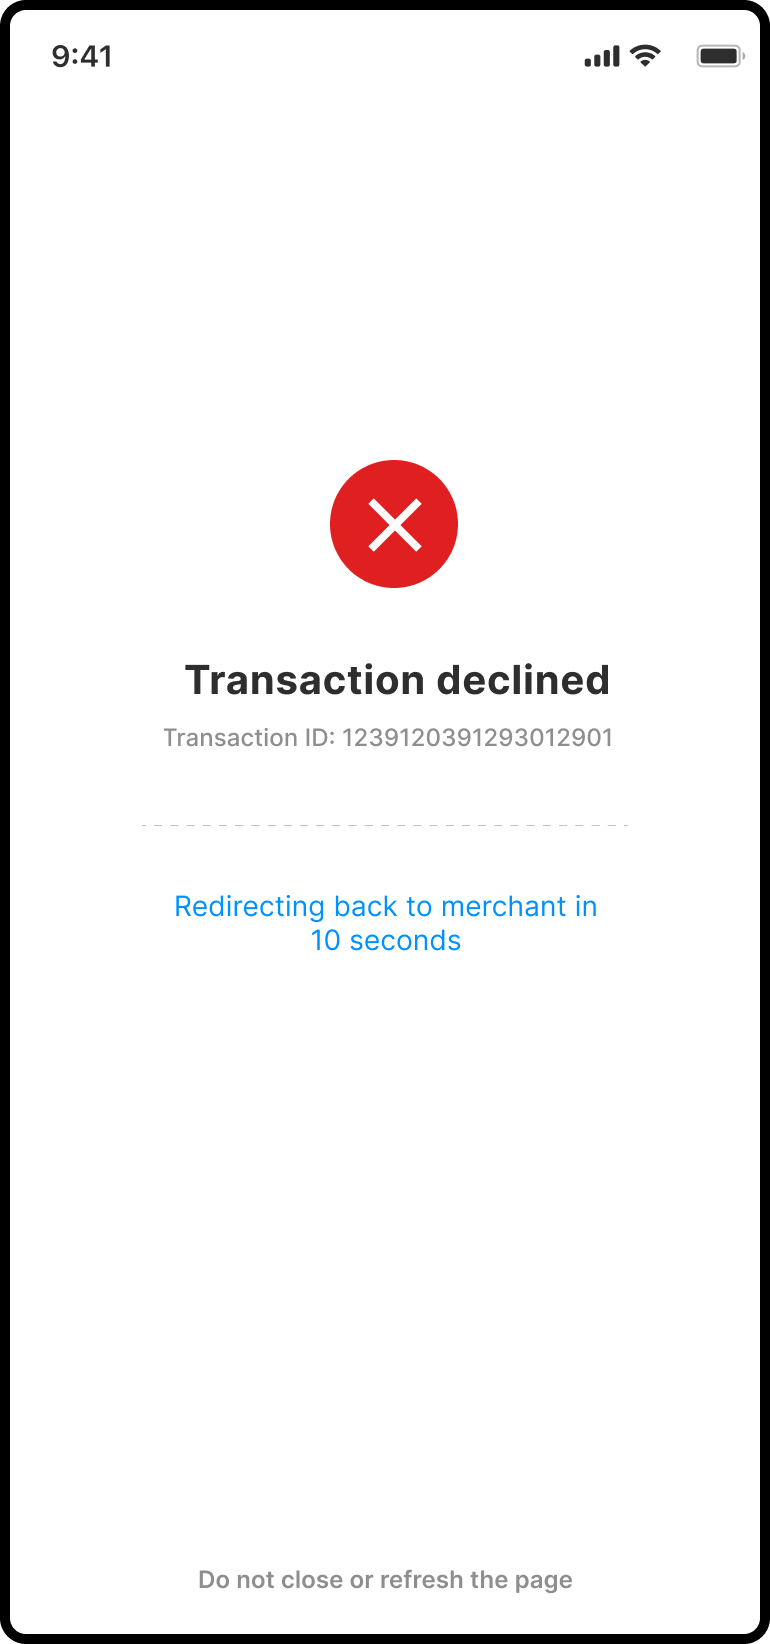
In general, user will not be redirected to NPCI mandate creation page and will redirect back to Merchant’s url with transaction response.
-
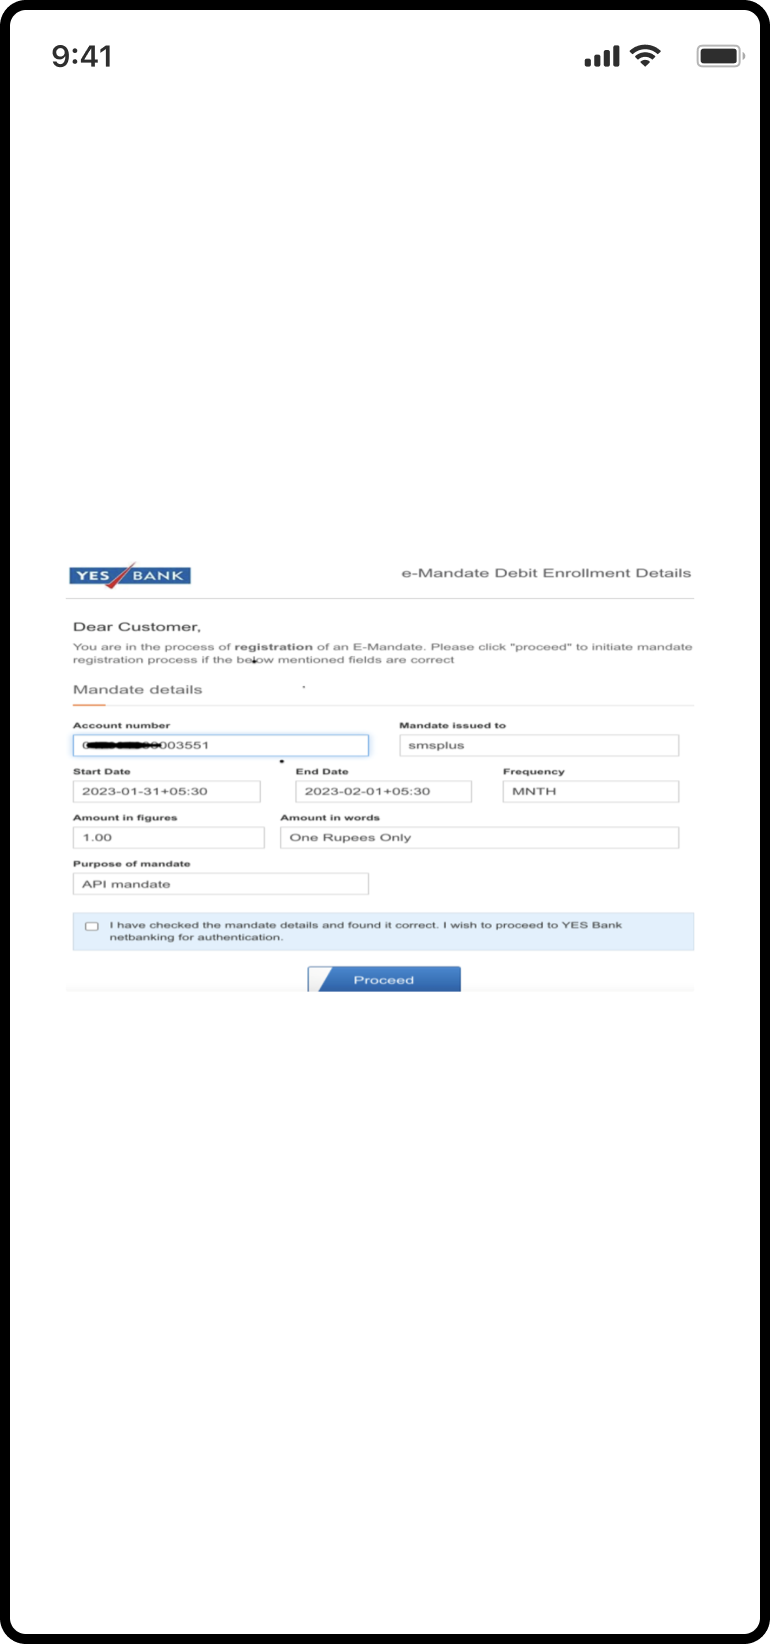
After the transaction is successful, user will be redirected to NPCI Page where user gives consent for the mandate.
-
User will be directed to Bank’s Login Page from NPCI portal.
-
User will enter the OTP required for thetransaction.
Updated 8 months ago