Configure Chargeback Webhook
Configure chargeback webhooks to automatically receive instant notifications when chargeback events occur, helping you stay informed and respond quickly to minimize financial impact.
Prerequisites
Before configuring a chargeback webhook, ensure that:
- You have access to your PayU merchant dashboard
- You have a server endpoint ready to receive webhook notifications
- Your endpoint can handle HTTP POST requests
Procedure
-
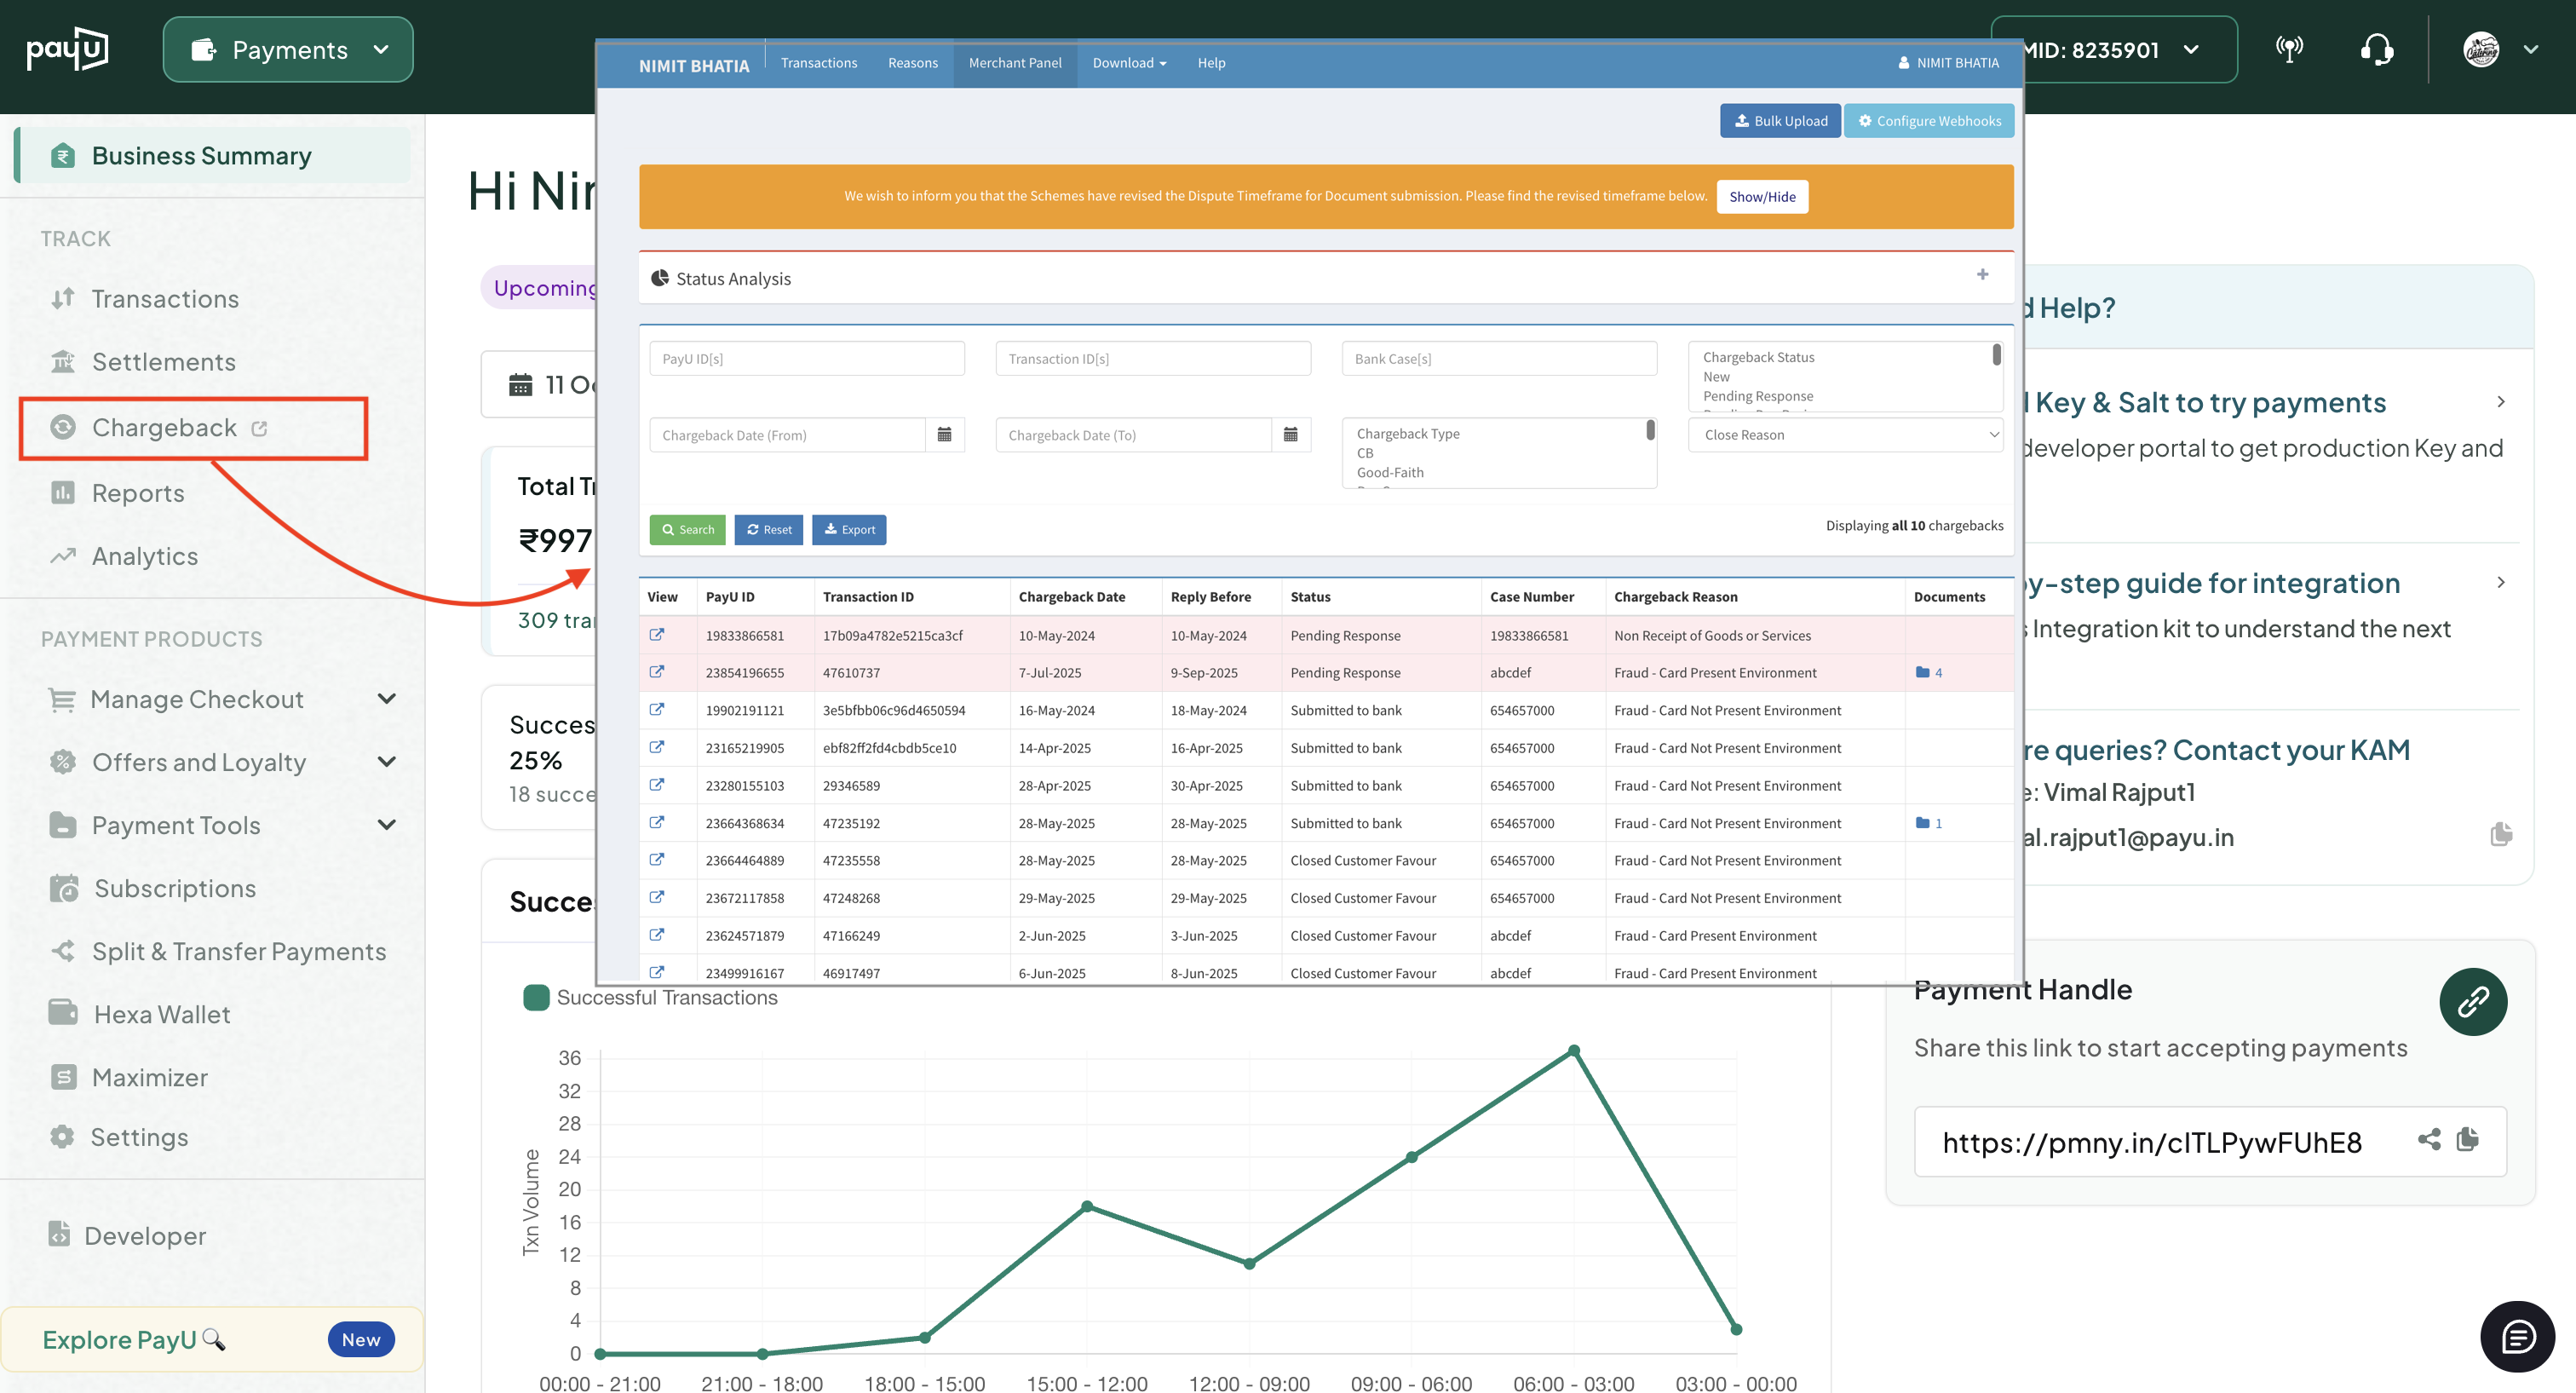
Navigate to the Chargeback dashboard.
- Log in to PayU Dashboard.
- Select Chargeback on the menu or left-pane.
The Chargeback dashboard is displayed in a new browser tab.
-
Click Configure Webhooks at the top-right corner.
-
Click the Configure Webhooks button.
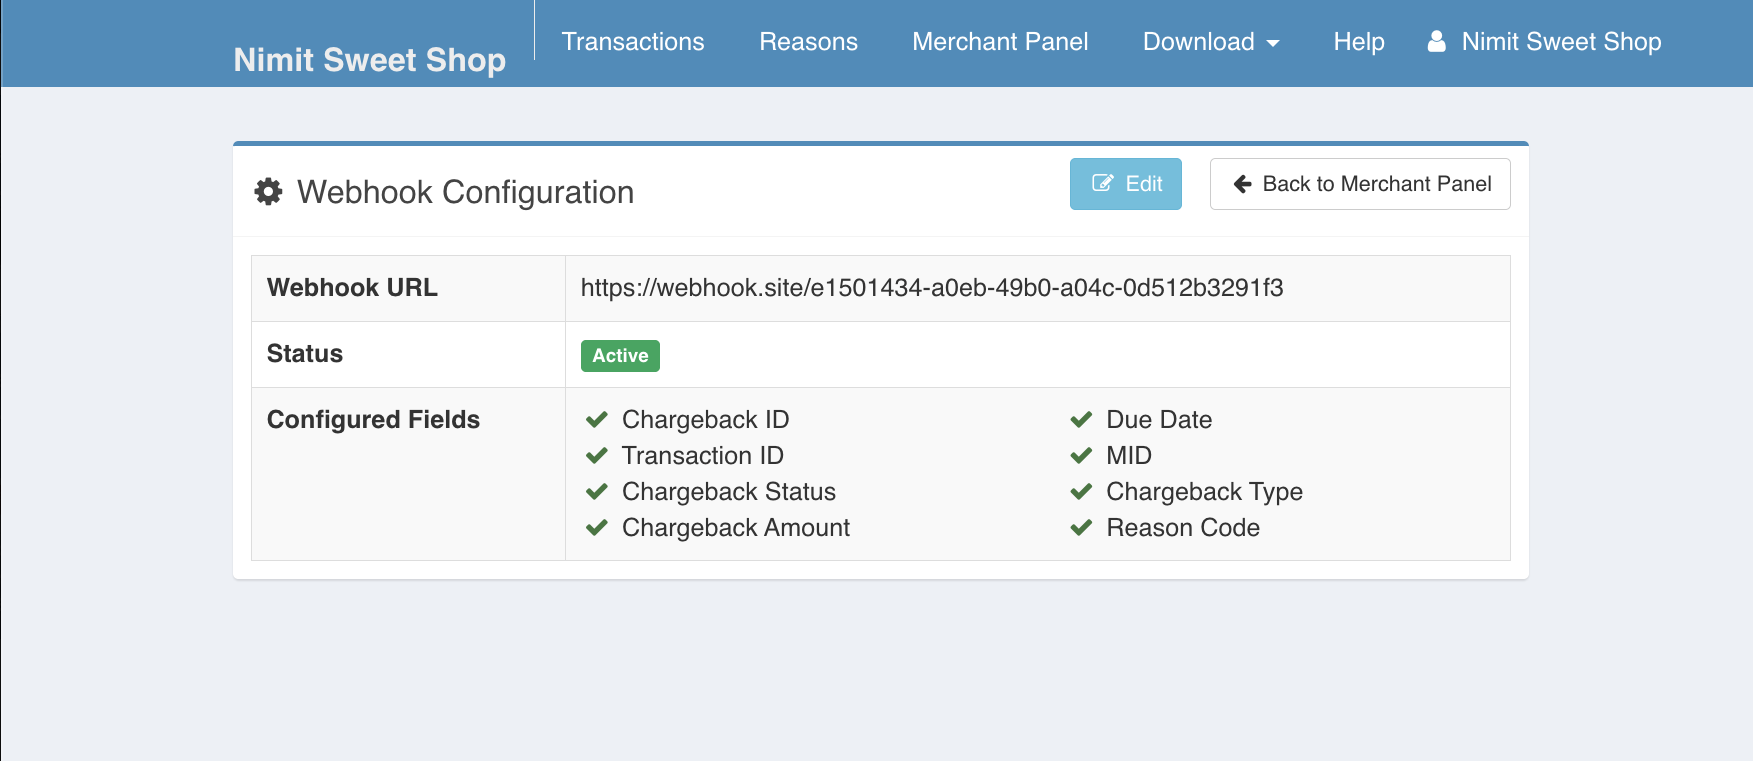
- Click Edit.
The Configure Webhook page is displayed.

- In the configuration form, fill in the following details:
- Webhook URL: Enter the URL where you want to receive webhook payloads
- Fields Selection: Select the fields you want to include in the webhook payload
- Activation Status: Set the webhook as active or inactive using the toggle switch
- Click Save Configuration to finalize your webhook configuration
Updated 2 months ago
Did this page help you?