Create a Personalized Coupon
Coupon codes are an important feature of offers as they add tangibility to offers, thereby helping attract customers and improve sales by providing discounts or cashback on behalf of merchants, banks and brands. Personalised coupons helps you mass-generate unique coupons that are specifically mapped to a unique customer, thus no pilferage, wrongful usage or mis-use of coupons. Also, they can be easily shared with your customers directly on WhatsApp.
This procedure describes how to create a Personalized coupon.
Steps to Create an Offer
- Select the discount type
- Add basic details of the offer
- Include the offer rules or limitations
- Configure the payment modes which can avail the offer
- Setting up customers and communications
- Subvention details
- Review the offer
Step 1: Add the basic details
-
Navigate to .Offers Dashboard.
-
Click Create an Offer at the top-right corner.
The Create New Offer page is displayed.
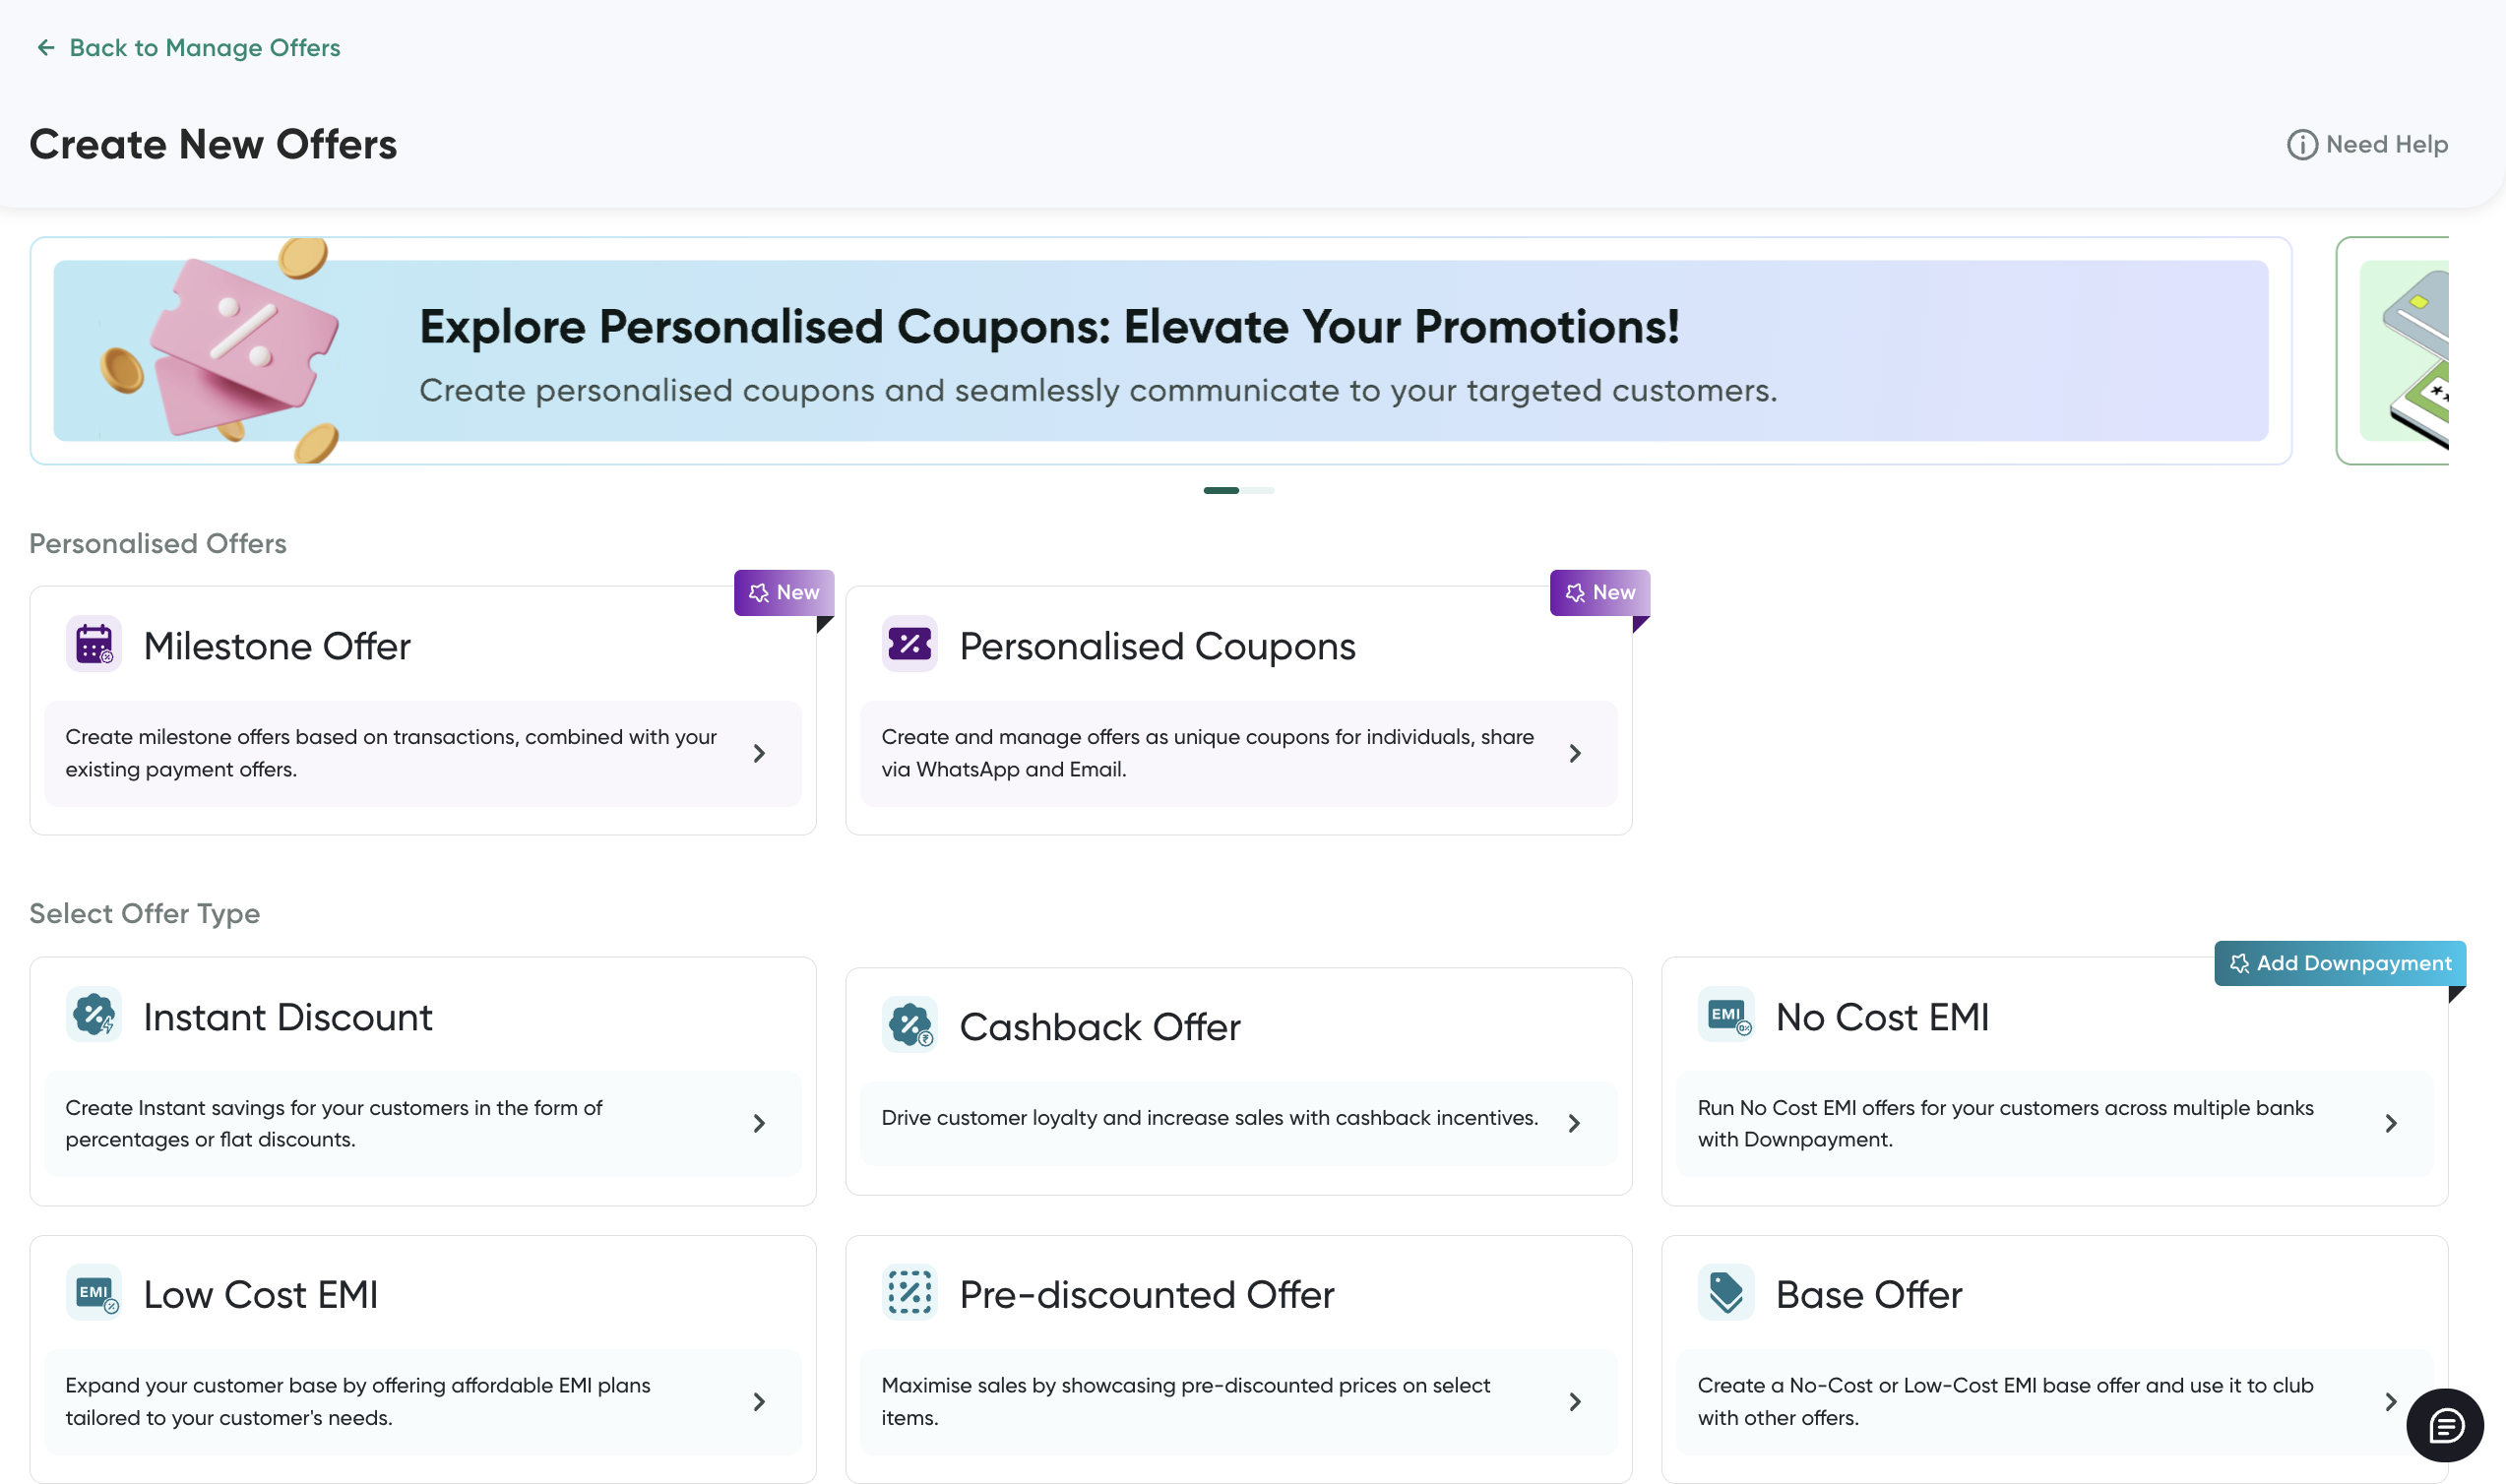
-
Select Personalised Coupons as the offer type.
Step 2: Add basic details
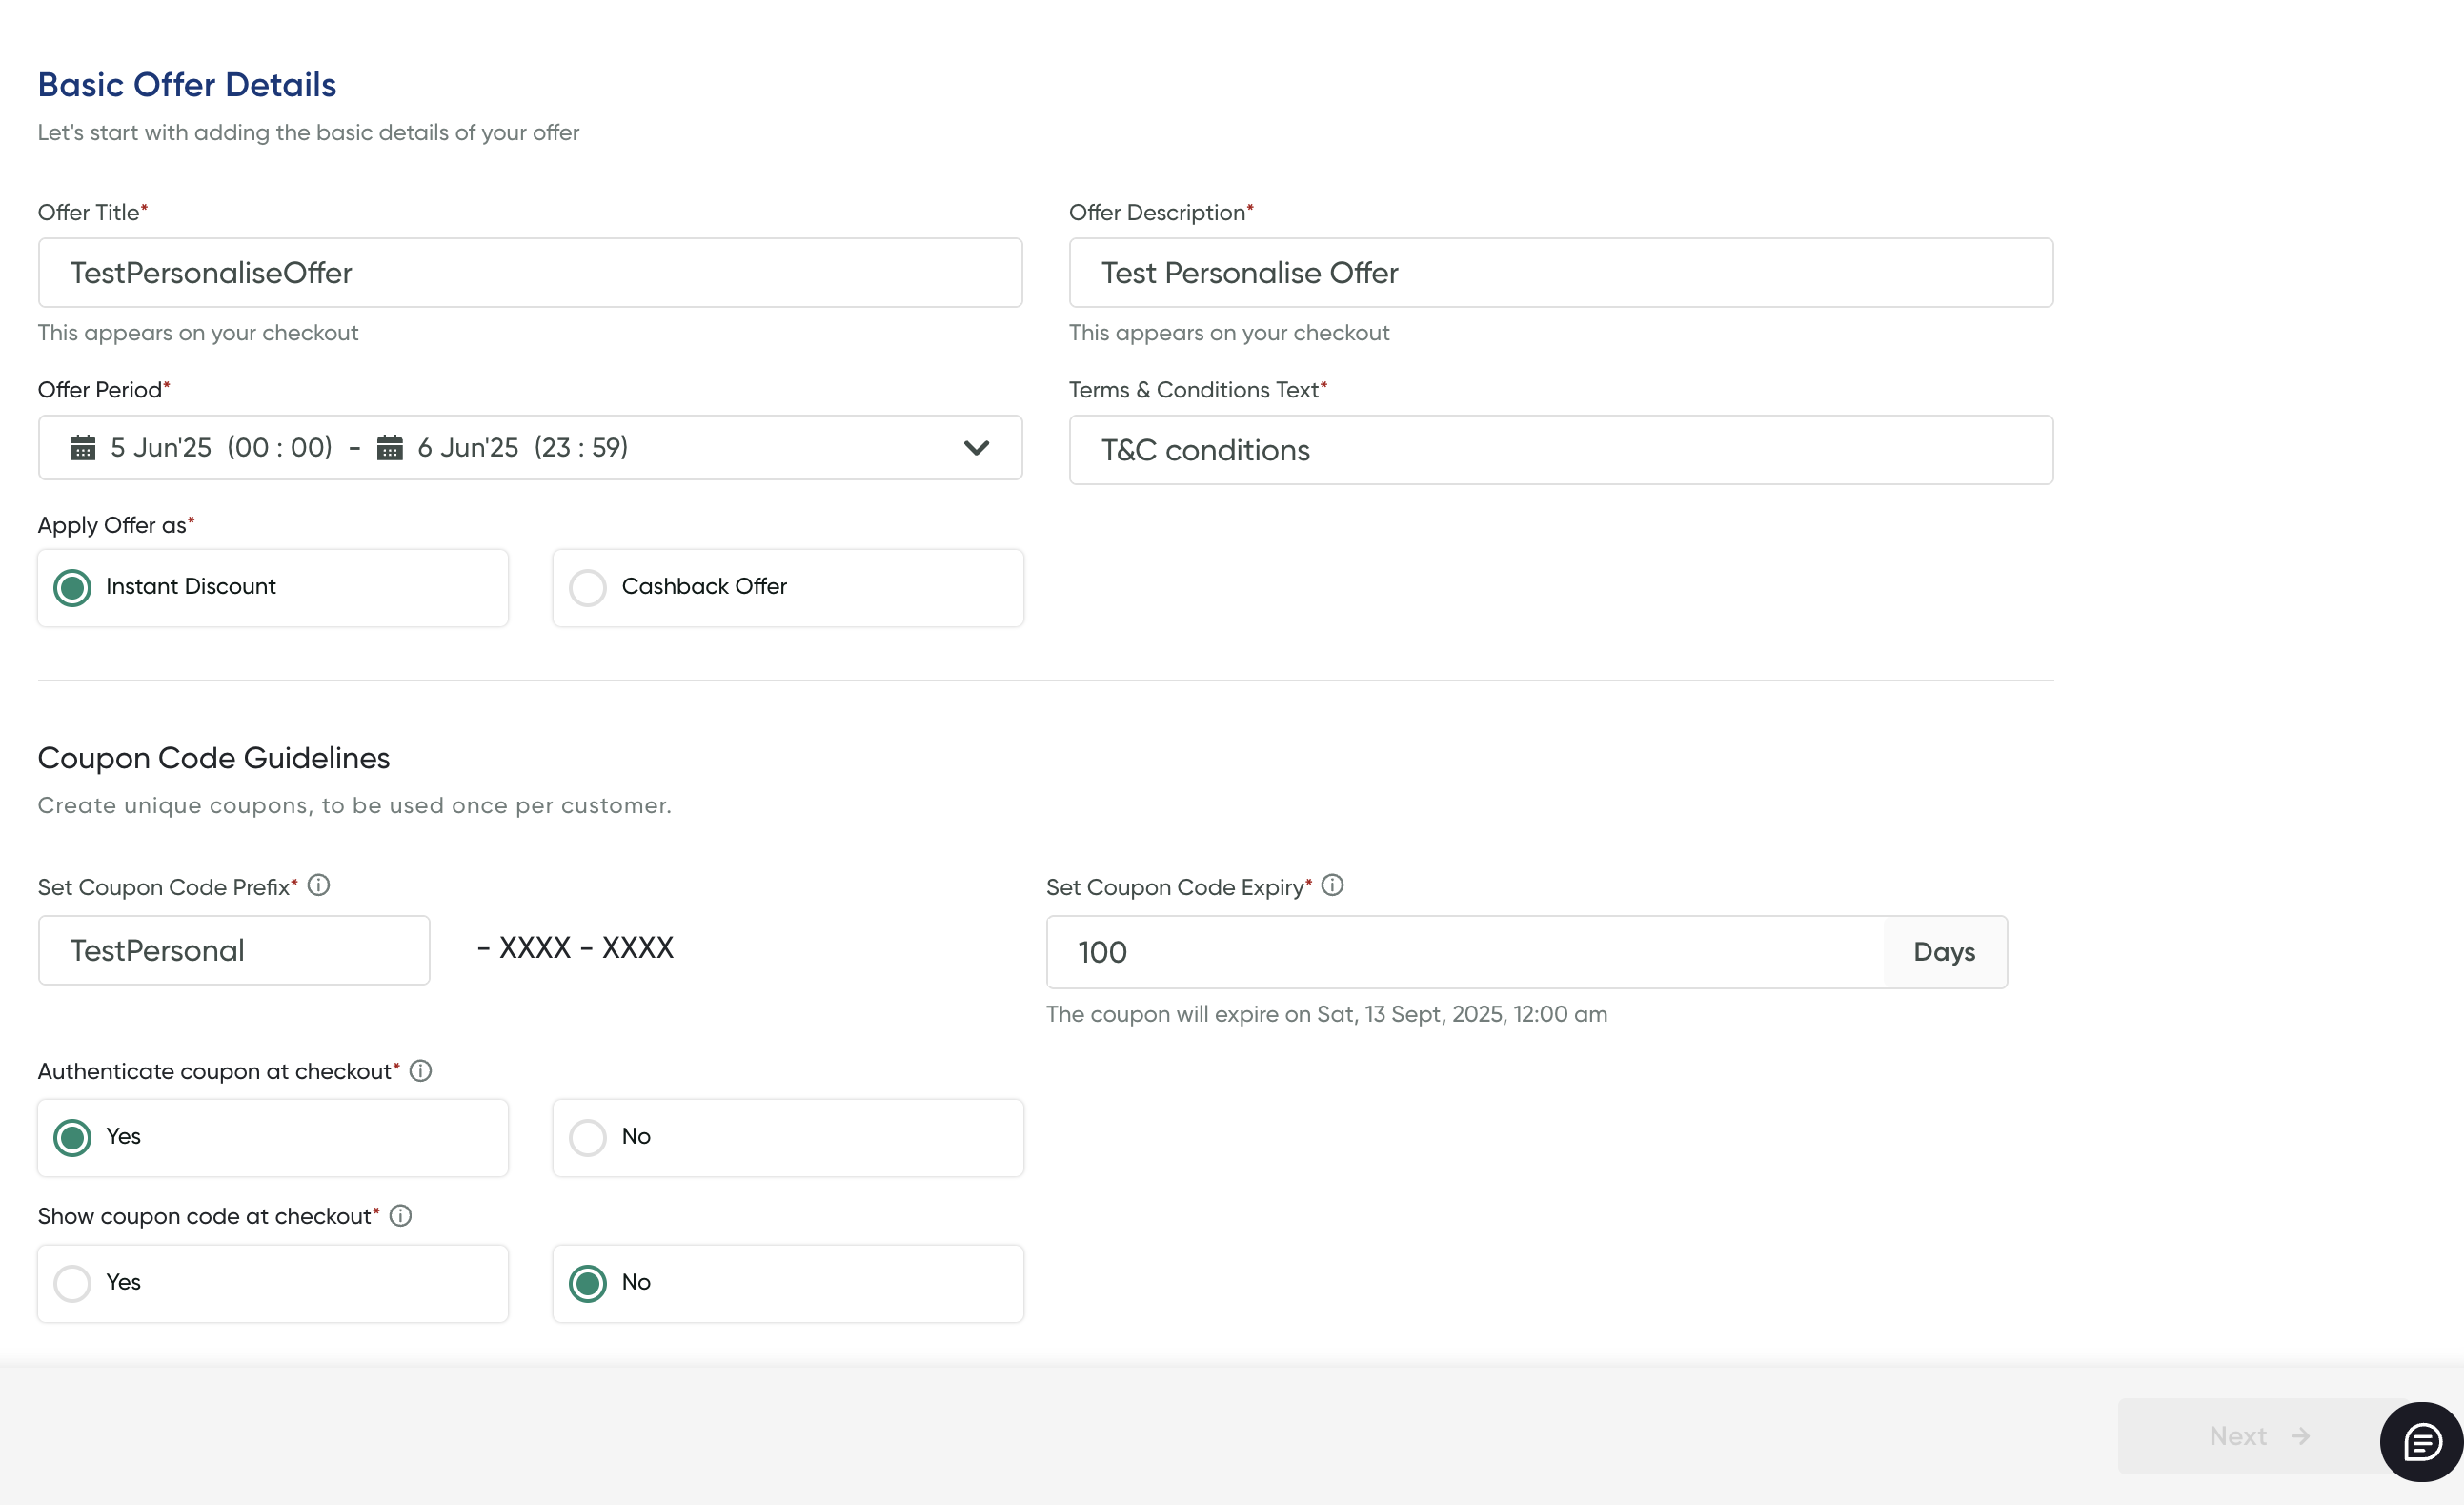
- Include the basic details as described in the following table:
| Field | Description |
|---|---|
| Offer Title | Enter a unique title for the offer. This would be displayed as the offer title on your Checkout page. |
| Offer Description | Enter the offer text that would be shown to your customer at checkout (for PayU Hosted Checkout Integration transactions). |
| Offer Period | Enter the offer validity date and time range. Your offer will be valid and visible to the customer between this time period. You can specify the time range up to the seconds detail. |
| Terms & Conditions Text | Enter the text content that should appear under the “Terms and Conditions” on the Checkout page for customers. |
| Apply Offer as | You can apply the offer as Instant Discountor Cashback Offer. |
- Include the details in the Coupon Code Guidelines section as described in the following table and then click Save & Process:
| Field | Description |
|---|---|
| Coupon Code Prefix | Enter a prefix for the coupon code to match with your campaign. For example, "Welcome". |
| Authenticate coupon at checkout | Select Yes to authenticate the coupon code entered by your customer whether it is valid one. |
| Show coupon at checkout | Select Yes to show the coupon code on the checkout page after authentication.
|
-
After you complete the above details and click Next.
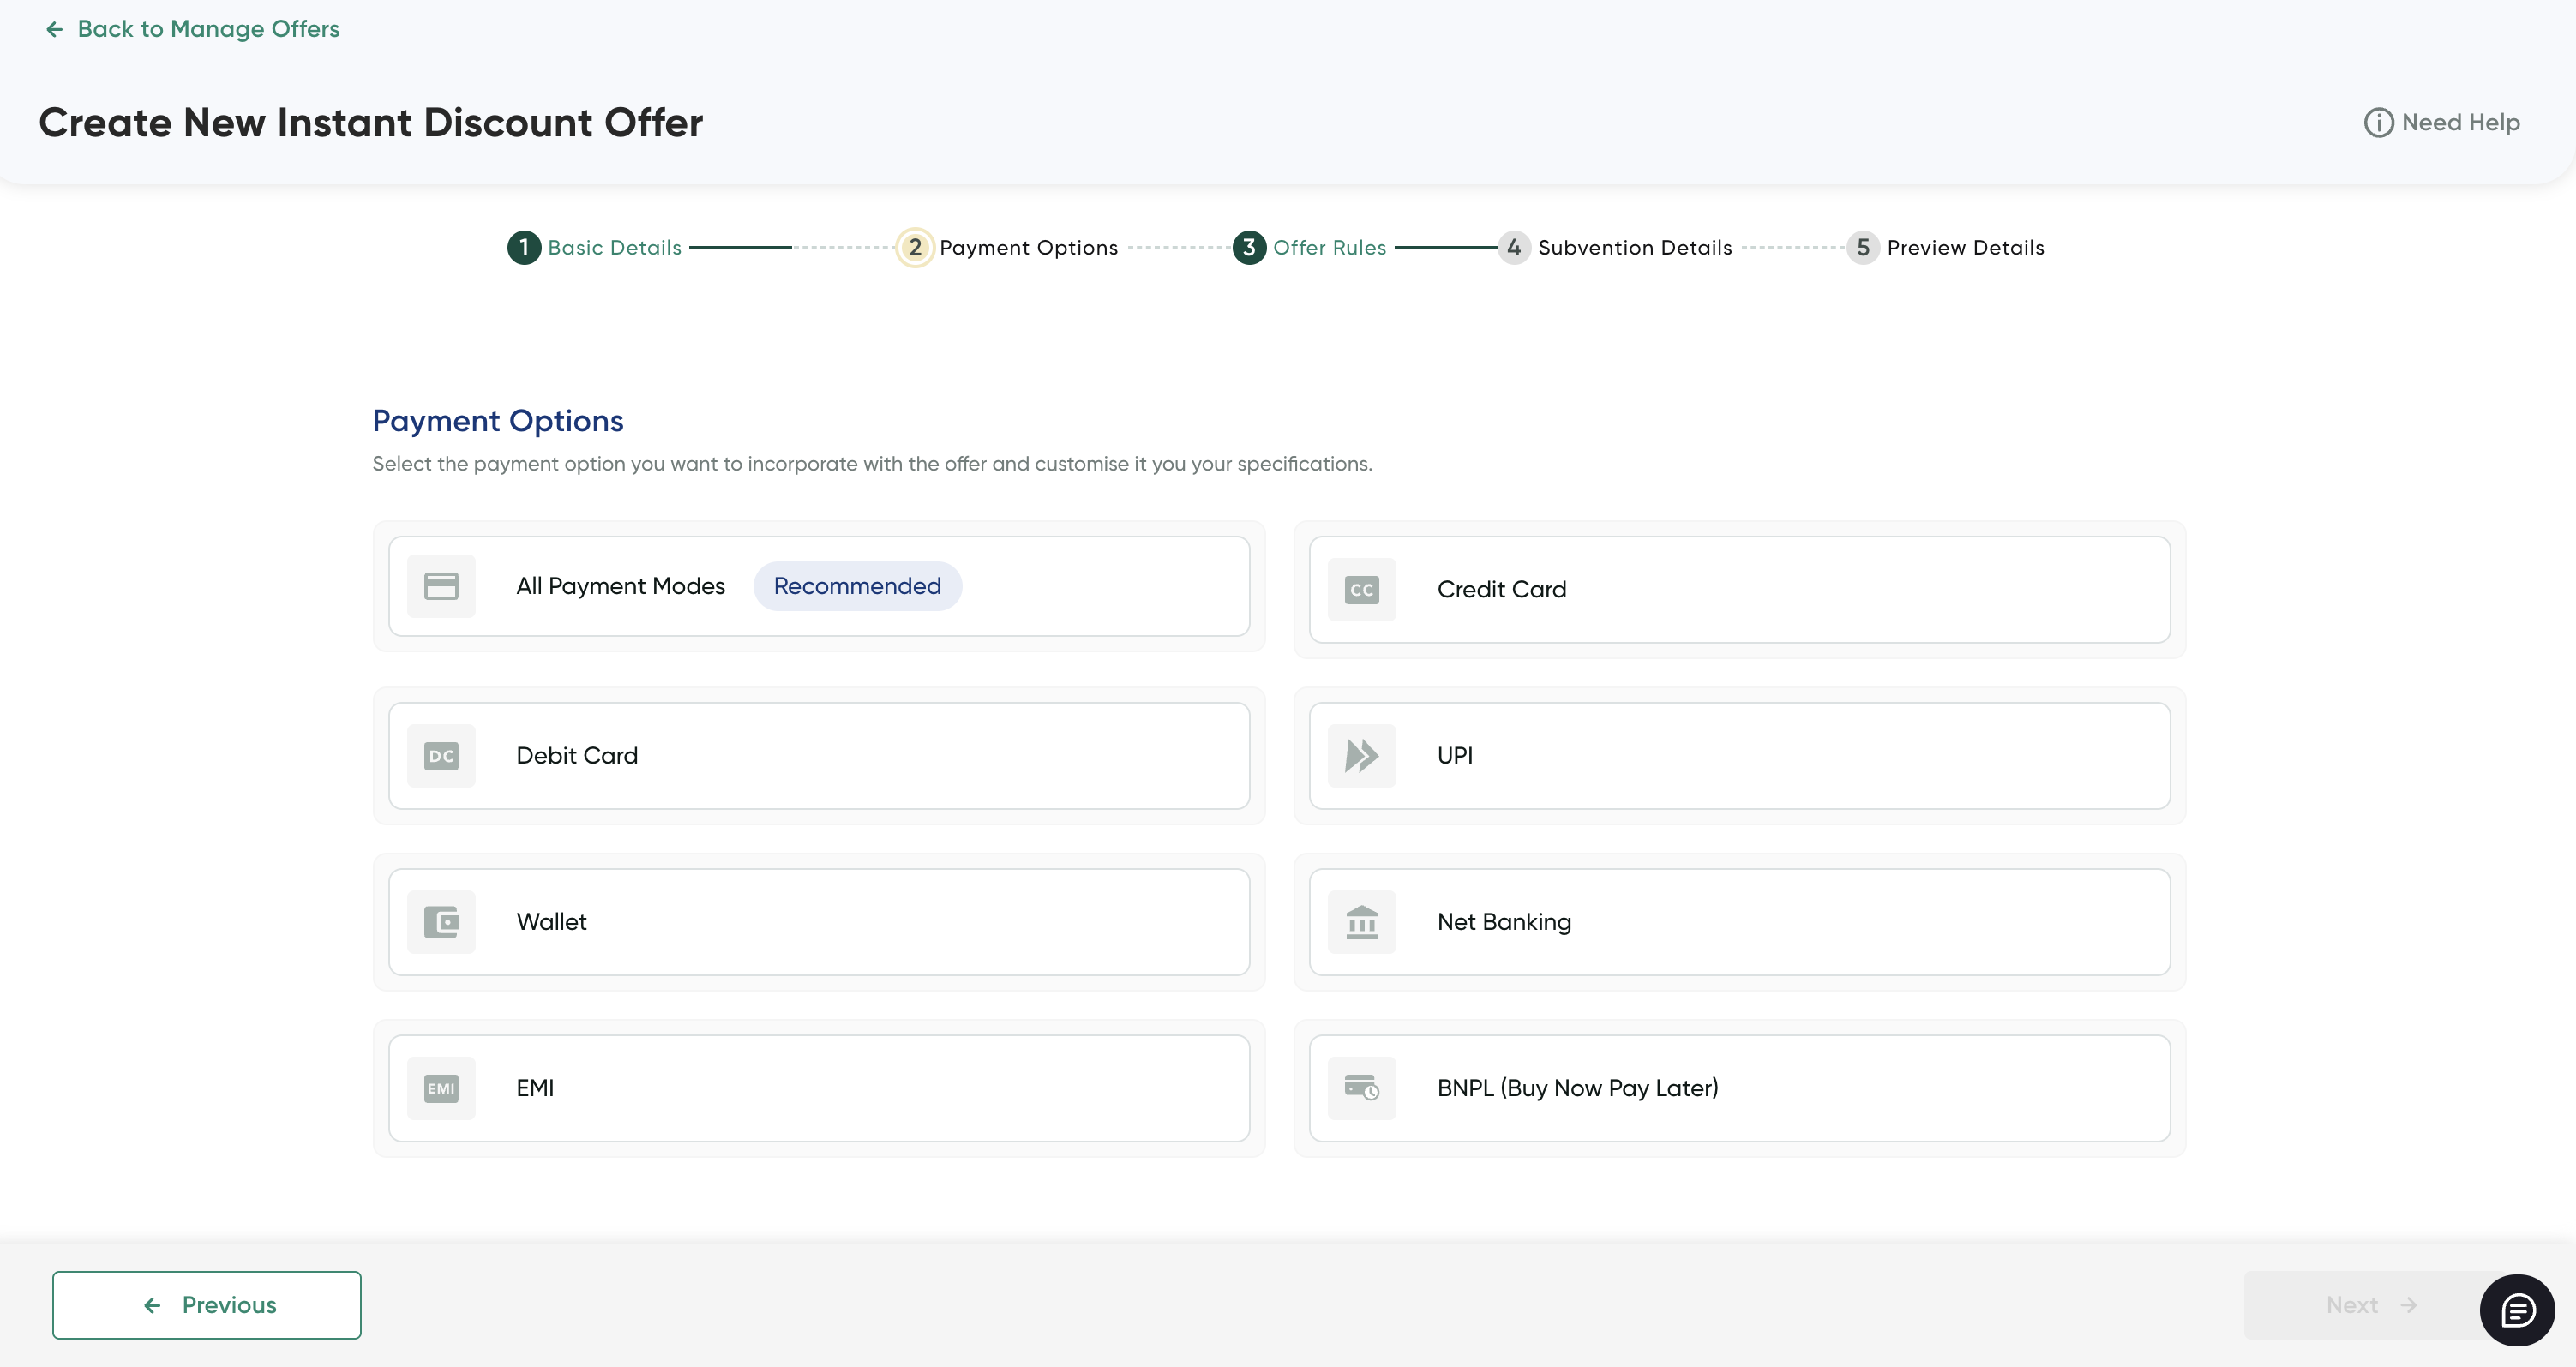
The Payment Options page is displayed.
 Note
NoteWhen you are creating an offer, you can choose to save the incomplete offer details in the Draft state using the Save as Draft & Exit button at the top-right corner and publish it later.
Step 2: Configure payment modes- Configure the payment modes. For more information, refer to Create an Instant Discount or Cashback Offer.
- Click Next.
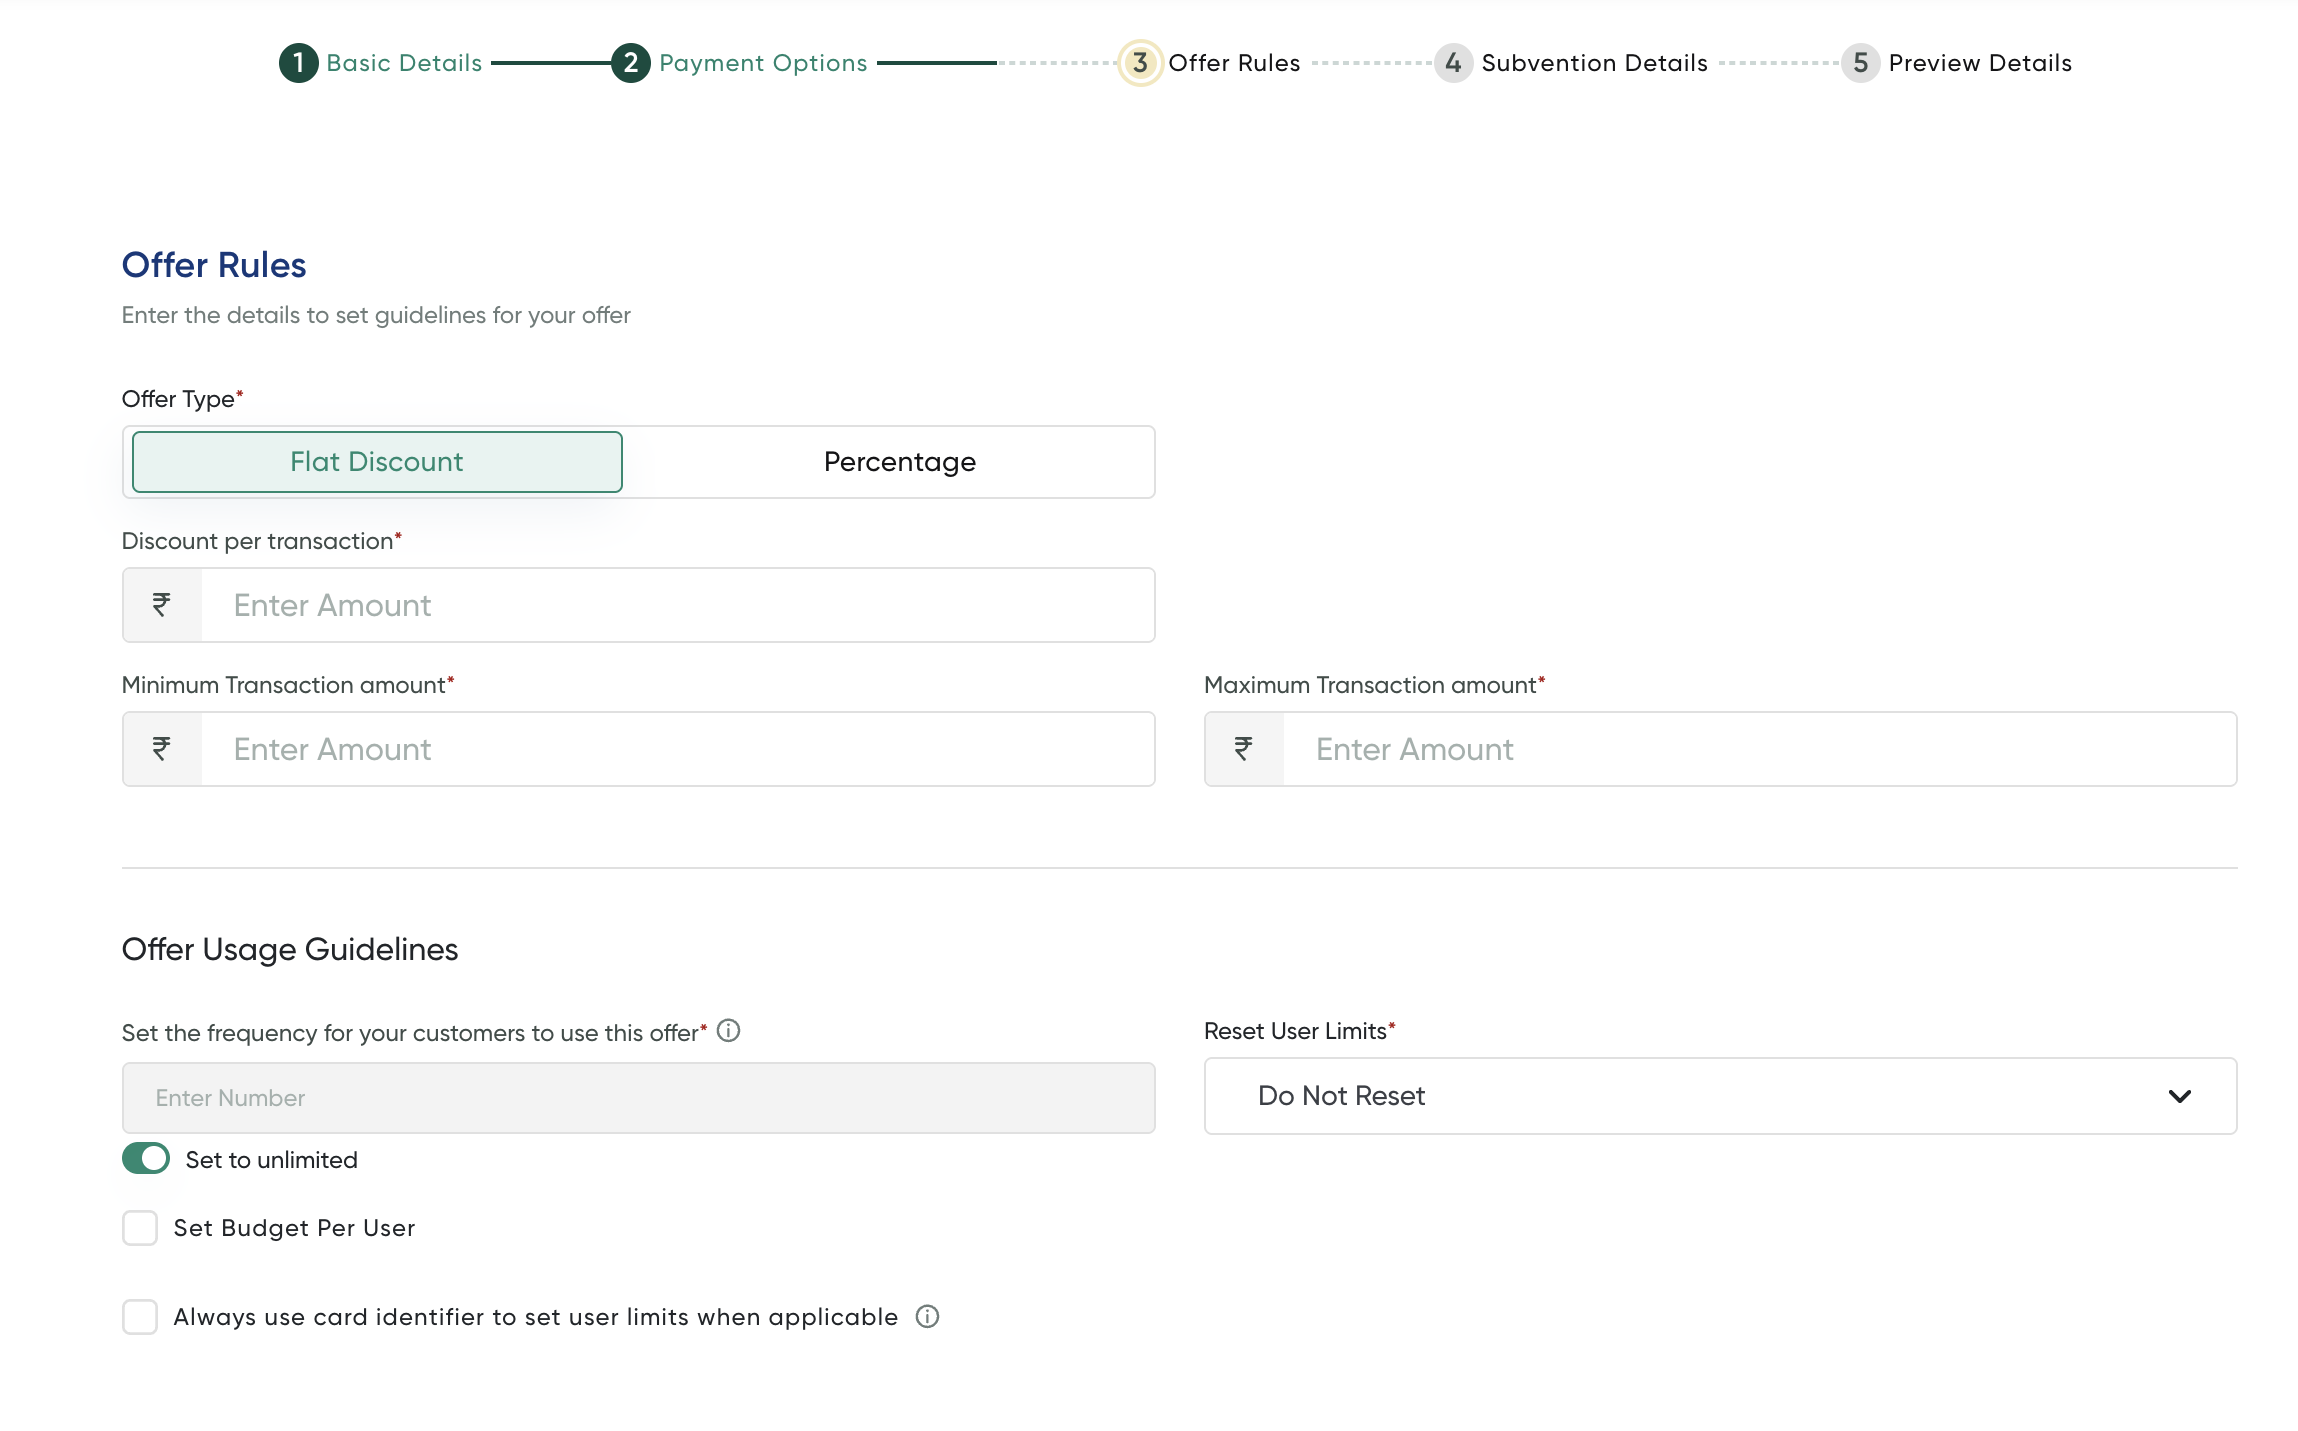
The Offer Rules page is displayed.
 Step 3: Include the Offer rules
-
Enter the offer rules and limitations on the Set Offer Rules page. For more information, refer to Create an Instant Discount or Cashback Offer.
-
After you complete the above details and click Next.
The Subvention Details page is displayed.
Step 5: Setting up customers and communicationsSetting up new customer base- Select the customer base from the Customer Base field.
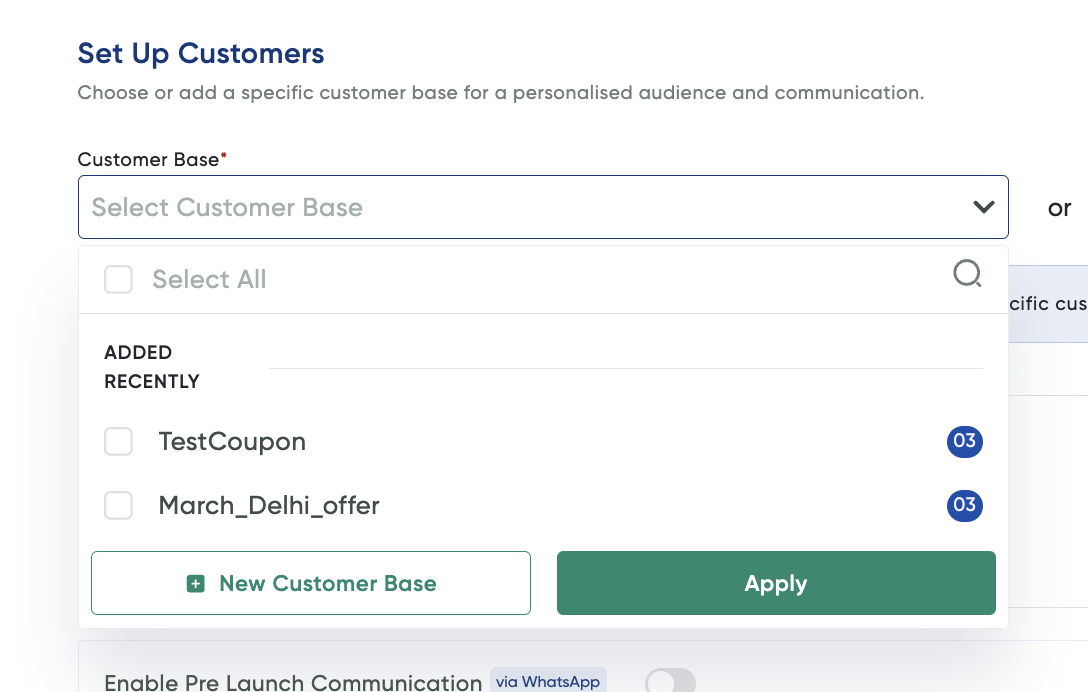
- If you wish to configure a new customer base, click New Customer Base and follow these steps:
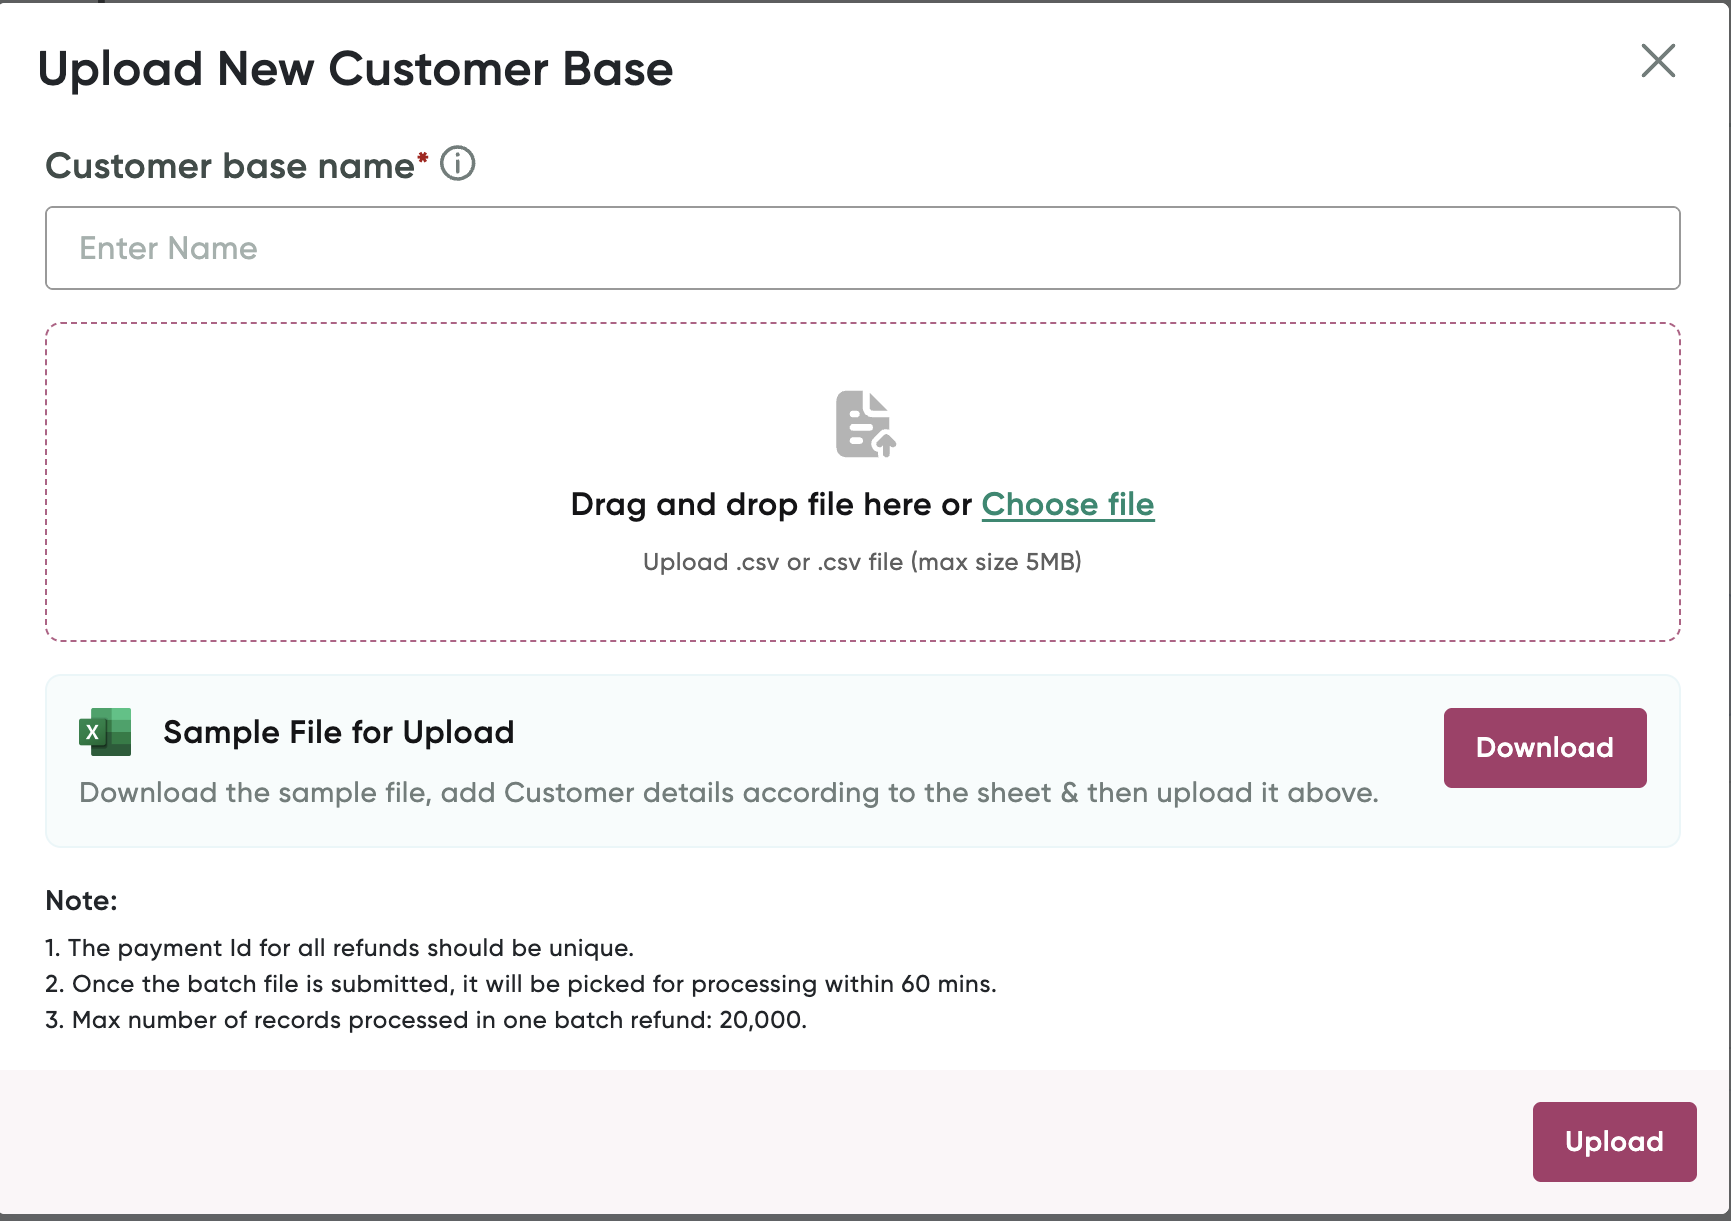
- Click Download Sample File if you are not having the sample file or CSV file template. The CSV file contains some sample customer details, which you need to update according to your requirements.
- Update the CSV or text file to include the customer details with a unique user token. For updating the CSV file, you can use Microsoft Excel or any other Spreadsheet tool.
- Click Choose file and select the CSV or text file and click Upload.
Setting up communications (via WhatsApp)This is an optional step. You can send the messages to the recipients directly and seamlessly from within the dashboard without the need to do it manually. The following communications are supported by PayU:
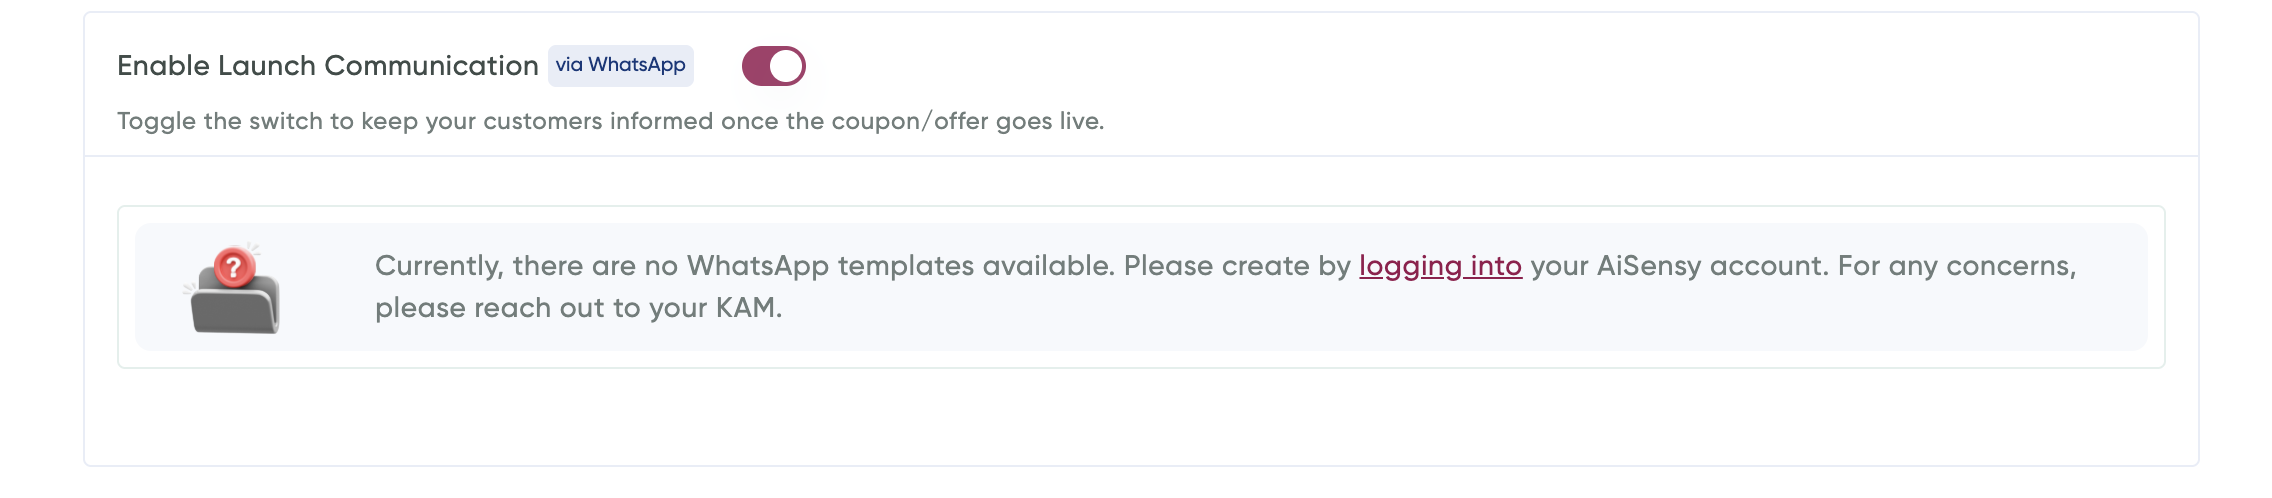
Note:For sending WhatsApp messages, you are required to have a Meta account, using AISensy as our service provider. AISensy is a BSP that helps manage and approve WhatsApp templates with META. If you have any difficulties in setting up the AISensy account, contact your PayU Key Account Manager (KAM or PayU Support.) You need to log on to AISensy account to set up your WhatsApp templates. Click logging into and connect to the AISensy account.
 Pre-launch communication for building Intrigue
They help send notifications to the end users for any upcoming offers
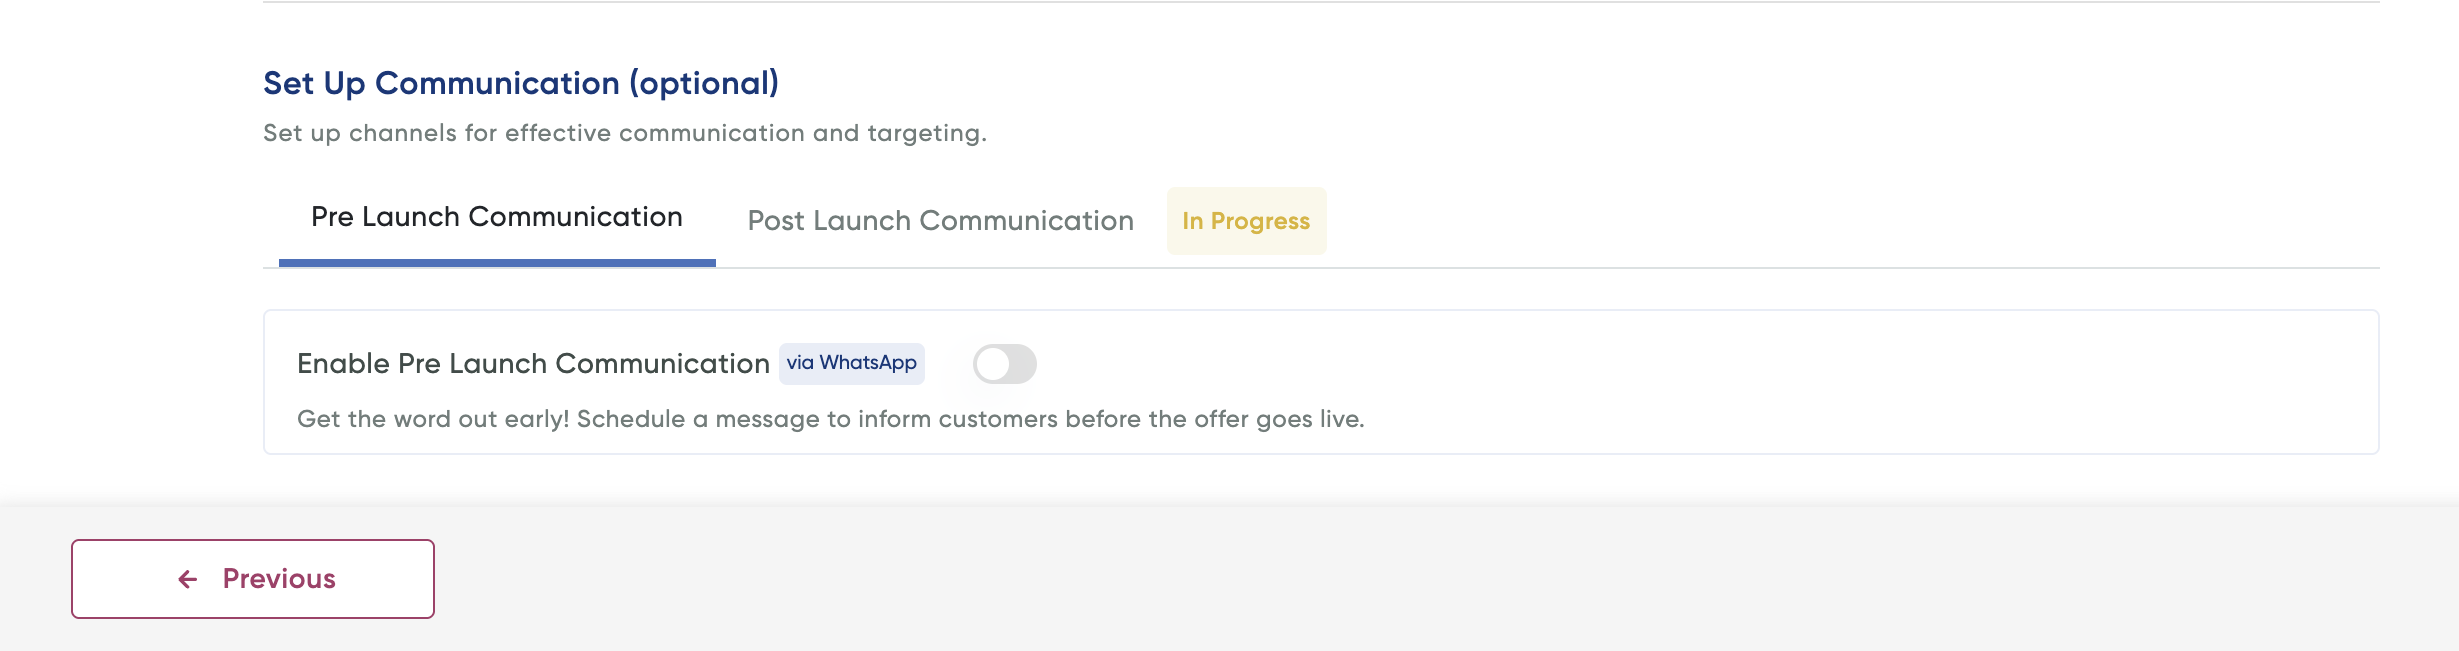 Post-launch communication
This section is used to launch after coupon delivery. You need select template and then allow user to set up the delivery dates.
- Click the Enable Launch Communication toggle button.
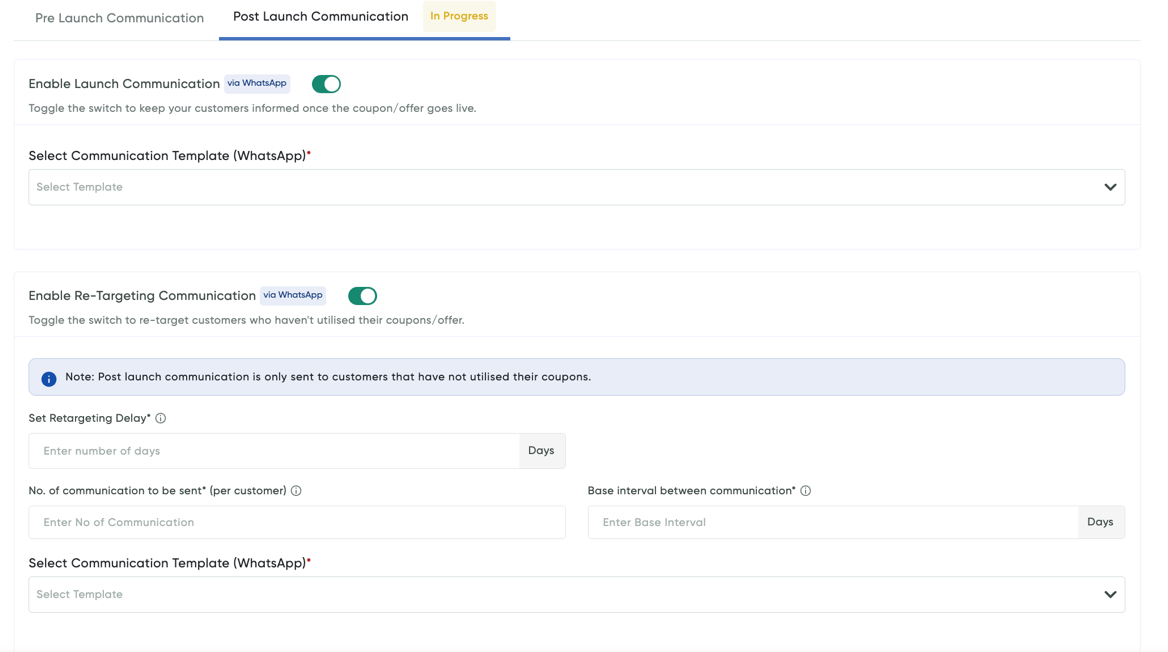
- Select the coupon from the Select Communication Template (WhatsApp) drop-down list.
- Click the Enable Re-Targeting Communication toggle button enter the following details to enable the re-targeting communication:
Field Description Set Retargeting Delay Specify the number of days after the coupon is generated or the offer goes live to send retargeting communication. No. of communication to be sent (per customer) Enter the total number of messages to be sent per customer for re-targeting. Once this limit is reached, no further messages will be sent. Base interval between communication Set the number of days between messages. For example, if 2 messages are sent with a 4-day interval, the second message will go out 4 days after the first, only if the coupon remains unused. Message template and Value of variables Choose the template that you want to trigger a message for. - After you complete the above details and click Next.
Step 5: Configure Offer Subvention Details- Enter the subvention details in the Subvention Details page. For more information, refer to refer to Create an Instant Discount or Cashback Offer.
- After you complete the above details and click Next.
The Preview Details page is displayed.
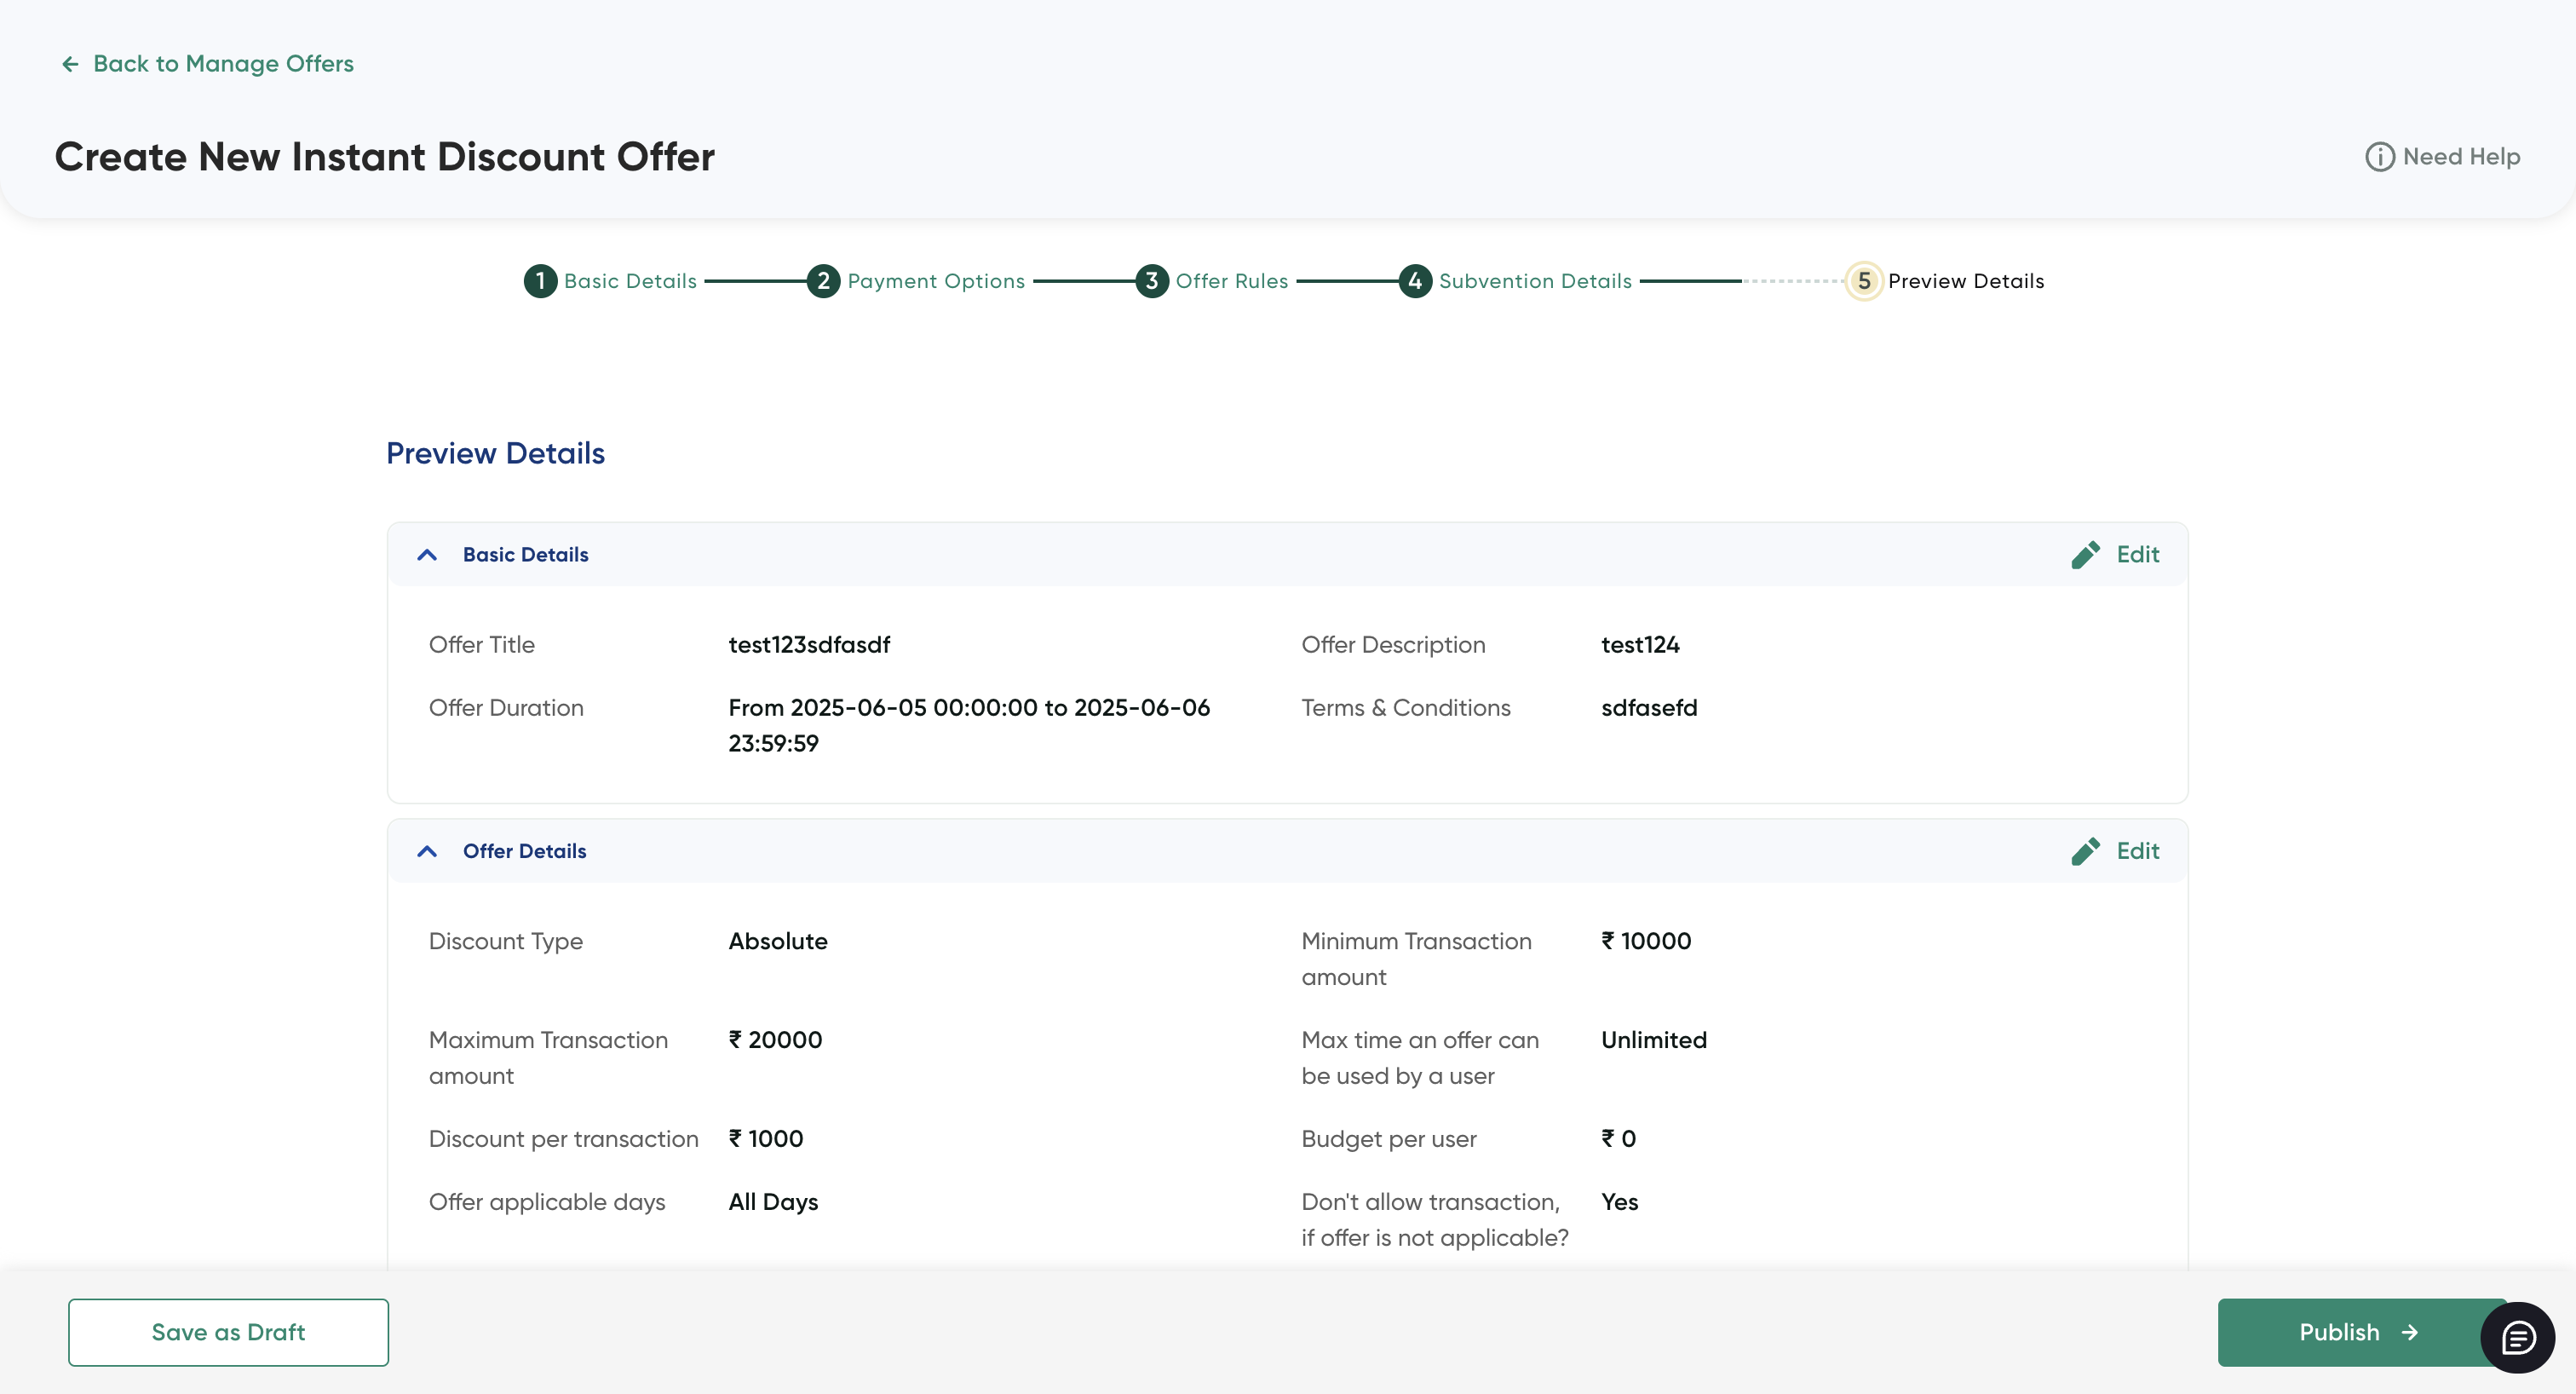 Step 6: Review of the Offer
The Preview Details page summarizes the details you provided in Step 2 to Step 4.
-
Review all the configurations added before you make the offer available to your customers.
-
Click the Edit button to return back to the corresponding page and update the configuration.
-
Click Publish to make it available to customers.
Updated about 1 month ago