
Add a Payment Button
Create a payment button in the PayU Dashboard, configure it, and embed the generated snippet on your website or blog.
Add a payment button to your website or blog from the PayU Dashboard in just a few minutes without any code.
What All I Need?
Set up your account if you have not already done so.
Any website where you can add content to your pages — WordPress, Wix, Squarespace, or any site with a page editor.
How Do I Add a Payment Button?
To add a payment button:
1. Open Payment Buttons on the Dashboard
- Log in to the PayU Dashboard.
- Expand Payment Tools and click Payment Links displayed in the left navigation.
All your existing buttons are listed here.
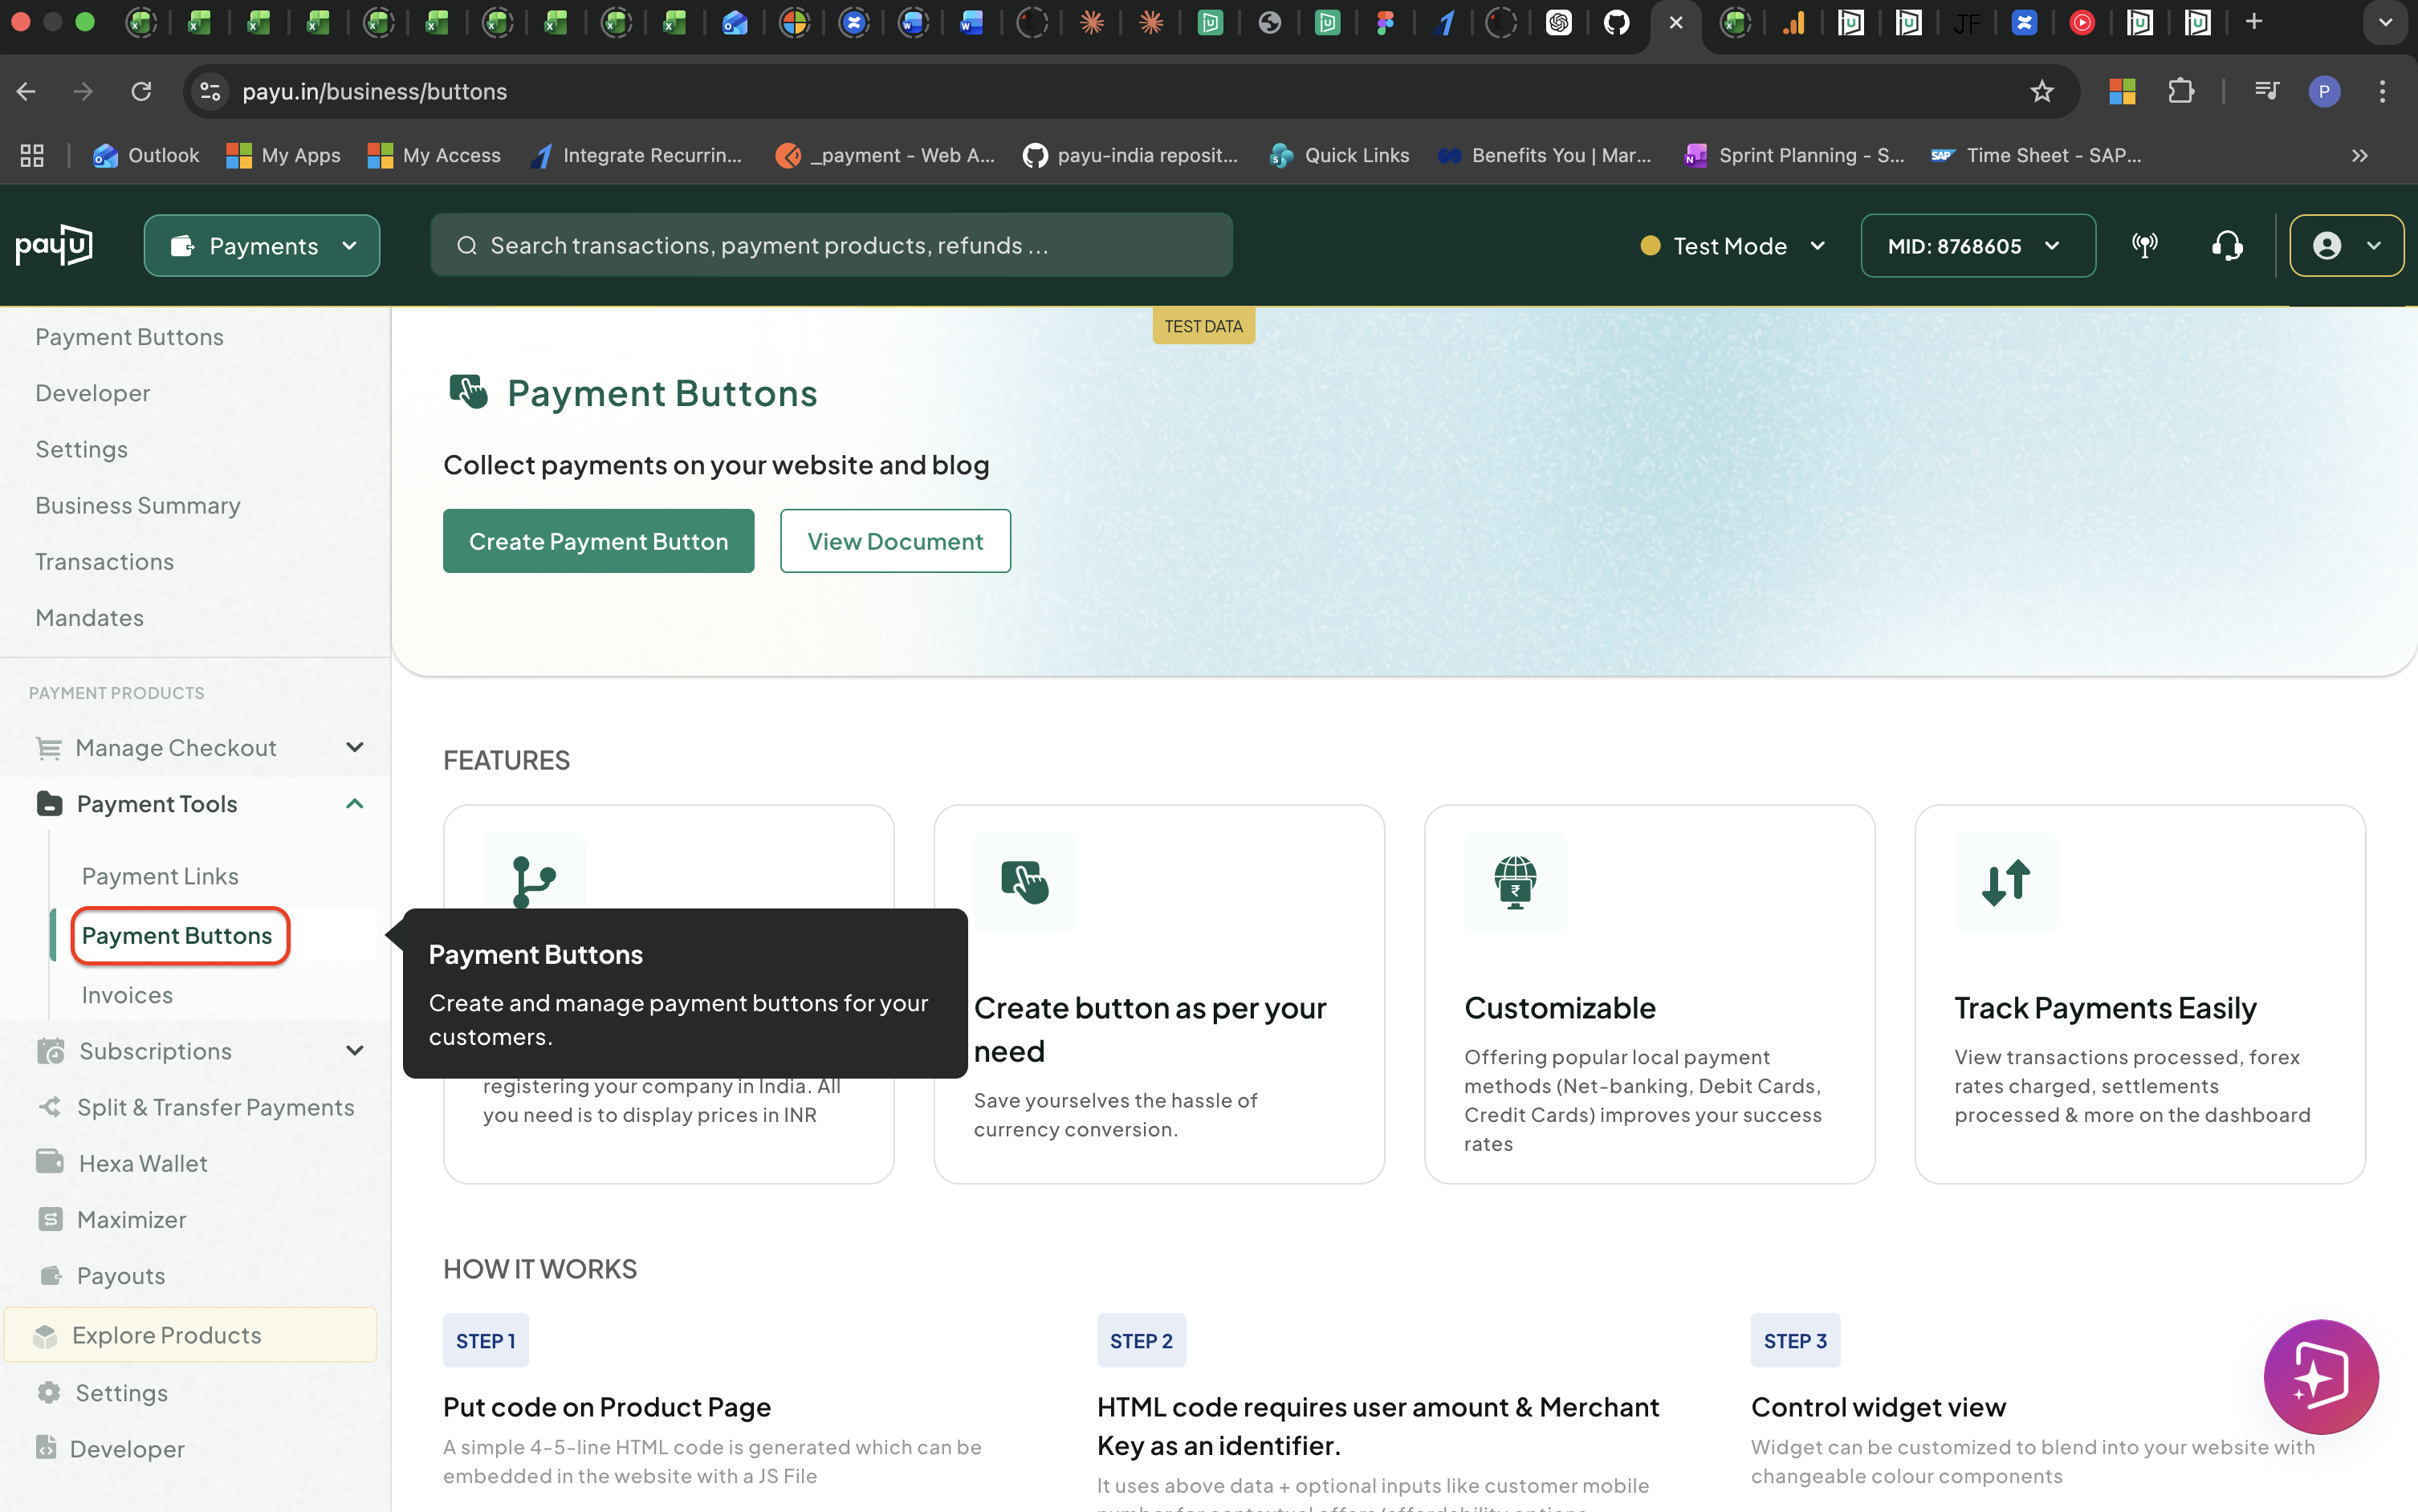
Access Payment Buttons
2. Create a New Payment Button
-
Click Create New Button displayed at the top-right corner of the page.
The Create New Payment Button page is displayed.
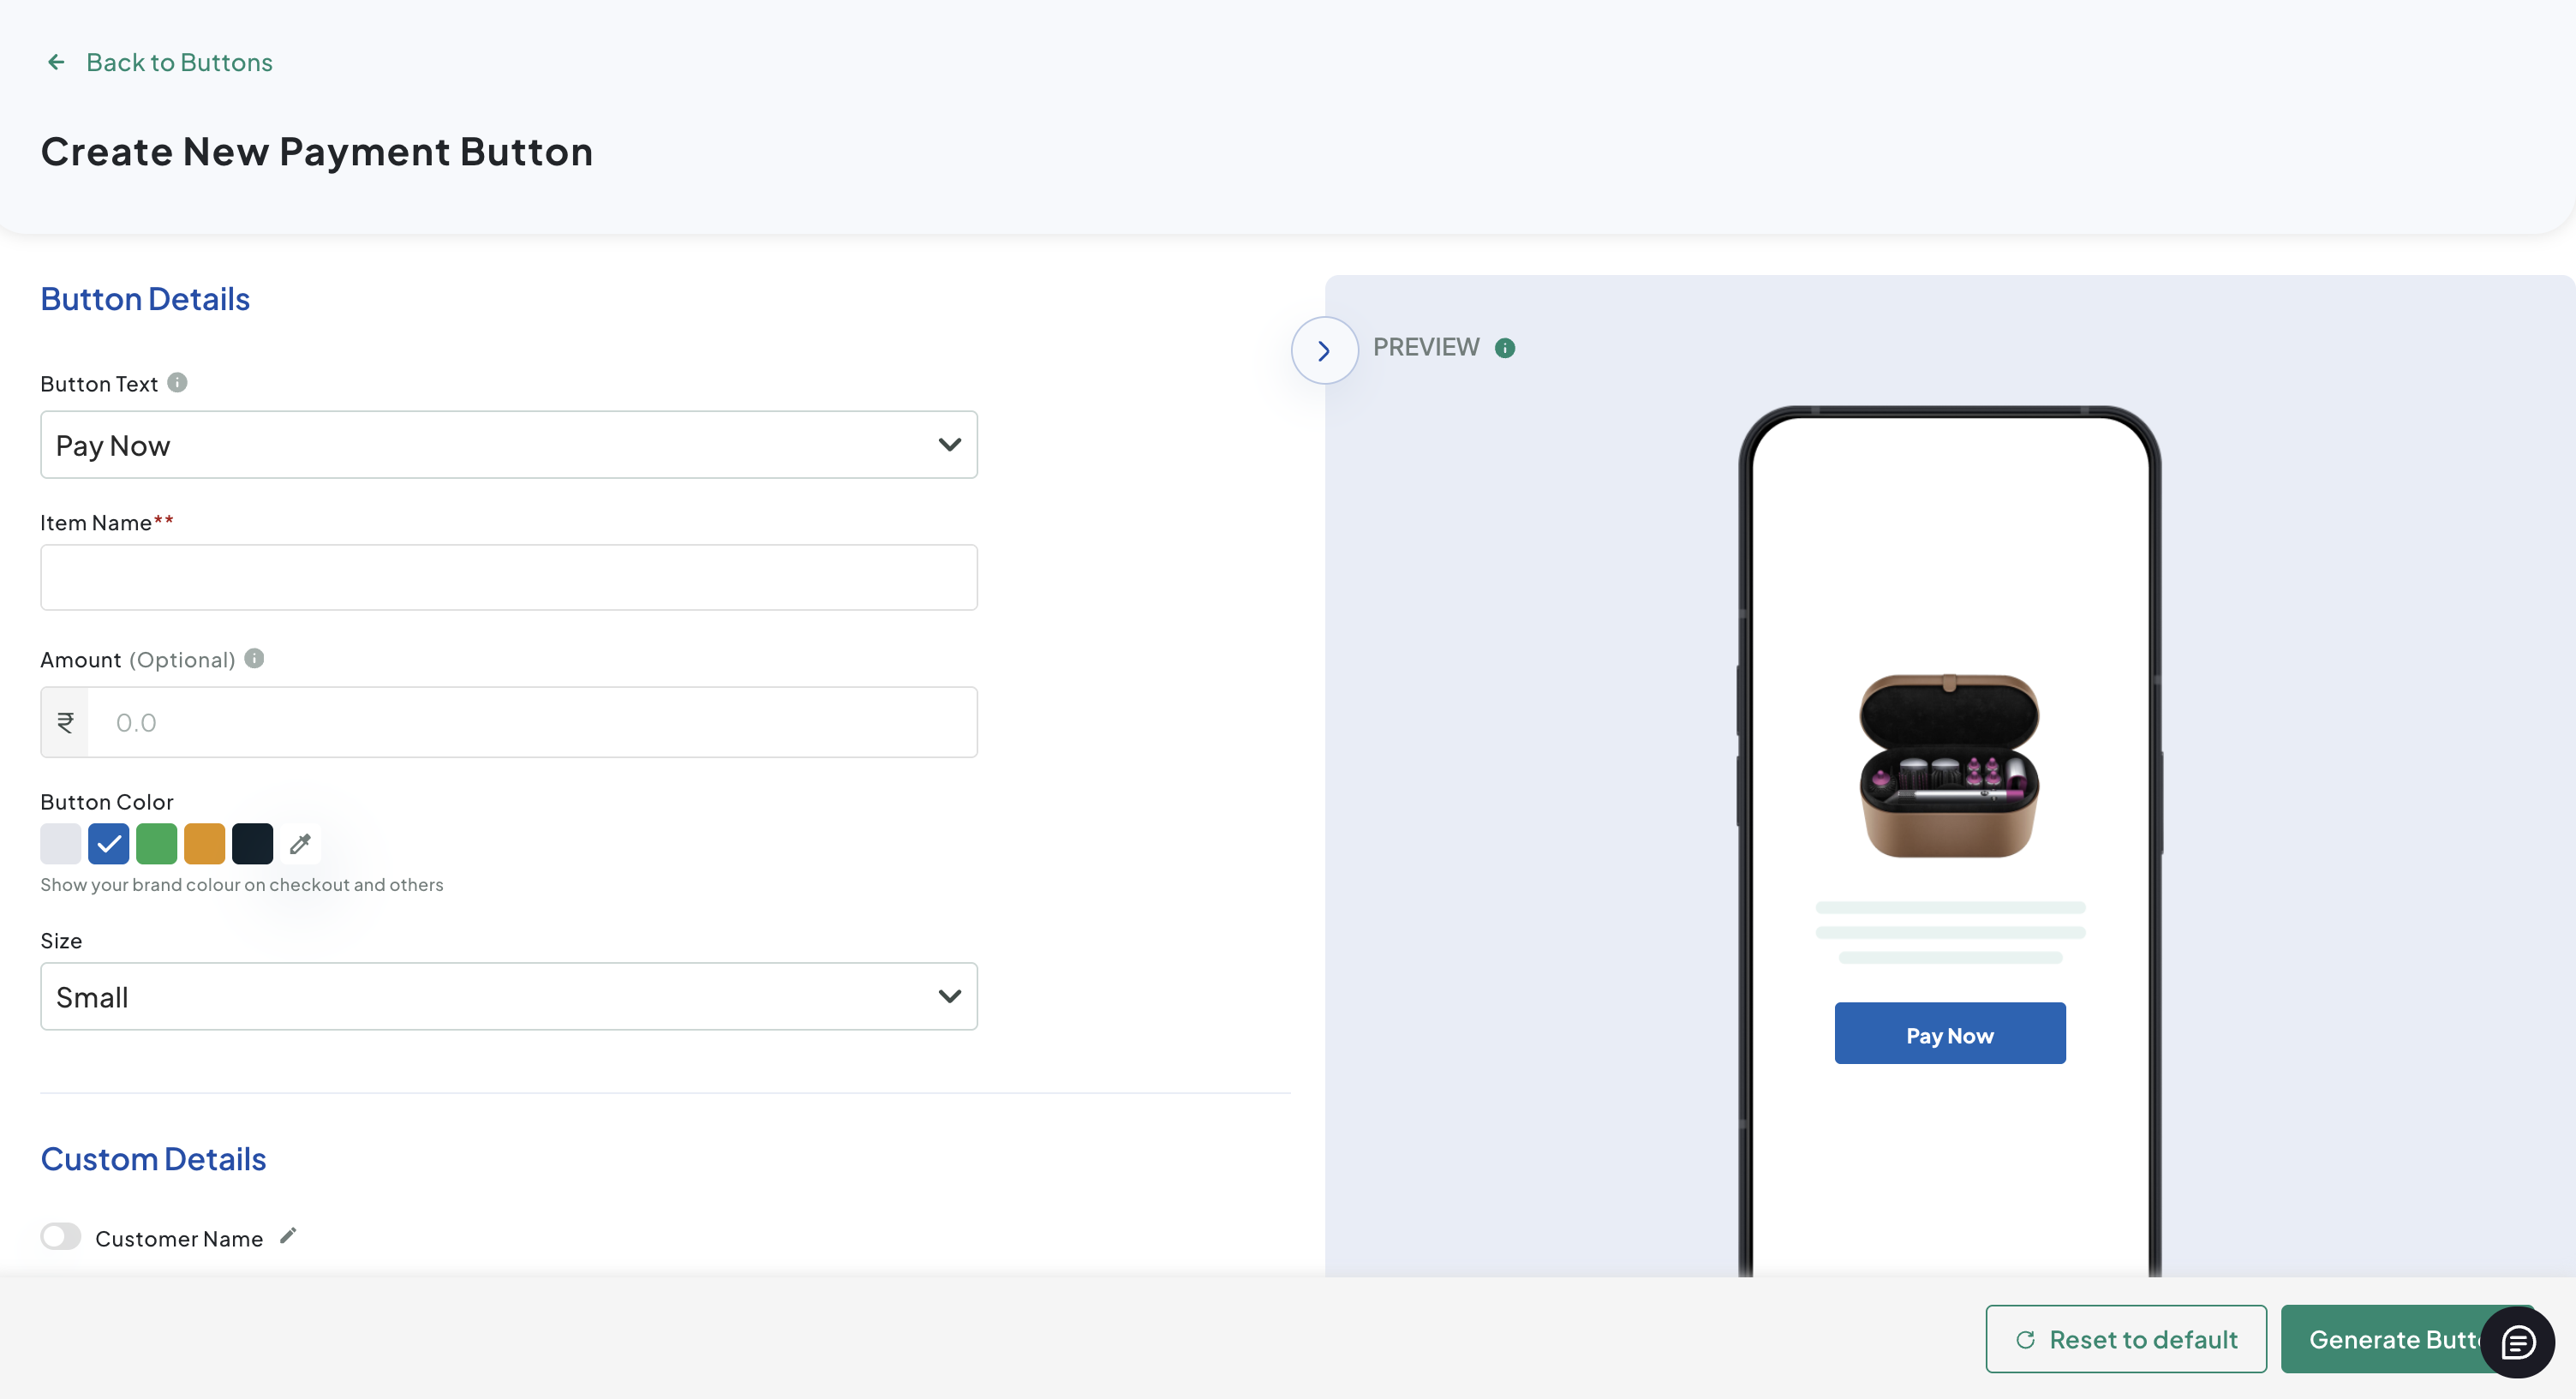
Create New Payment Button Page
-
Provide these Button Details to set up how your button looks and works:
Field Description Button Text The text displayed on the button . Choose any of these text from the drop-down: - Buy Now
- Pay Now
- Book Now
- Donate Now
Item Name
RequiredEnter a short description of the product or service. This is shown to the customer on the payment page Amount Enter the amount you want to collect. You can leave blank to let your customer type in the amount Colour Choose a colour from the palette or enter a custom colour Size The size of the button. Choose any of these from the drop-down: - Small
- Medium
- Large
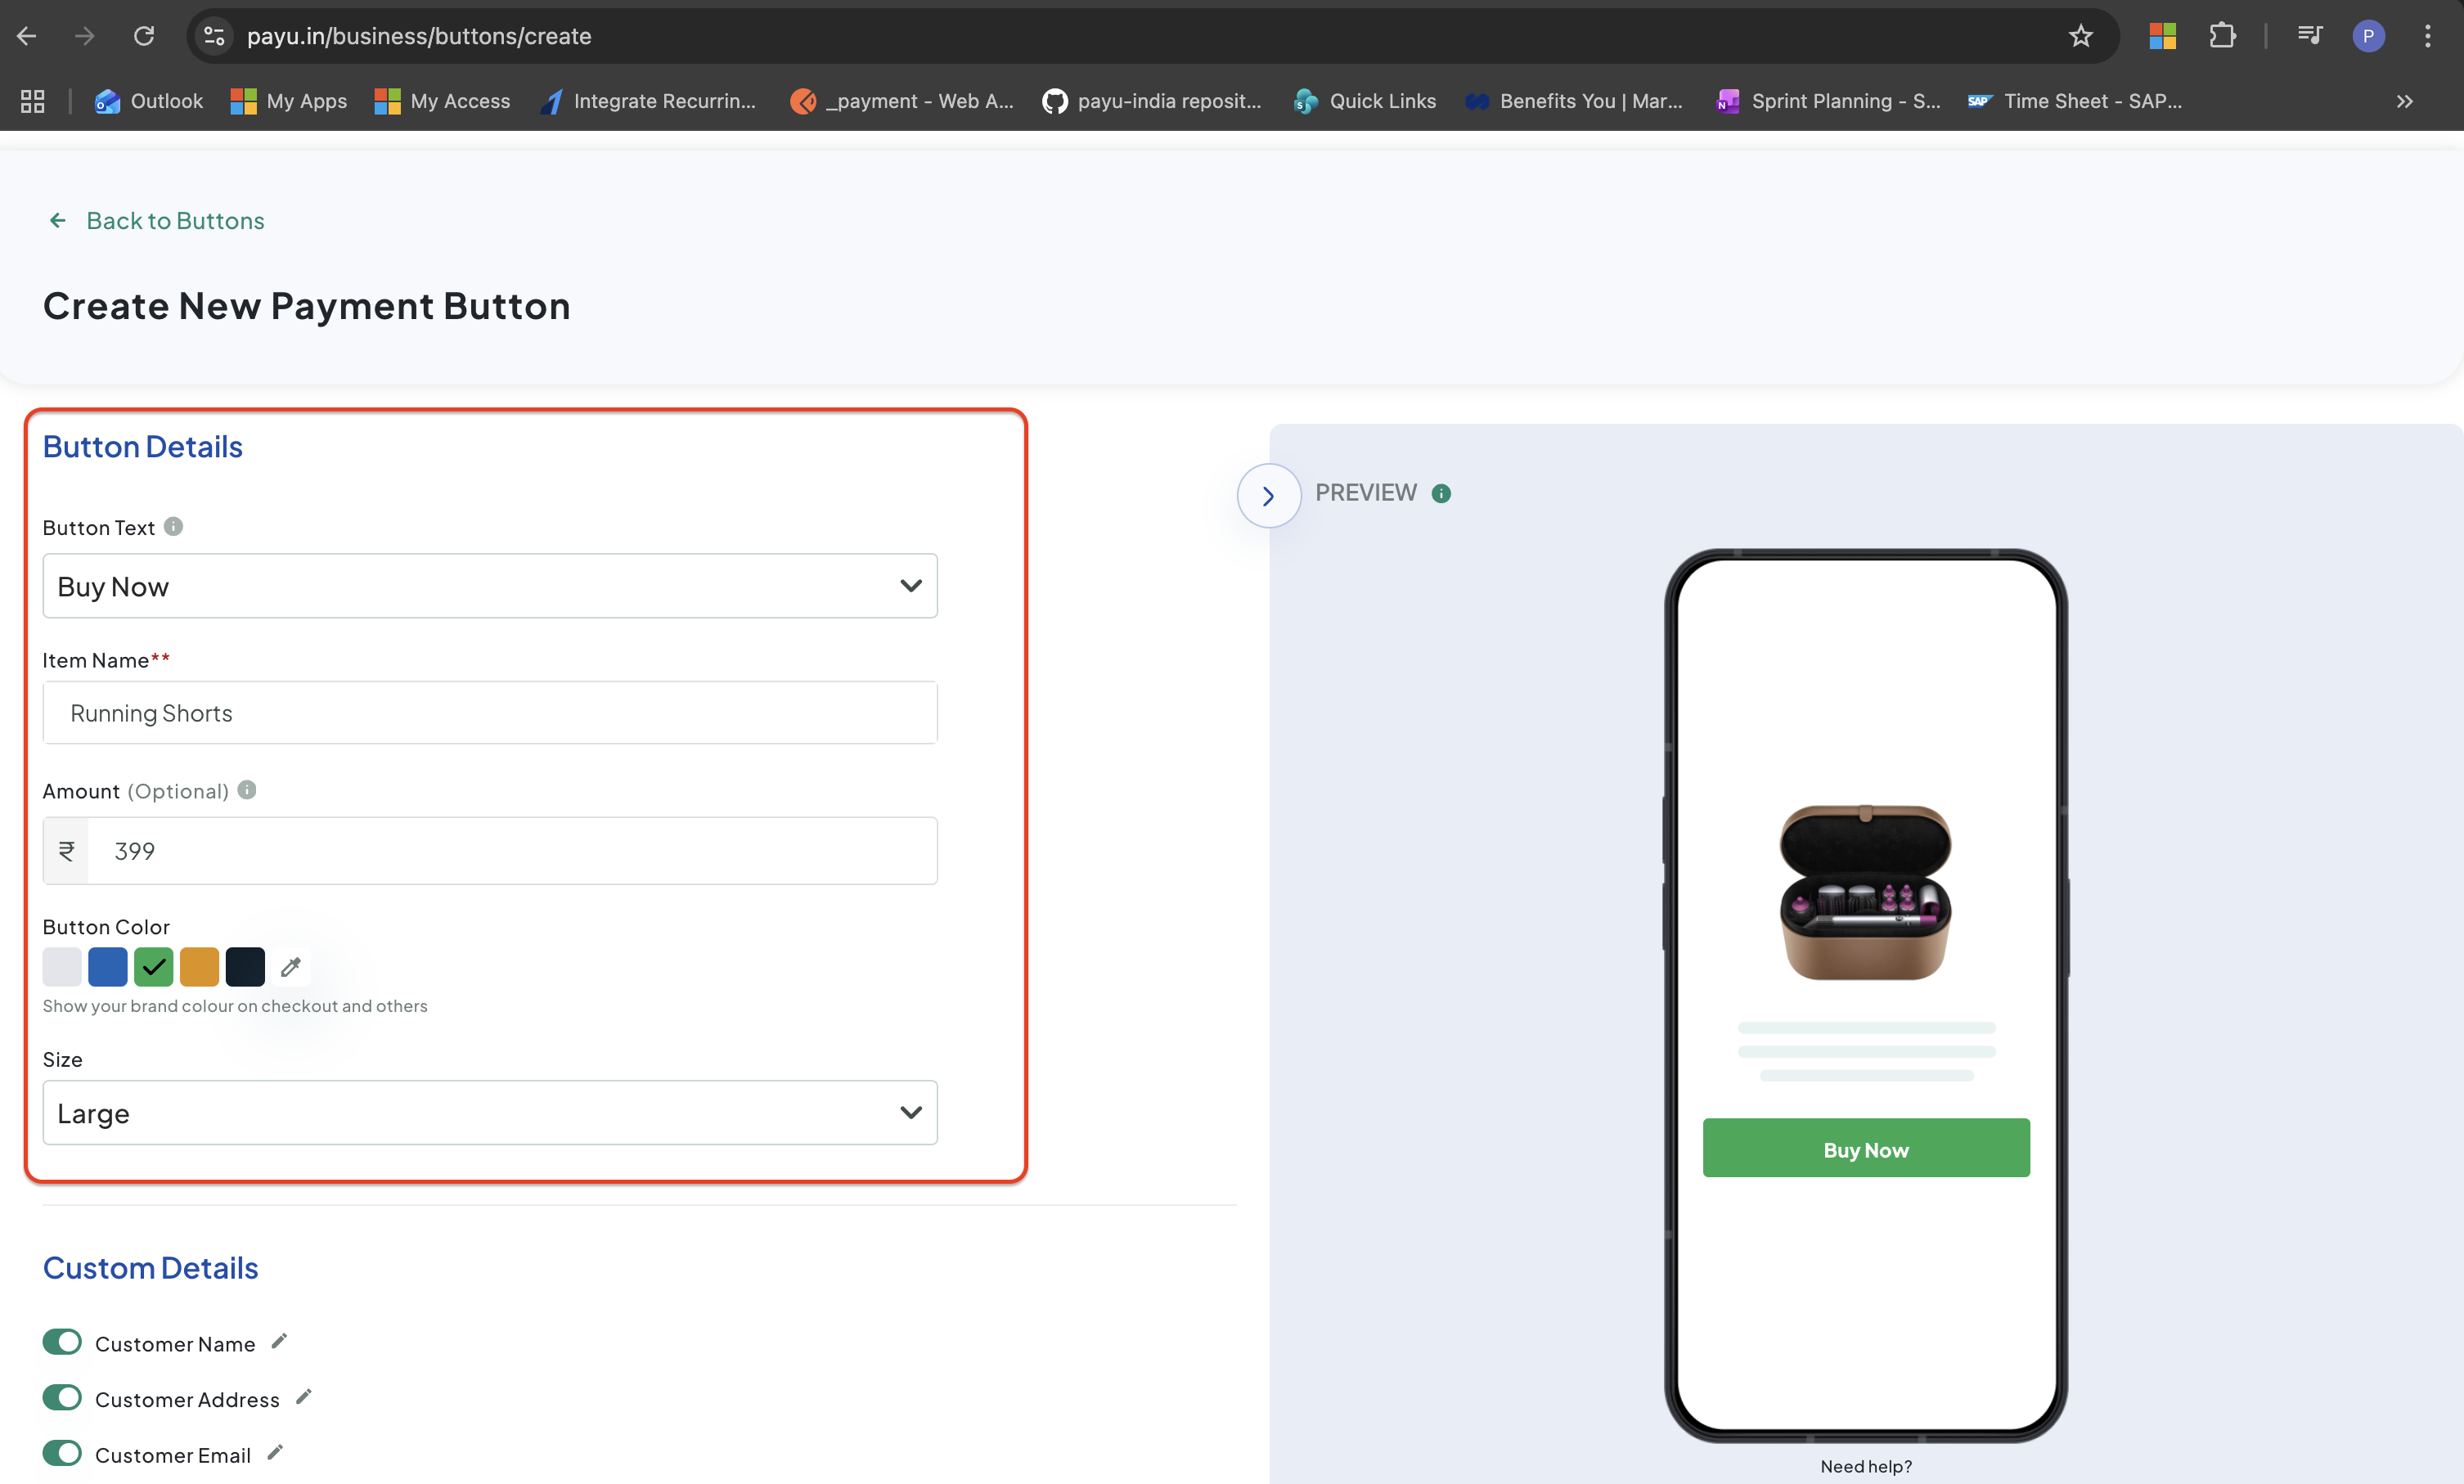
Add Button Details
3. Add Checkout Fields (Optional)
Add custom fields to collect information from your customer before they pay.
-
Scroll to the Custom Details section and switch on any of the ready-made fields you want to collect:
- Customer Name
- Customer Address
- Customer Email
- Customer Mobile
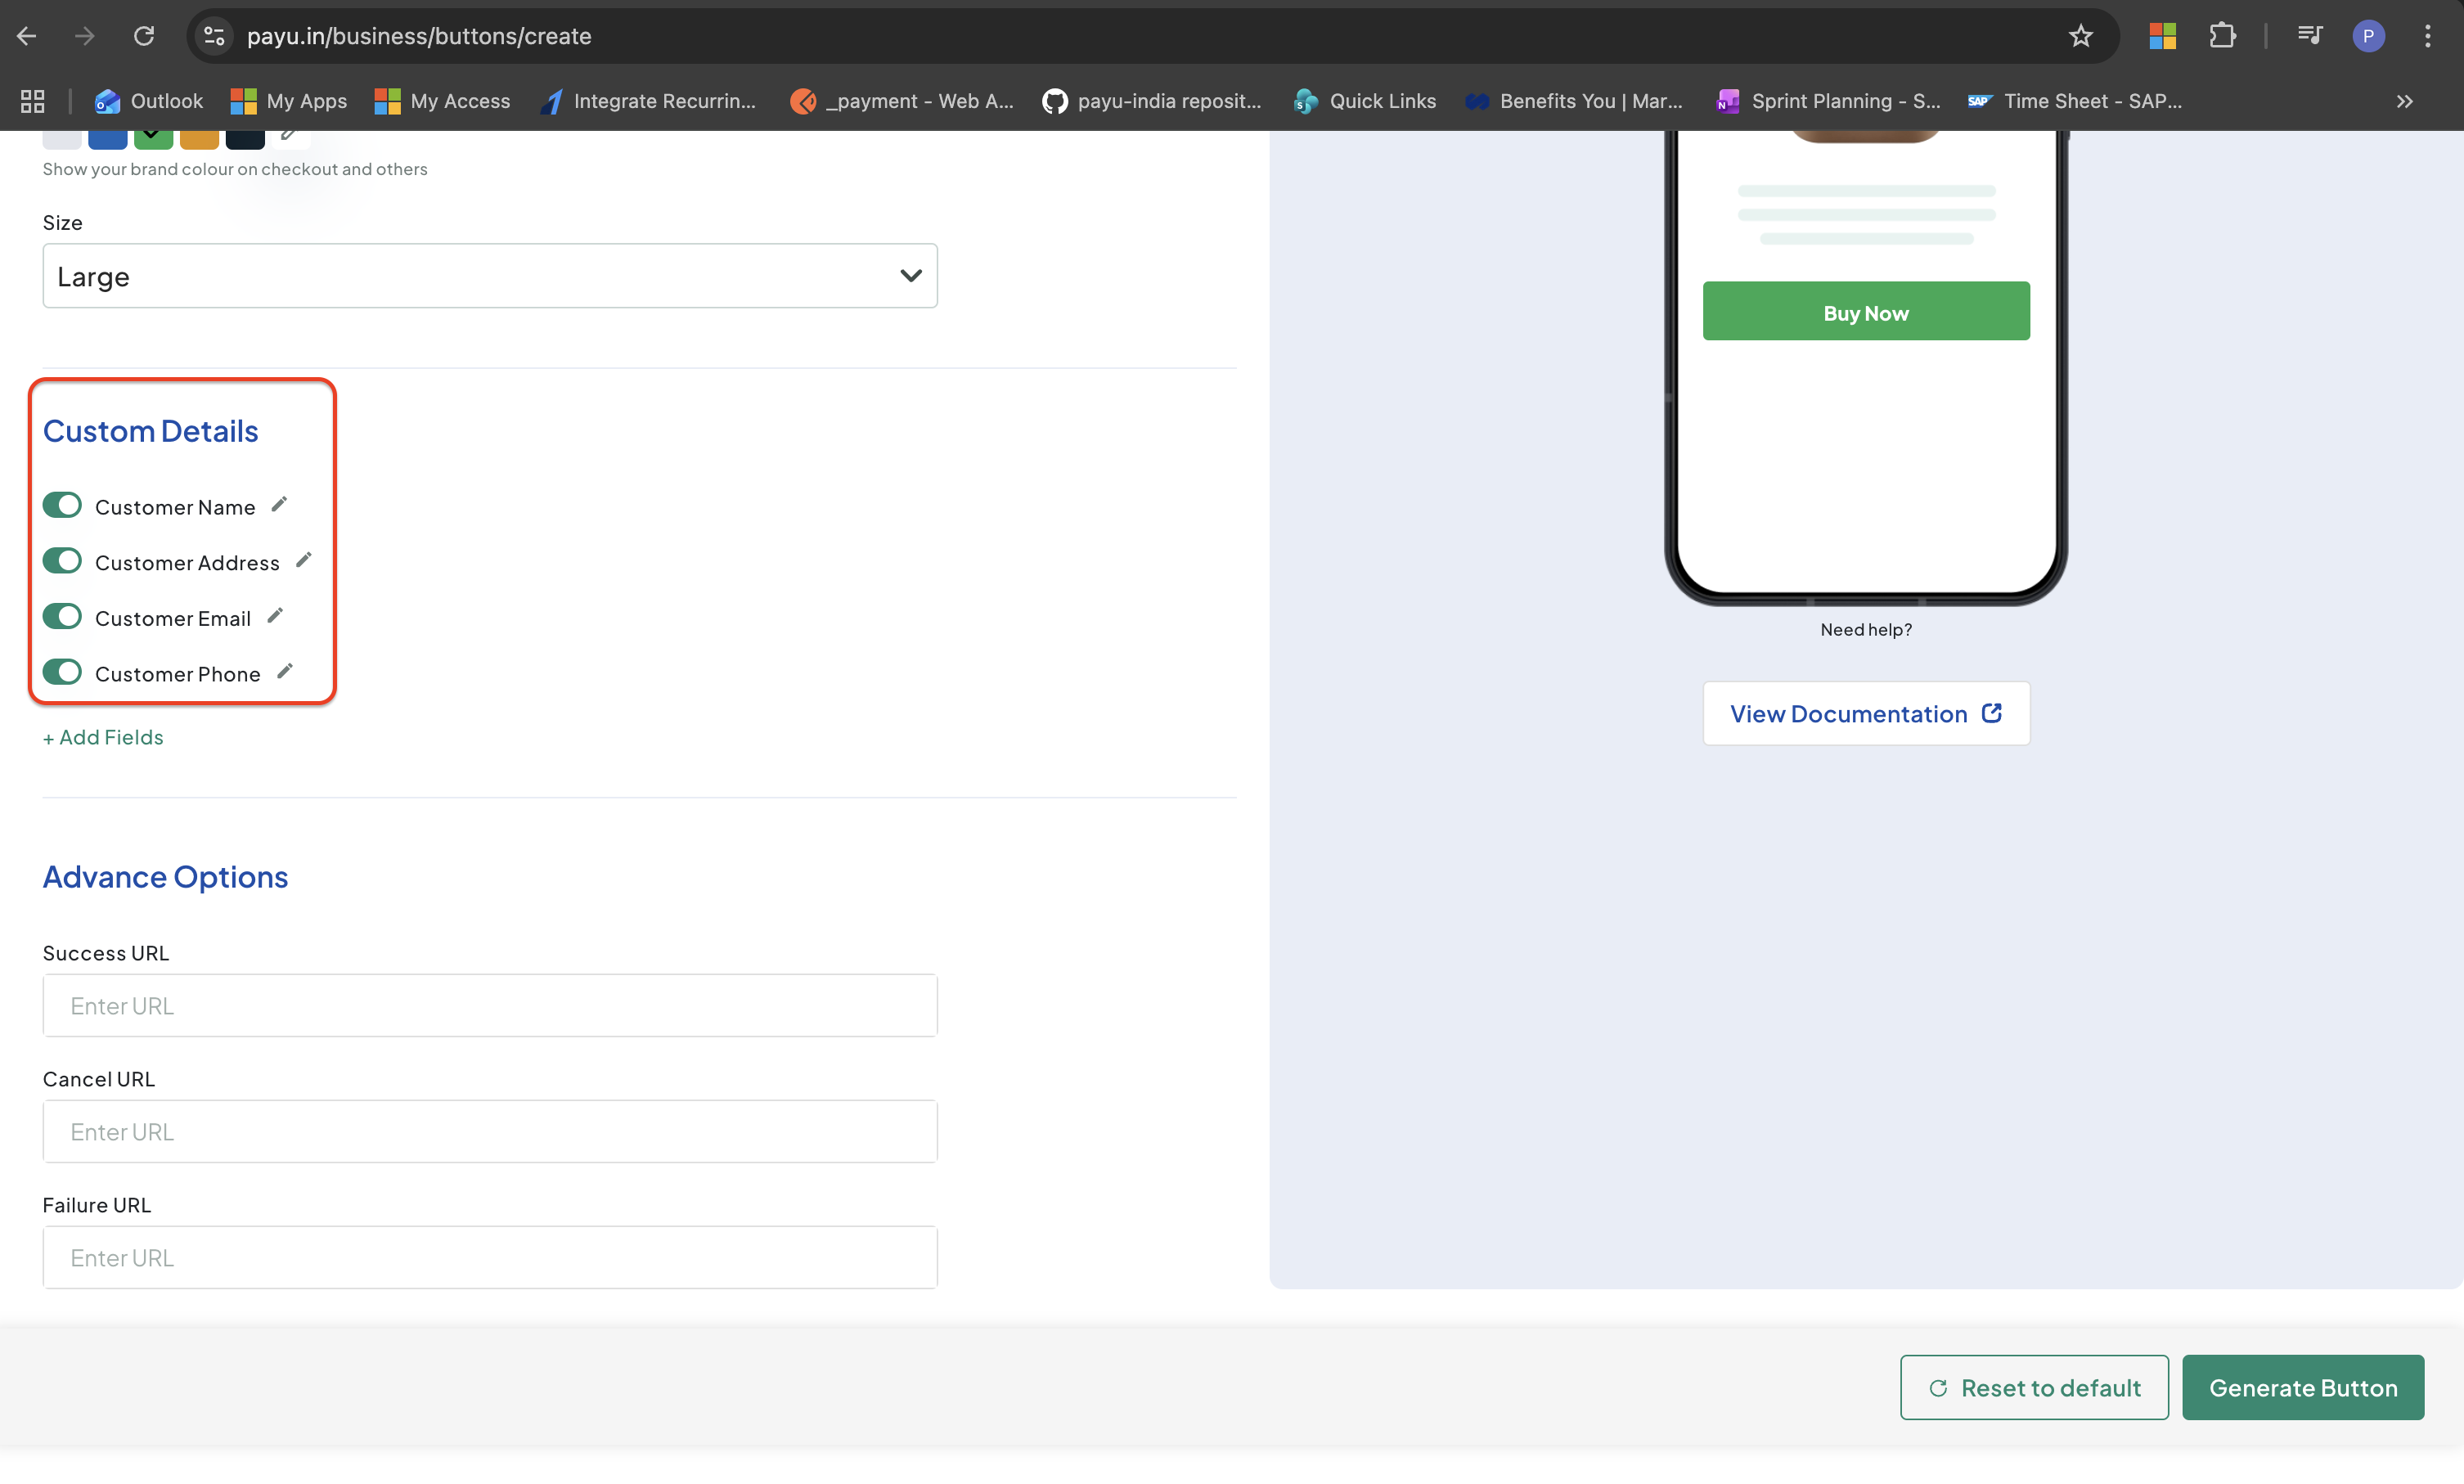
Add Custom Detials
-
To add a field of your own, click Add Fields and fill in:
| Field | What to Enter |
|---|---|
| Field Type | Text, Calendar, or Drop-down |
| Field Name | The question or label your customer will see |
| Mark as mandatory | Switch on if the customer must fill this in before paying |
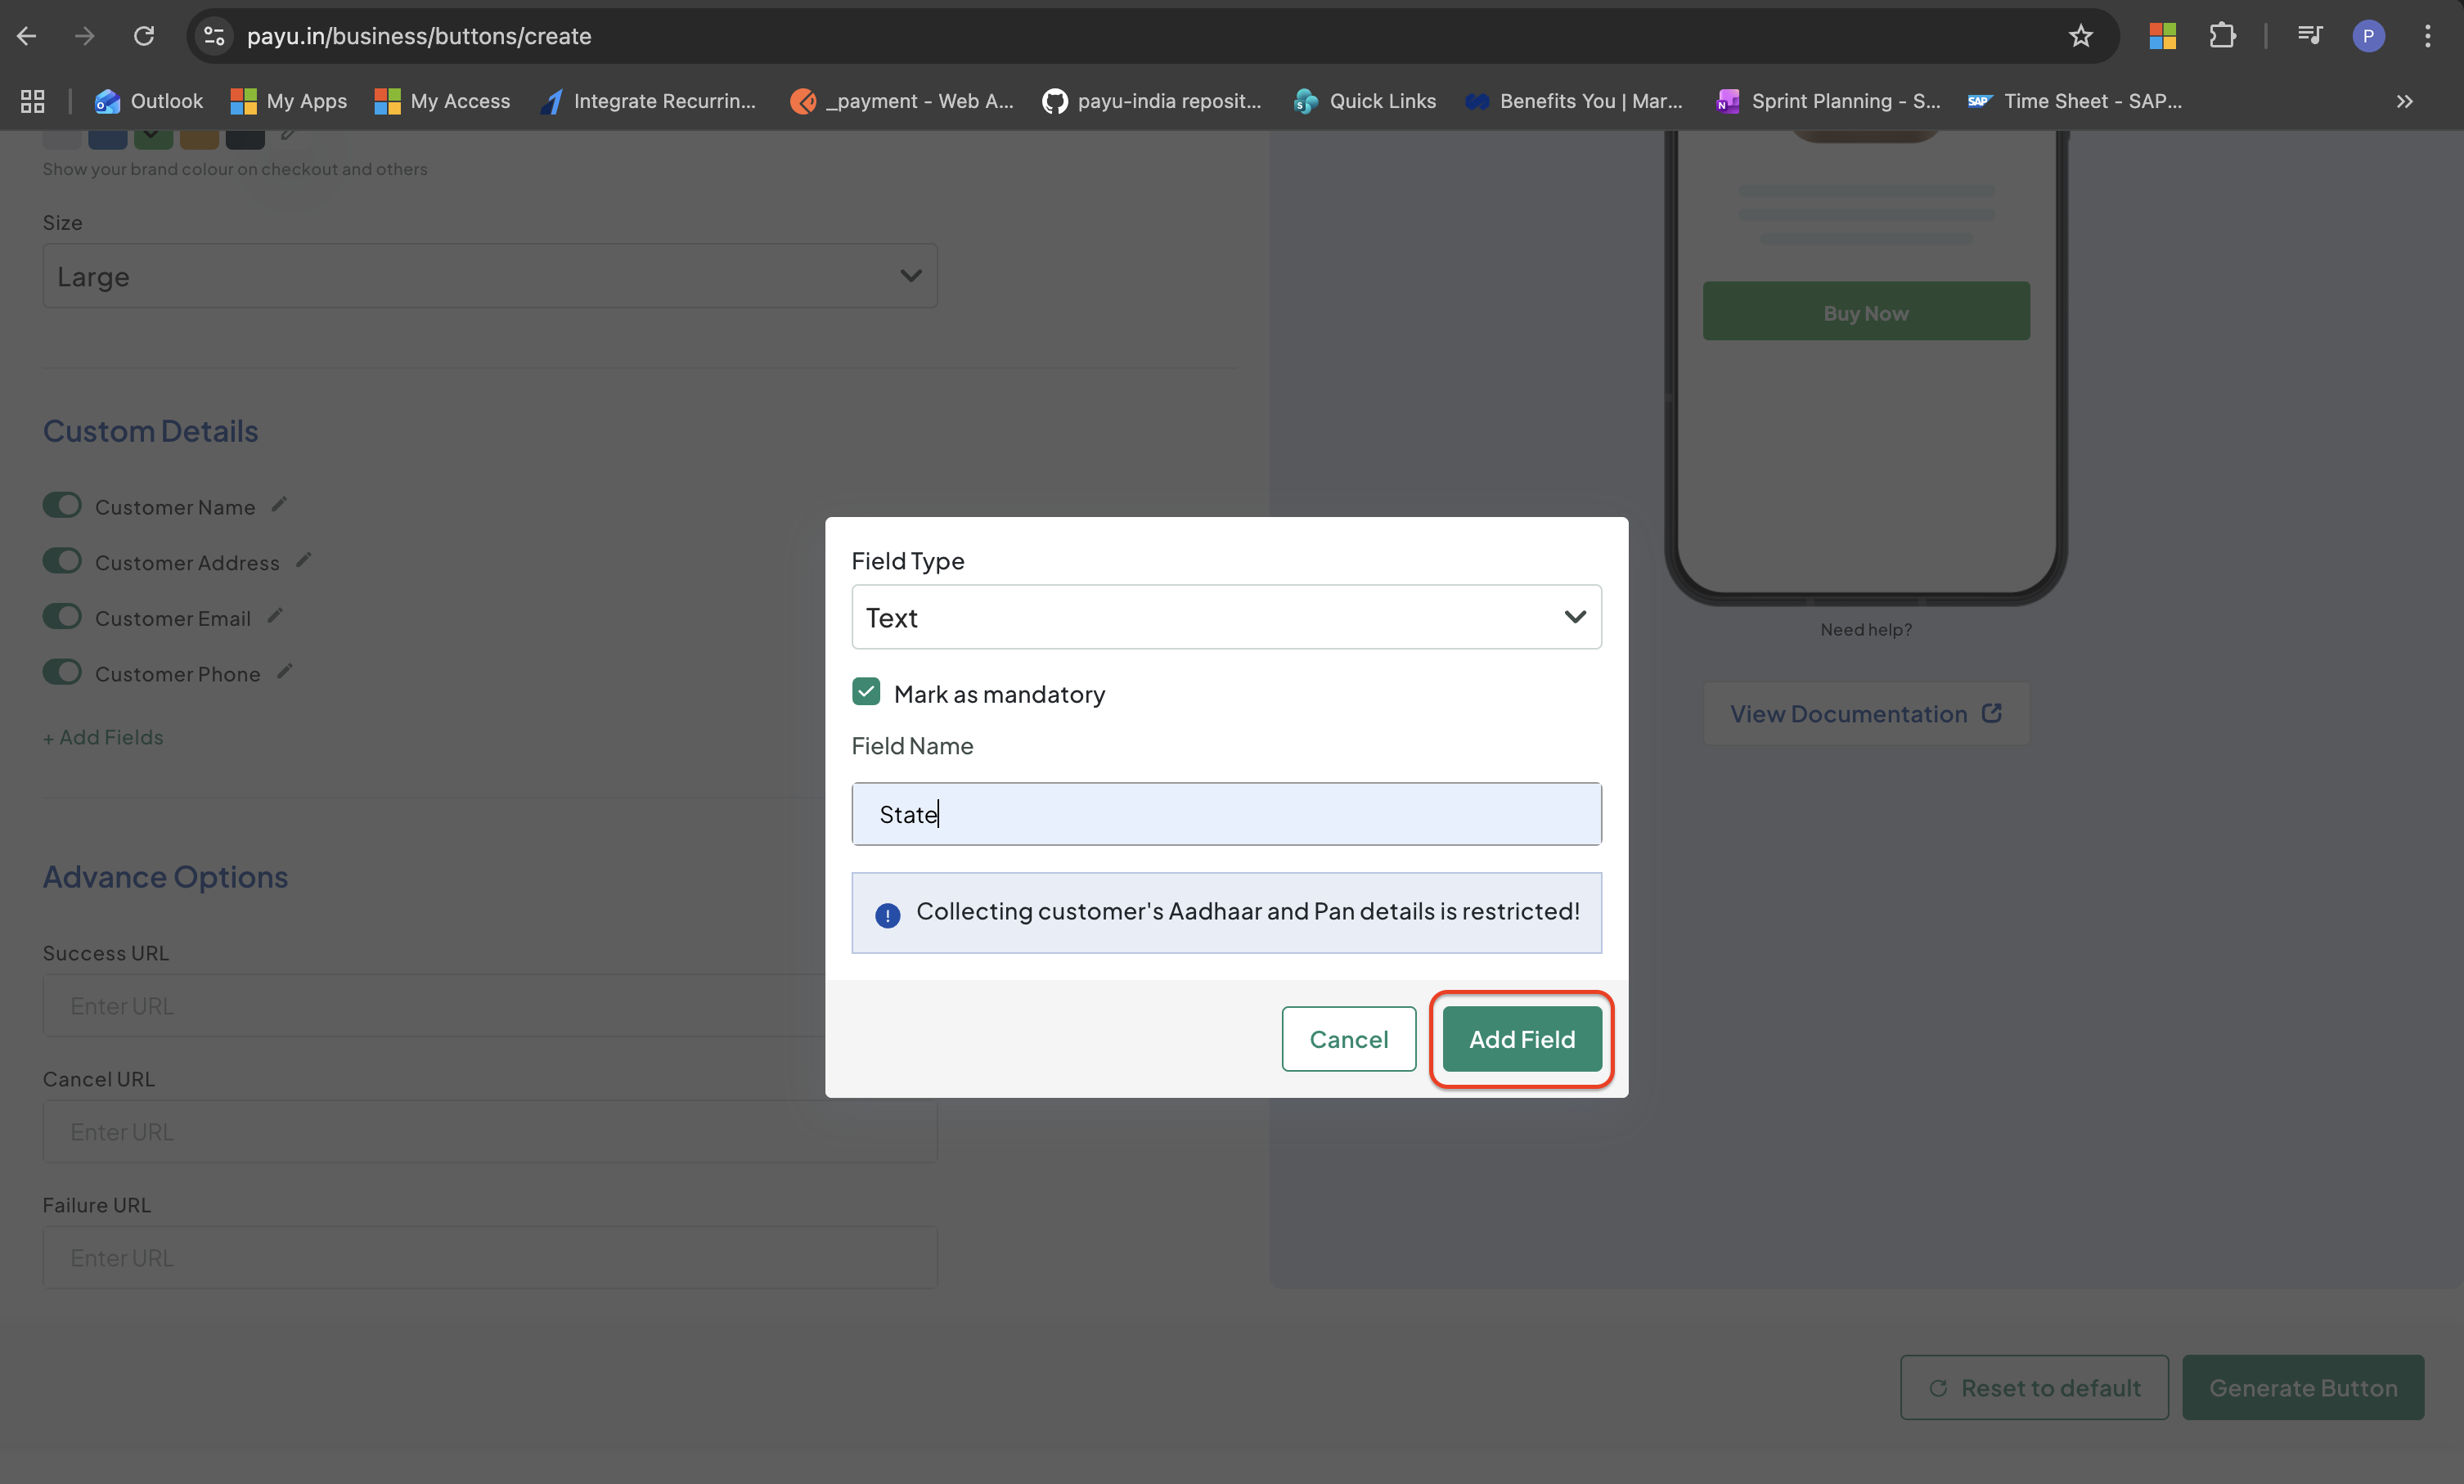
Add Your Own Field
- Click Add Field to save each field.
5. Add Redirect Pages (Optional)
Under Advanced Options, you can tell PayU where to send your customer after they pay:
| Page | When it is used |
|---|---|
| Success URL | Your customer is taken here after a successful payment |
| Cancel URL | Your customer is taken here if they close the payment page without paying |
| Failure URL | Your customer is taken here if the payment is unsuccessful |
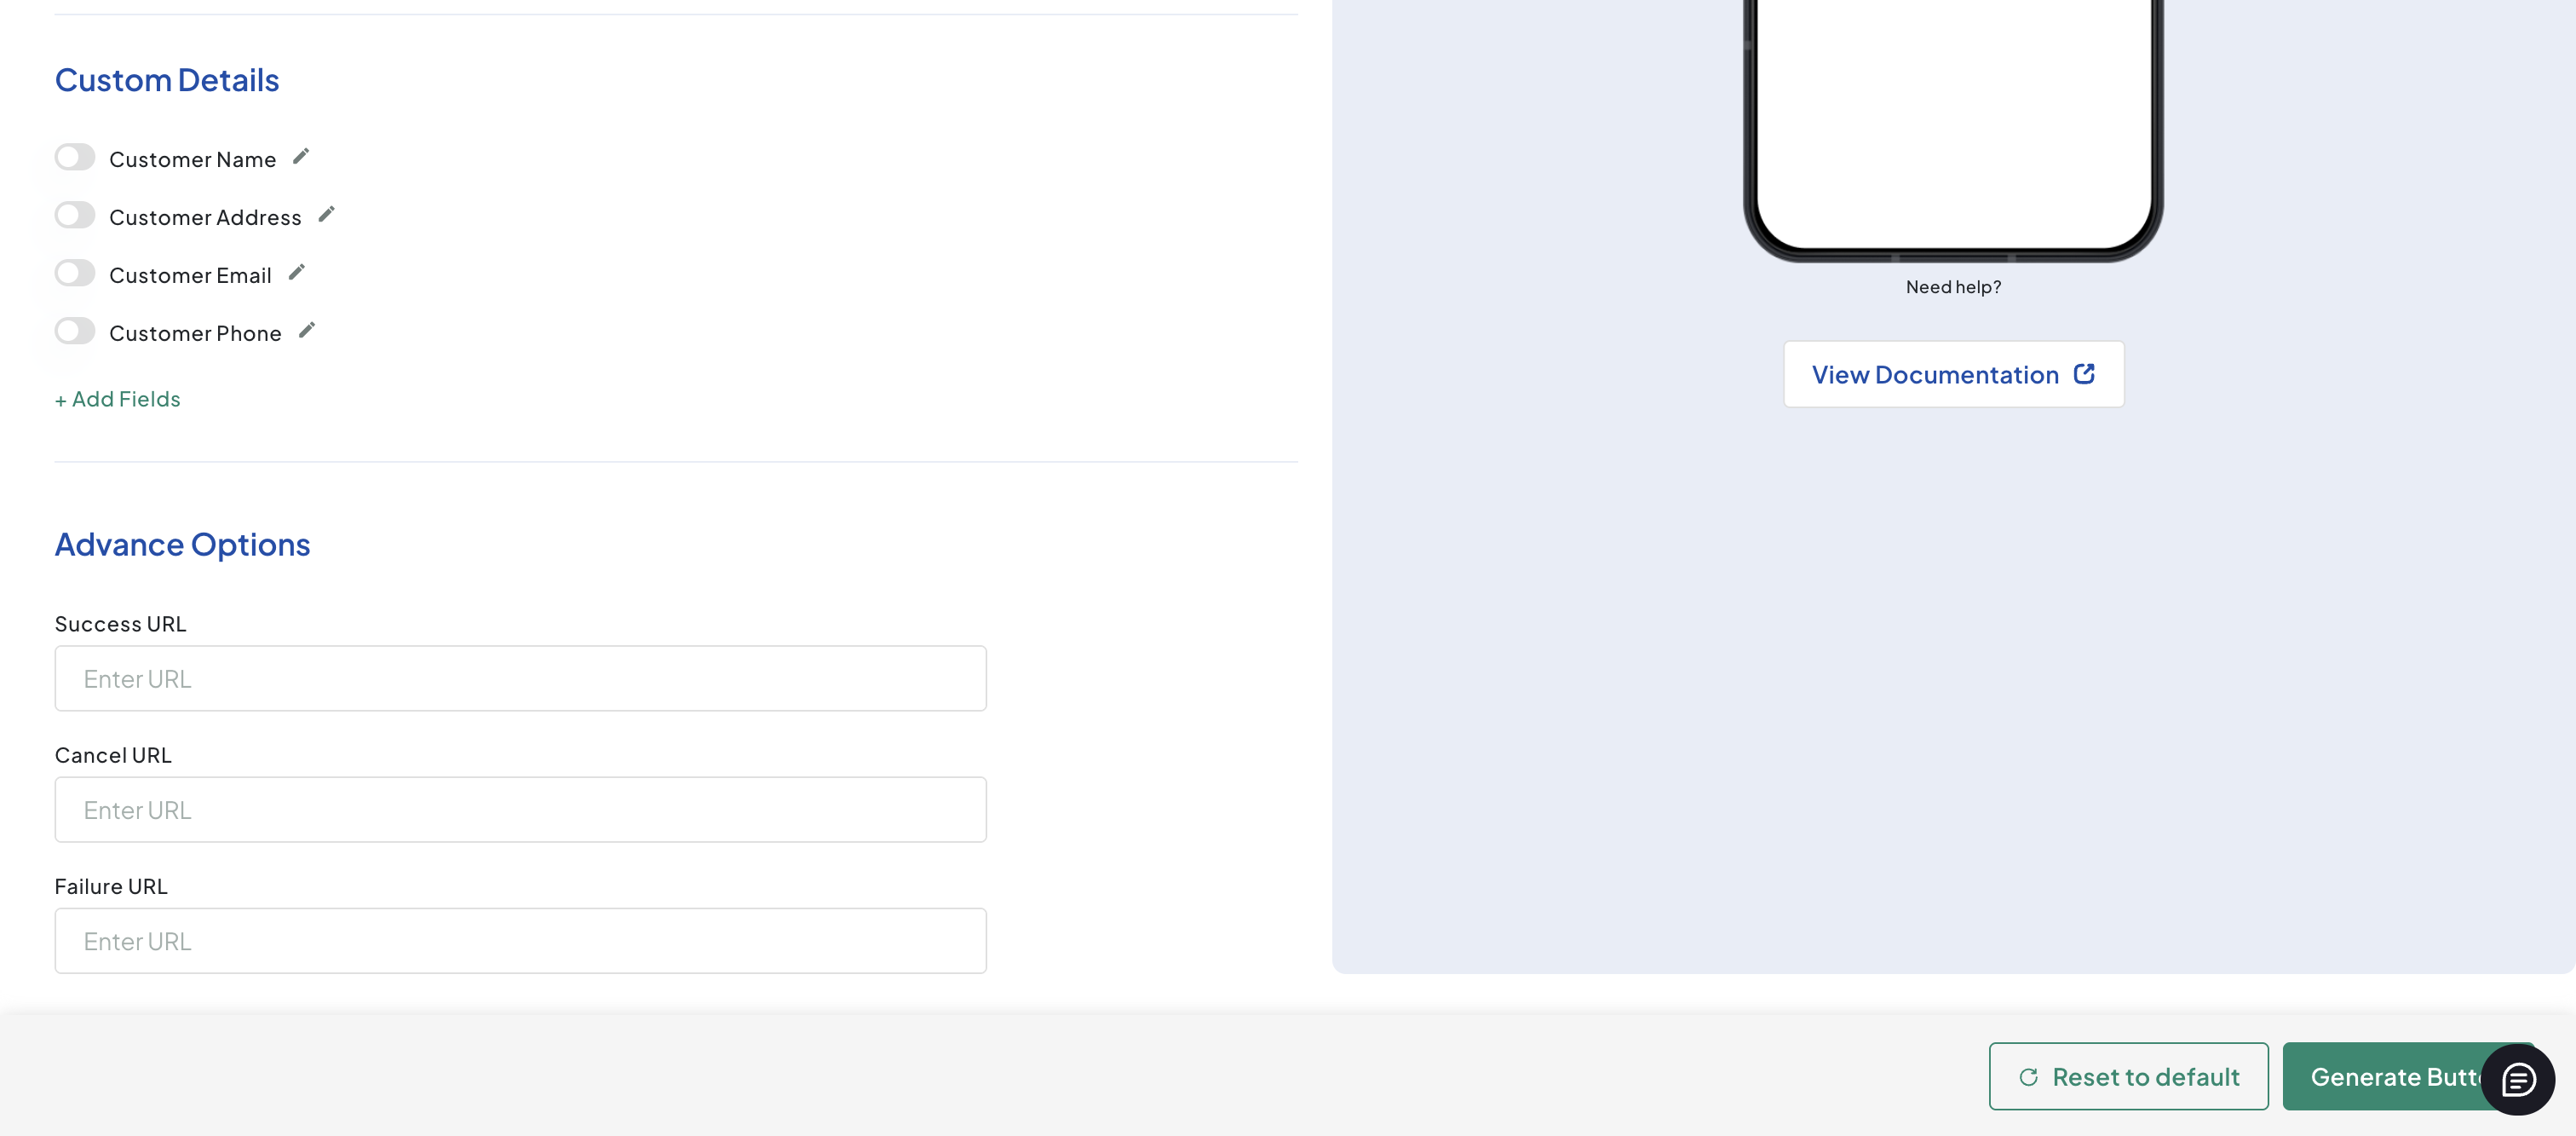
Add Redirect URLs
Note:These pages are optional but we recommend setting them. Without a success page, customers end up on a default PayU page after paying and do not automatically come back to your website.
6. Generate the Button and Add It To Your Website
- Click Generate Button.
PayU creates your button and gives you a short piece of code to copy.
-
Click Copy Code to copy the button code.
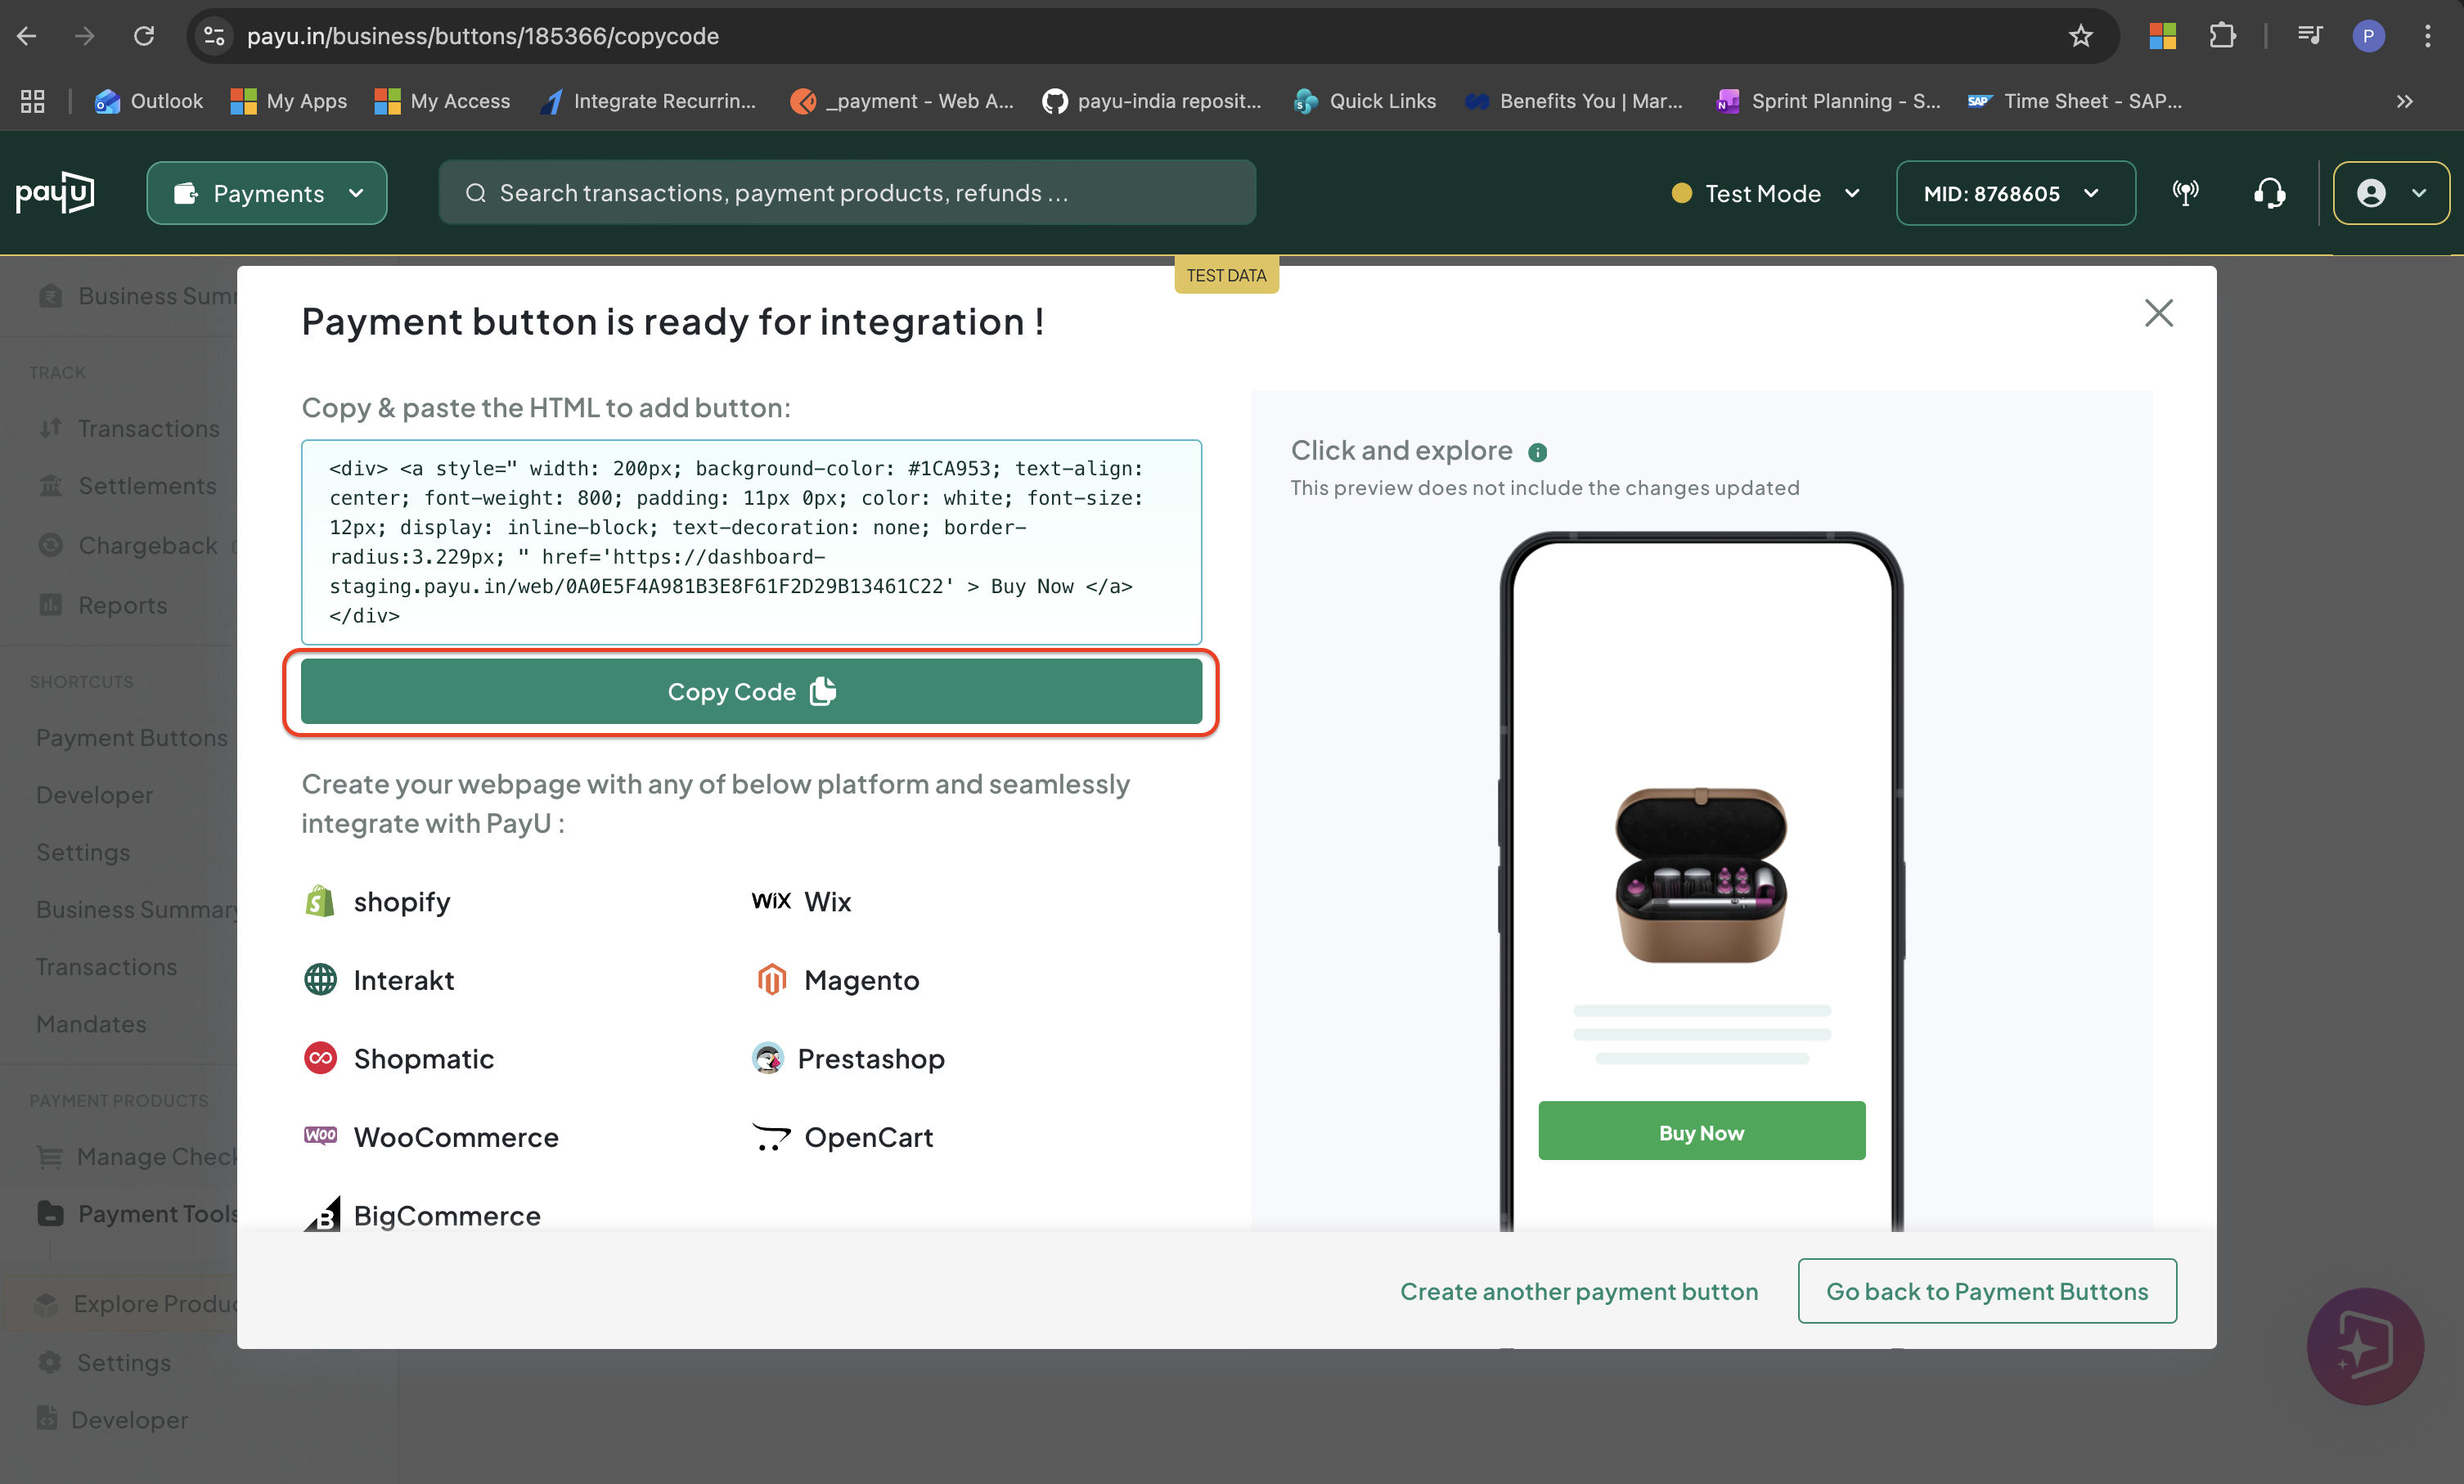
Add the Code to Your Website
-
Go to your website and paste the code where you want the button to appear:
| Website Builder | How To Add the Code |
|---|---|
| WordPress | Add a Custom HTML block to your page and paste the code inside it |
| Wix | Add an HTML iframe element to your page and paste the code |
| Squarespace | Add a Code Block to your page and paste the code |
| Other builders | Look for an "HTML", "Code", or "Embed" block in your page editor |
The button appears on your page right away.
What Happens After My Customer Pays?
After your customer clicks the button and completes a payment:
- PayU updates the payment status in your Dashboard right away.
- The payment appears in the Transactions tab in your PayU Dashboard.
- Your customer is taken to your success page or your failure page if the payment did not go through.
- The money is settled to your bank account on the standard settlement cycle.
Webhooks for NotificationWebhooks are optional. Your Dashboard always reflects the current payment status without any webhook setup.
What Do I Do If Something Goes Wrong?
| Problem | Recommended Fix |
|---|---|
| The button is not showing on my website | Make sure the code was pasted into a code or HTML block and not as plain text. Clear your browser cache and reload the page. |
| Customer clicks the button but nothing happens | The button code may not have loaded correctly. Remove it, paste it again in a fresh code block, and reload the page. |
| I entered the wrong amount or button text | Edit the Payment Button to enter the correct amount. |
| Customer paid but I cannot see it in my Dashboard | Wait a few minutes and refresh. If it still does not appear, see Errors and Troubleshooting. |
| Customer was not taken to my success or failure page | Check that you entered the correct page addresses under Advanced Options. Make sure each address starts with https://. |
What If My Customer Wants the Money Back?
Updated 12 days ago
