
Manage Payment Buttons
View, filter, turn off, and download records for your Payment Buttons — all from the PayU Dashboard.
You can manage your payment buttons from the PayU Dashboard after they are created and live on your website.
How Do I Access My Payment Buttons?
To open payment buttons: log in to PayU Dashboard and click Payment Buttons under Payment Tools.
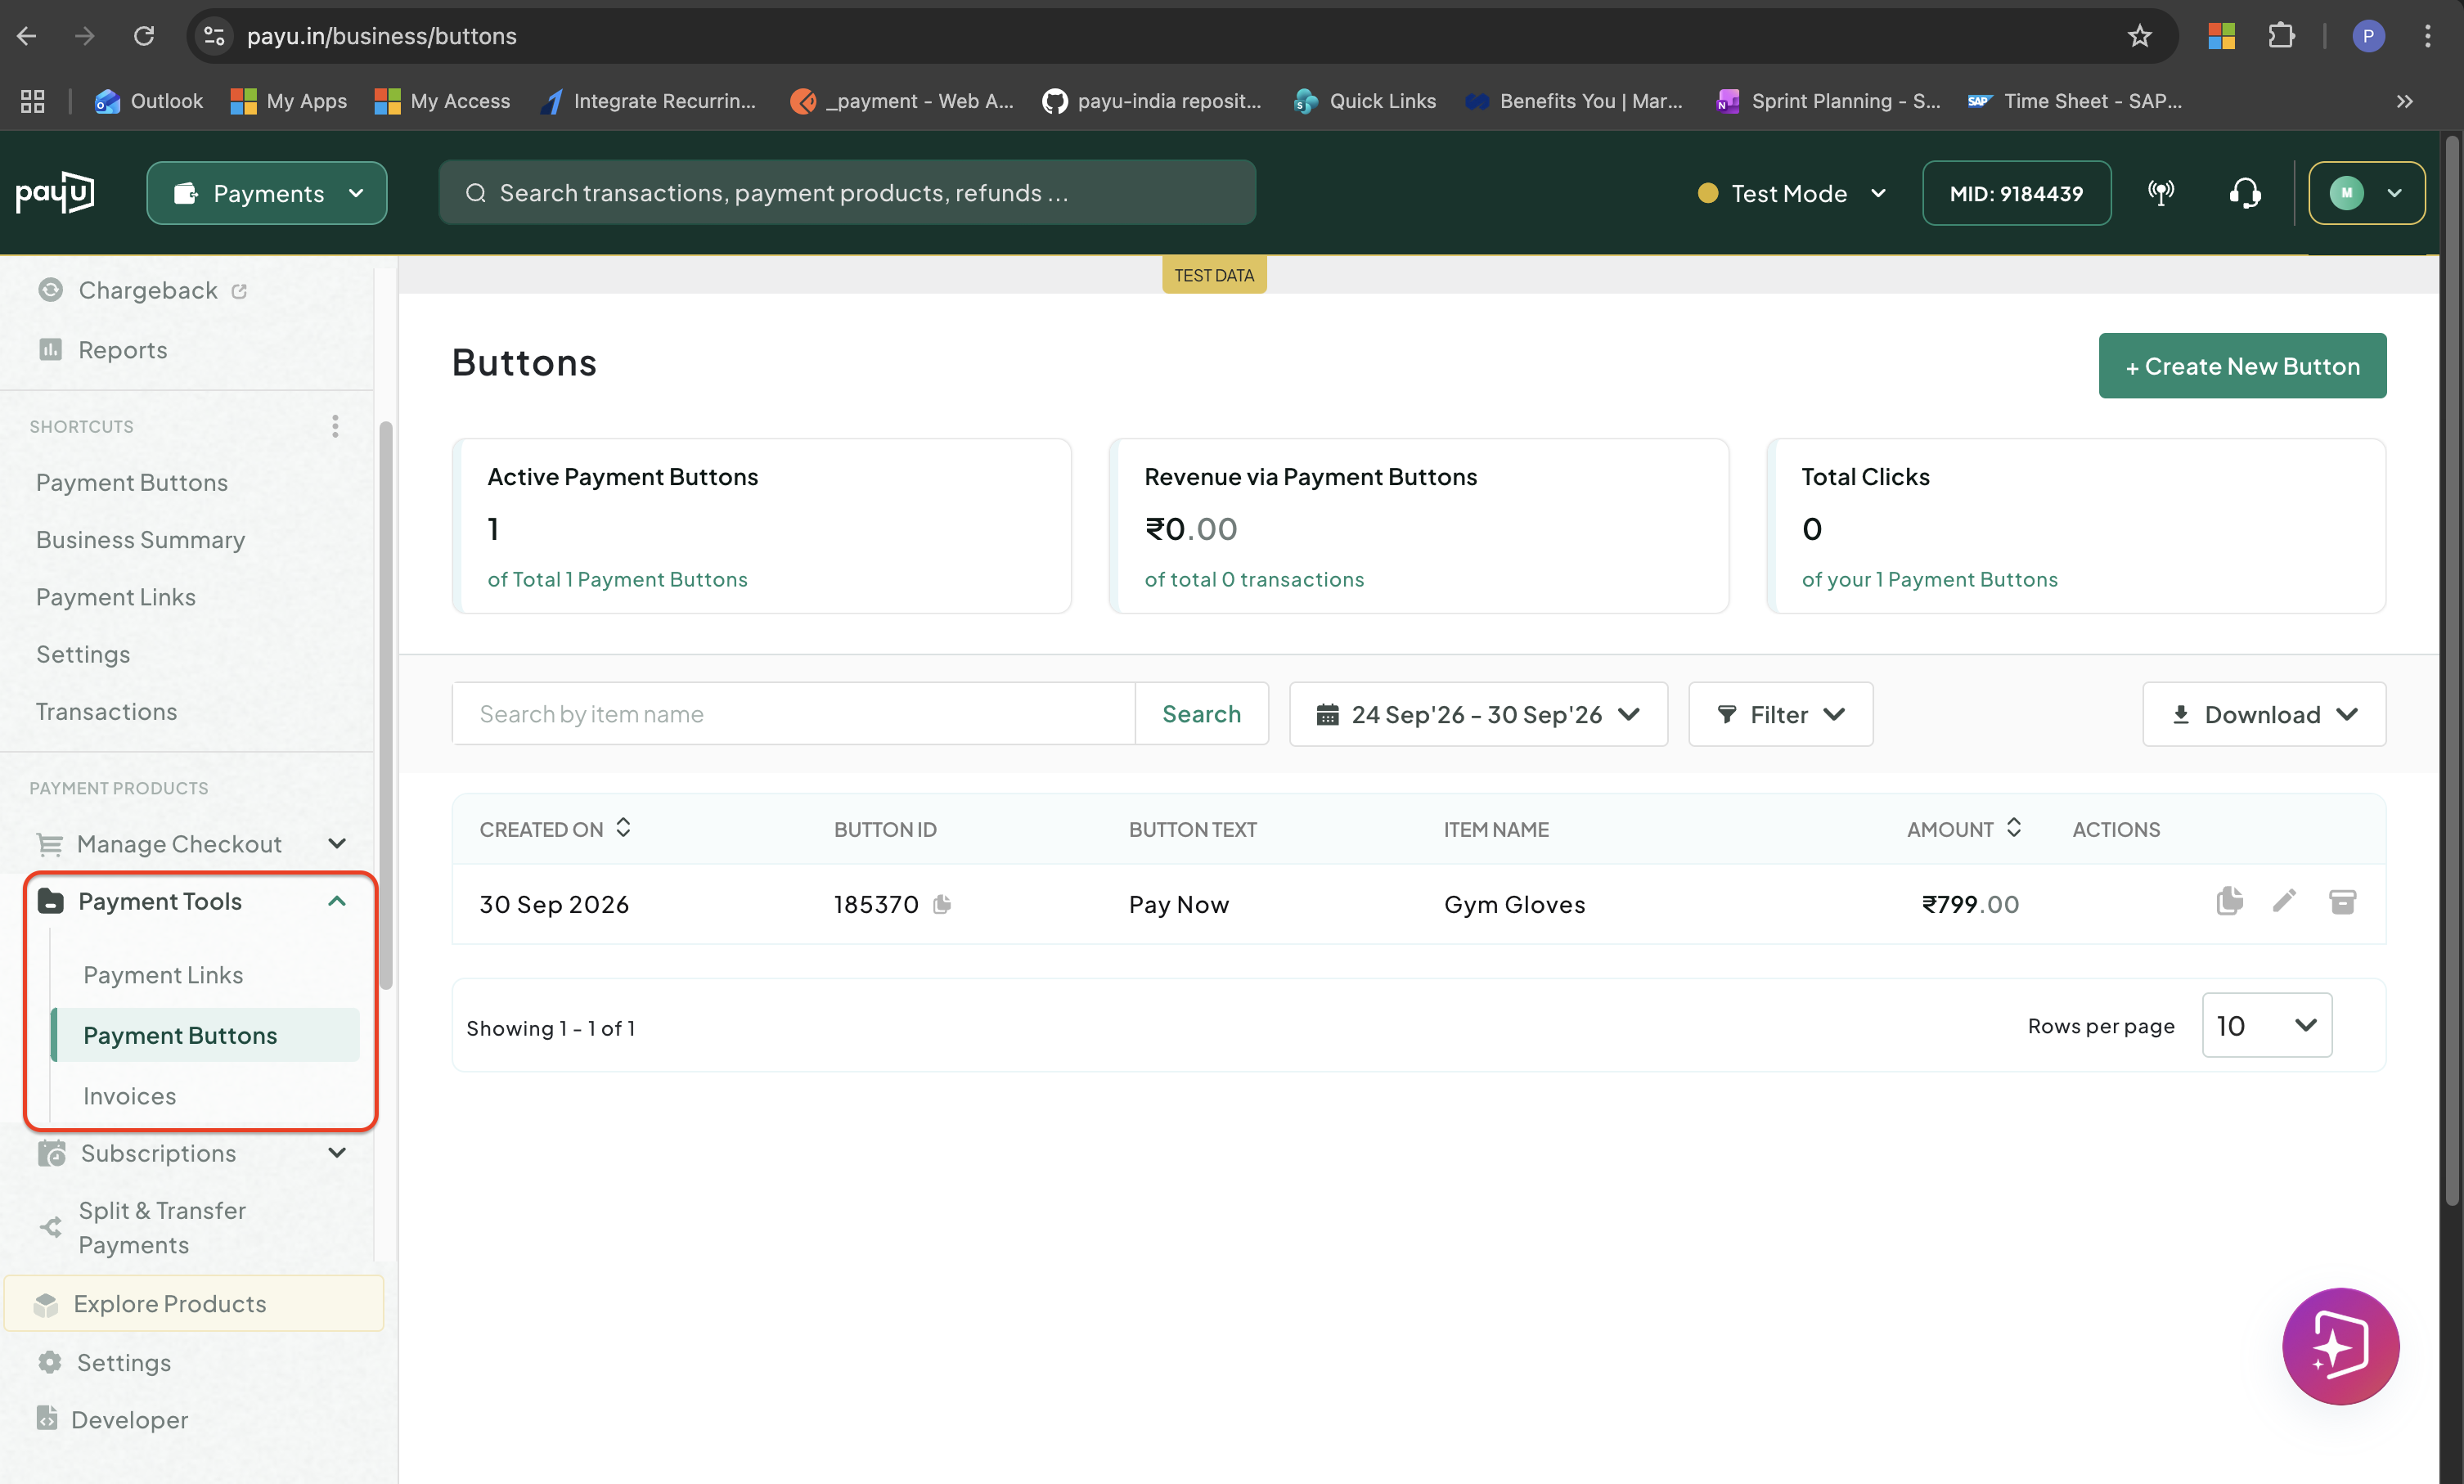
Access Payment Buttons
What Can I Do With a Payment Button After It Is Created?
You can perform the following actions after a button is created:
- View Payment Button Details
- Edit Payment Button Details
- Delete a Payment Button
View Payment Button Details
Steps to View Button Details
To see the details and payment history for a payment button:
-
Log in to the PayU Dashboard and click Payment Buttons under Payment Tools.
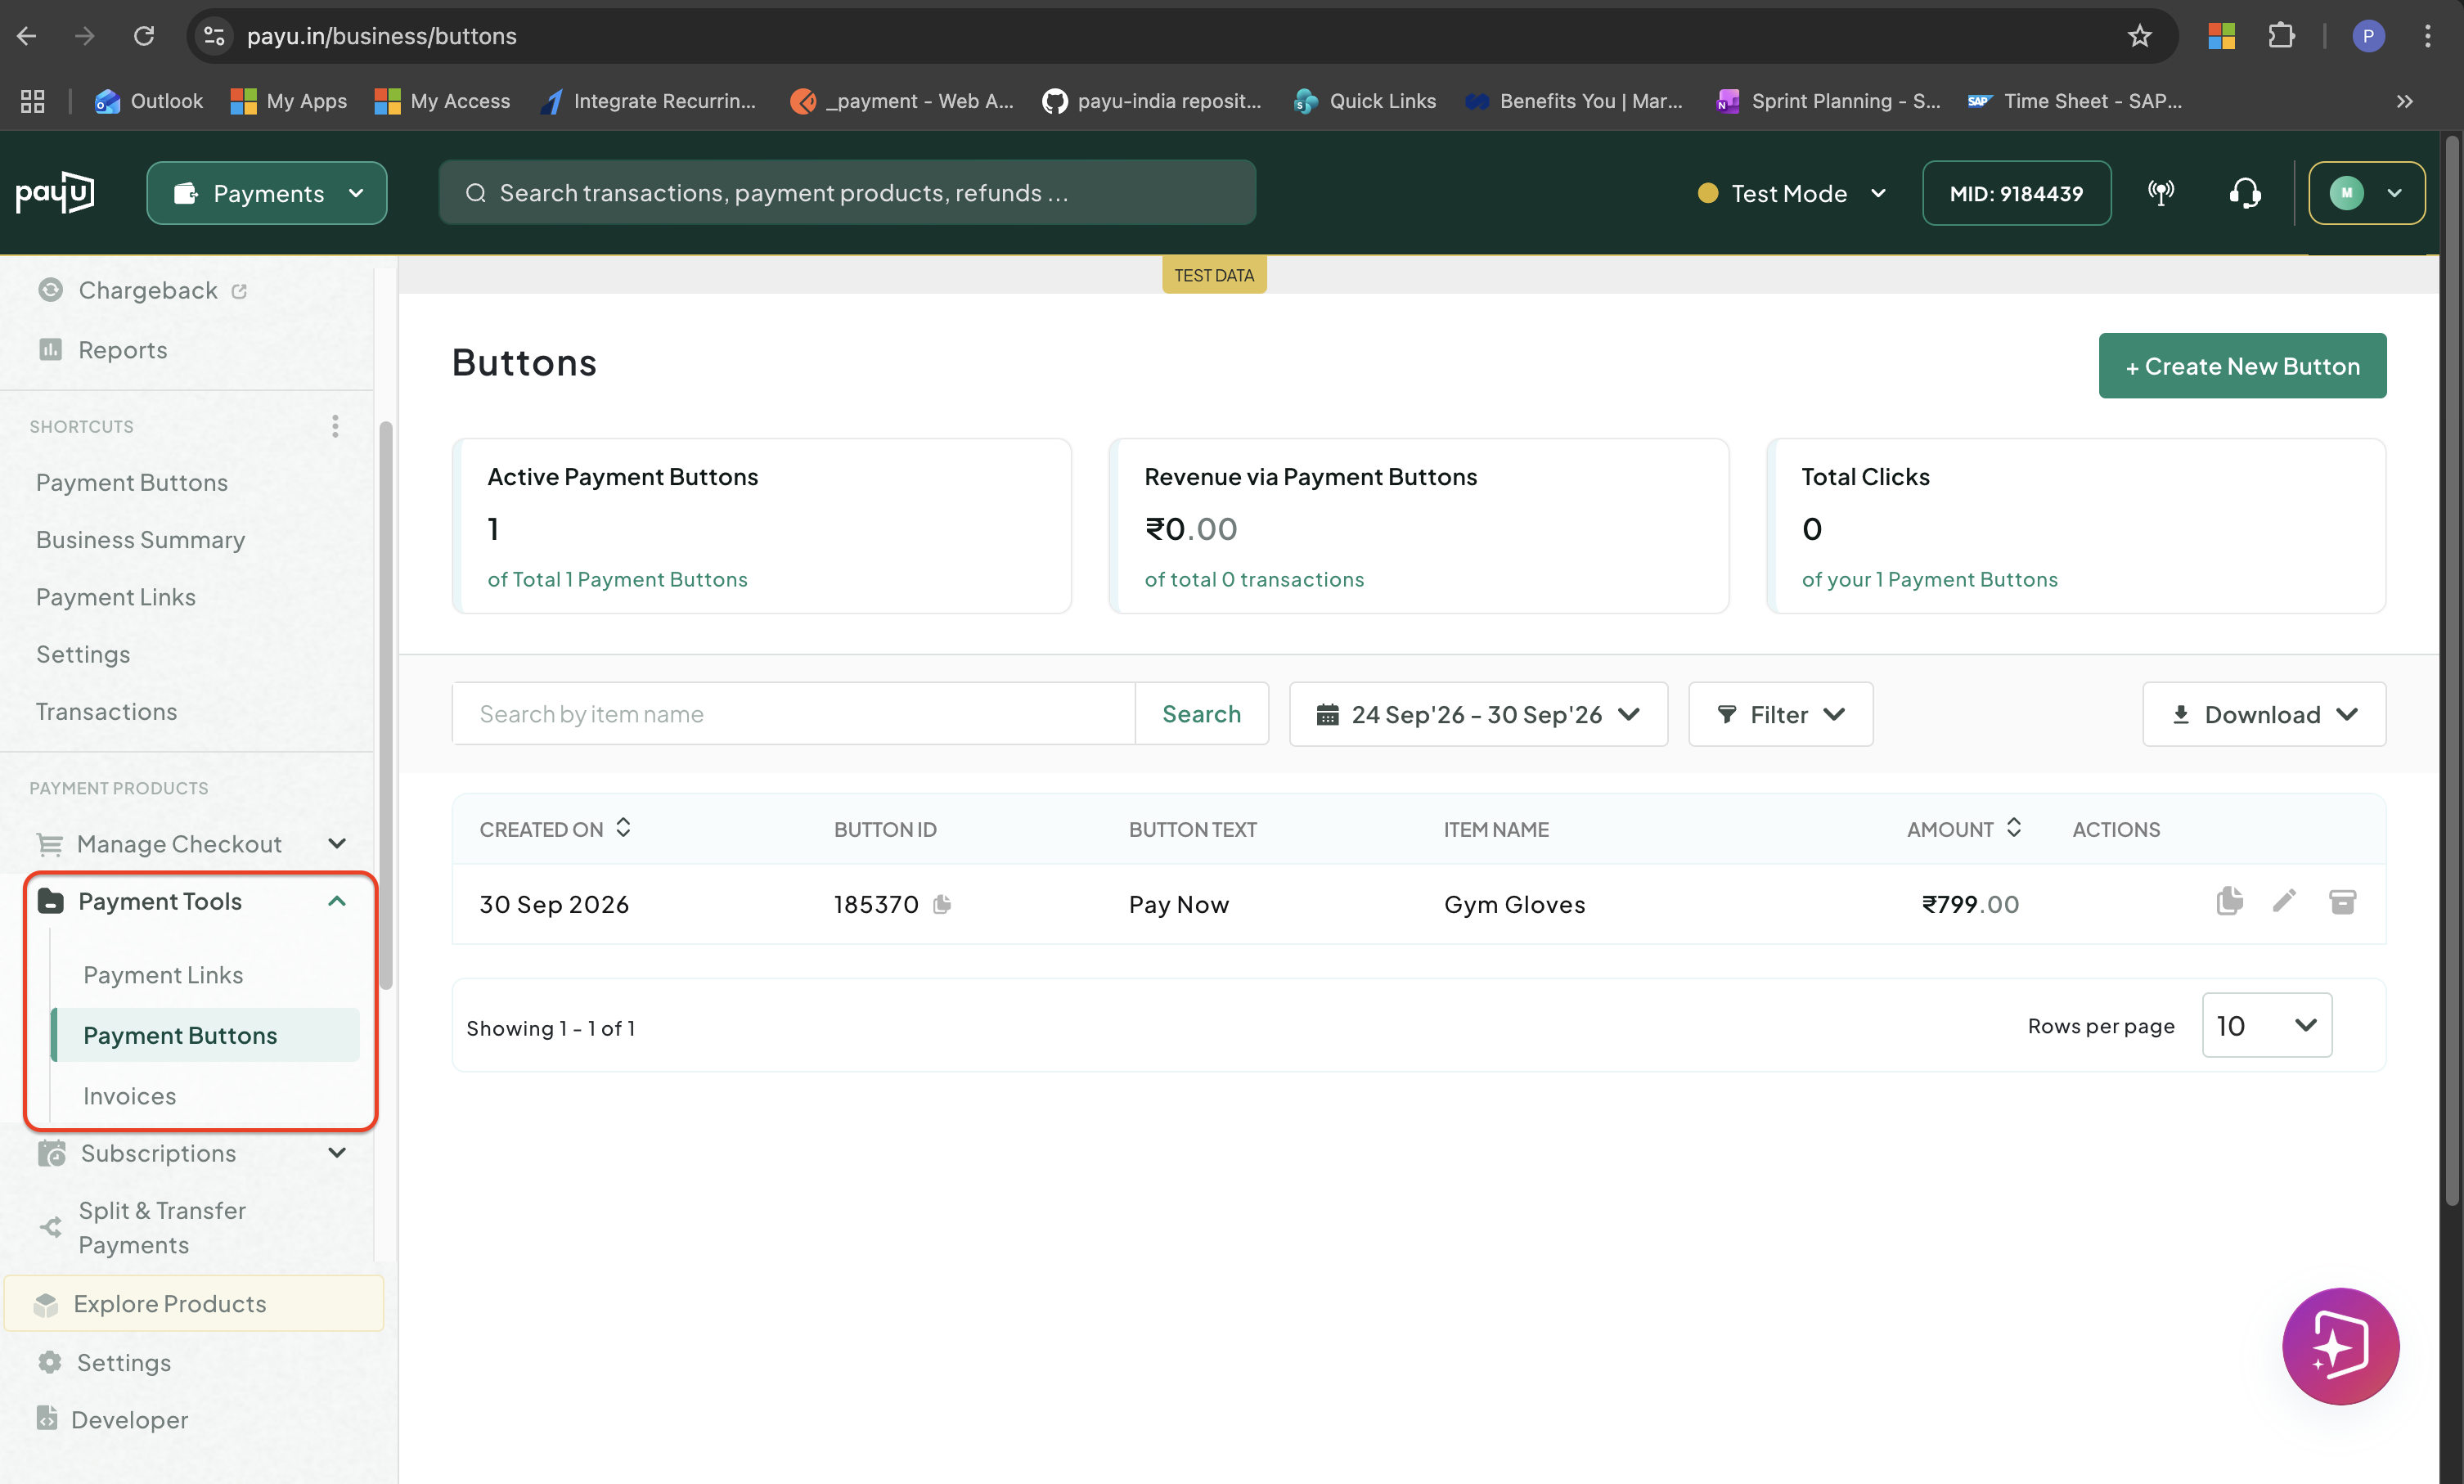
Access Payment Buttons
A list of all your payment buttons is displayed with the following information:
- Created On
- Button ID
- Button Text
- Item Name
- Amount
- Actions: Contains buttons to perform varios actions.
- Click the button you want to view.
The details are split into the following sections:
Button Details
The upper half of the Button Details page displays the following information:
-
Button ID: The unique button ID.
-
Created On: The date and time on which the payment button was created.
-
Button Text: The button text you have selected while creating the payment button.
-
Action Buttons: Action buttons to edit, duplicate and view the code of the payment button.
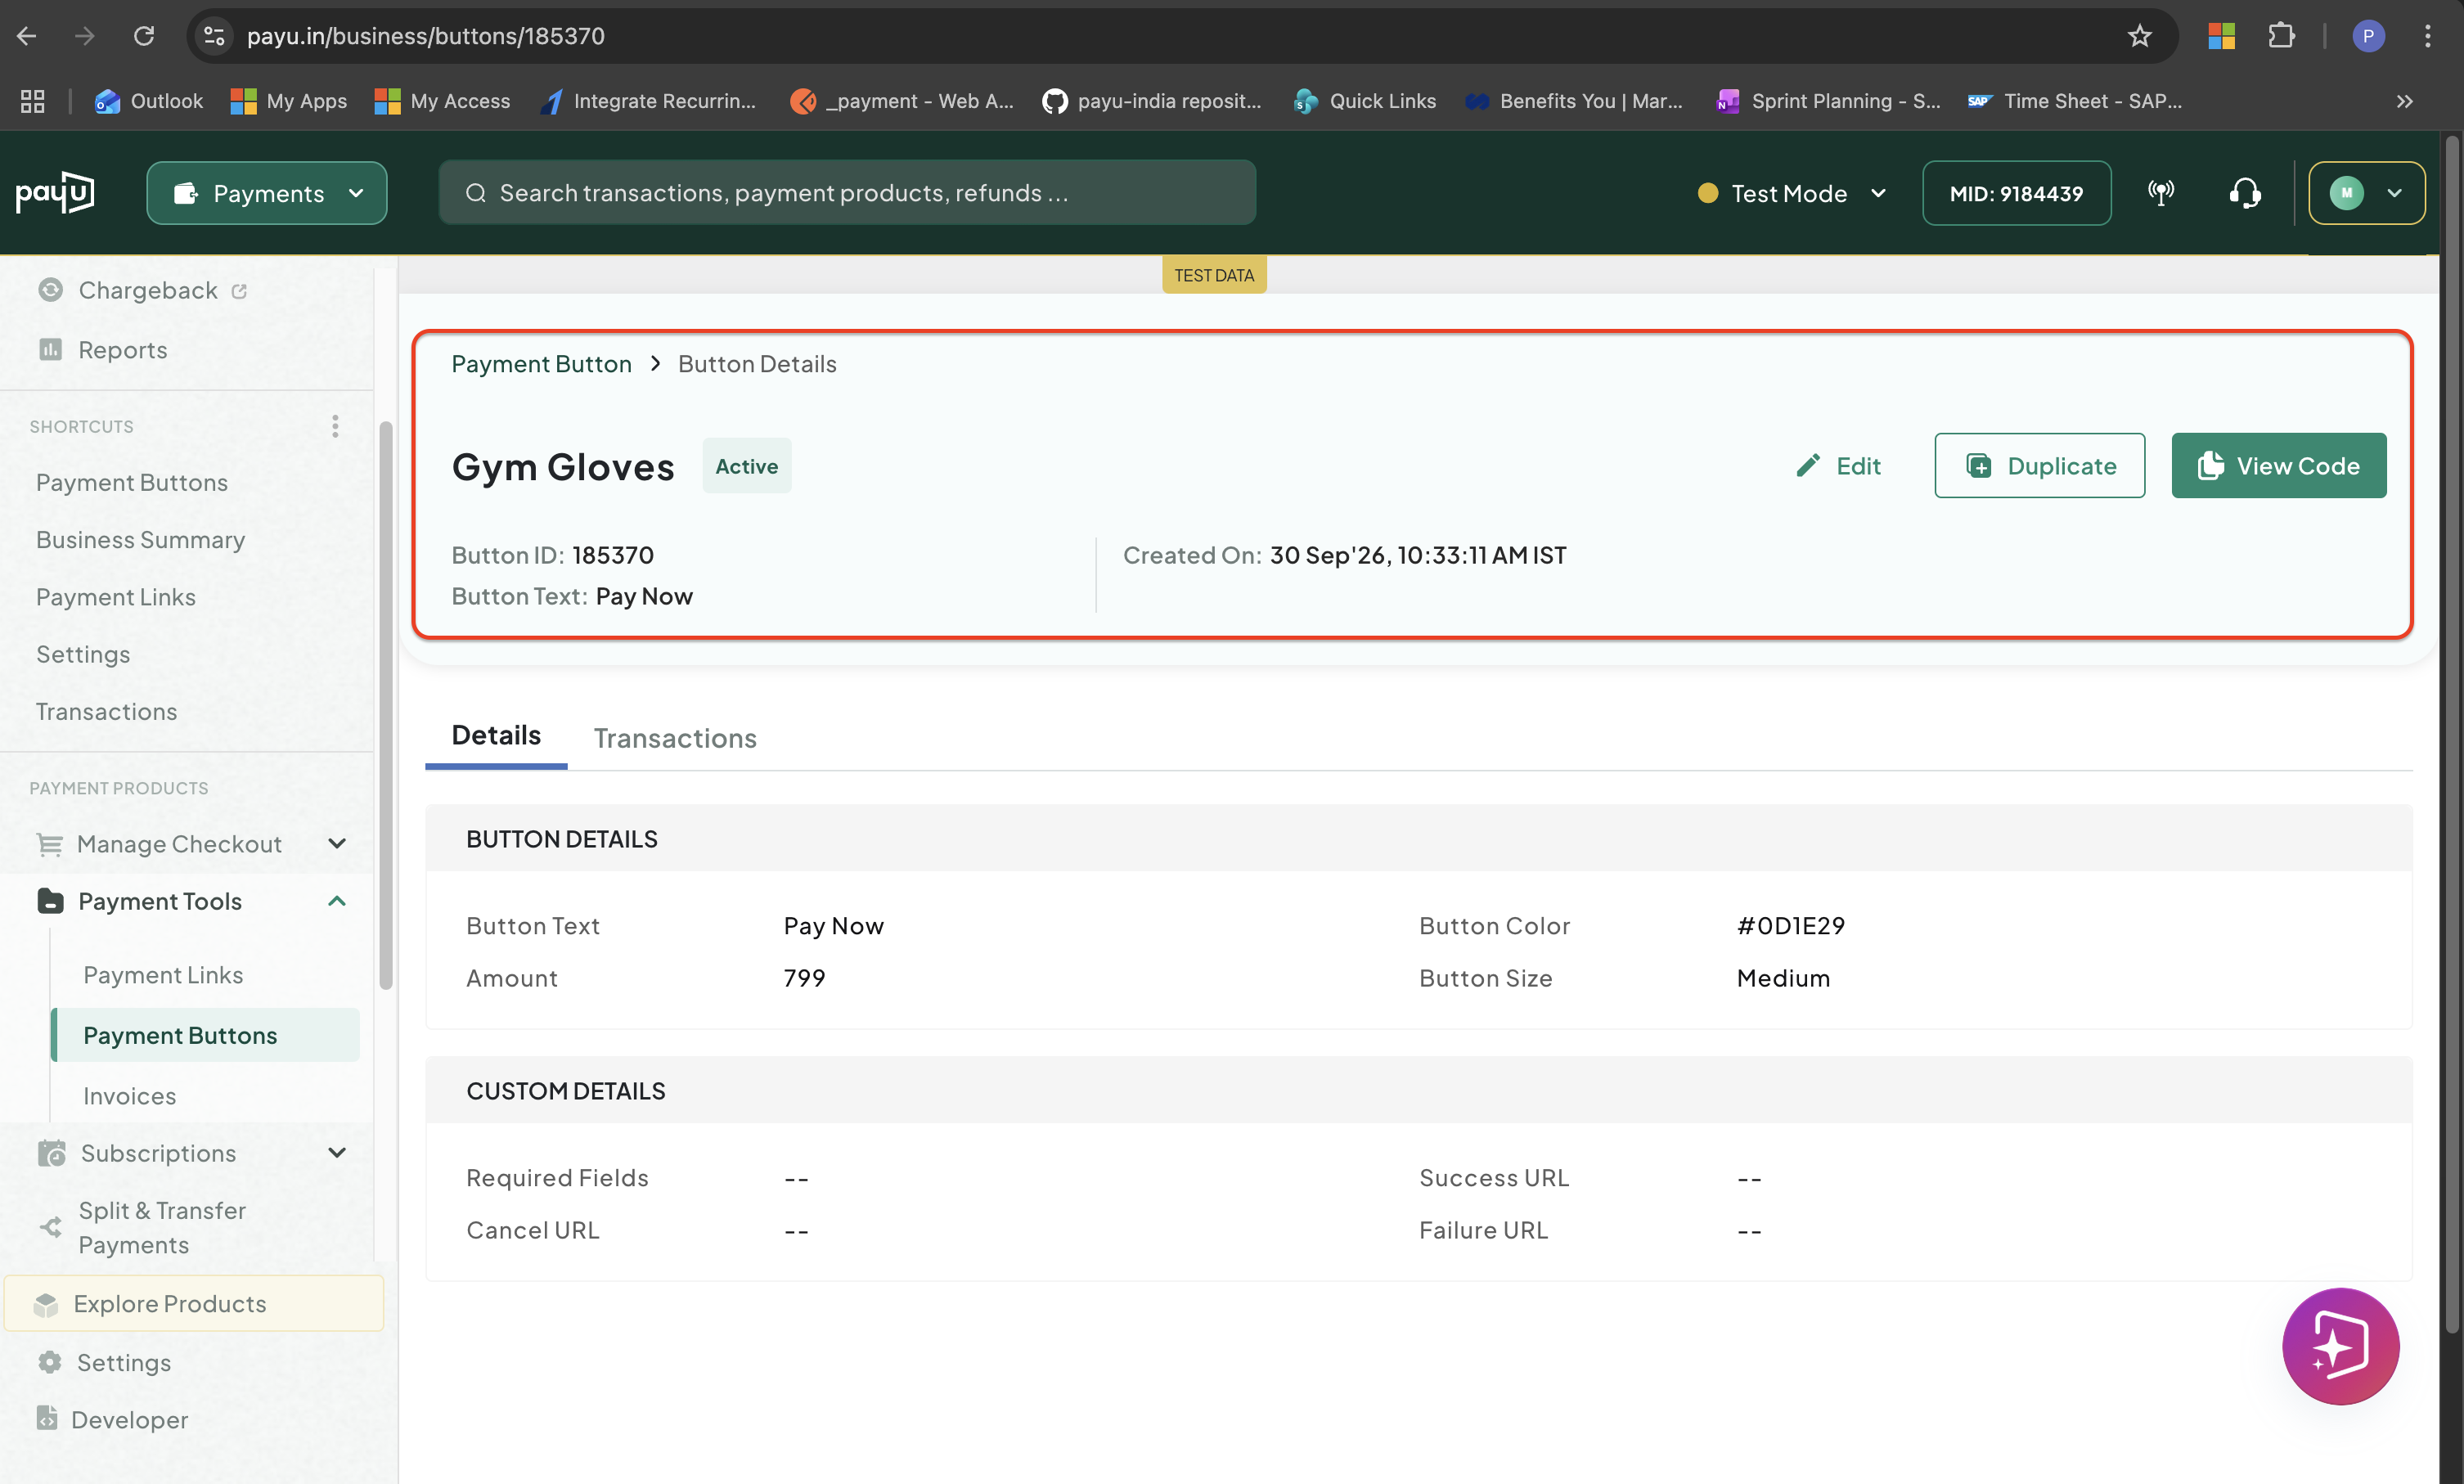
Payment Button Details
Details and Transactions
The Details tab displays the following information in two sections:
Button Details:
- Button Text: The label on the button — Buy Now, Pay Now, Book Now, or Donate Now.
- Button Color: The button you have selected while creating the payment button
- Amount: The fixed amount, or blank if the customer enters it themselves.
- Button Size: The button size you have selected while creating the payment button.
- Status: Whether the button is active or turned off.
- Button Code: The code you added to your website. Copy it from here if you need to add it to another page.
Custom Details:
- Required Fields
- Success URL
- Cancel URL
- Success URL
- Failure URL
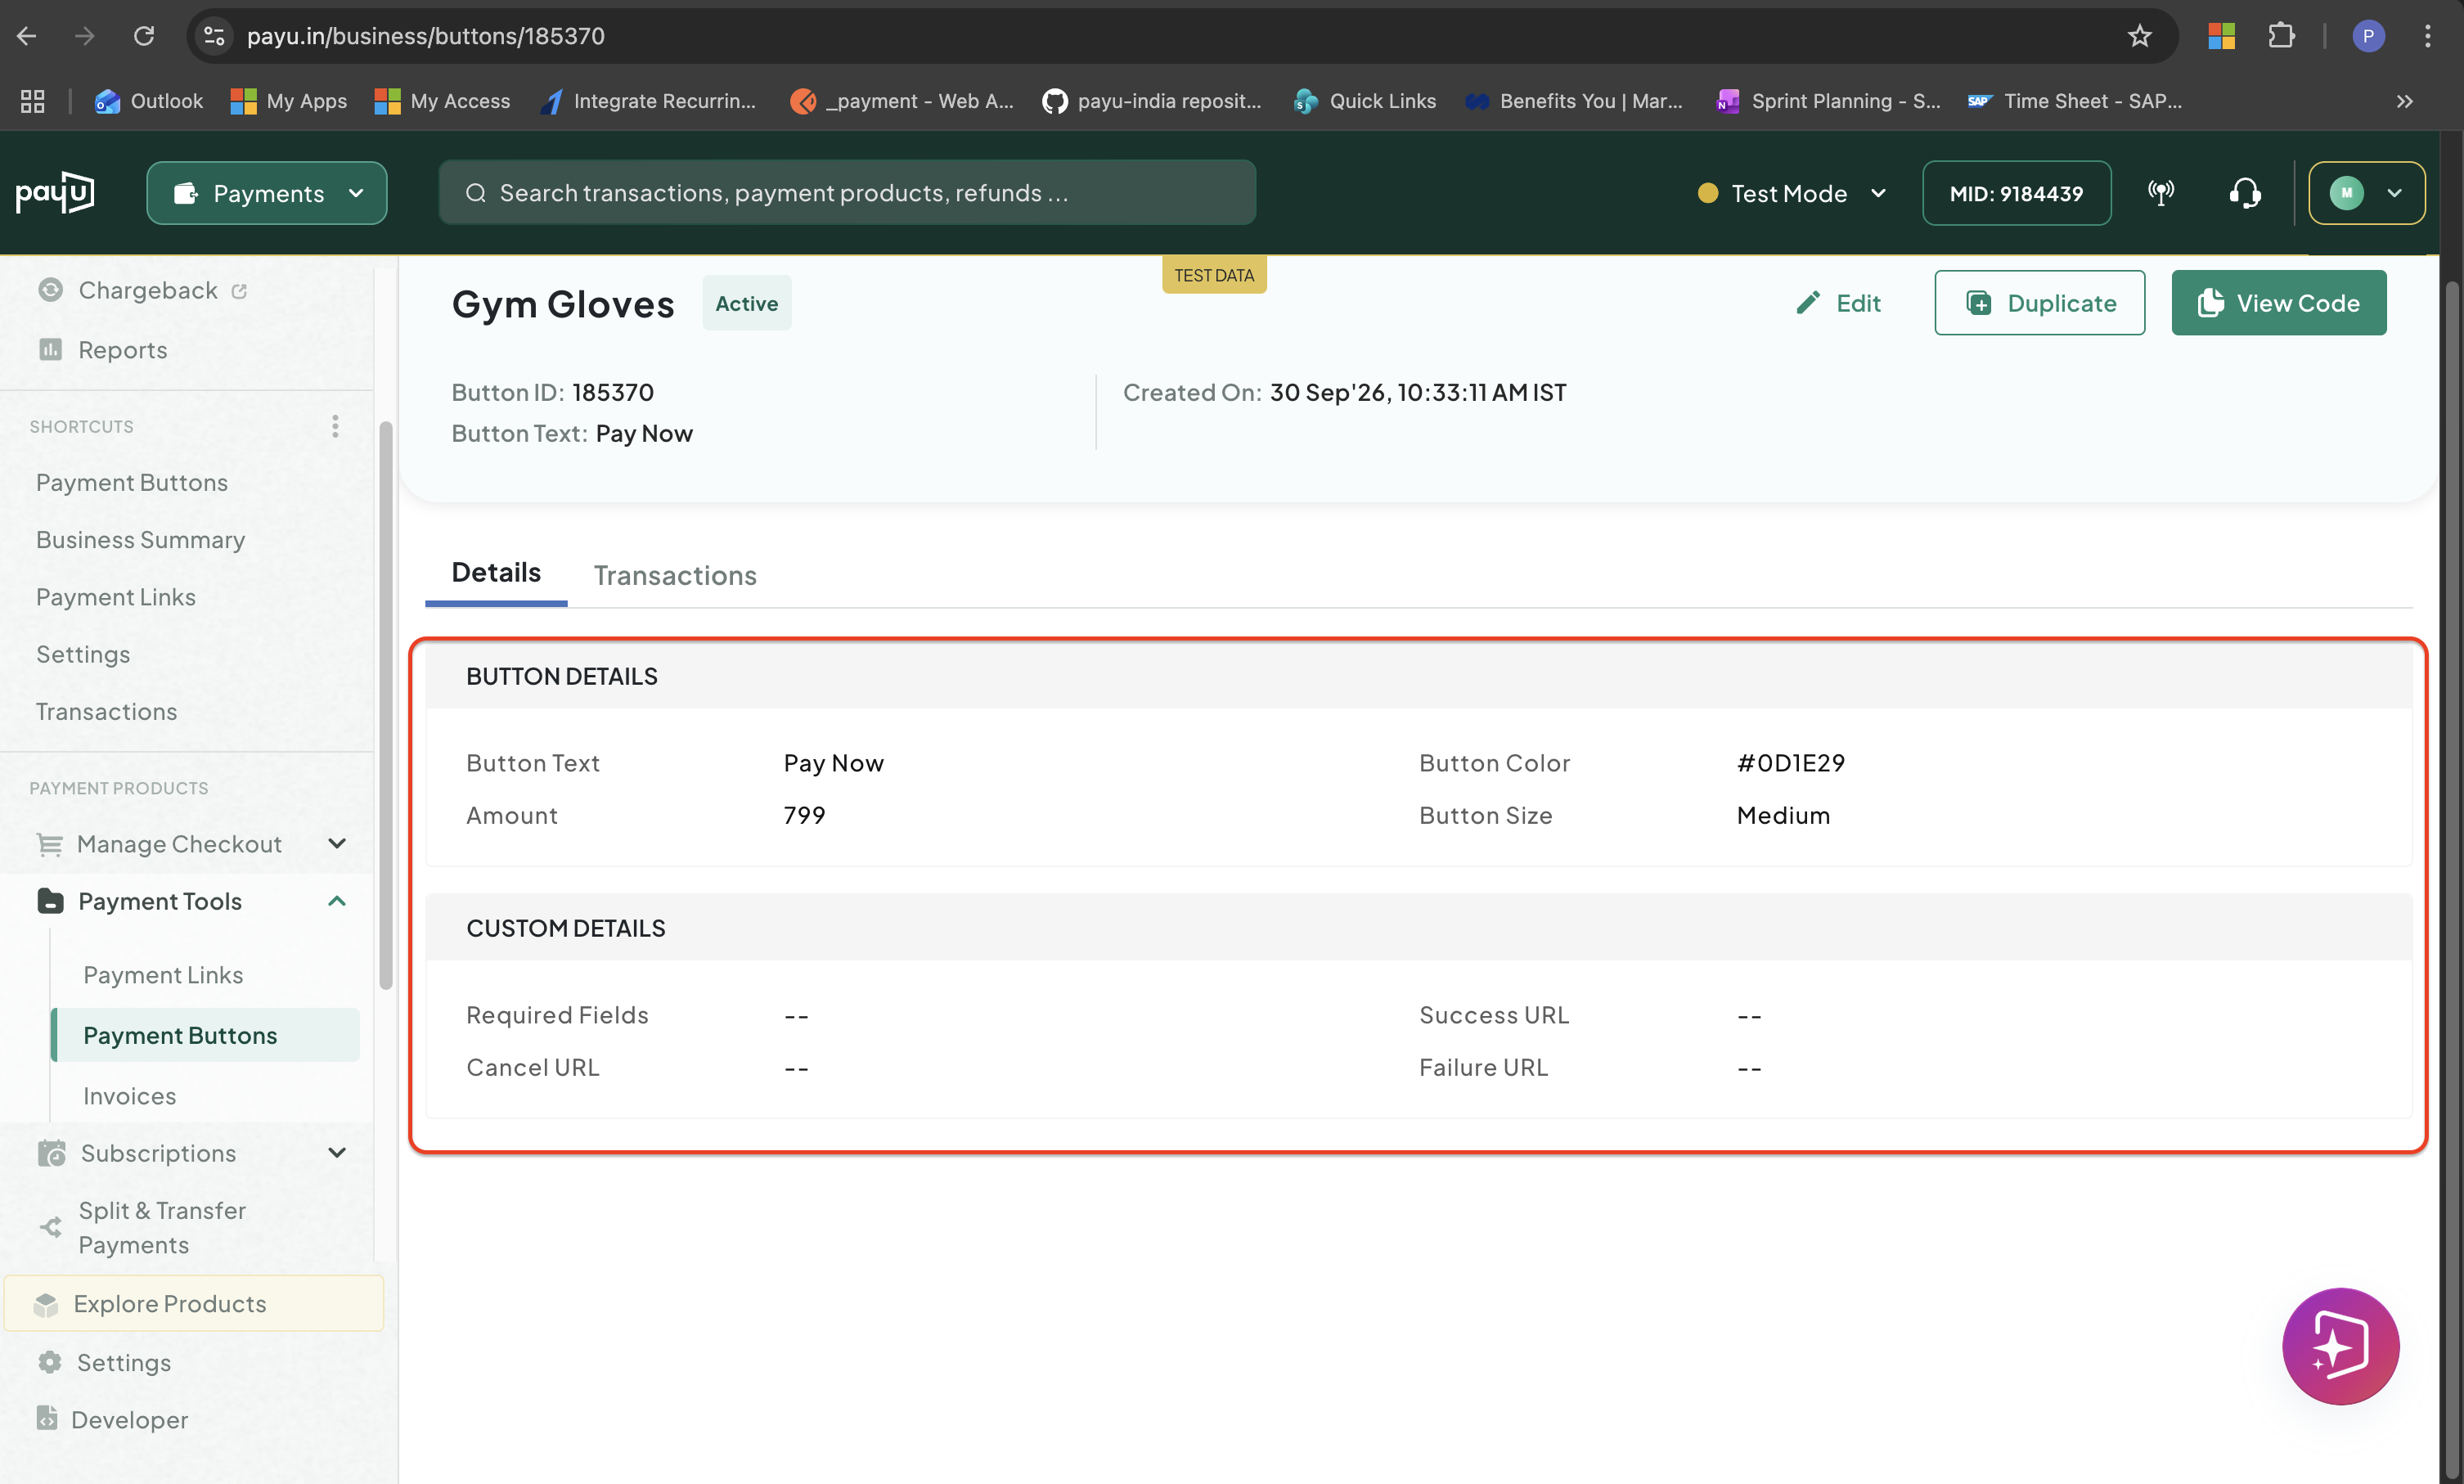
Button and Customer Details
Every payment made through this button is listed here with the following information:
- Amount Requested: The requested amount you have added while creating the payment button.
- Revenue: The total amount collected using the payment button.
- Total Clicks: The number of recorded clicks on the payment button.
- Date: Transaction date
- PayU ID (Transaction ID): The unique transaction ID of the payment.
- Settled Amount: The amount settled.
- Customer Email
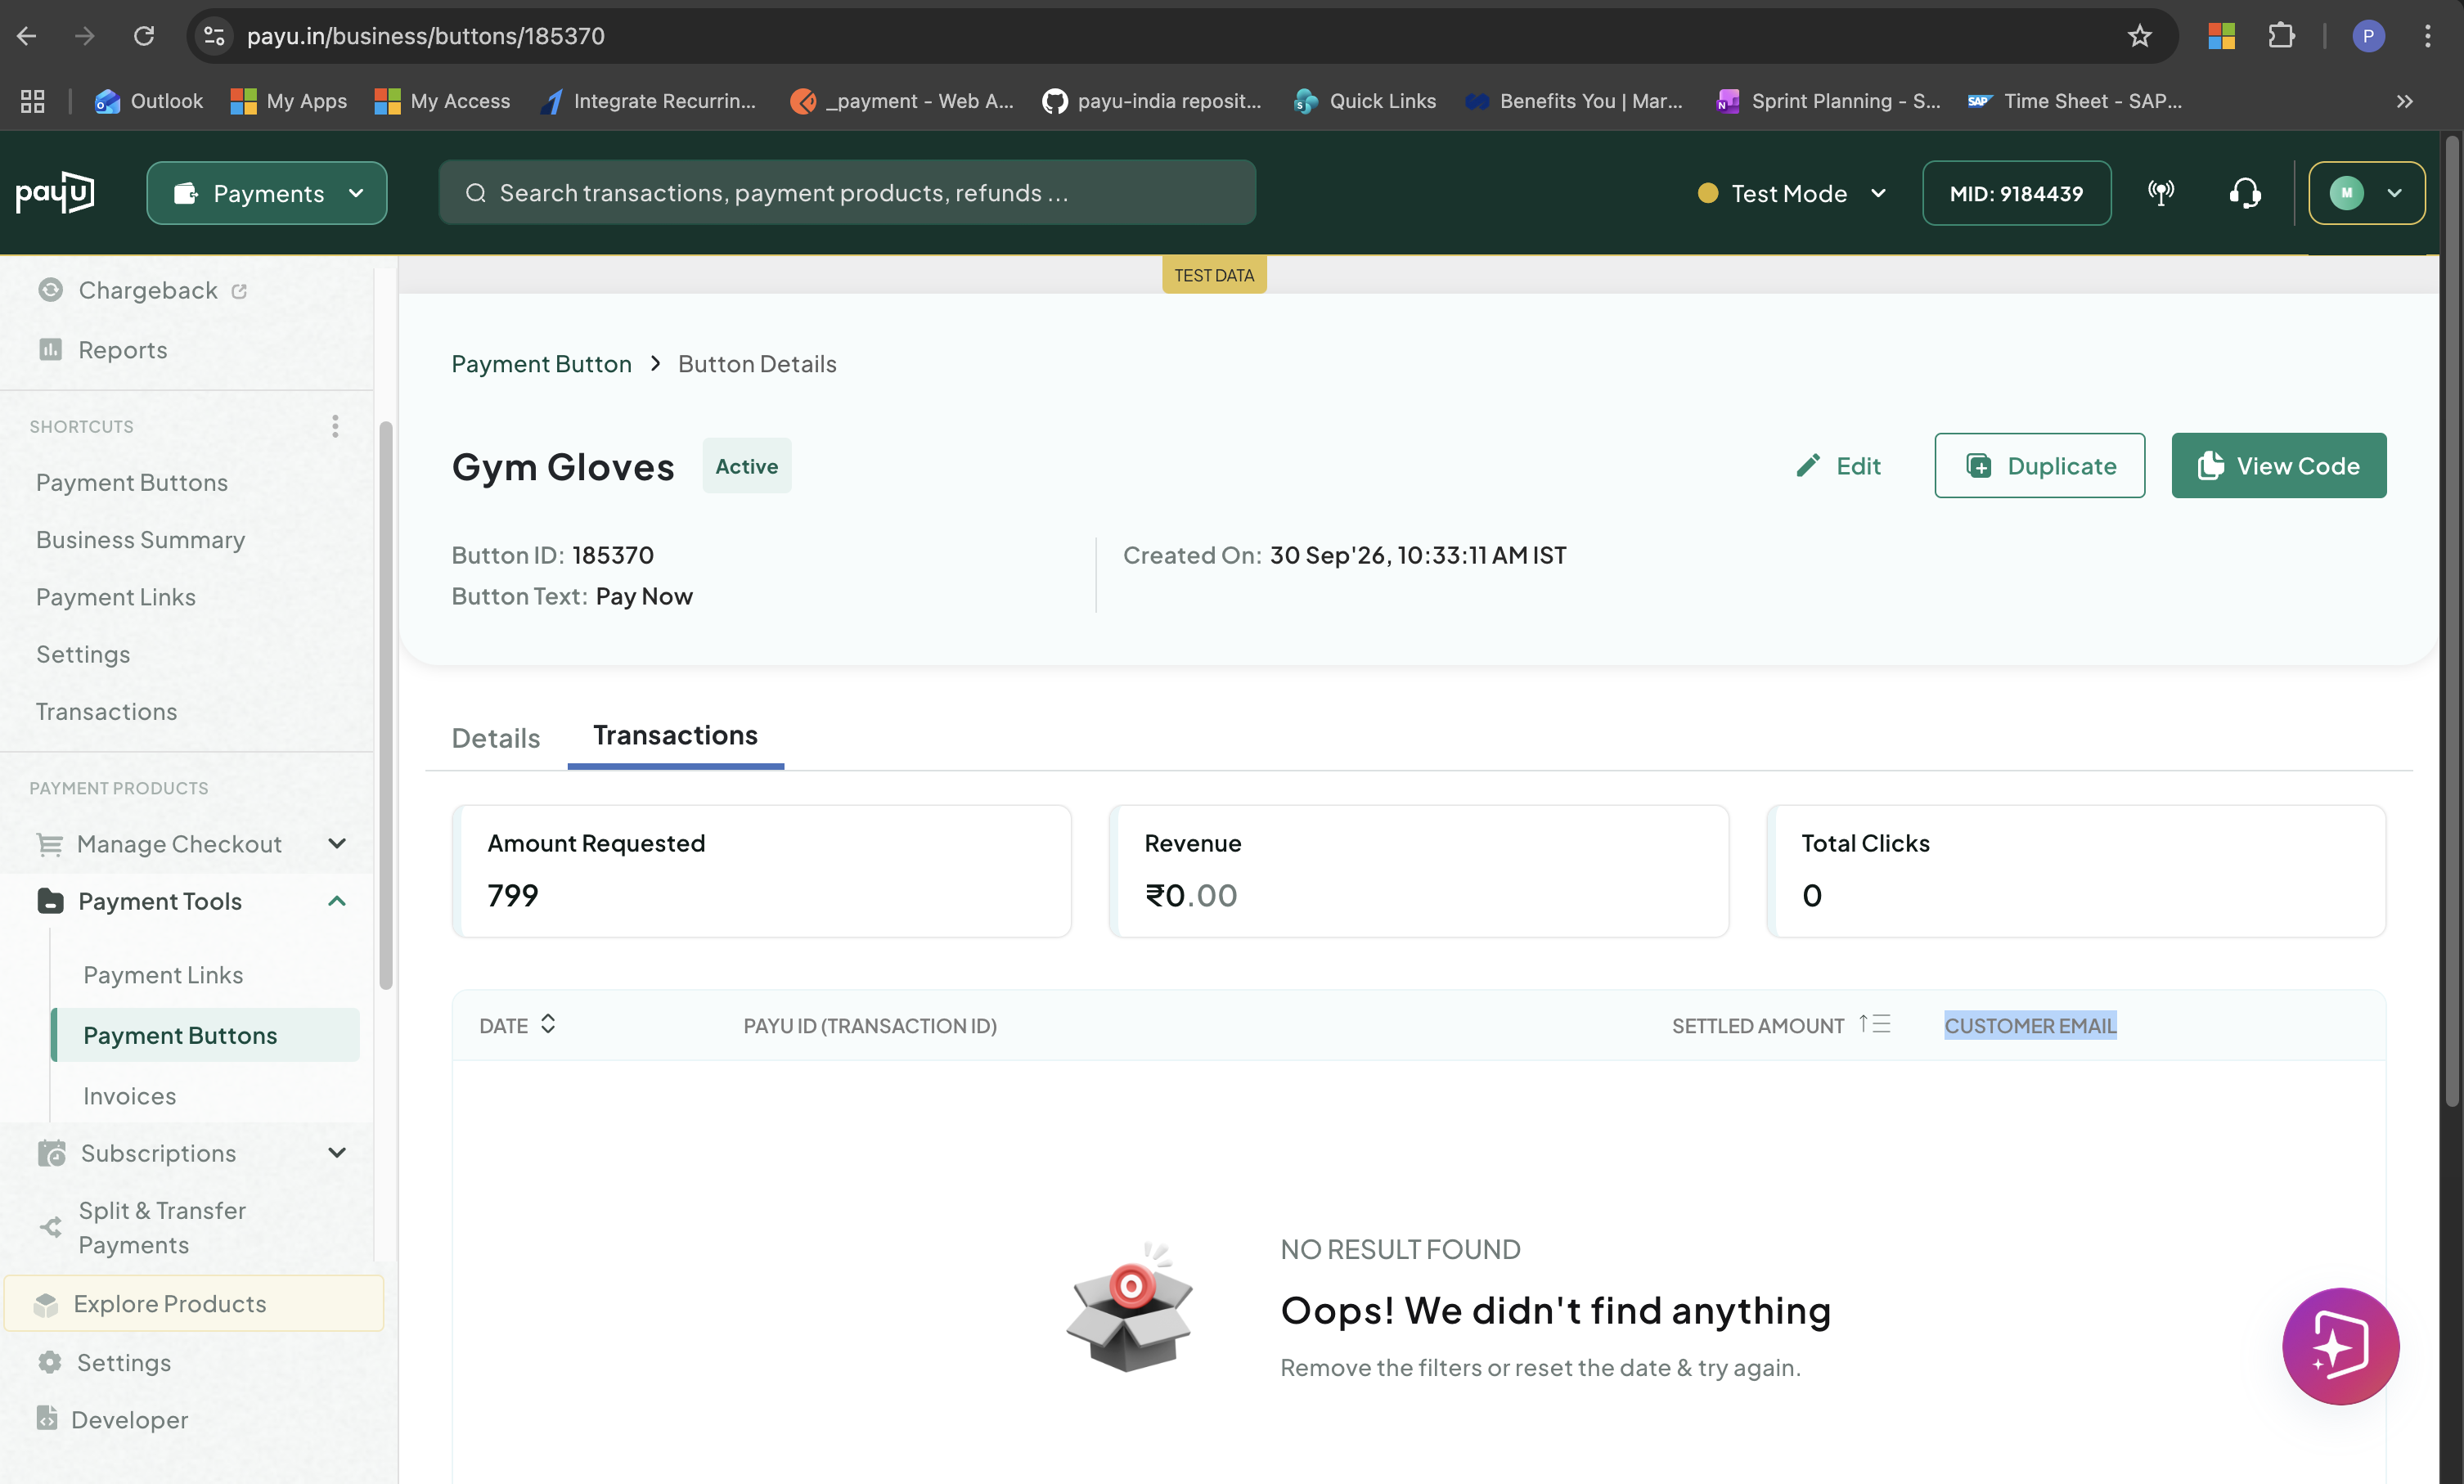
Transaction Details
Edit Payment Button Details
Steps to Edit a Payment Button
To edit payment button details:
-
Log in to the PayU Dashboard and click Payment Buttons under Payment Tools.
Access Payment Buttons
-
Click edit icon against the required payment button.
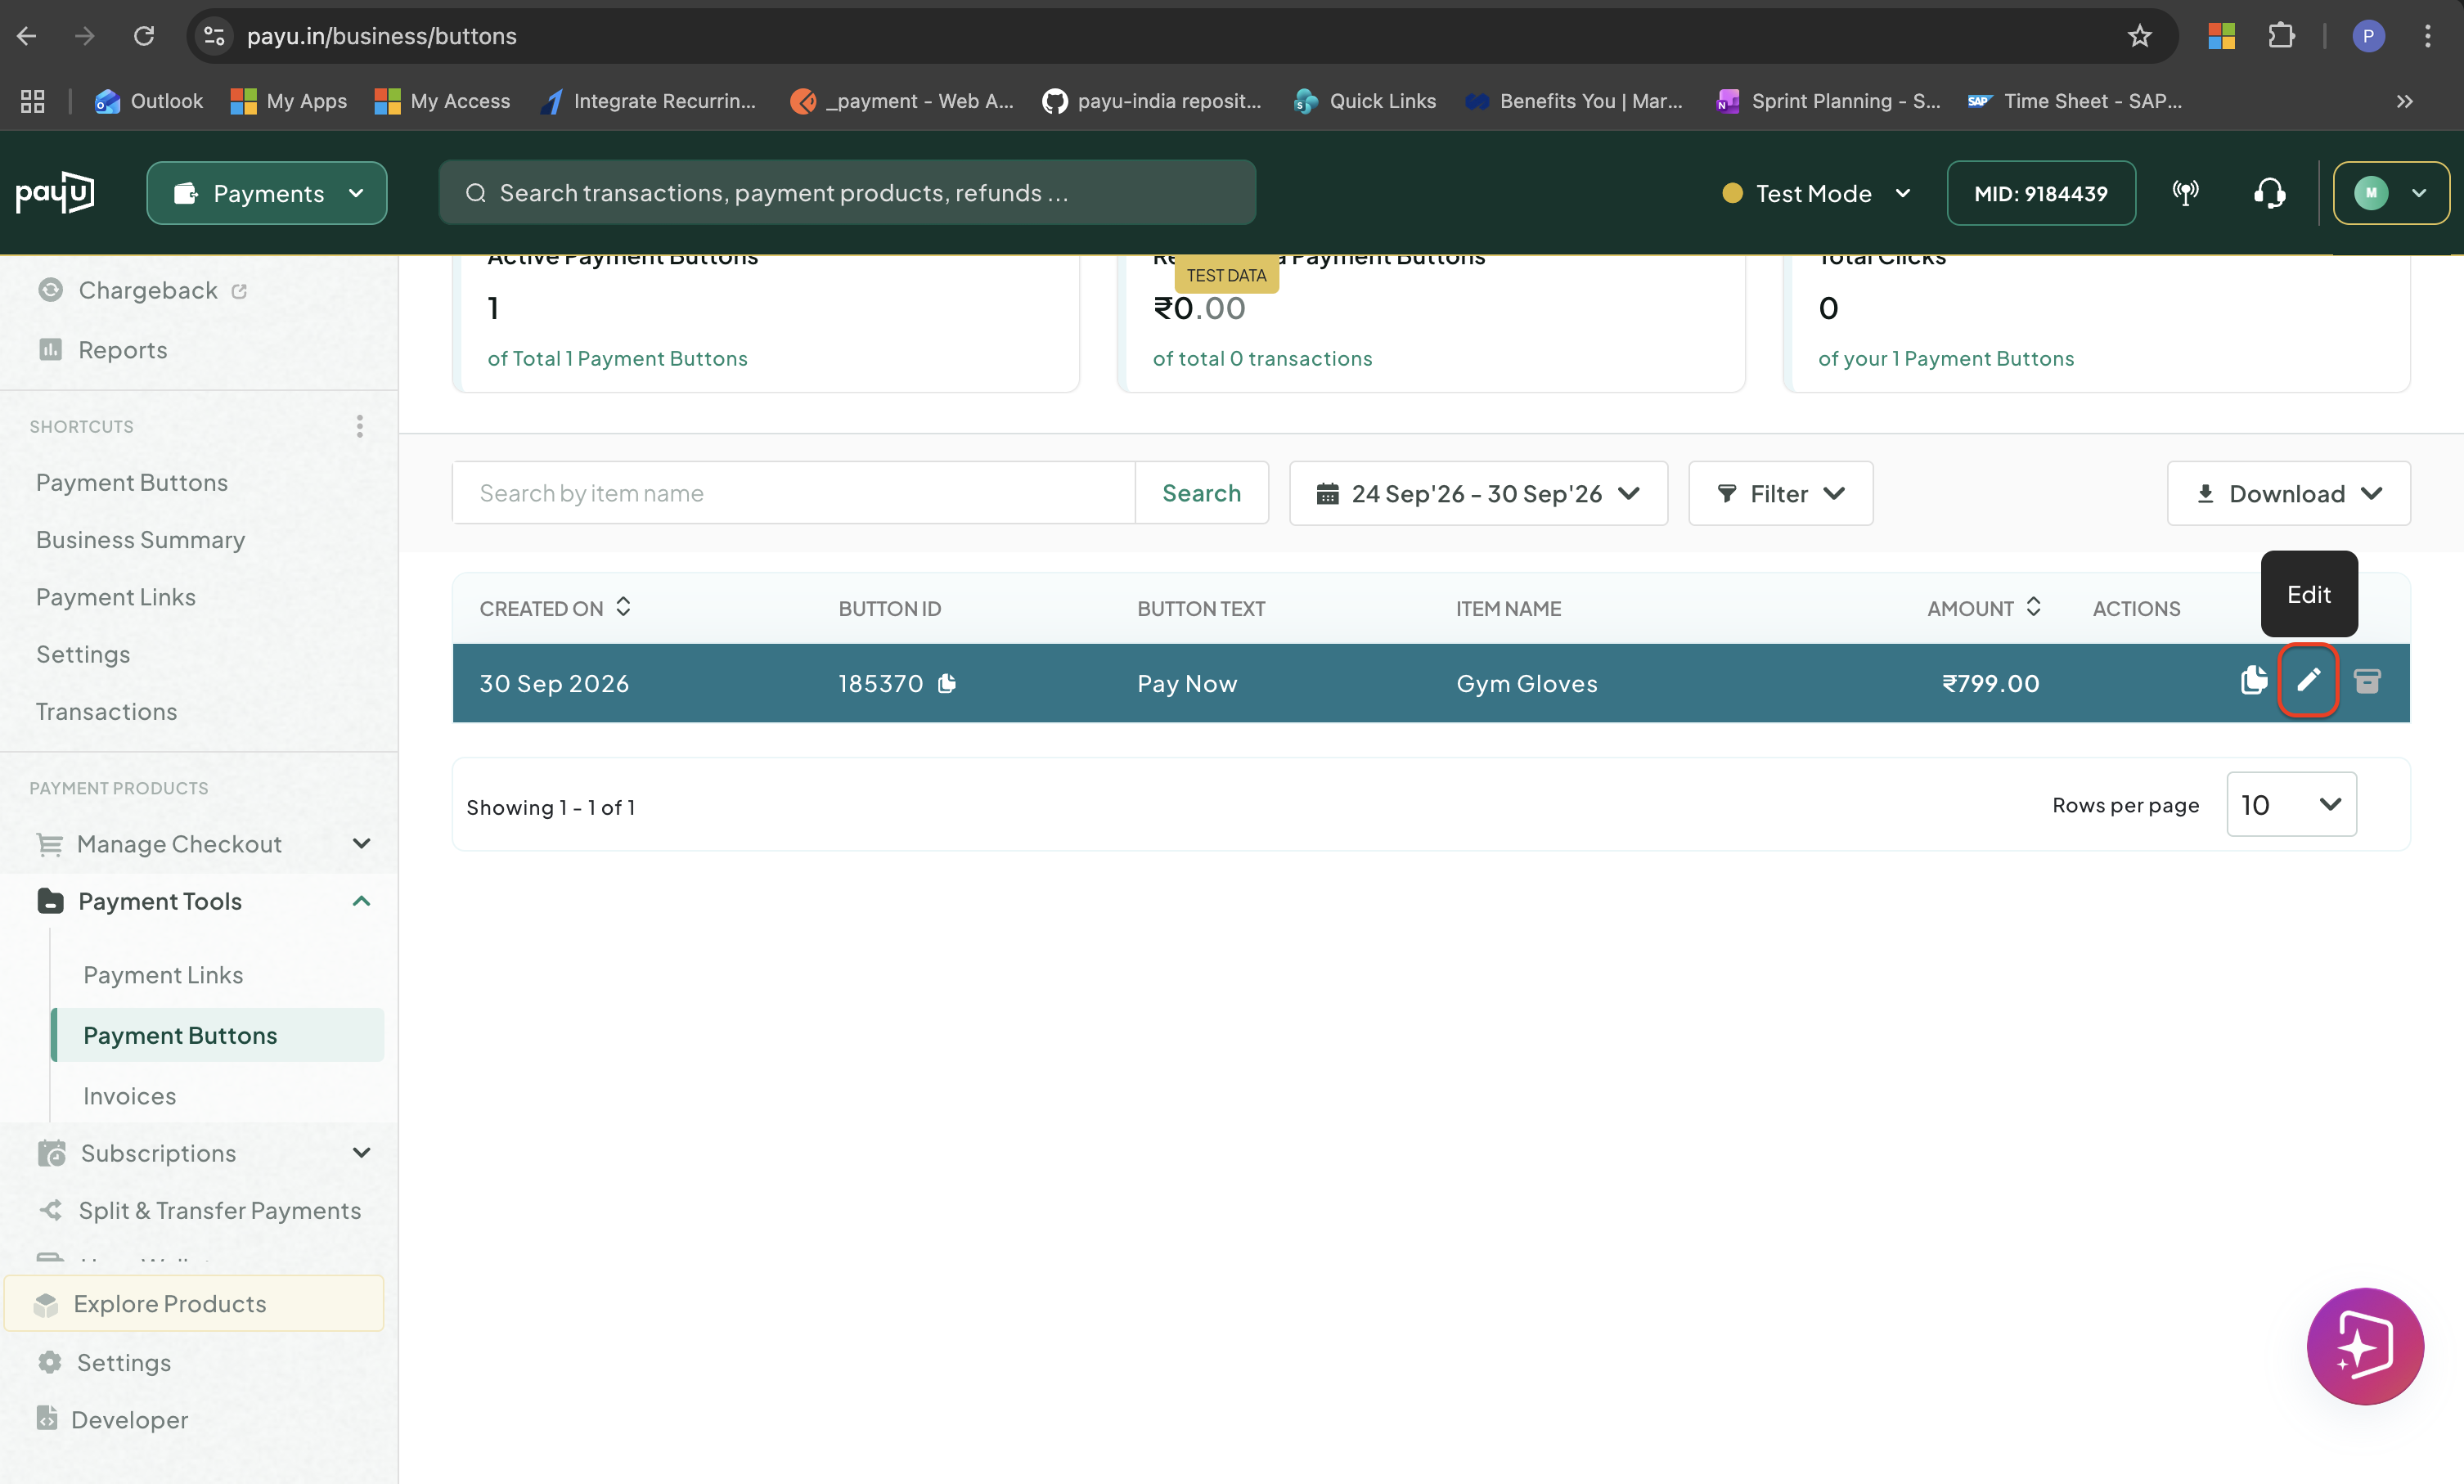
Edit Payment Button
-
Enter the required details in the Update Button page. You can edit all the information you have provided while creating the button.
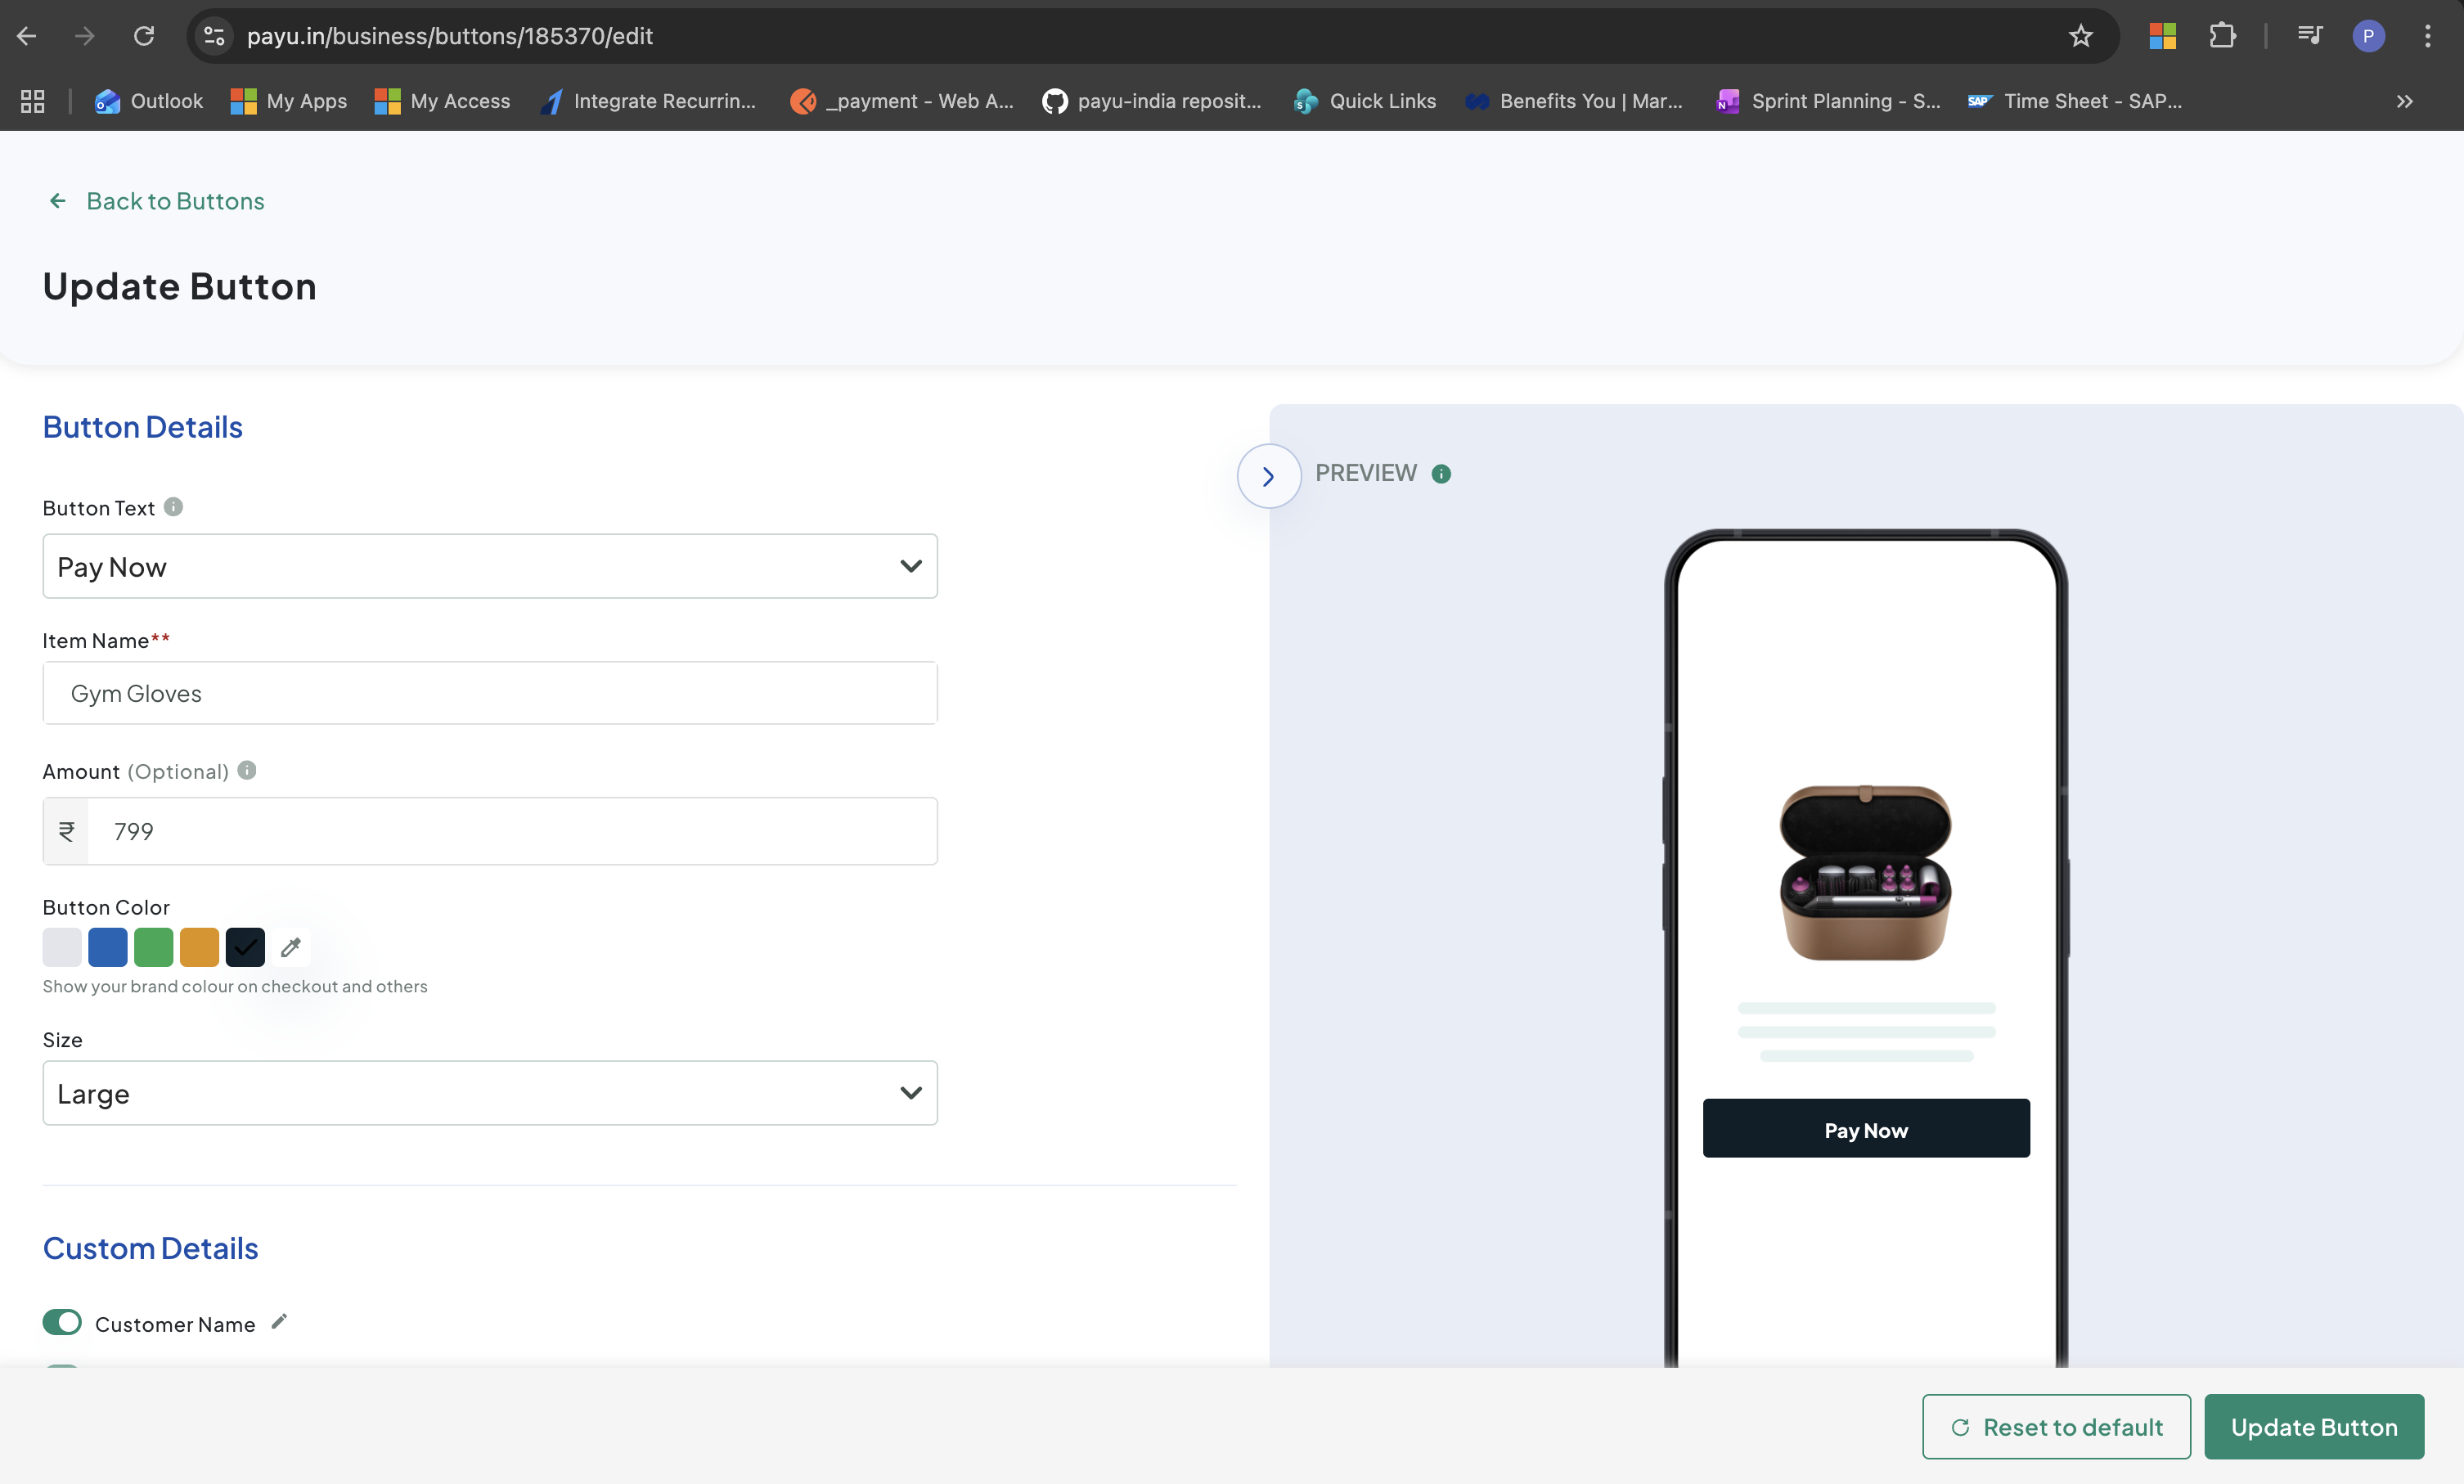
Edit Payment Button Details
-
Click Update Button to generate a new code.
-
Click Copy Code to copy the new button code and replace it in your website.
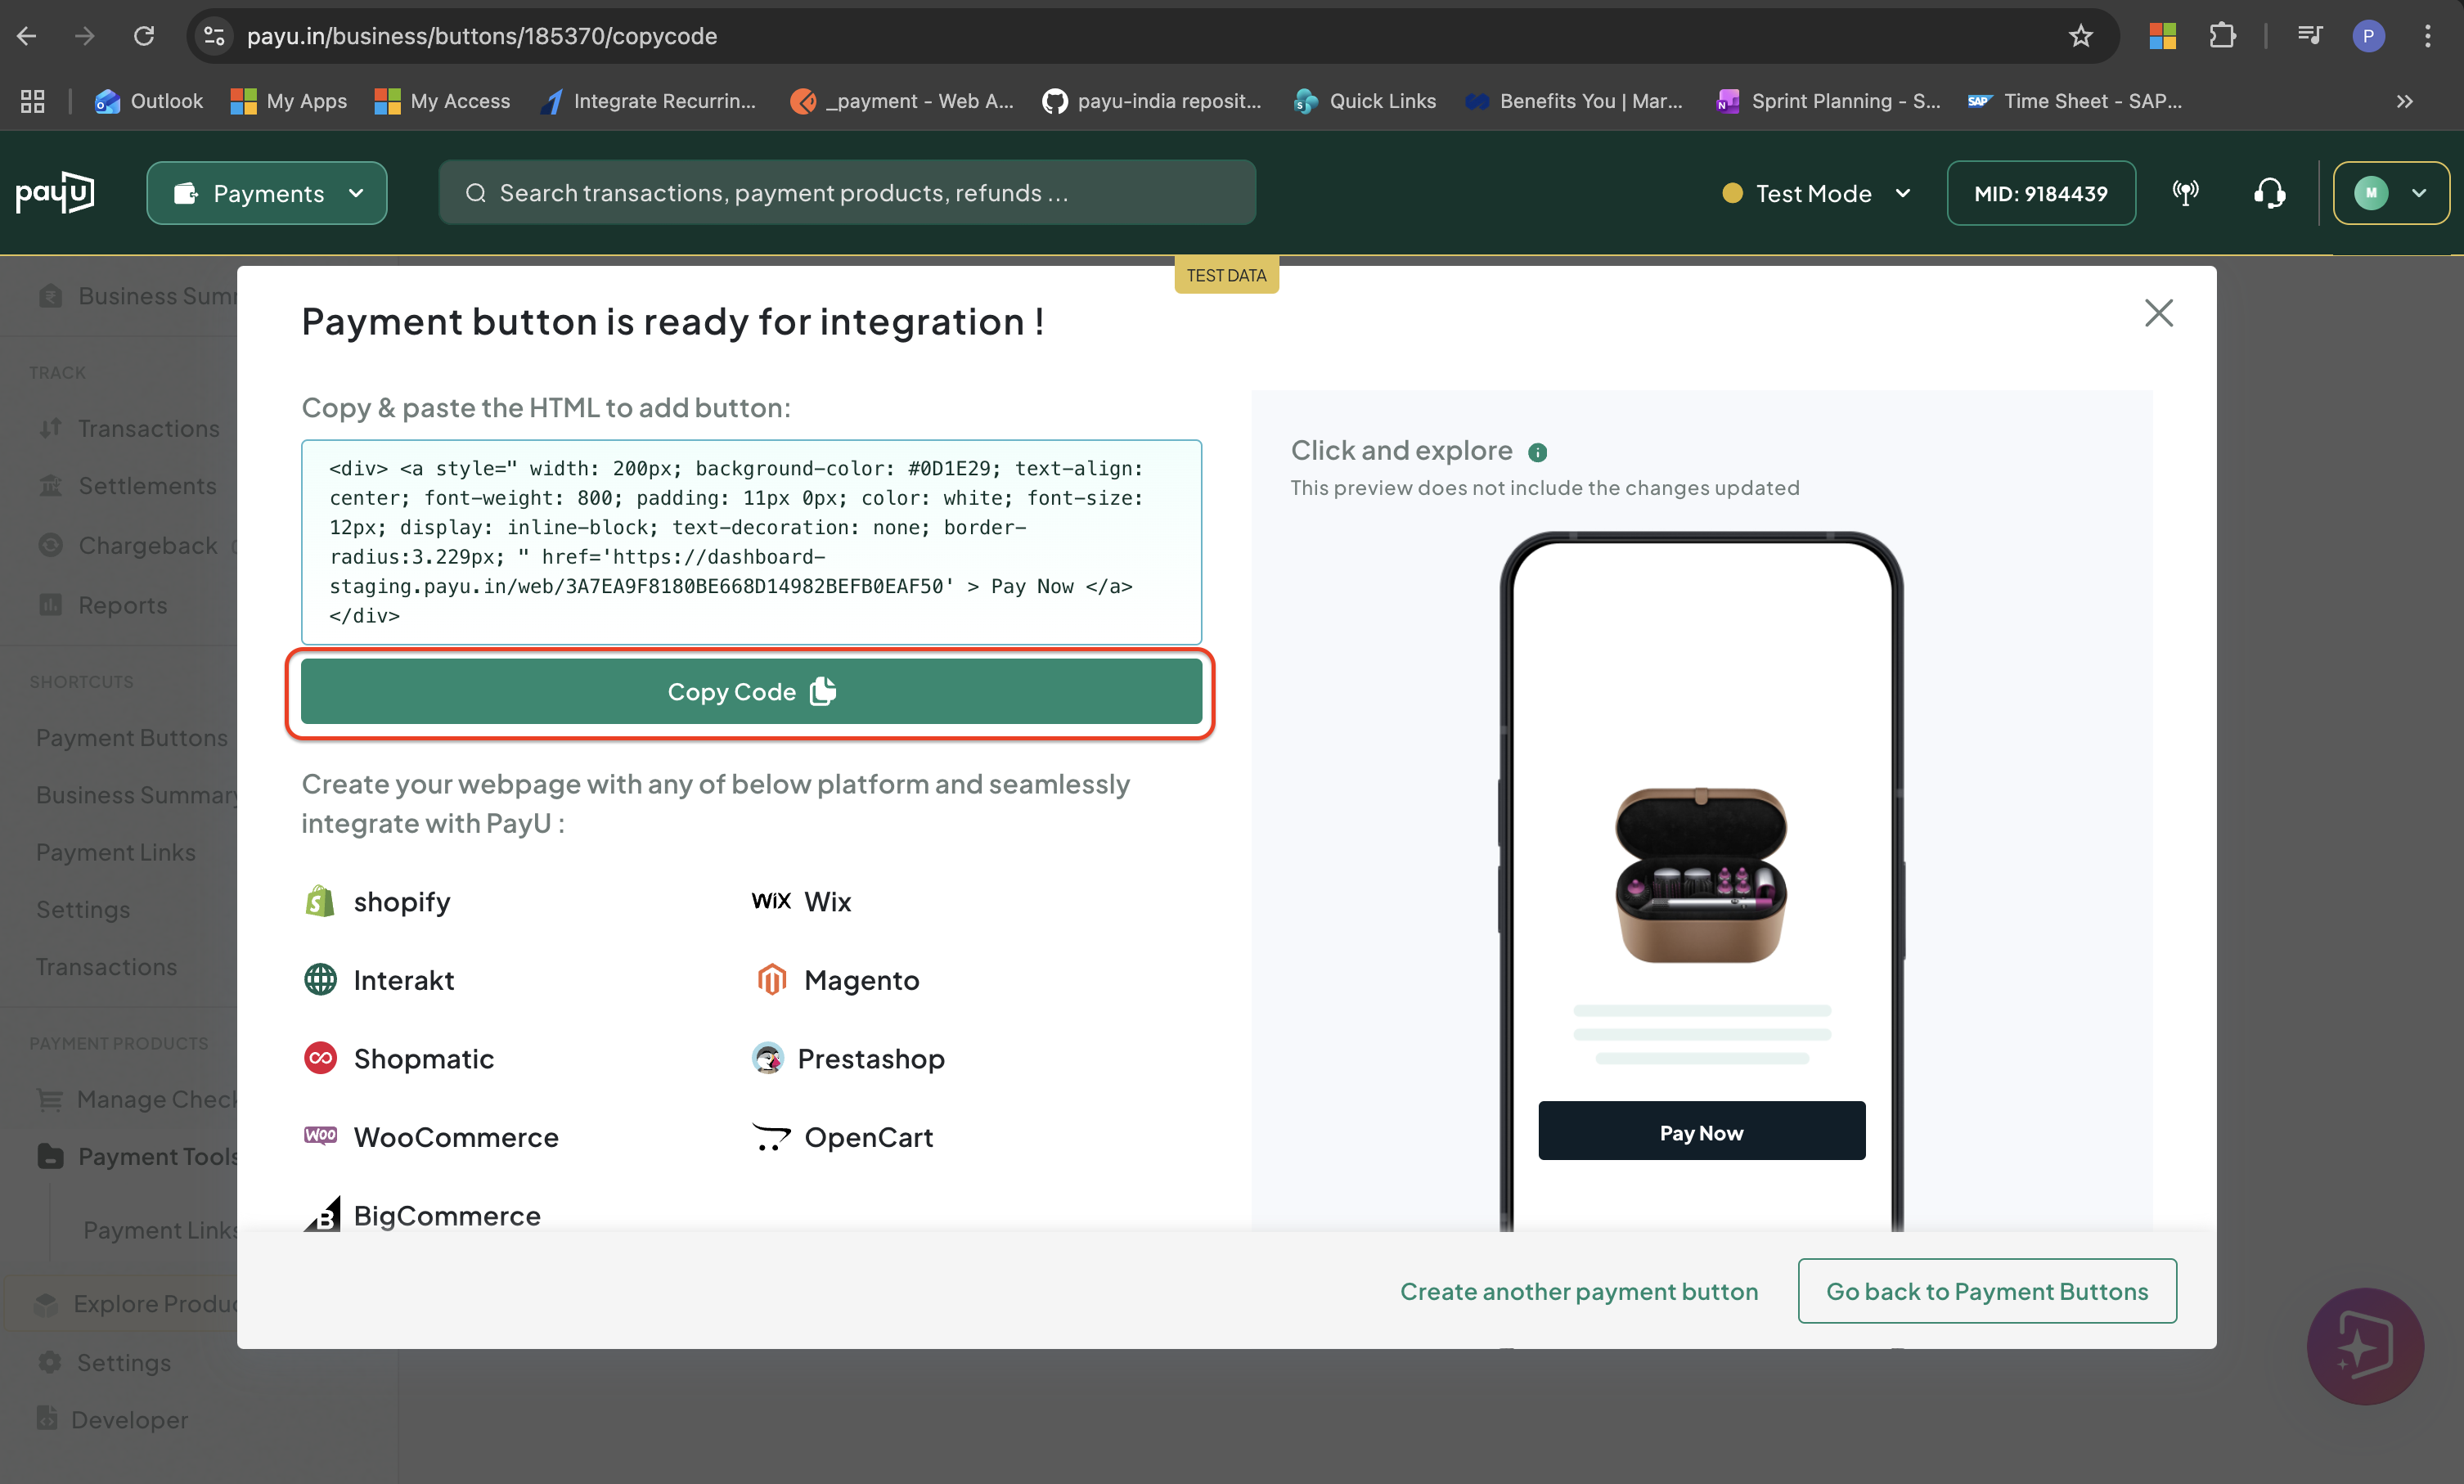
Embed the new code in your website
Delete a Payment Button
Steps to Delete a Payment Button
Deleting a button stops any further payments through it. Anyone who clicks it on your website will see a message that it is no longer active.
To delete a button:
-
Log in to the PayU Dashboard and click Payment Buttons under Payment Tools.
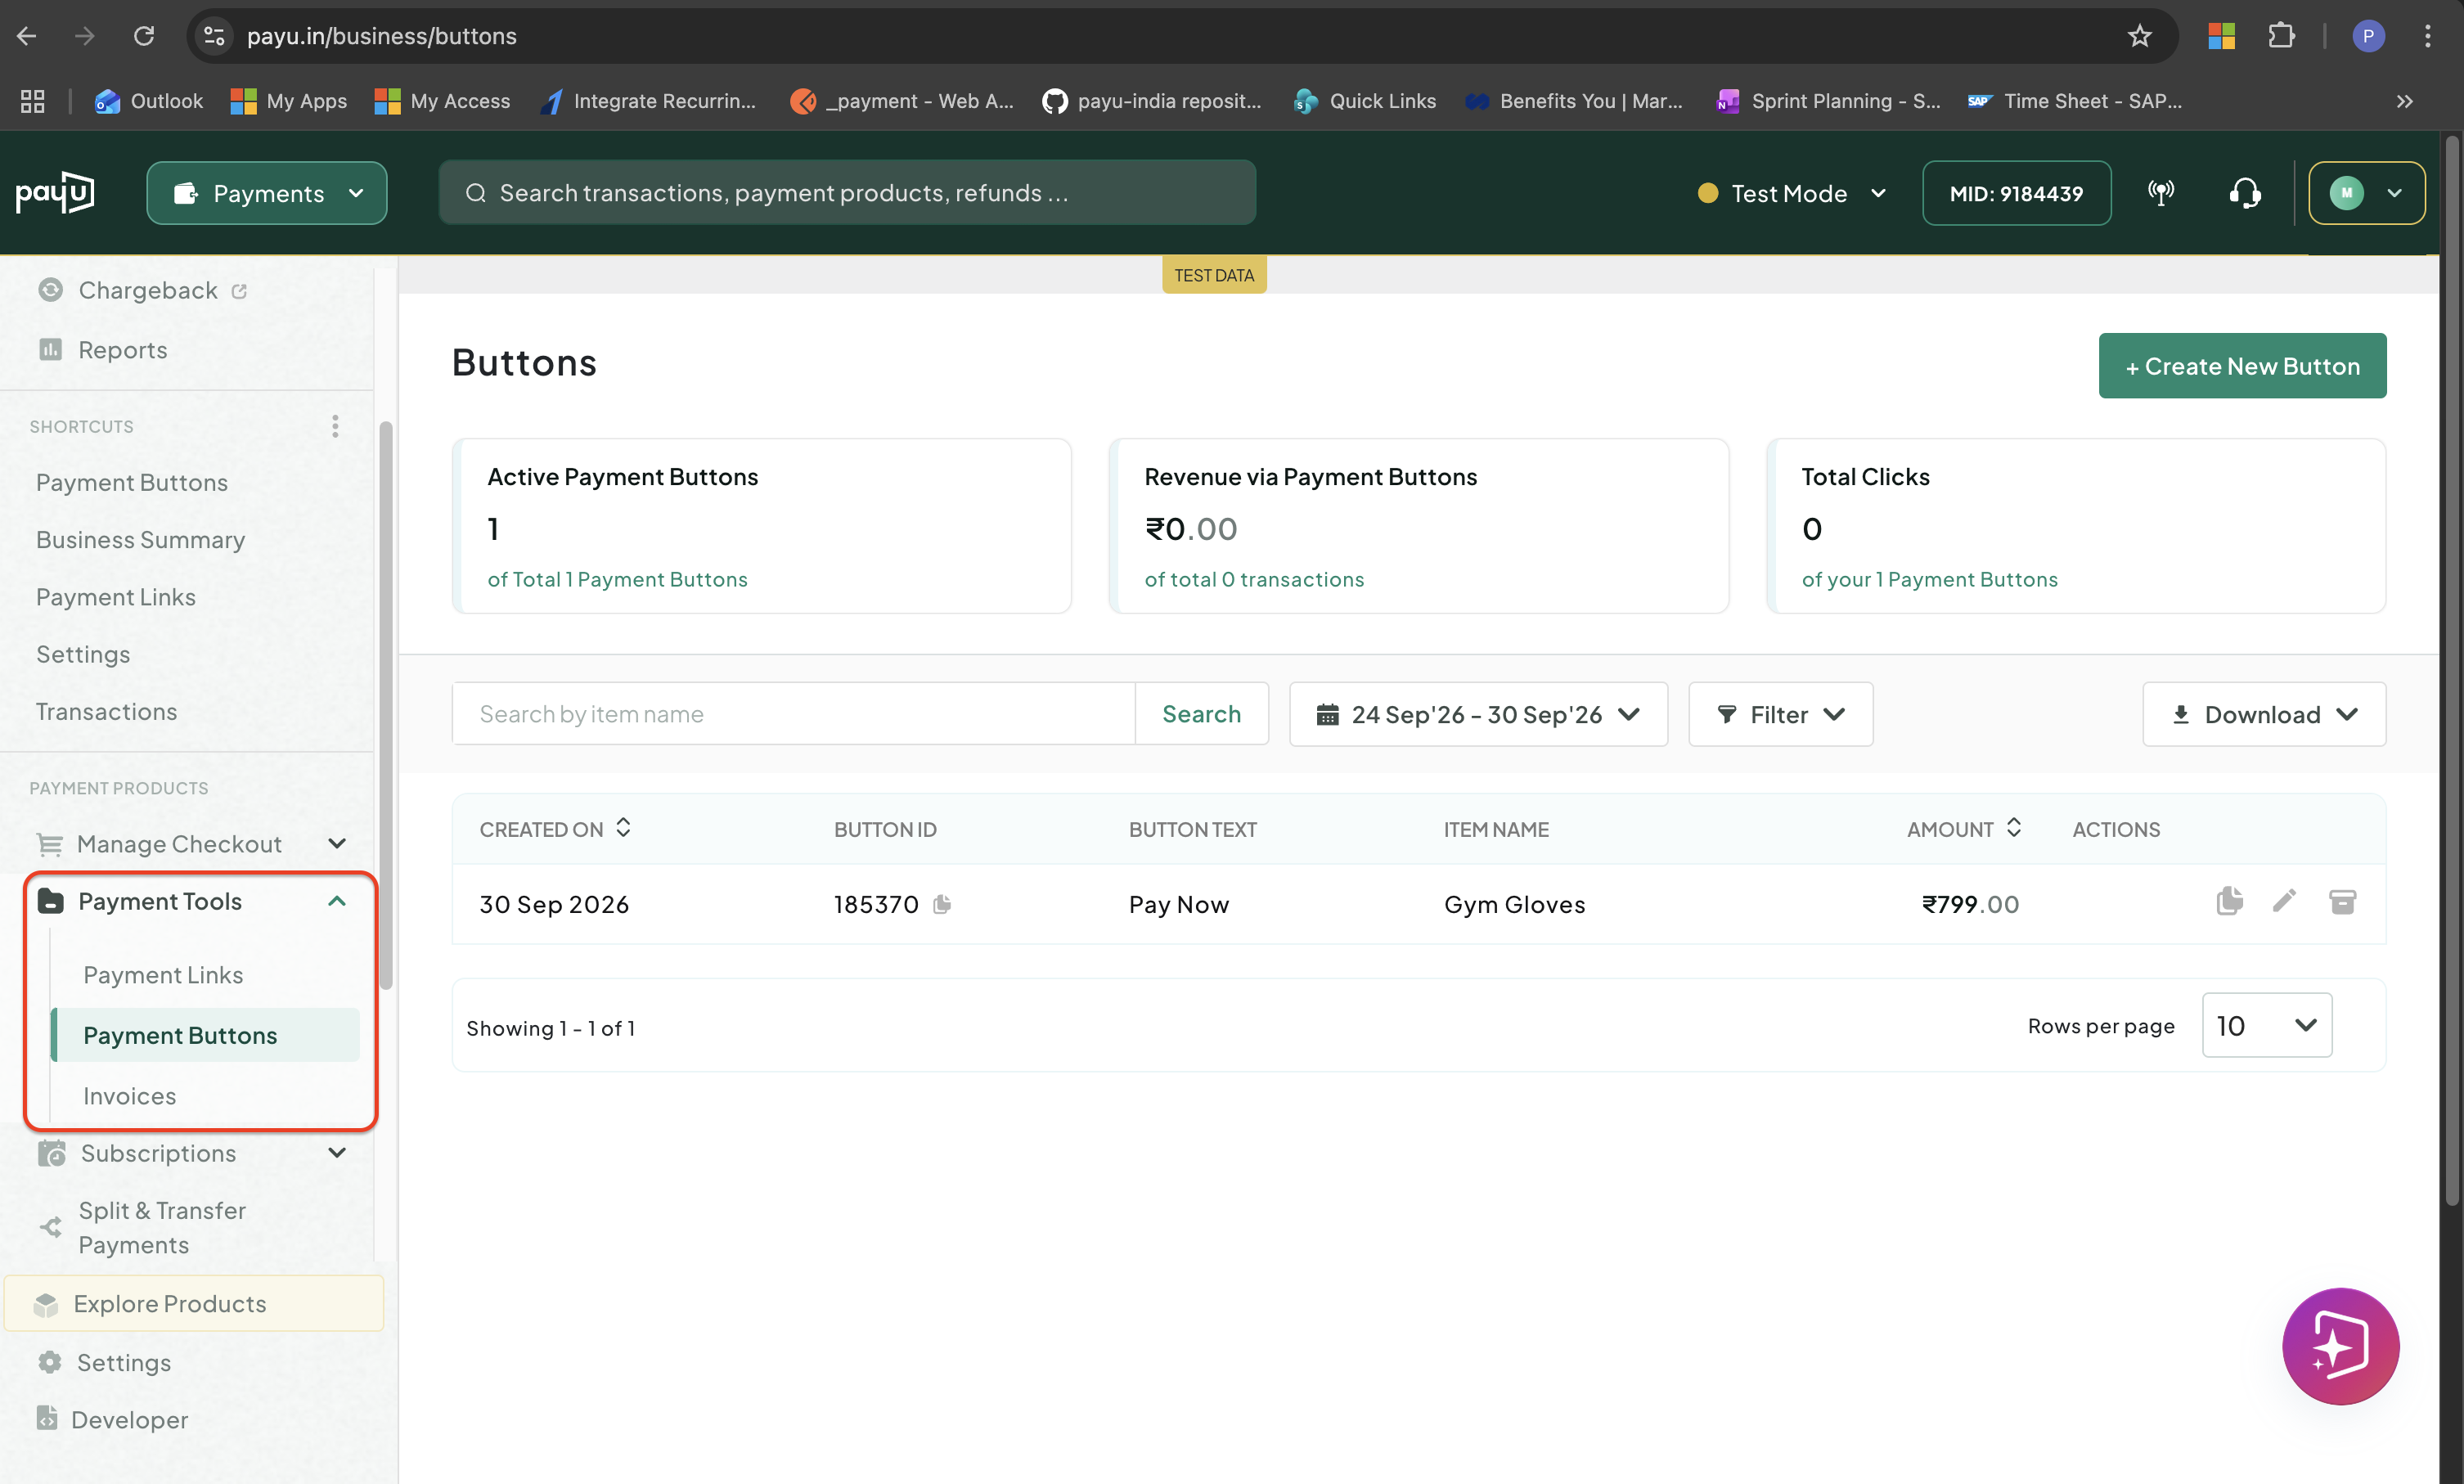
Access Payment Buttons
-
Click the delete icon next to the button you want to delete.
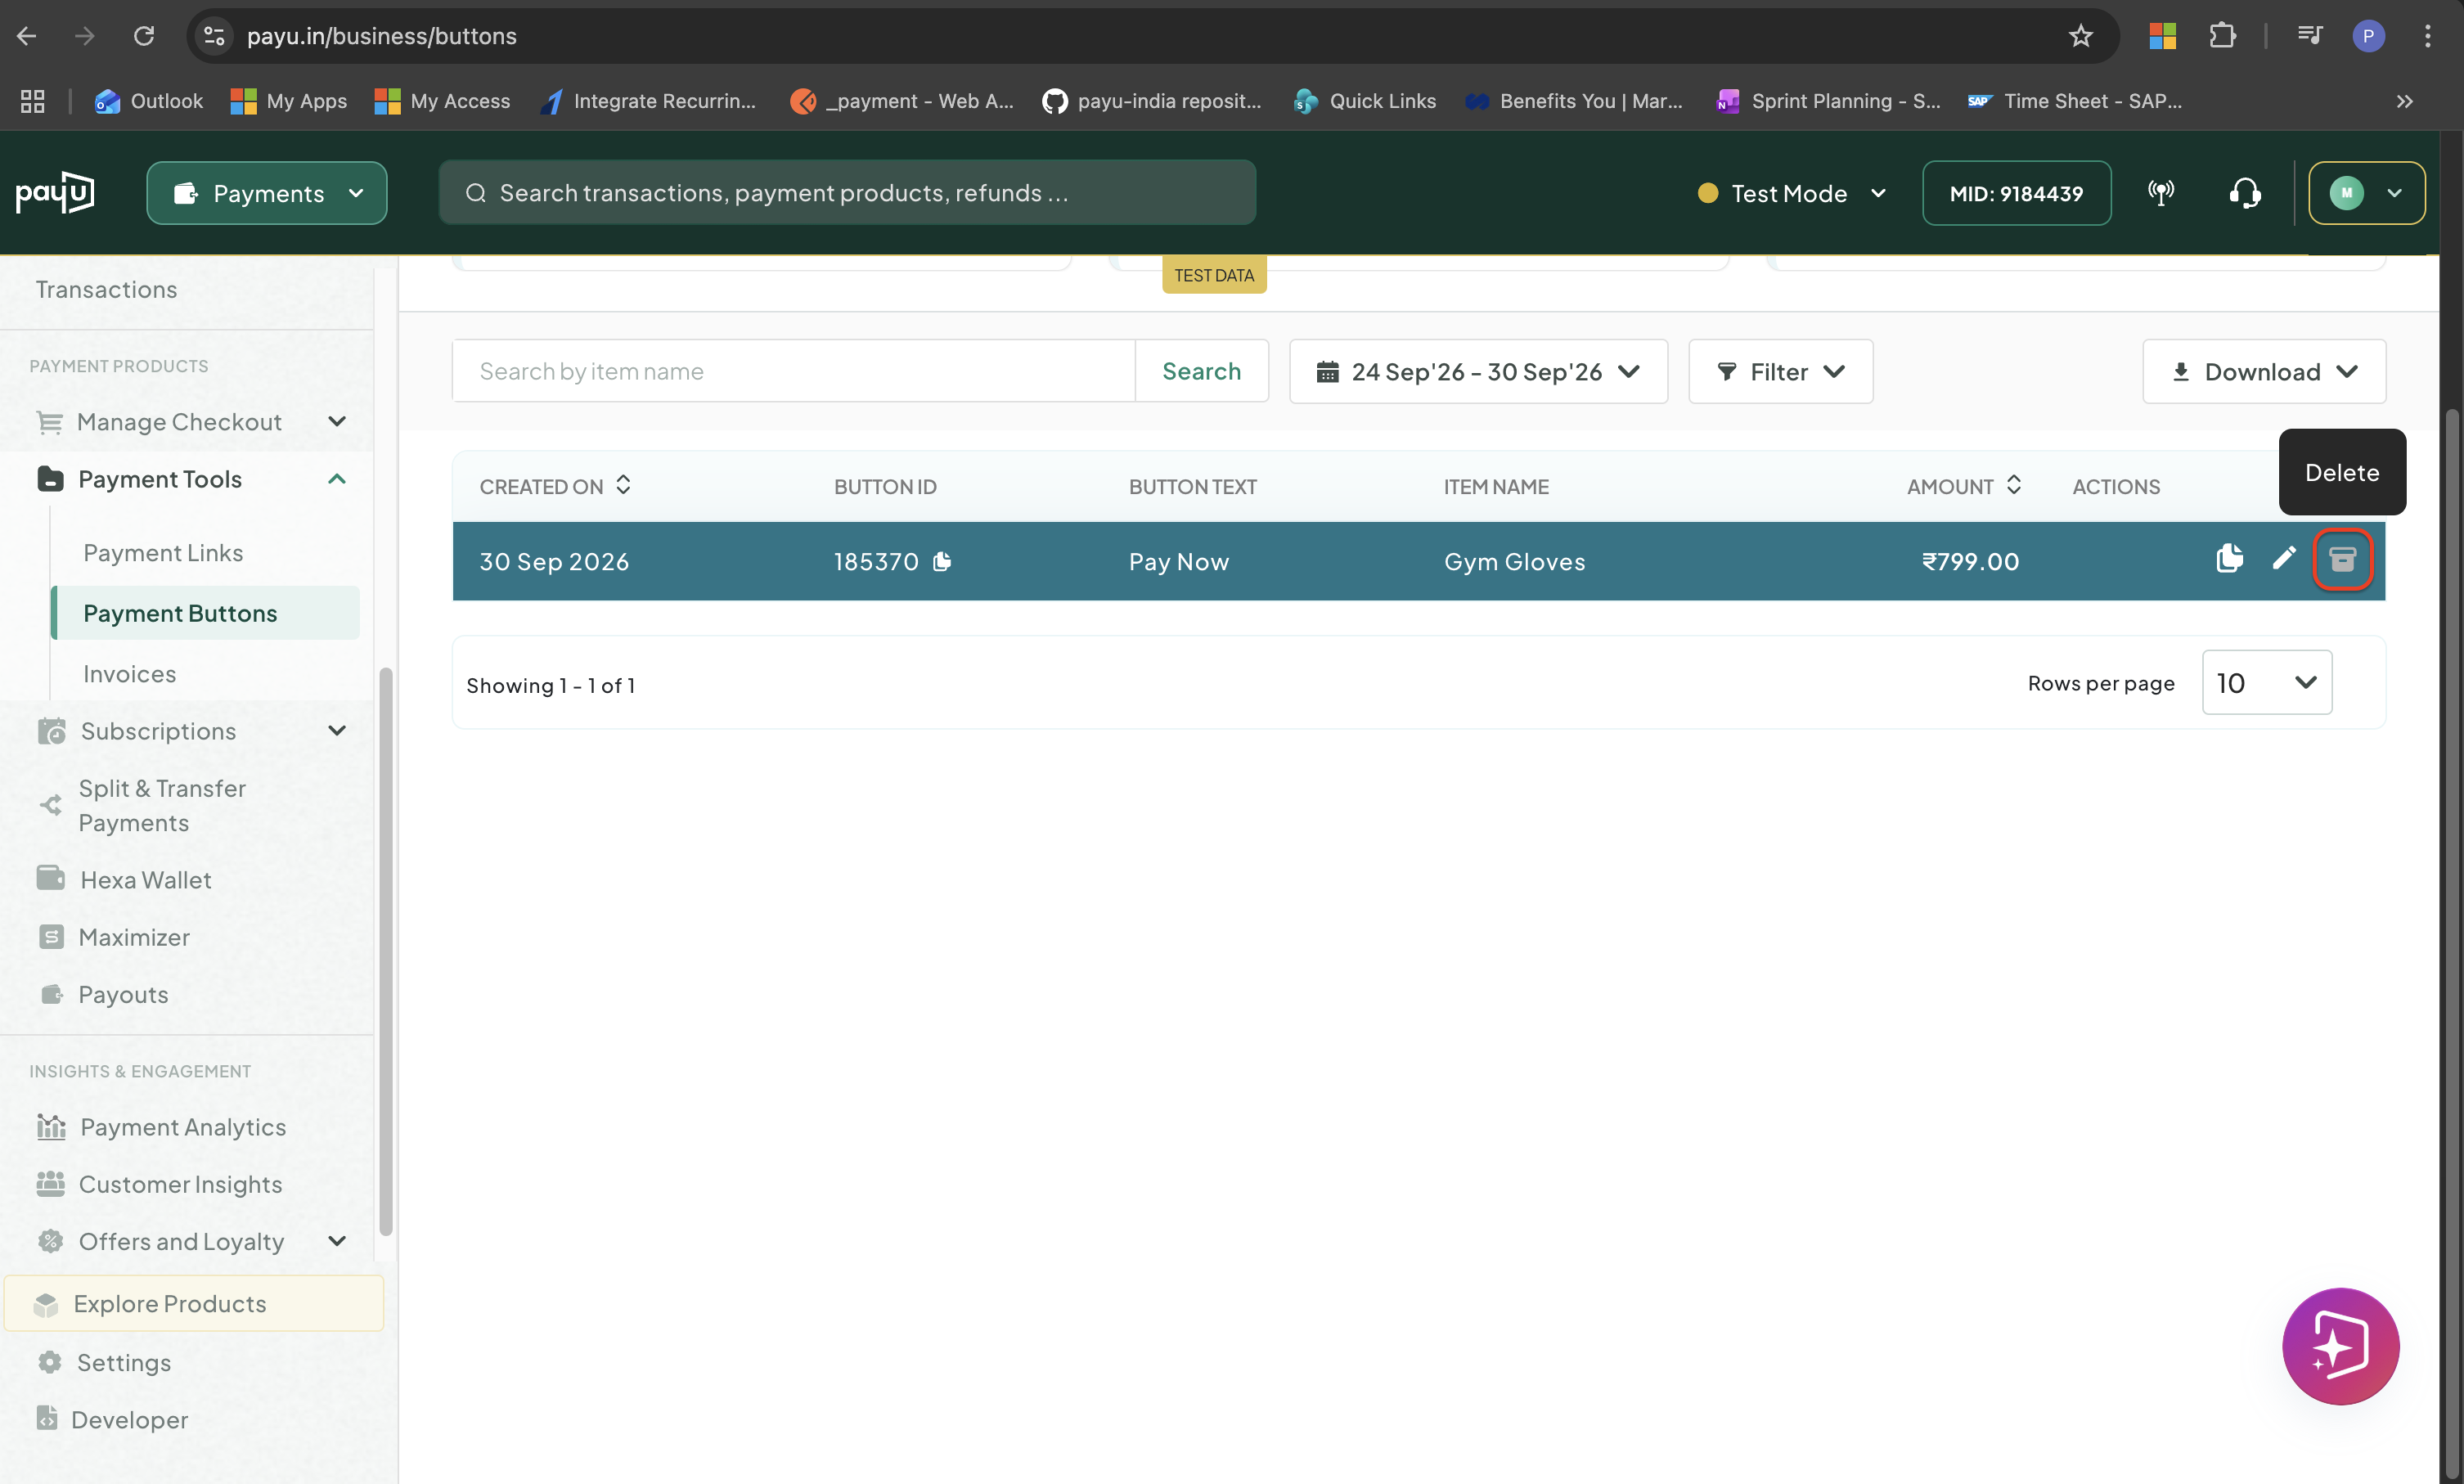
Delete a Payment Button
-
Click Yes, Delete in the confirmation window.
How Do I Search for a Payment Button?
You can filter the payment buttons list using the following options:
Filter by Button Text
To filter your buttons by type:
-
Log in to the PayU Dashboard and click Payment Buttons under Payment Tools.
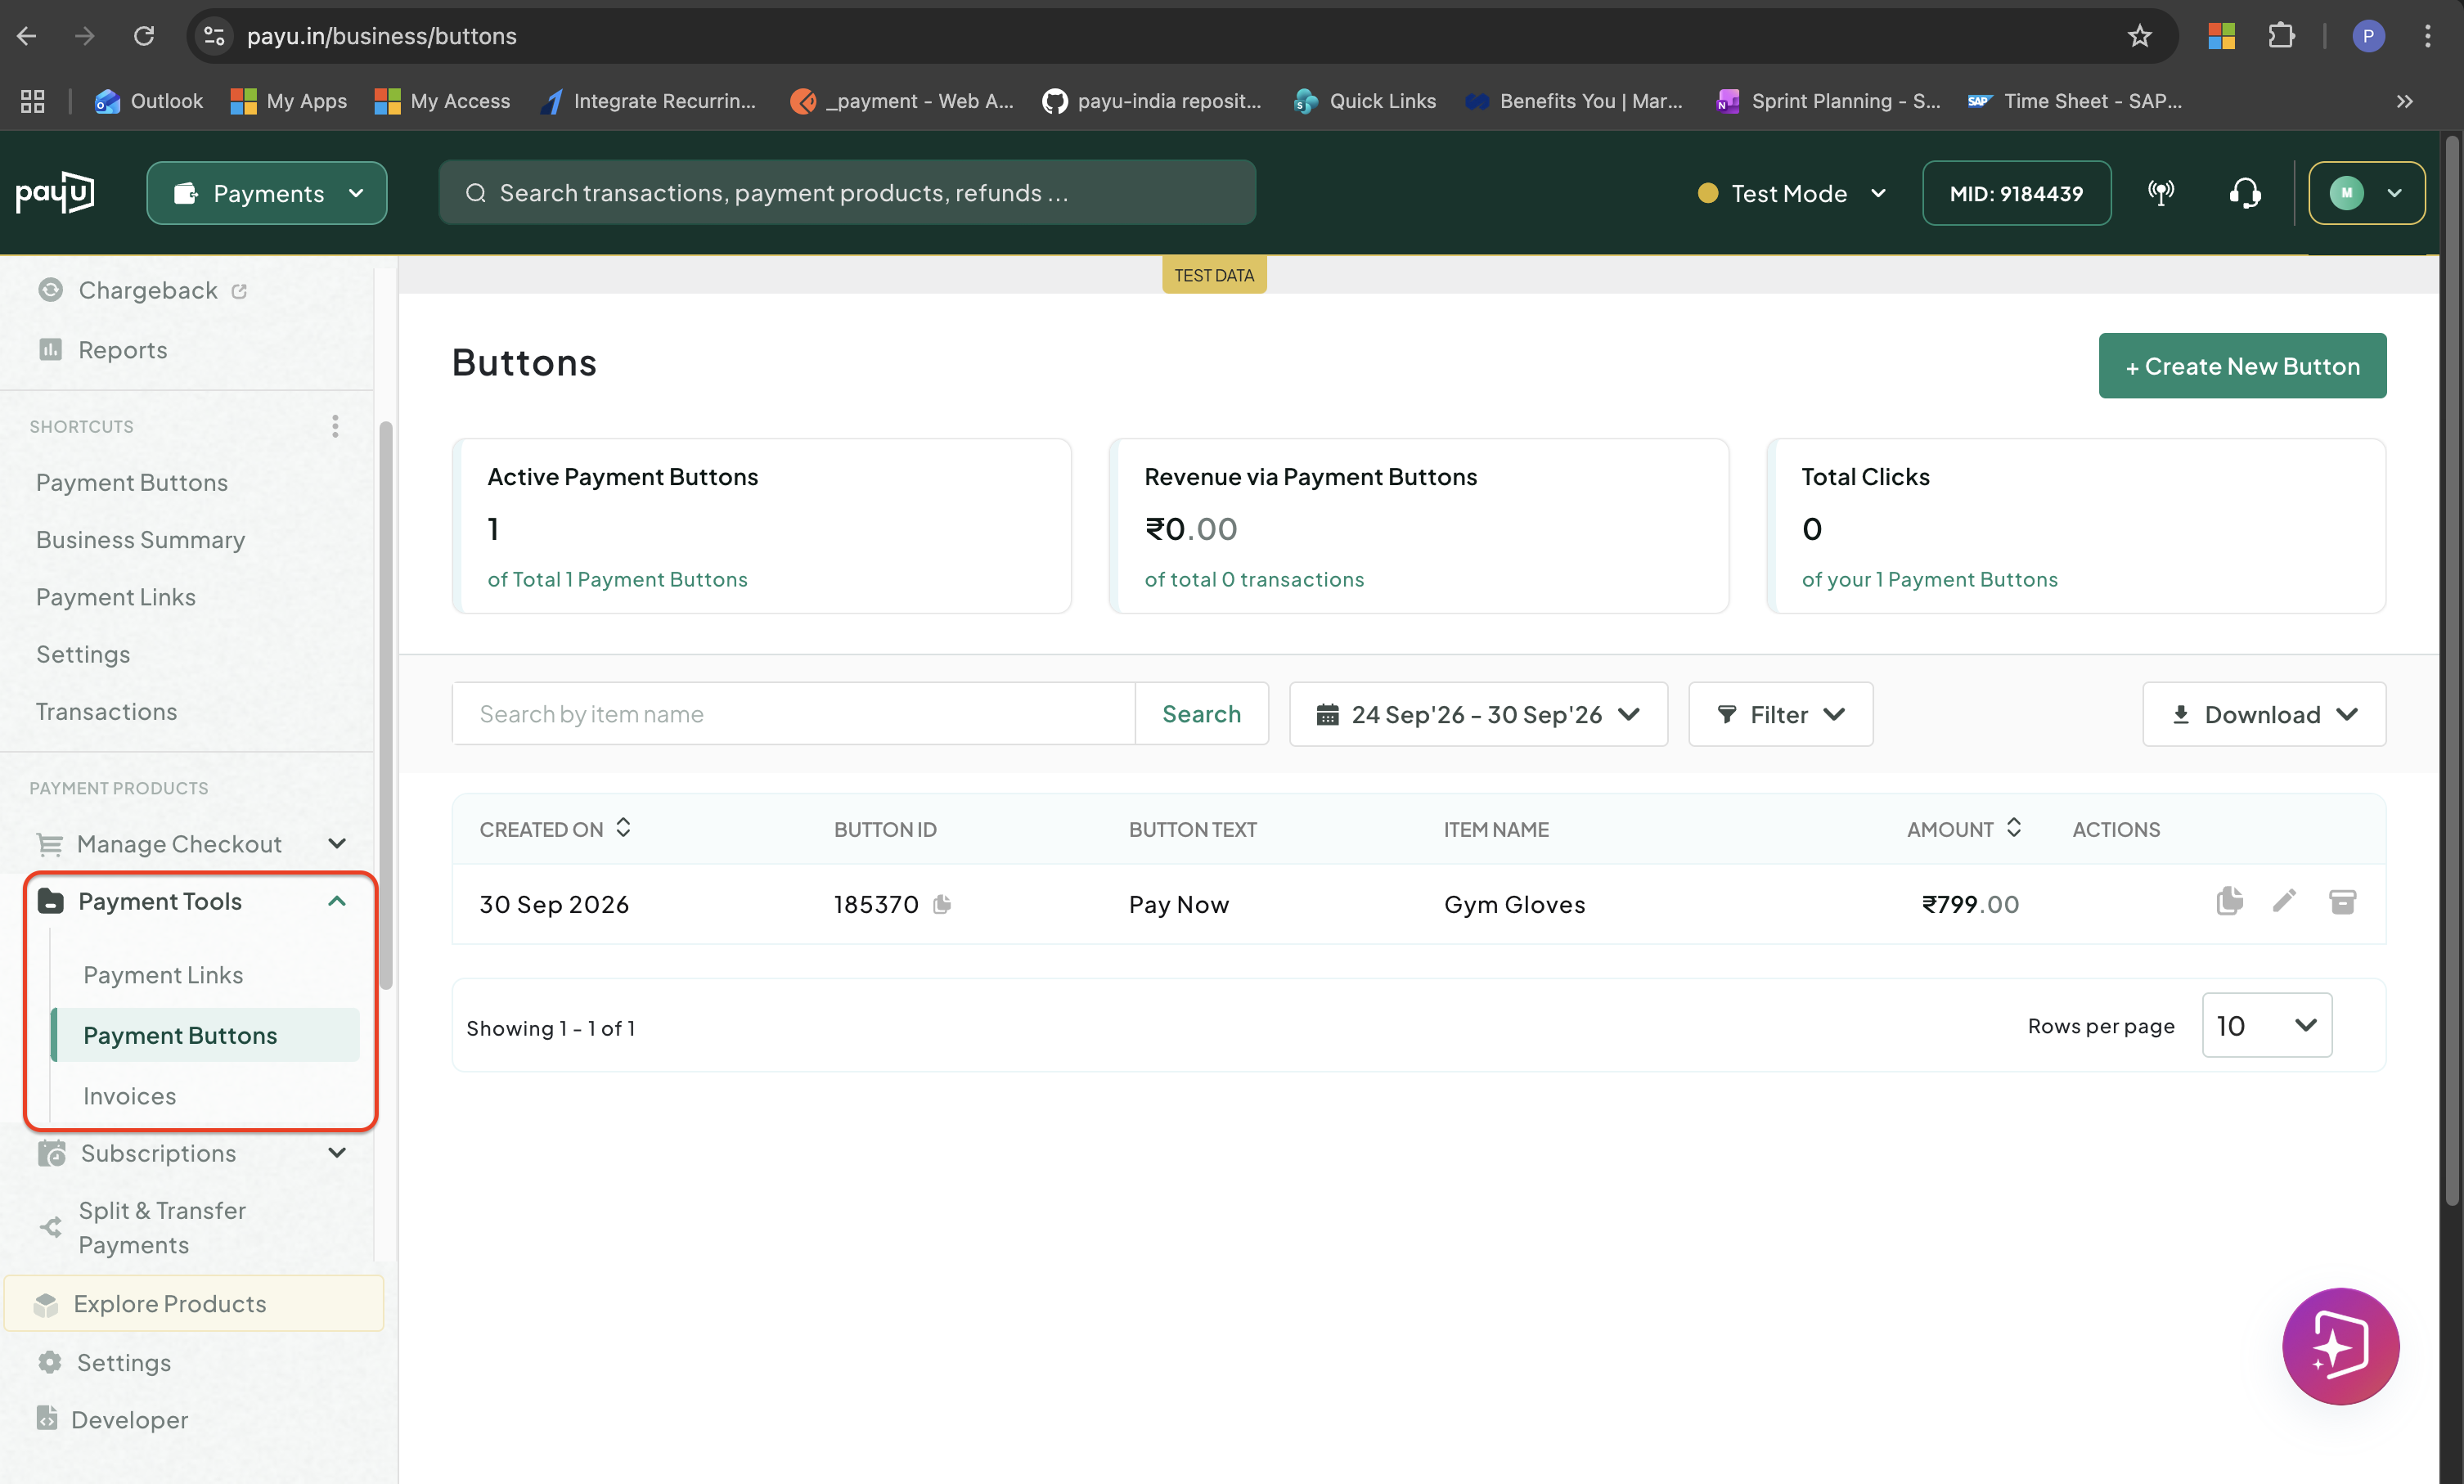
Access Payment Button
-
Click the Filter drop-down at the top bar and select the button text of buttons you want to see.
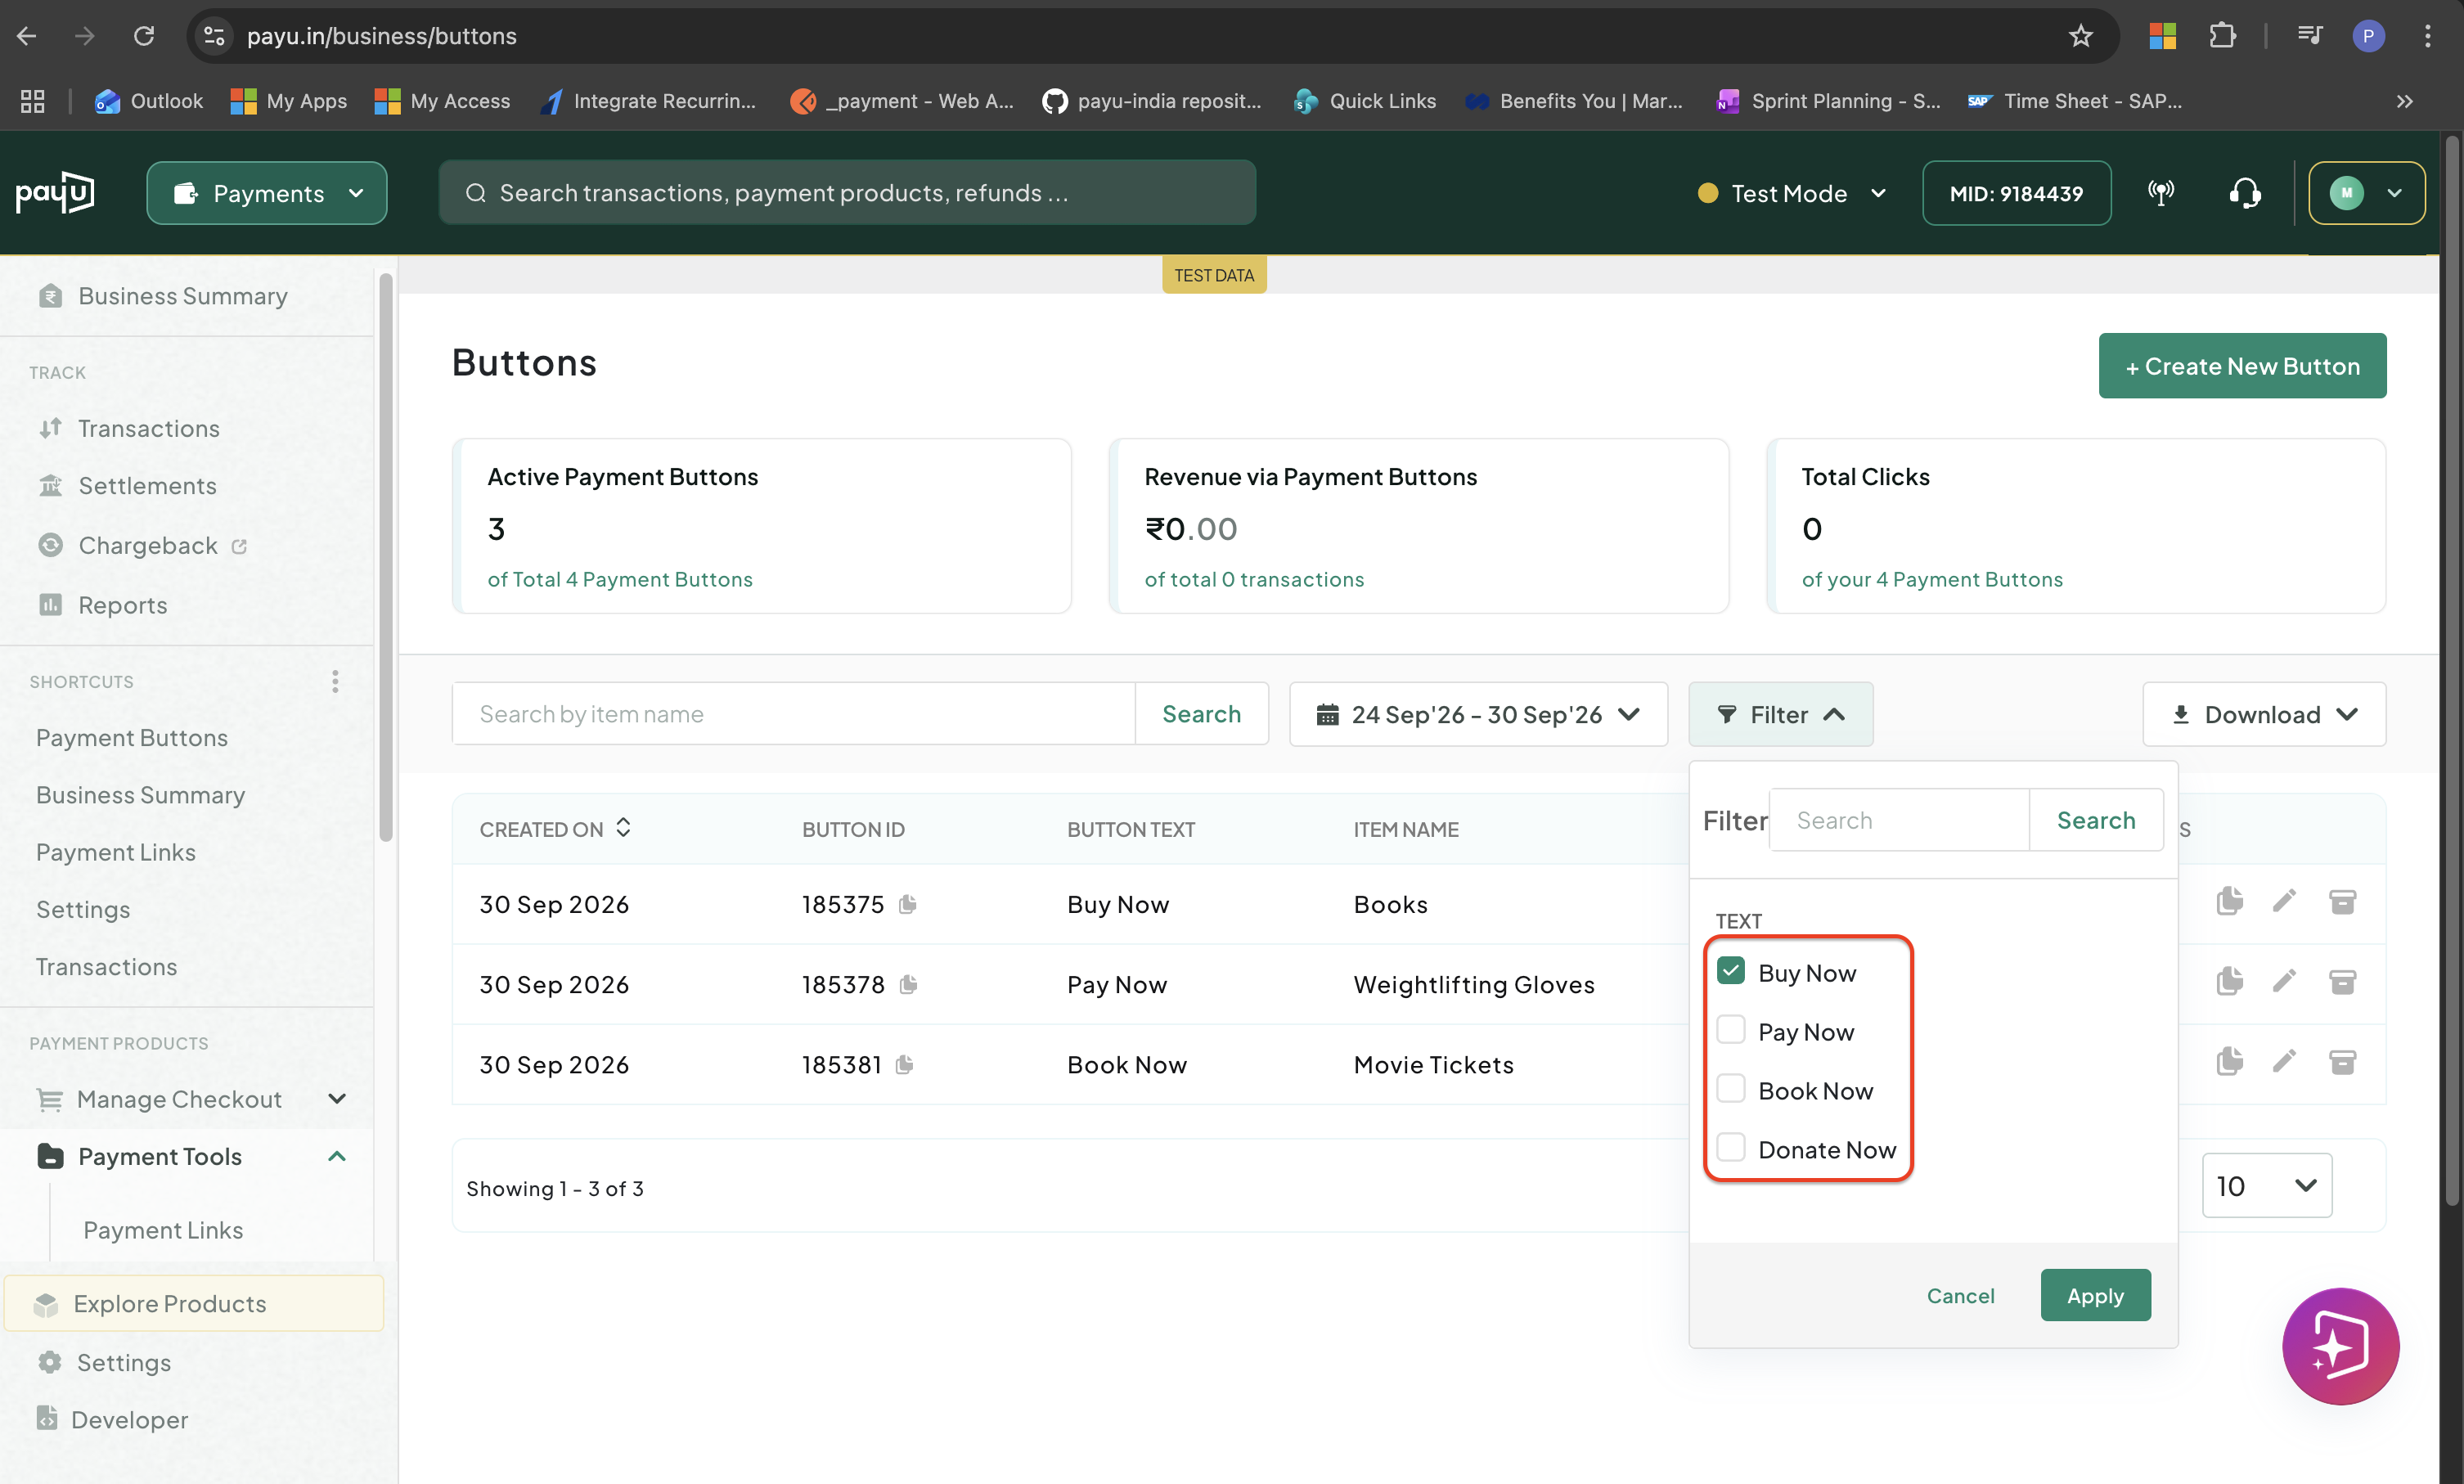
Filter the Payment Button List
-
Click Apply to filter the list.
To remove the filter and see all buttons again, click Reset inside the filter panel.
Filter by Date
To filter your buttons by when they were created:
-
Log in to the PayU Dashboard and click Payment Buttons under Payment Tools.
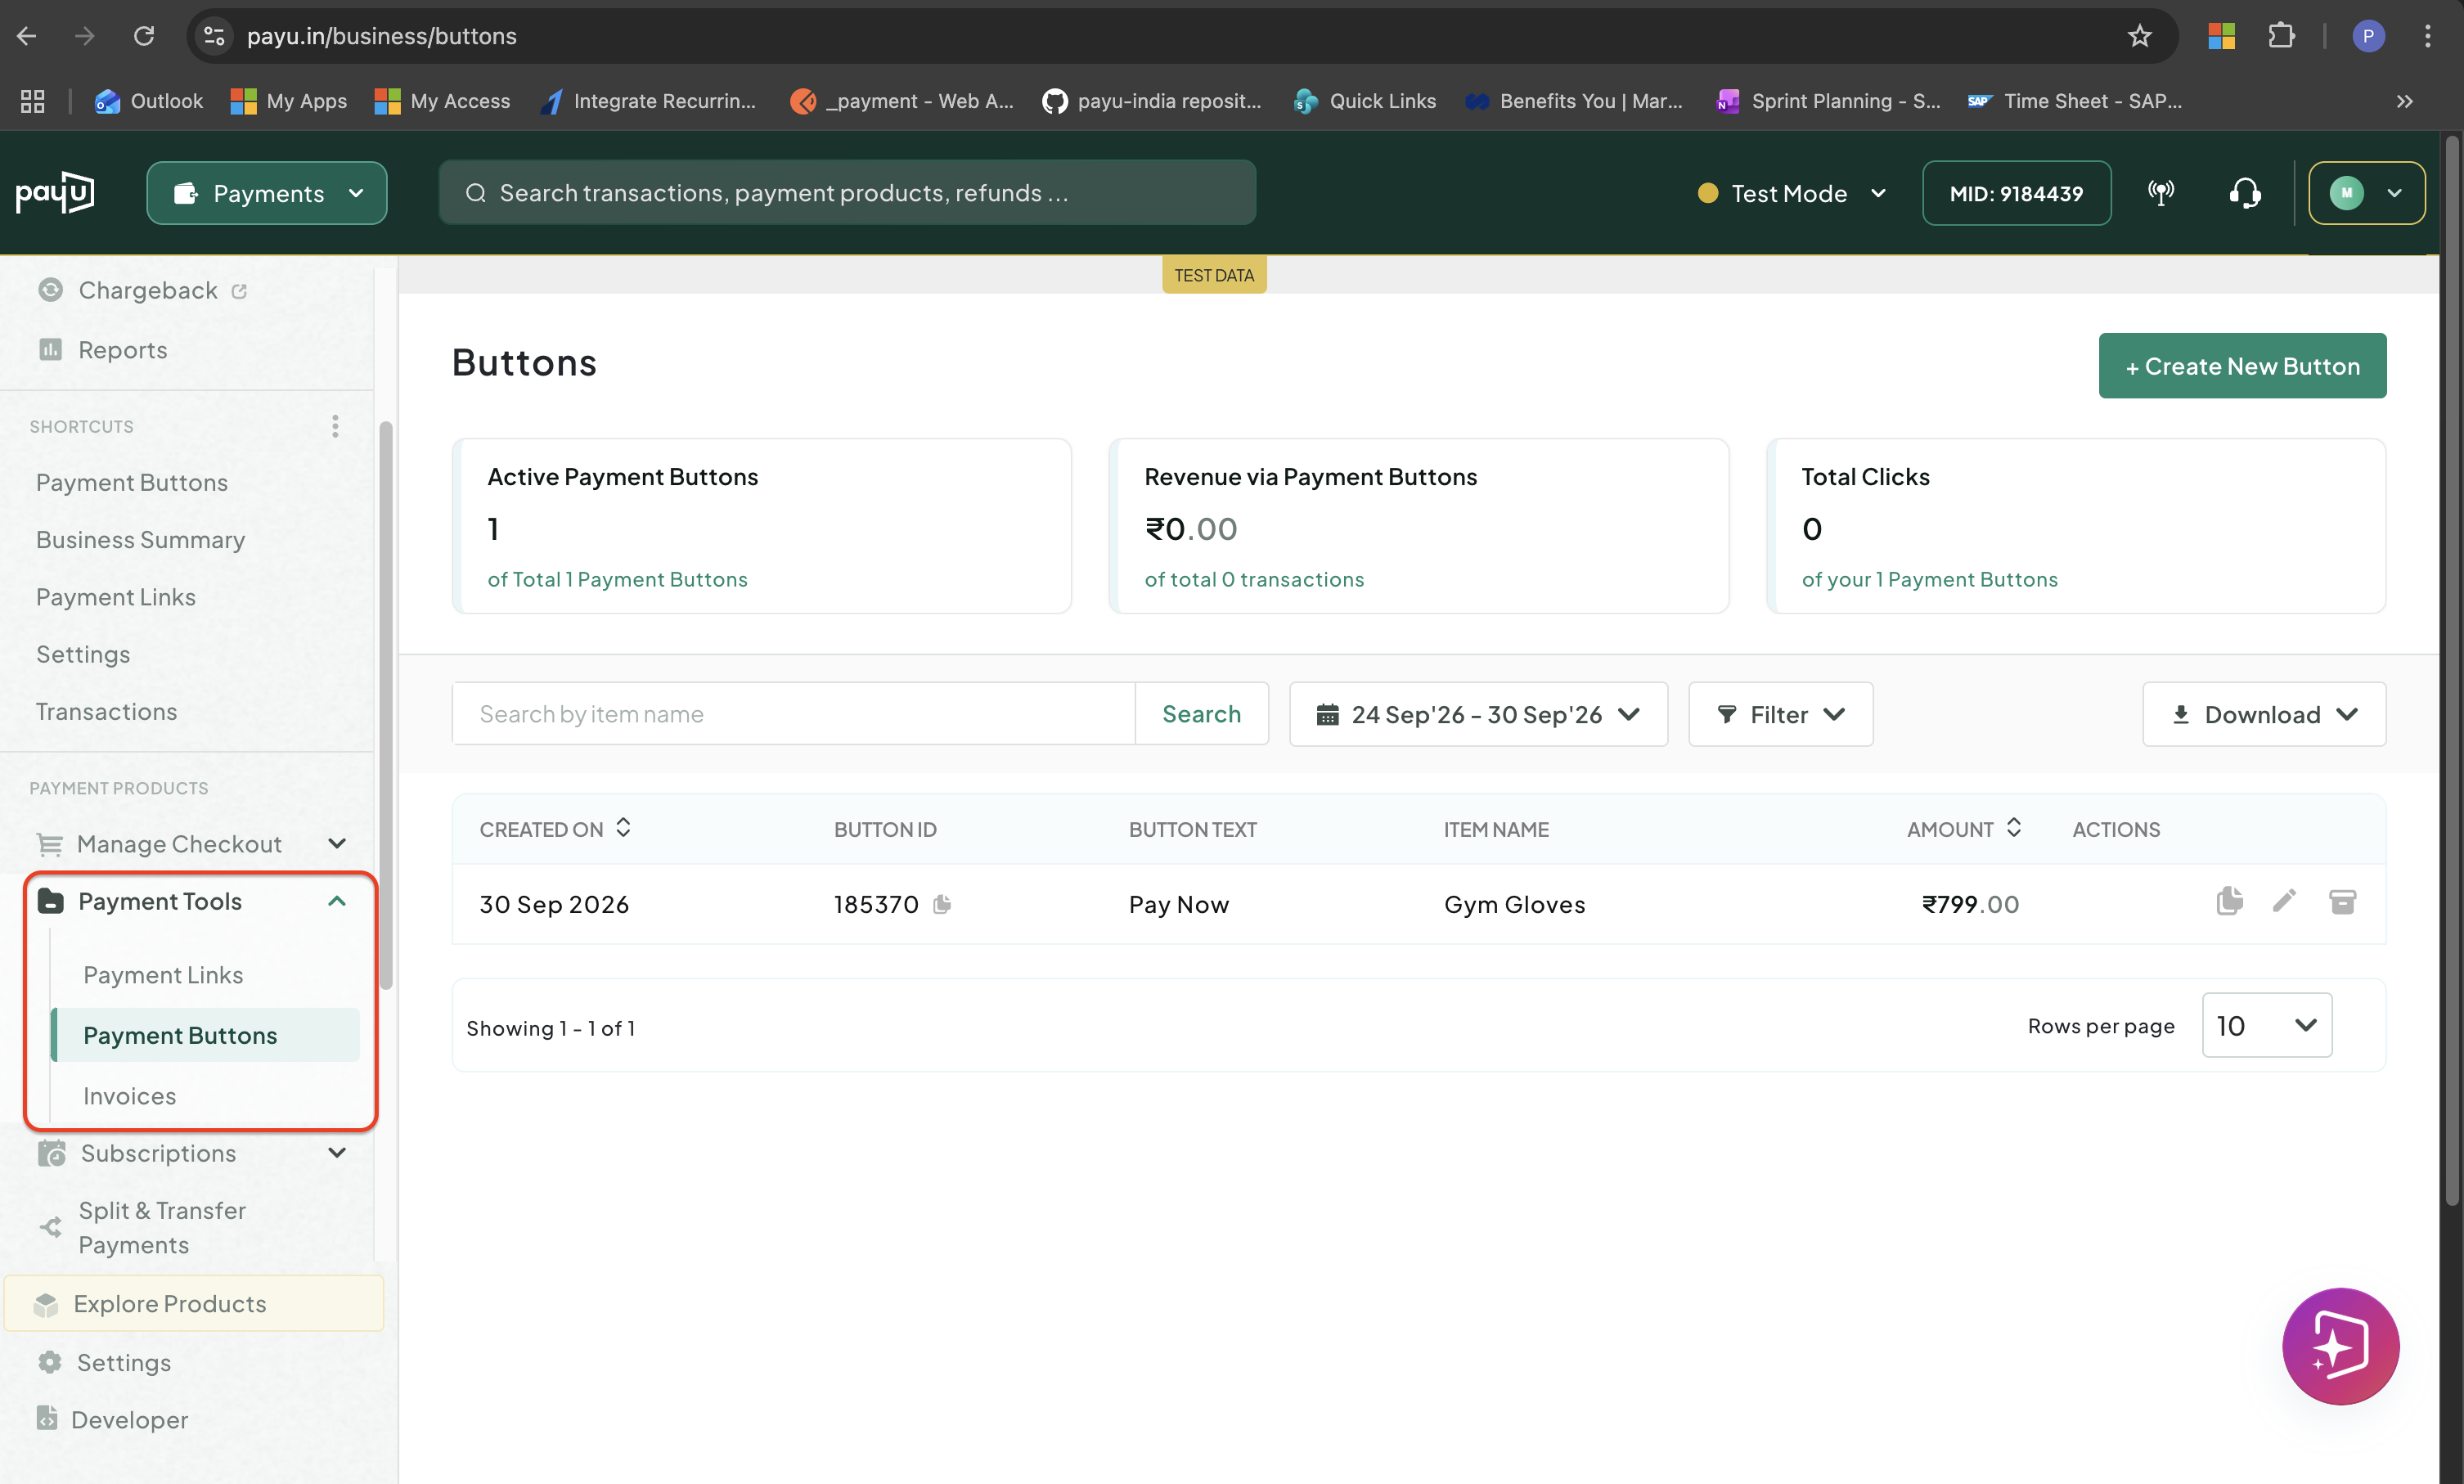
Access Payment Button
-
Click the calendar at the top bar and select a time period:
- Today
- Yesterday
- Past 7 days
- Past 30 days
- Custom Range
-
For a custom range, pick a start and end date and click Apply.
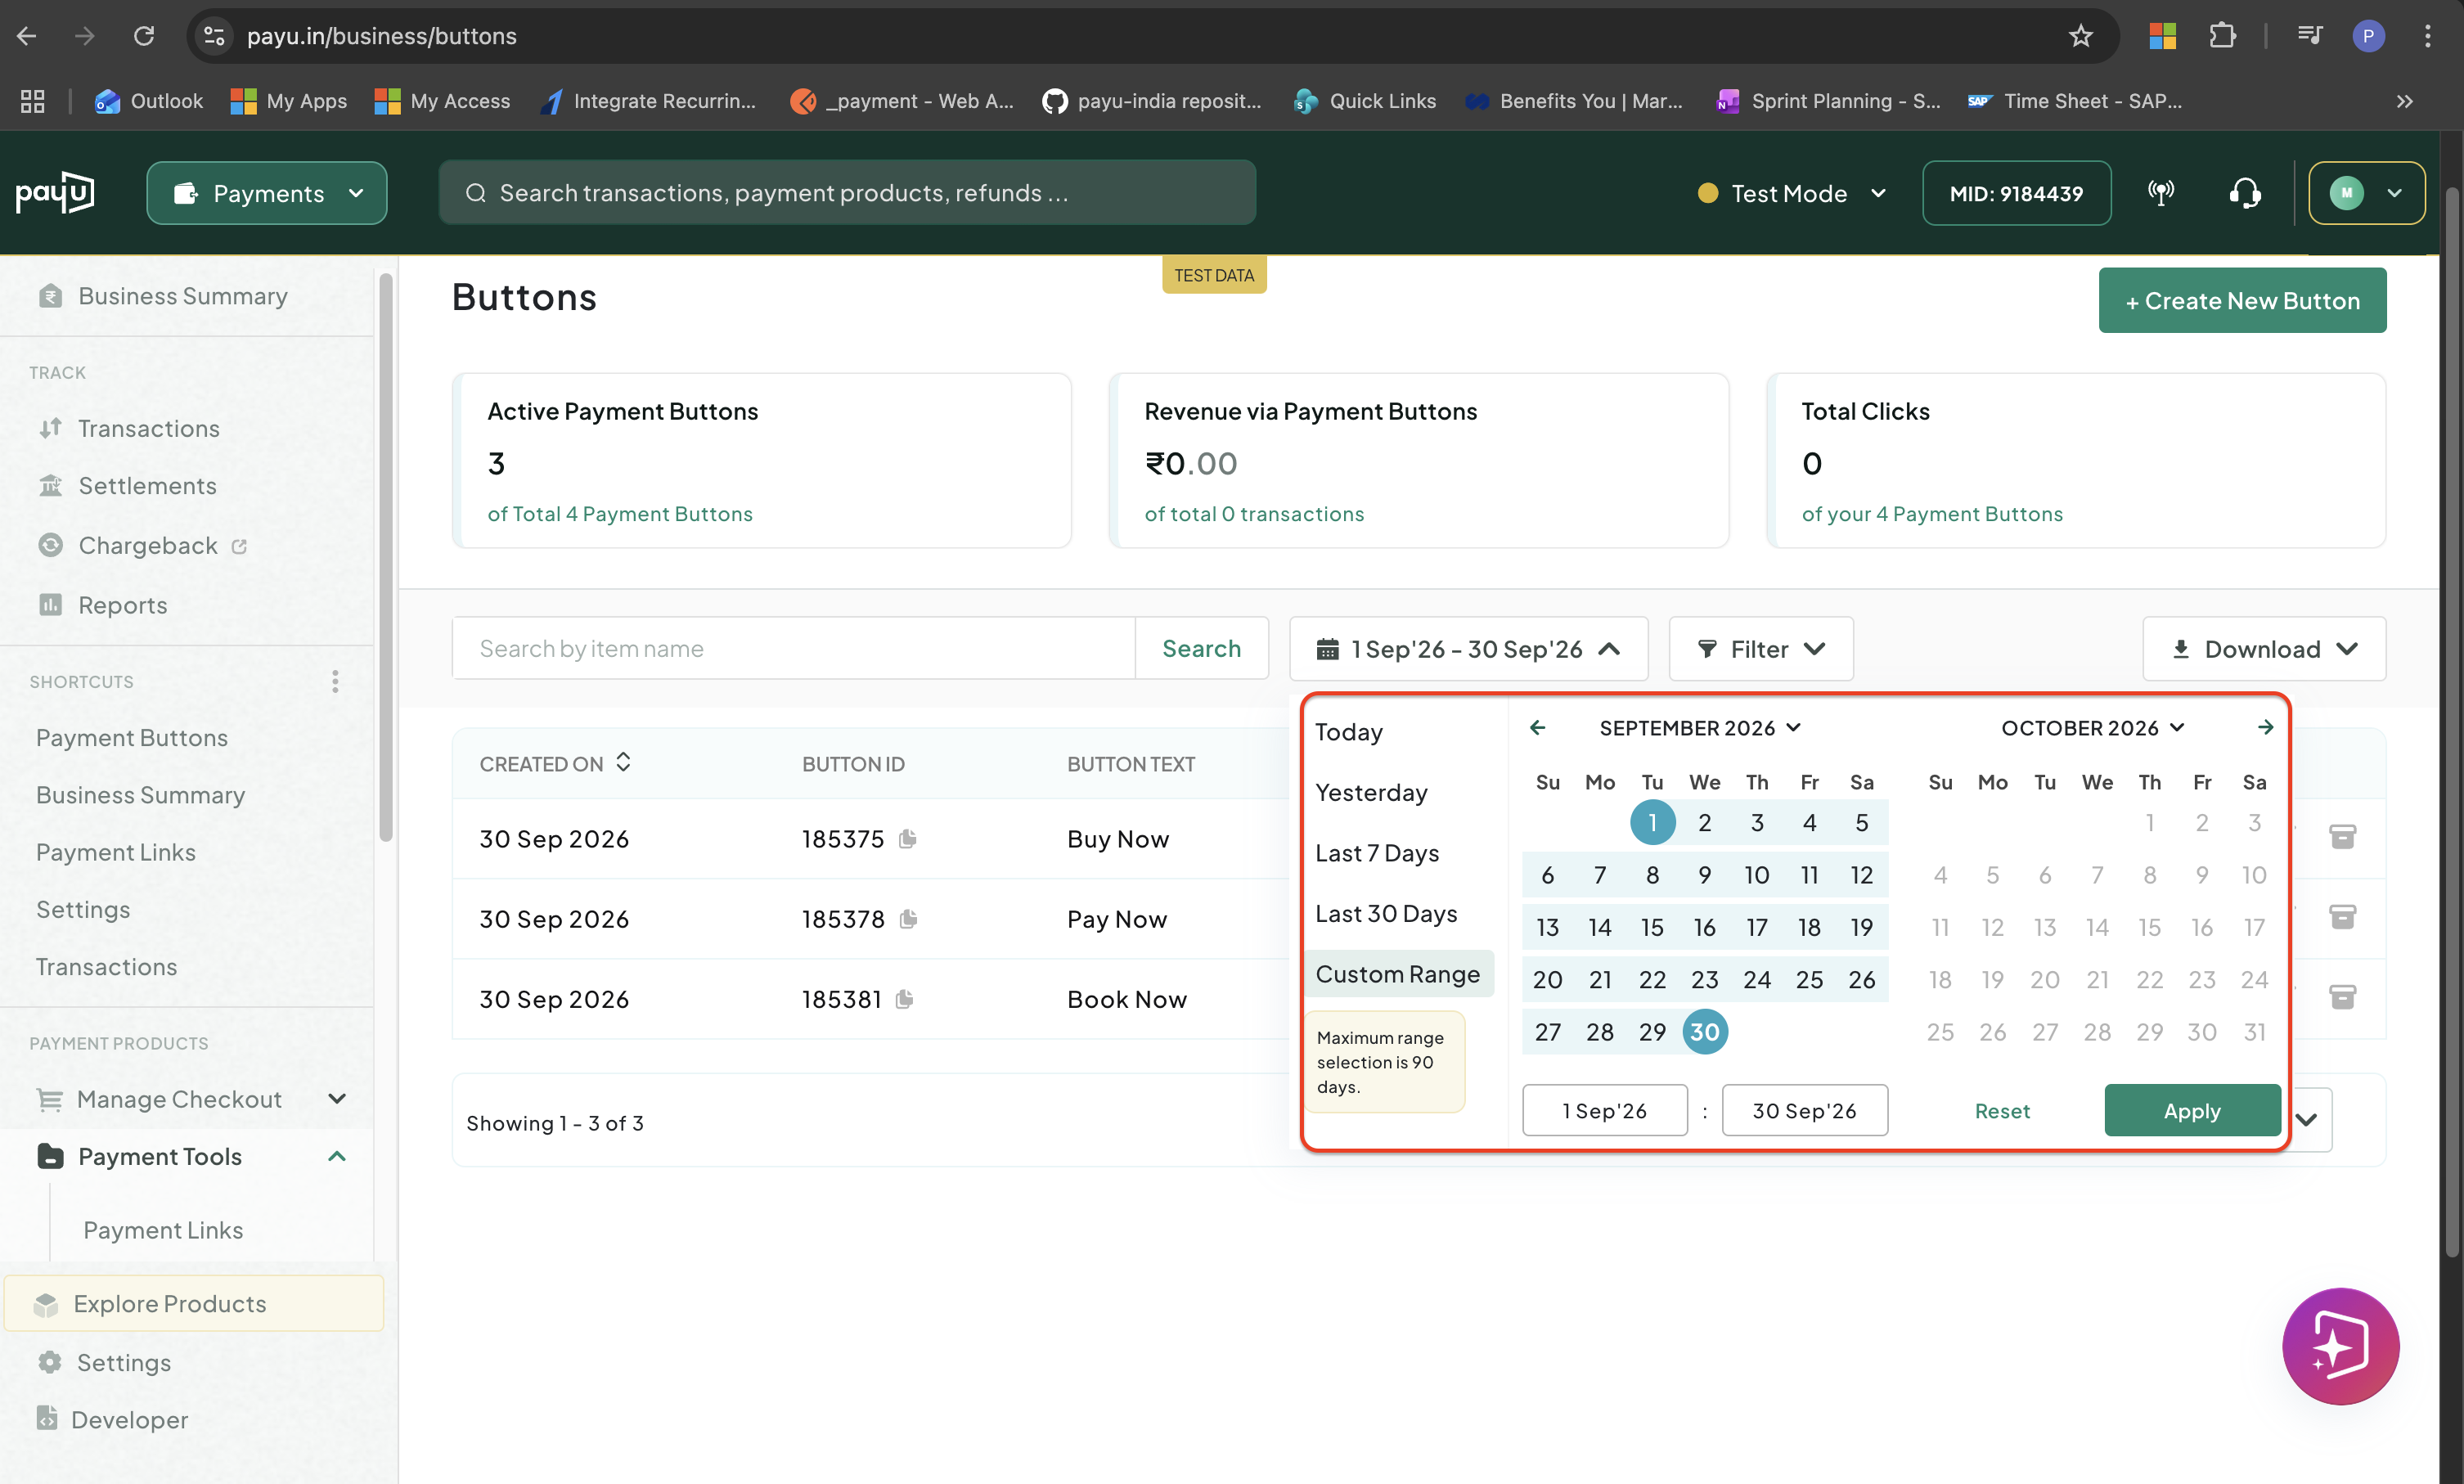
Filter by dates
How Do I Download My Payment Button Records?
Steps to Export Payment Button Records
To download payment button records:
-
Log in to the PayU Dashboard and click Payment Buttons under Payment Tools.
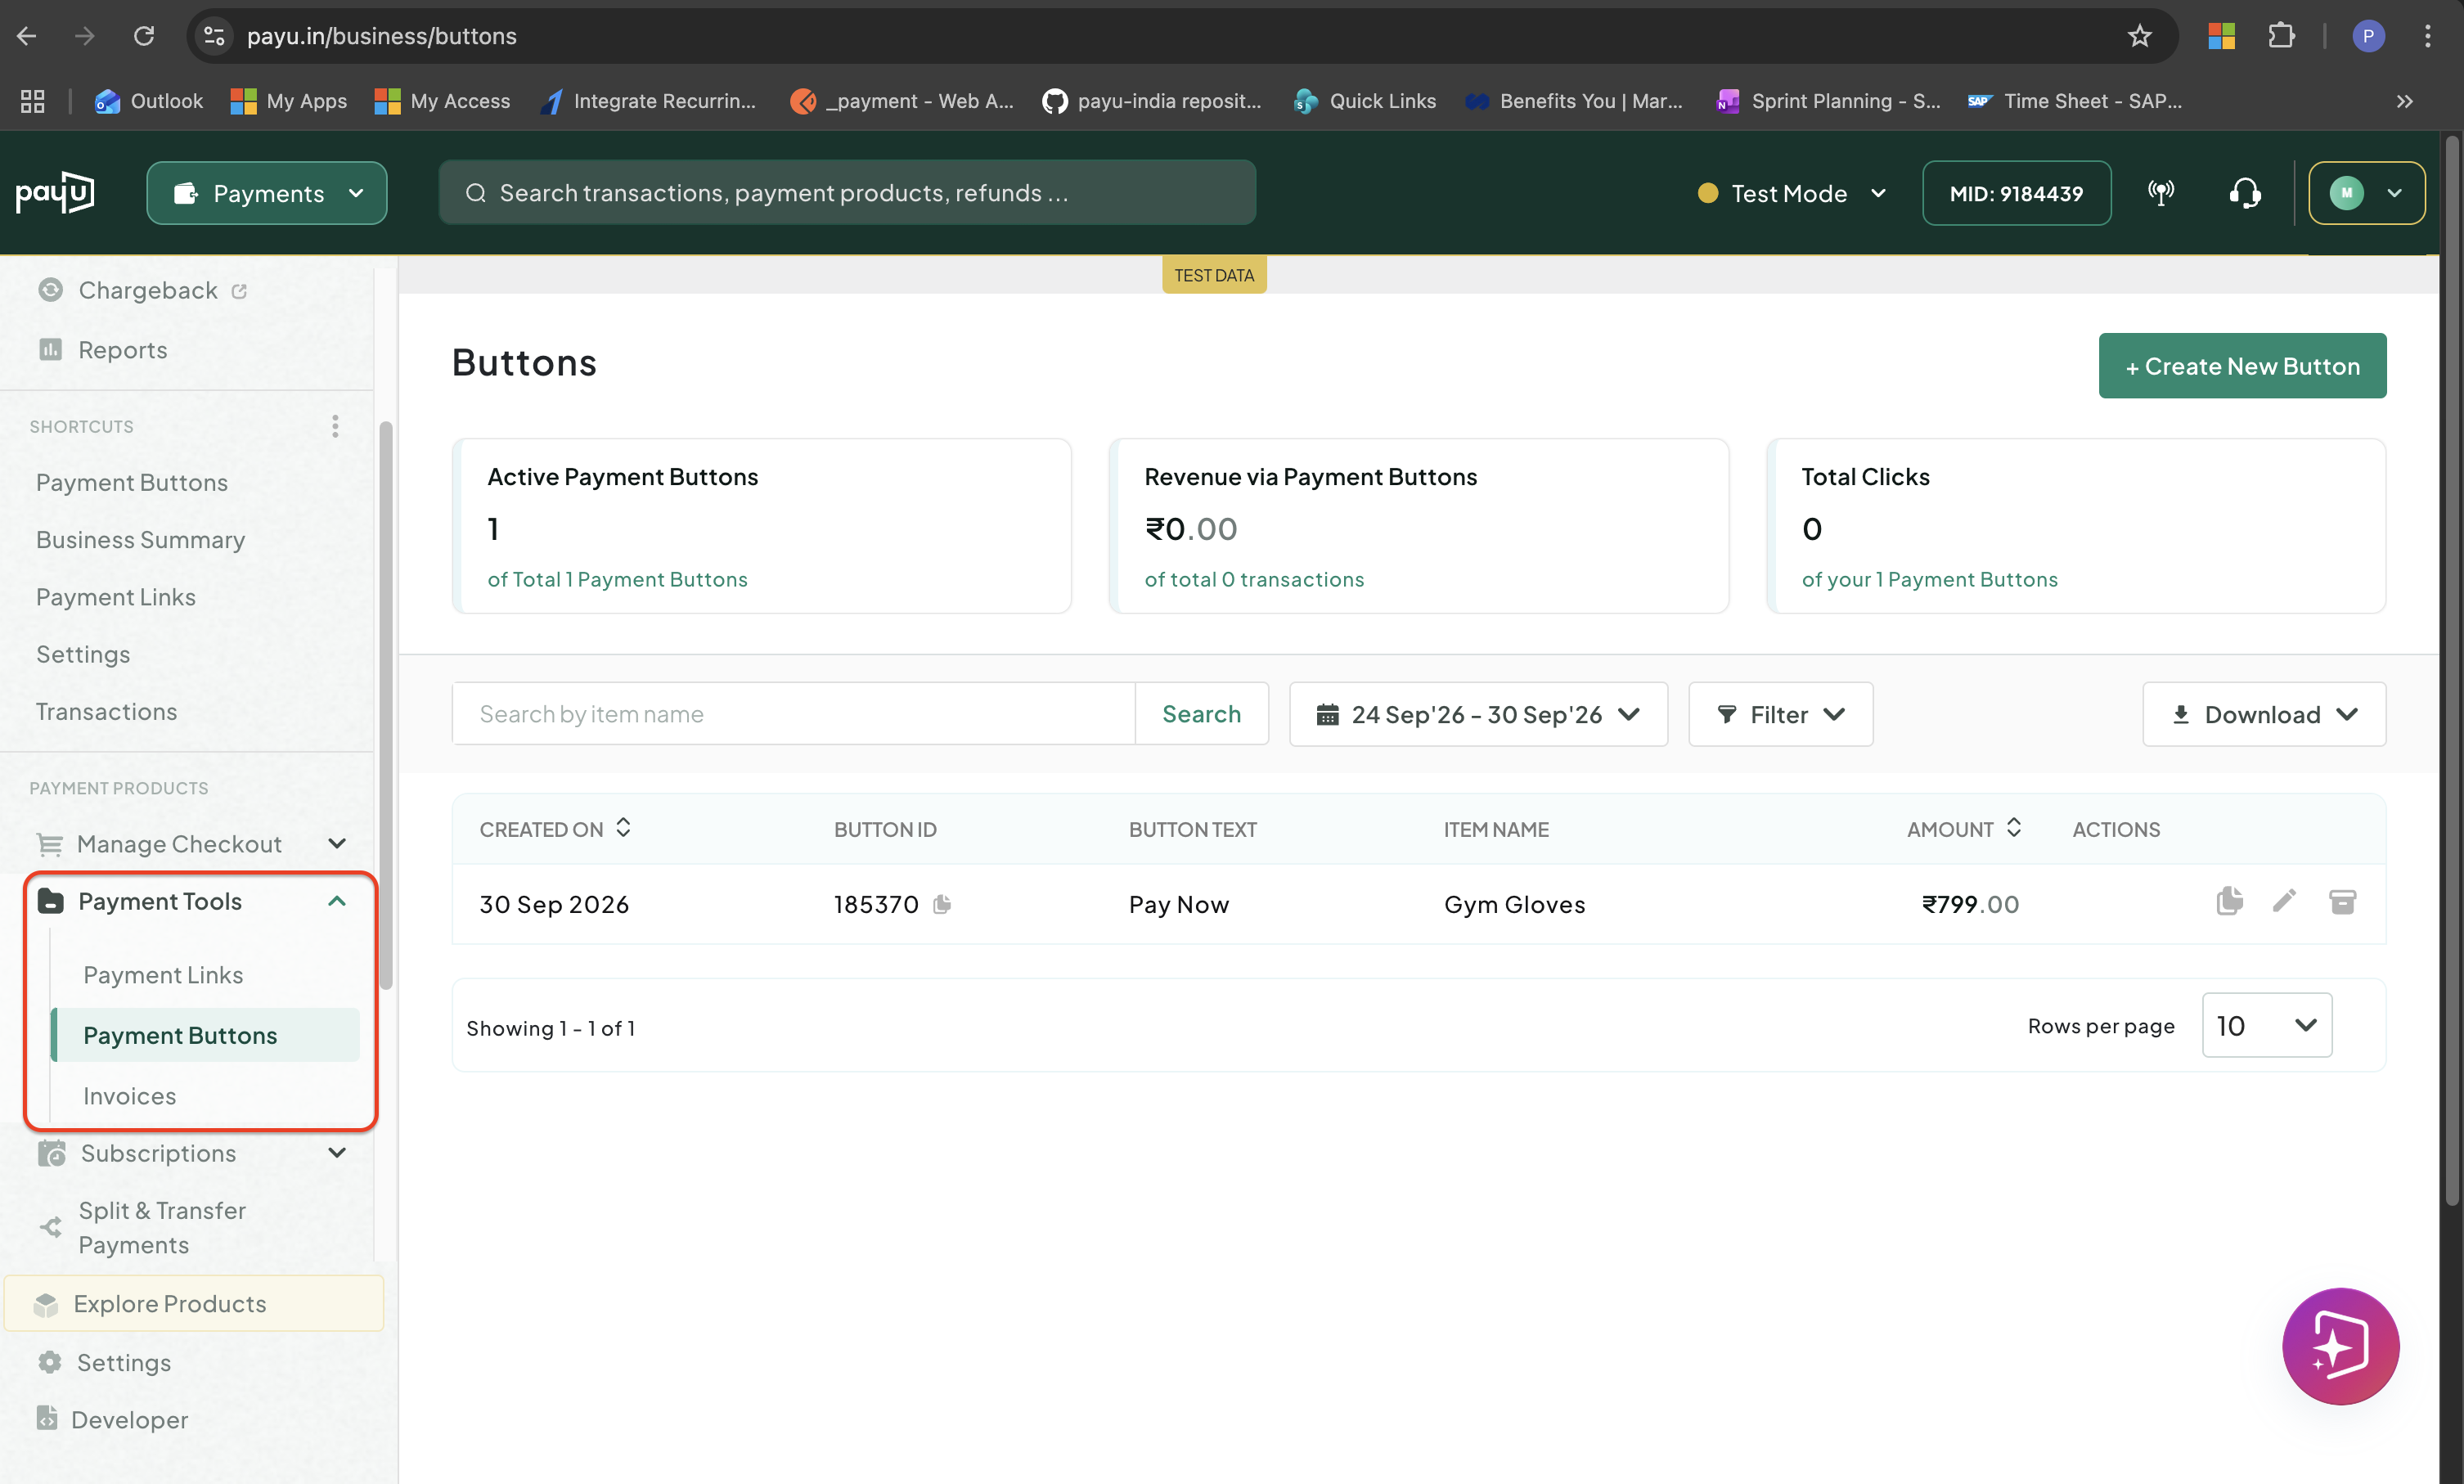
Access Payment Button
- Click the Download drop-down at the top bar and select any of these formats:
| Format | What it includes |
|---|---|
| CSV | All payment button records as a spreadsheet |
| XLSX | The same records in Excel format |
| Txns - csv | Transaction-level detail per button in the CSV format |
| Txns - xlsx | Transaction-level detail per button in the XLSX format |
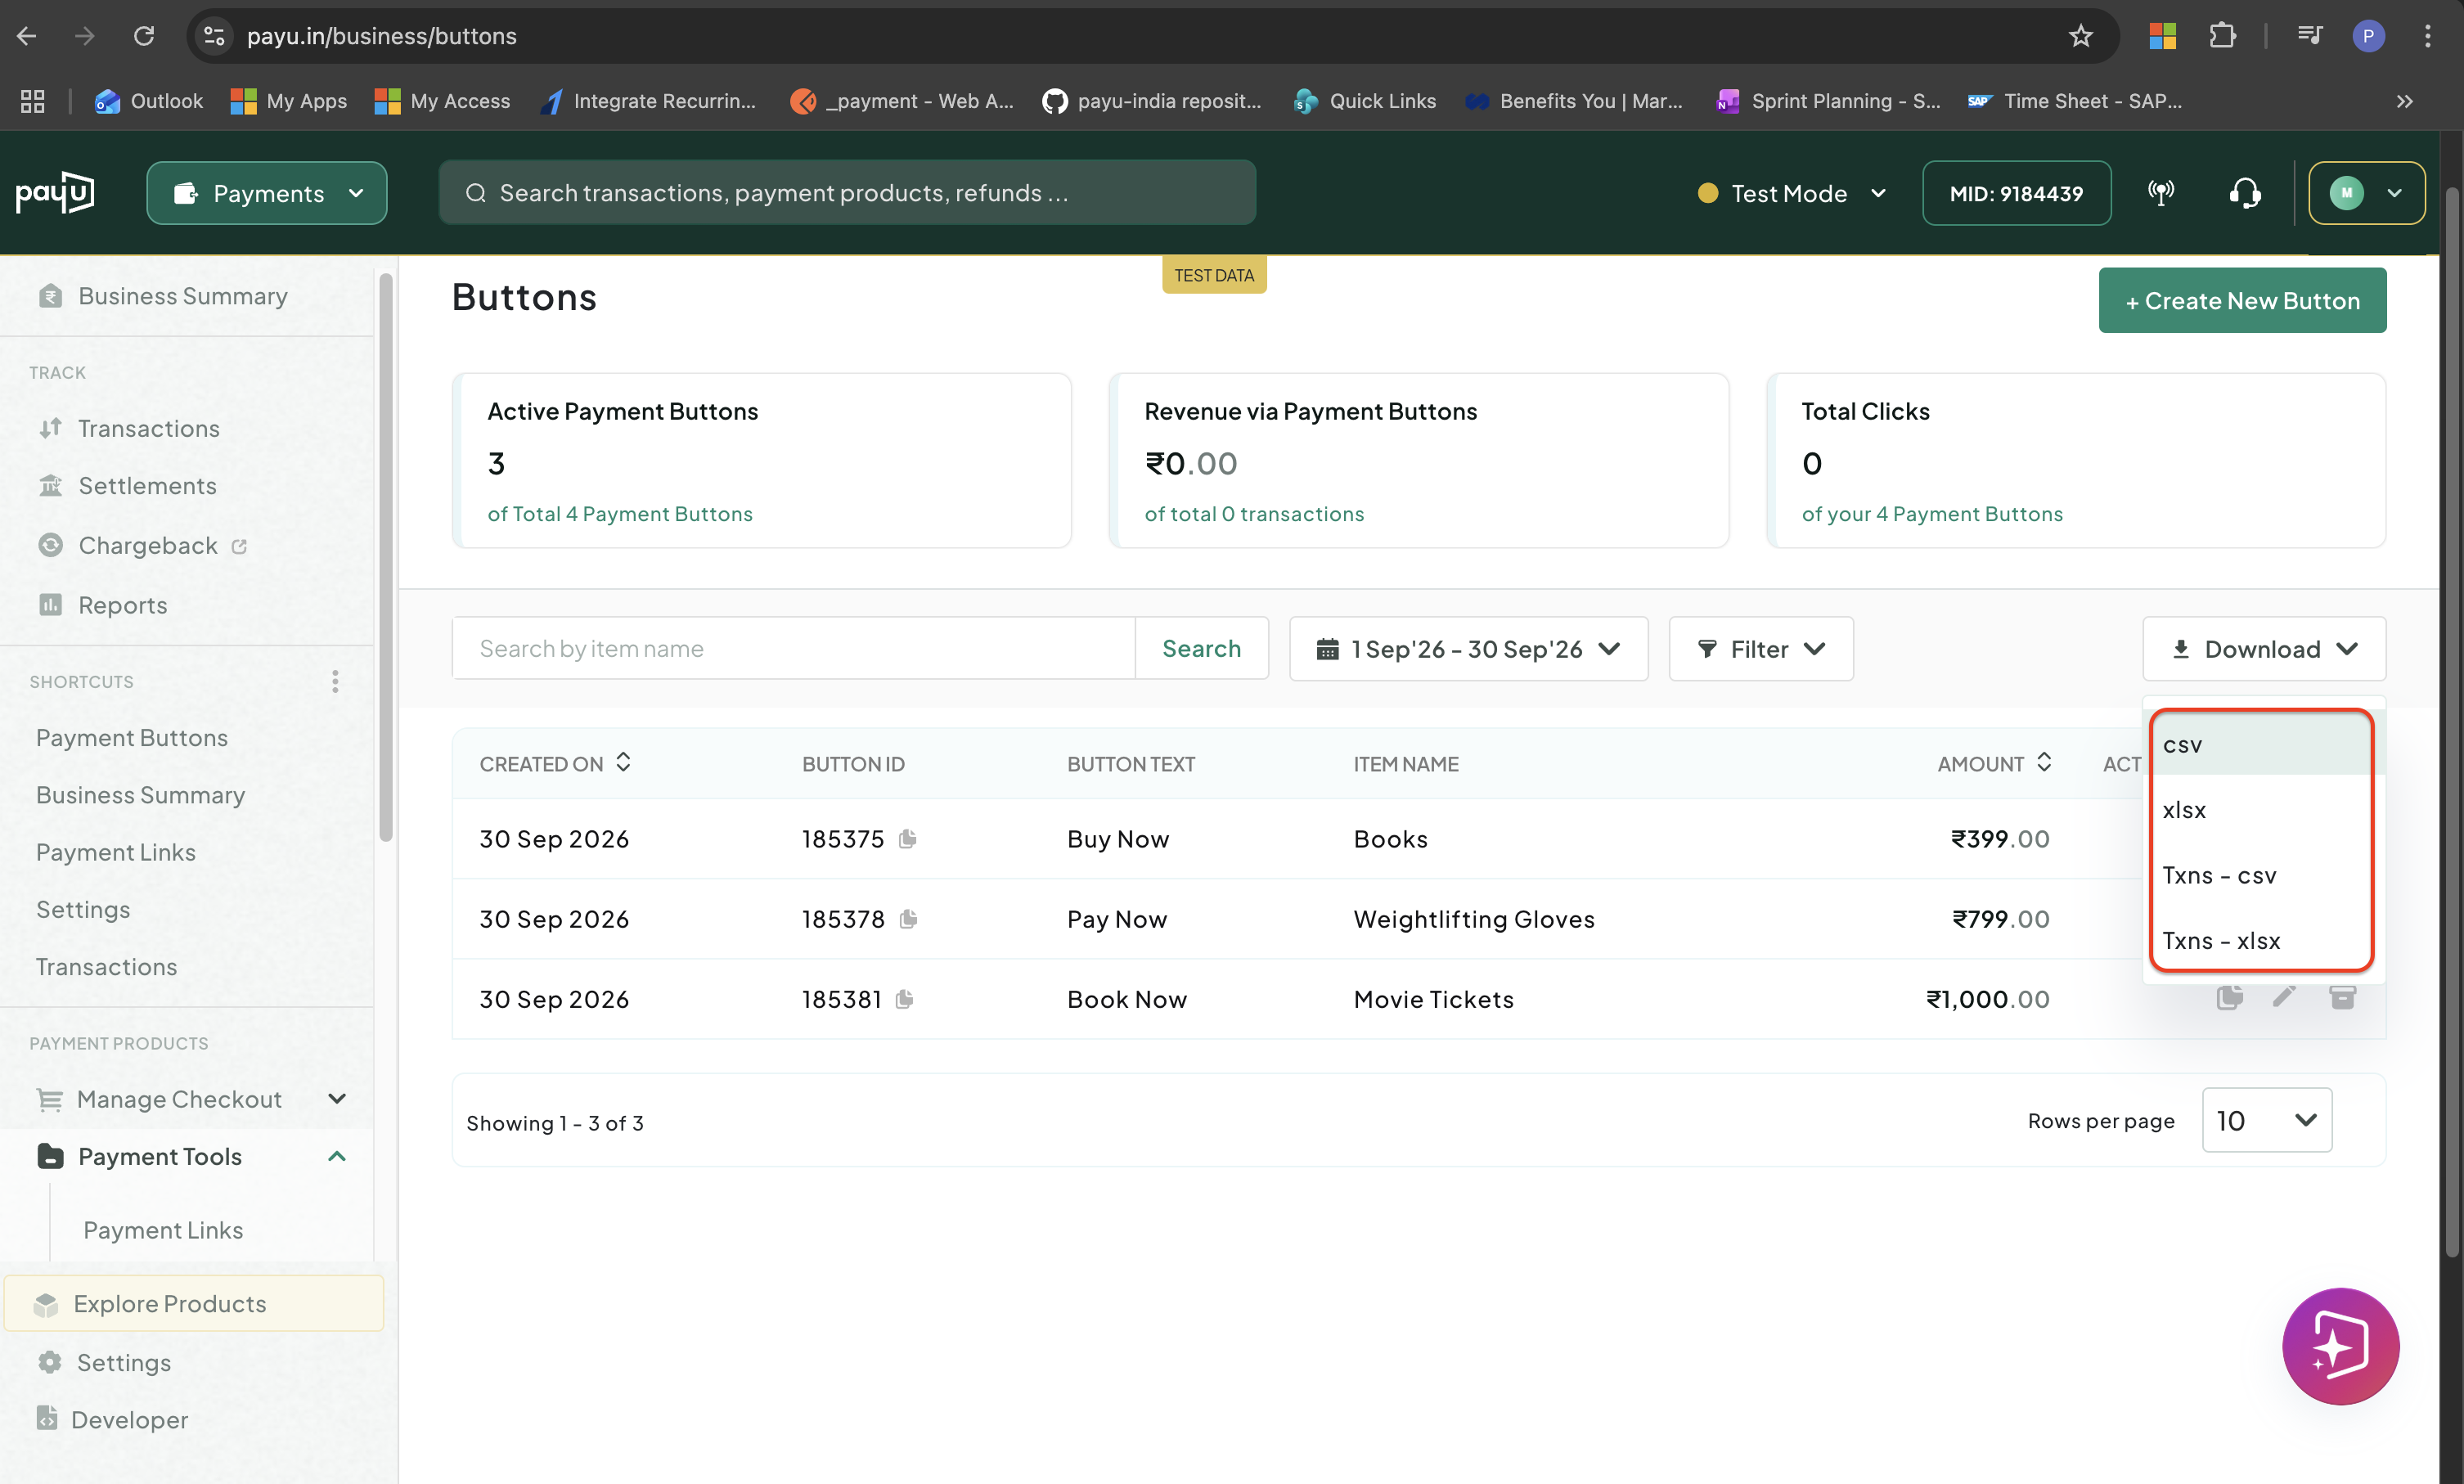
Downlaod reports
- Click Downloaded Reports on the Generating Report pop-up when your report is ready.
Next Steps
Create a new payment button and add it to your website.
Set the button text, colour, amount, and redirect pages before you create it.
Fix issues with buttons not showing, payments not going through, or records not appearing.
Common questions about Payment Buttons.
Updated 12 days ago
What's Next?
Explore related information and resources.
